Table of Contents
Advertisement
Quick Links
Advertisement
Table of Contents

Related Manuals for NanoEnTek EVE HT FL


Summary of Contents for NanoEnTek EVE HT FL
- Page 2 Tel: +1-781-472-2558 Fax: +1-781-790-5649 The information in this user manual is described as accurately as possible. Firmware and software changes may occur without prior notification. Copyright © 2023 by NanoEntek Inc. All rights reserved. Published in Korea Document number: NESMU-EHTFL-001E (V.0.1) Revision history: V.0.0 NOV 2023...
-
Page 3: Table Of Contents
Table of Contents Introduction ........................... 5 Product Components ......................6 Product Description ......................7 Front view ........................7 Upper side view ........................ 7 Left side view ........................8 Installation ..........................9 Environmental Requirements ....................9 Installation and turning power on ..................10 Sample preparation ...................... - Page 4 Setting ........................... 38 User manage ......................... 39 ............... 42 Maintenance and Cleaning ....................44 Troubleshooting ......................... 45 Warranty ..........................46 Safety precautions ......................47 Mesures de sécurité ......................48 Safety Symbols ........................49 Product specifications ....................... 50 Ordering information ......................51 Technical support .......................
-
Page 5: Introduction
Introduction EVE™ HT FL is a high-throughput automated fluorescence cell counter. EVE™ HT FL can measure up to 48 samples simultaneously using disposable EVE™ HT FL Counting Plates. It takes only 3 minutes to measure all 48 samples with fast mode, and up to 18 minutes with accuracy mode. -
Page 6: Product Components
Product Components EVE™ HT FL consists of the following components. If any of the components are missing or damaged, please contact your local sales representative or send an email to sales@nanoentek.com. EVE™ HT FL... -
Page 7: Product Description
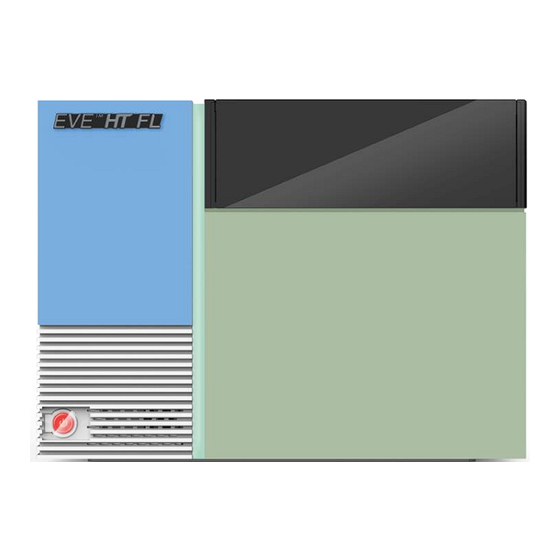
Product Description Front view Upper side view EVE™ HT FL... -
Page 8: Left Side View
Product Description Left side view EVE™ HT FL... -
Page 9: Installation
Installation For best performance, please see review the following Environmental recommendations to set up EVE™ HT FL: Requirements • Use at room temperature. • Do not expose instrument to direct sunlight. • Do not expose instrument to continuous vibration. • Do not expose instrument to intense magnetic or electromagnetic fields. -
Page 10: Installation And Turning Power On
Installation 1. Find a flat space on a bench. Installation 2. Open packages, put EVE HT FL instrument and EVE HT FL and turning desktop PC on a flat space. Remove protective films. power on 3. Set up EVE HT FL desktop PC and monitor. 4. - Page 11 10. Run EVE HT FL software. CAUTION If an error code occurs during initialization, turn off both instrument and PC, and then restart both instrument and PC. If same error message appears repeatedly, contact your local distributor or sales@nanoentek.com. EVE™ HT FL...
-
Page 12: Sample Preparation
Sample preparation To obtain best results, follow these recommendations: Recommended Actions 1. Handling sample ① Wear personal protective equipment while handling samples. ② Make sure to mix sample well at every step. ③ After loading prepared sample onto counting plate, wait for 2 minutes to let cells settle down on the bottom surface. -
Page 13: Staining Samples
Sample preparation 1. Prepare samples in growth media or PBS. Make sure that cells Staining are well separated and suspended. If needed, vortex samples samples before starting staining procedure. ☞ NOTE HT FL can analyze cell concentrations of 1 x 10 to 2 x cells/mL. - Page 14 Sample preparation 6. Load 20 μL of mixed samples into EVE HT FL Counting plate. Staining samples ☞ NOTE Examples of correctly loaded counting plate and incorrectly loaded counting plate EVE™ HT FL...
-
Page 15: Insert Counting Plate
Sample preparation 1. Open black door in front of the instrument by pulling the door Insert forward and find the black plate holder. Press the bar in the middle counting of the plate holder to open the holder. plate 2. Insert EVE HT FL Counting plate loaded with samples into the plate holder. - Page 16 Sample preparation 3. Close the plate holder by pressing the holder cap down until Insert you hear “click” sound, and close the door. counting plate CAUTION Allow samples to settle for ‘2 minutes’ after loading samples onto EVE HT FL Counting Plate. One can wait either before or after inserting plate.
-
Page 17: Quick Count
Quick count The quick count function gives a quick measurement of what is Quick count being shown on live feed. One can use quick count function to determine whether sample needs further dilution or to adjust counting parameters. 1. To move the plate holder to imaging position, click the ‘Insert’ button. -
Page 18: Counting Parameters
Quick count Counting parameters are used to deal with wide varieties of cell Counting sizes and shapes. The description of each parameter is as follows. parameters 1. BRIGHT channel Sensitivity level : Decreasing this sensitivity parameter will make it easier to prevent debris from counting. (Caution: if the sensitivity level is too low, then some of the real cells may not be counted) Correction factor : Decreasing this correction factor will make it easier to detect cells which are slightly darker than the background. - Page 19 Quick count Cell intensity level: Cell intensity level works similar to intensity Counting gating. When cells are very dim or too bright, you can change the range parameters of intensity levels of cells to be counted. Here, you can choose both minimum and maximum values.
-
Page 20: Measure Setting
Measure In the Measure tab, follow the steps described below to run Measure measurements. setting a. Project type: select “Cell” to run cell samples. Select “QC” to run quality control samples. Please refer to ‘QC’ for details. b. Project name: enter a project name. c. - Page 21 Measure Measure setting d. Define plate map: repeat the following steps for all the wells to be measured. ① After selecting a cell type, enter sample name. This field can be left blank. ② Select all the wells having this cell type in the plate map (e). ③...
- Page 22 Measure If you right-click outside the well, you can import or export plate Measure maps. setting If you select Format, you can download an Excel file with a blank format. You can enter information such as sample name and cell type directly into this Excel file before running measurements and then import predefined format.
-
Page 23: Focus Setting
Measure When you press the focus setting button, the window below will Focus setting appear. You can fine-tune the focus and parameters for each cell type here. Navigation Navigation on/off. Circles Circle (Live Cells / Dead Cells) on/off. Preview image Image (Total / Dead / Cell) on/off. - Page 24 Measure Follow the steps below to set focus. Focus setting 1. Preview - Zoom In and Out: put mouse cursor on the preview and turn mouse wheel. - Select channel: Choose between BRIGHT, AO, or DAPI. 2. Plate map: Wells marked with BLUE indicate the wells of which focuses have not been set.
-
Page 25: Measurements And Calculations
Measure After clicking ‘Run sample’, the following window appears, and the Measurements measurement will start following the plate map information entered previously. Calculations You can check the current measurement status on the plate map in the upper right. Blue: To be measured. Orange: Image acquisition is in process. -
Page 26: Data
Data You can check the data list and results by clicking the Data tab. Data list View type It can be viewed by two criteria, date or name. Quick Count Data list taken from the Quick menu. Data list taken from the QC mode (Project type). Cell Data list taken from the Cell mode (Project type). -
Page 27: Graph And Table
Data Data measured with Quick Count, results will only include images Graph and and counting summary. Table Data measured with QC as a project type, results will show whether results are consistent. (See Quality Control chapter for details.) Data measured with Cell as a project type, results will appear in graph and table form. -
Page 28: Individual Well Results
Data When one well is selected, cell counts (Total, Live and Dead cell Individual concentrations), viability, and average cell size will be shown below well results cell size histogram. You can change minimum or maximum cell sizes to be included in the results. By selecting ‘Image’, you can review raw images. - Page 29 Data If you click ‘count setting’, you can change counting parameters in Individual the current data. Refer to page 18-19 for a detailed explanation of well results parameters. Parameter values can be applied simultaneously to Channel, Cell type, Group, or Project. By right-clicking and dragging the image, you can select cells individually as shown below to manually assign those objects in the selected area to either live or dead cells, or debris.
-
Page 30: Quality Control
Quality control Bead counting can be used as a way to evaluate whether QC bead instrument is in good condition. preparation 1. Shake bottle vigorously or vortex briefly for 5 seconds before use. 2. Mix test beads and PBS with 1:1 ratio and add to reservoir. 3. -
Page 31: Qc Bead Run
Quality control 4. Open EVE HT FL door and open plate holder. QC bead Preparation 5. Insert counting plate loaded with sample into the plate holder. 6. Close the plate holder cap and close the door. CAUTION Allow beads to settle for ‘1 minute’ before starting measurements. - Page 32 Quality control 3. Select the lot you use and click ‘Apply’ button. QC bead Run 4. Select the wells loaded with QC samples. For multiple selection, left click and drag. 5. Click ‘Include’ button or select ‘Include’ option from sub-menu by right clicking.
- Page 33 Quality control After measurement is completed, select data from the data list and QC bead Run check the dot graph as shown below. One can check total counts of AO and DAPI beads, and sizes of AO and DAPI beads. If you click on a bead lot number in the data list, you can see the results of all previous measurements of the selected lot.
-
Page 34: Setting
Setting Setting tab In Setting, you can set default values for parameters and dilution factors. These value sets will be used when a cell type is not specified or a new cell type is created. Cell size & Cell size and dilution factor of sample Dilution Counting Parameter values for each BRIGHT, AO, and DAPI... -
Page 35: Cfr Part 11
The Food and Drug Administration (FDA) of the United States has established regulations on electronic records and electronic signatures (ERES) in Title 21 of the Code of Federal Regulations, specifically 21 CFR Part 11. EVE HT FL offers 21 CFR part 11 compliance program for cGMP facilities as an option. Please contact... -
Page 36: Approval
21 CFR part 11 In the approval tab, you can request or approve data. Approval You can check the report file for the data by double-clicking the data or clicking the Preview button. Data list is divided into four status (Requestable, Requesting, Approvable, Approved) types depending on the approval status. - Page 37 21 CFR part 11 2. Requesting Approval The requesting data are displayed. It is possible to ‘Cancel’ the request for approval. The approver can approve the request in Requesting tap. The approval no need to log in to the approval ID. ①...
-
Page 38: Setting
21 CFR part 11 In the 21 CFR part 11 program, several functions are added to the Setting setting tab. 1. Backup & Restore ① Click the Backup & Restore ‘Setting’ button. ② Click the Auto sync ‘Enable’, set the backup data path. ③... -
Page 39: User Manage
21 CFR part 11 When the 21 CFR part 11 program is activated, the user tab User manage becomes available. 1. User management Click the User manage ‘View’ button. a) New user registration. ① Enter the user ID and PW. ②... - Page 40 21 CFR part 11 User manage User and Supervisor default permission settings can be changed. - Set the privilege and click the ‘save’ button. - See the 21 CFR part 11 Supplement for default settings. b) Edit the user option ①...
- Page 41 21 CFR part 11 User manage ① Change cycles. Disable, 30 days, 60 days,180 days. ② Account lock Disable, ≥ 3 times, ≥ 5 times, ≥ 10 times, ≥ 15 times. ③ Minimum length Disable, ≥ 3, ≥ 5, ≥ 10, ≥ 15. ④...
- Page 42 21 CFR part 11 1. Log management This log management allows you to view a list of instrument log. - Every log can be saved in CSV file. 2. Document manage This document manage allows you to check the documents made in the equipment.
- Page 43 Document manage, Delete list This deleted list allows you to view a list of deleted data. EVE HT FL provides a comprehensive solution to comply with the requirements of the 21 CFR Part 11 rule. ☞ Note: Please see the appendix for more information on these features.
-
Page 44: Maintenance And Cleaning
Never disassemble or service EVE™ HT FL by yourself. IMPORTANT! Unauthorized repairs may damage EVE™ HT FL or alter its functionality, which will void your warranty. Contact sales@nanoentek.com or your local distributor to arrange for service. Always wipe surfaces with ethanol-soaked paper towels. -
Page 45: Troubleshooting
Troubleshooting Installation • Check on/off switch on left side of main instrument. EVE™ HT FL does not • Check power source or contact your distributor. power on • Check on/off switch on back side of main instrument. Operator software • Check connection between instrument and PC. does not start Inaccurate result •... -
Page 46: Warranty
For your protection, units being returned must be insured against possible damage or loss. NanoEntek cannot be responsible for damage incurred during shipment of a defective instrument. It is recommended that you save the original packing material in which the instrument was shipped. This warranty is limited to the replacement of defective products. -
Page 47: Safety Precautions
Safety precautions Review and follow the safety instructions below: • If water or other material enters the instrument, the adaptor, or power inlet, disconnect the power cord and contact a service person. For operating environment, refer to Product Specifications. • Do not touch the main plug or power cord with wet hands. •... -
Page 48: Mesures De Sécurité
Mesures de sécurité Examiner et suivre les instructions en matière de sécurité ci-dessous: • Si de l'eau ou d'autres matières entrent dans l'instrument, l'adaptateur, ou l‘entrée de la prise, débrancher le cordon d'alimentation et contacter un technicien de service. Pour l'environnement d'exploitation, se reporter aux Spécifications du Produit. -
Page 49: Safety Symbols
Safety Symbols The following symbols are found on the medical device and this document. Always use the instrument in the safest possible manner. Symbol Meaning Caution & Warning Protective earth (Ground) Power On/Off The moving parts symbol indicates areas of the medical device in which moving parts can cause injuries. -
Page 50: Product Specifications
Product specifications EVE™ HT FL Analysis time 3 ~ 18 minutes per 48 samples Detectable range: 1 x 10 ~ 2 x 10 cells/mL Measuring range Optimal range: 1 x 10 ~ 1 x 10 cells/mL Detectable size : 1 ~ 85 µm Cell size range Optimal size: 5 ~ 80 µm Channel... -
Page 51: Ordering Information
EVE HT FL QC Plate EHGQ-003 High level, 1 pc (optional) Preparation plate EHPP-001 Preparation plate (optional) EVE HT FL EVE HT FL 21 CFR Part 21 CFR Part 11 software 21 CFR Part 11 11 software (optional) EVE™ HT FL... -
Page 52: Technical Support
Technical support EVE™ HT FL... - Page 53 NESMU-EHTFL-001E (V.0.1) NanoEntek, Inc. 851-14, Seohae-ro, Paltan-myeon, Hwaseong-si Gyeonggi-do, 18531, Korea Tel: +82-2-6220-7940 Fax: +82-2-6220-7999 NanoEntek America, Inc. 220 Bear Hill Road, Suite 102, Waltham, MA 02451, USA Tel: +1-781-472-2558 Fax: +1-781-790-5649 E-mail sales@nanoentek.com Website www.nanoentek.com...
Need help?
Do you have a question about the EVE HT FL and is the answer not in the manual?
Questions and answers