Table of Contents
Advertisement
FOR FAX ADVANTAGE ASSISTANCE:
— PHONE CALL
1-800-HELP-FAX (1-800-435-7329)
— E-MAIL TO
consumerproducts@panasonic.com
for customers in the U.S.A. or Puerto
Rico
— REFER TO
www.panasonic.com
for customers in the U.S.A. or Puerto
Rico
High Speed Laser Fax and Copier
Operating Instructions
Model No.
Please read these Operating
Instructions before using the unit
and save for future reference.
KX-FL511
This model is designed to be
used only in the U.S.A.
Advertisement
Table of Contents

Related Manuals for Panasonic KX-FL511


Summary of Contents for Panasonic KX-FL511
-
Page 1: Operating Instructions
High Speed Laser Fax and Copier Operating Instructions KX-FL511 Model No. FOR FAX ADVANTAGE ASSISTANCE: — PHONE CALL 1-800-HELP-FAX (1-800-435-7329) — E-MAIL TO consumerproducts@panasonic.com Please read these Operating for customers in the U.S.A. or Puerto Instructions before using the unit Rico and save for future reference. - Page 2 Location of Controls How to use the operating instructions When following operating instructions, always keep the front cover page (next page) open so that you will find easy reference to the buttons. OPEN...
-
Page 3: Location Of Controls
Location of controls Please keep this page open when following operating instructions. Keys AUTO ANSWER FLASH QUICK SCAN START BROADCAST HANDSET MUTE REDIAL/PAUSE CALLER ID PRINT HELP RESOLUTION CALLER ID SEARCH LOWER CALLER IQ MANUAL BROAD Station keys COLLATE MENU STOP COPY START MONITOR... - Page 4 L All other trademarks identified herein are the property of their respective owners. Copyright: L This manual is copyrighted by Panasonic Communications Co., Ltd. (PCC) and its licensee. Under the copyright laws, this manual may not be reproduced in any form, in whole or part, without the prior written consent of PCC and its licensee.
-
Page 5: Safety Instructions
Safety Instructions Safety Instructions Safety Instructions 1For Fax Advantage assistance, call 1-800-435-7329. B. If liquid has been spilled into the unit. C. If the unit has been exposed to rain or Important safety water. D. If the unit does not work normally by instructions following the operating instructions. -
Page 6: Other Information
Safety Instructions OTHER INFORMATION: – If any toner comes into contact with your eyes, flush them thoroughly with water, L Keep the unit away from electrical noise and seek medical treatment. generating devices, such as fluorescent – If any toner comes into contact with your lamps and motors. -
Page 7: Table Of Contents
Table of Contents 1. Introduction and 1. Table of Contents information........33 Printing the Caller ID list....34 Installation Erasing caller information ....34 Accessories 3.10 Storing caller information....34 Included accessories......7 Accessory information ......8 4. Fax Finding the Controls Sending Faxes Description of buttons...... -
Page 8: Table Of Contents
Table of Contents Jams Recording paper jam ......58 Document jams - sending....60 Cleaning Cleaning the inside of the unit ..61 9. Caller IQ Feature Caller IQ Feature openLCR service for the Caller IQ feature ..........64 To turn the Caller IQ ON / OFF..64 Updating the rate table (downloading the rate table) ........64 Downloading information .... -
Page 9: Introduction And Installation
1. Introduction and Installation 1 Introduction and Installation 1.1 Included accessories Item Part number Quantity Specifications Power cord PFJA1030Z ---------- Telephone line cord PQJA10075Z ---------- Handset PFJXE0805Z ---------- Handset cord PFJA1029Z ---------- Paper stacker PFKS1096Z1 Paper tray PFKS1085Z1 ---------- Drum unit KX-FA84 See page 69. -
Page 10: Accessory Information
1.2 Accessory information {AUTO ANSWER} To ensure that the unit operates properly, we L To turn ON/OFF the auto answer setting recommend the use of a Panasonic toner (page 39, 40). cartridge and drum unit. {QUICK SCAN START} L To store a scanned document into 1.2.1 Available accessories... -
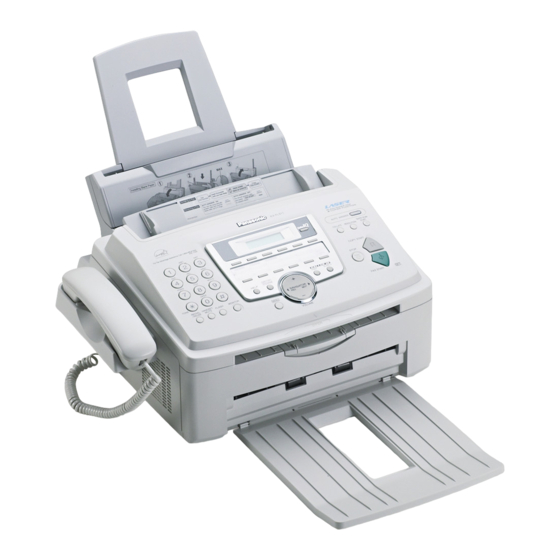
Page 11: Overview
1. Introduction and Installation 1.4 Overview 1 Handset 2 Speaker 3 Document guides 4 Paper tray 5 Recording paper entrance 6 Tension plate 7 Paper stacker 8 Document stacker 9 Recording paper exit j Document exit k Front cover l Document entrance *1 The paper stacker and document stacker may not be shown in all illustrations. -
Page 12: Toner Cartridge And Drum Unit
1. Introduction and Installation Installation Place the toner cartridge (1) into the drum unit (2) vertically. 1.5 Toner cartridge and drum unit Caution: L Read the following instructions before you begin installation. After you have read them, open the drum unit protection bag. The drum unit contains a photosensitive drum. - Page 13 1. Introduction and Installation Make sure that the triangles (1) match, to L If the lower glass (3) is dirty, clean it with install the toner cartridge correctly. a soft and dry cloth. Close the front cover (1) by pushing down Lift open the front cover (1), holding OPEN on both sides, until locked.
-
Page 14: Paper Tray
1. Introduction and Installation 1.6 Paper tray 1.7 Paper stacker Insert the paper tray (1) into the slot (2) on the Line up the slots (1) in the paper stacker with back of the unit. the pegs (2) on the bottom of the unit, then insert the two tabs of the paper stacker into the slots on the unit (3). -
Page 15: Document Stacker
1. Introduction and Installation 1.8 Document stacker 1.9 Handset cord Pull the document stacker (1) forward gently Connect the handset cord (1). until it clicks into place, then press the center part of the document stacker (2) to open the extender (3). - Page 16 1. Introduction and Installation Pull the tension plate forward (1) and insert To use A4 size paper the paper, print-side down (2), then push Insert the tabs on the A4 paper guides (1) into the tension plate (3) back. the slots. L “L”...
-
Page 17: Preparation
2. Preparation 2.1.1 Connections 2 Preparation 2For Fax Advantage assistance, call 1-800-435-7329. Connections and Setup 2.1 Selecting the way to Connect to LINE. use your fax machine Depending on your situation, you can select the way you prefer to use your fax machine in Quick Setup feature #00. -
Page 18: Case 1: Fax Only
2. Preparation 2.2.4 How to setup 2.2 Case 1: FAX ONLY 2.2.1 Your situation You wish to use the fax machine only for fax reception/transmission. 2.2.2 Telephone wiring image in house or office Single telephone line {MENU} {SET} {A}{B} (1 phone number) Fax machine Press {MENU}. -
Page 19: Case 2A: Distinctive Ring (1 Phone Line 5.1 With 2 Or More Phone Numbers)
2. Preparation 2.3.3 Connections for Case 2a 2.3 Case 2a: Distinctive Connect to LINE. Ring (1 phone line with 2 or more phone numbers) 2.3.1 Your situation You wish to use the fax machine and your answering machine in a different room and receive faxes and phone calls automatically. - Page 20 2. Preparation Press {A} or {B} repeatedly to display the following. SELECT A SETUP =DIST. RING [±] Press {SET}. Press {MENU}. L The AUTO ANSWER light is ON. L You cannot change the receiving mode while the Distinctive Ring feature is activated.
-
Page 21: Case 2B: Distinctive Ring
2. Preparation 2.4.3 Connections for Case 2b 2.4 Case 2b: Distinctive Connect to LINE. Ring (using with voice mail service) 2.4.1 Your situation You have already subscribed to voice mail service and also wish to receive a fax automatically. You must get another phone number to use for fax besides the current phone number. - Page 22 2. Preparation Press {A} or {B} repeatedly to display the following. SELECT A SETUP =DIST. RING [±] Press {SET}. Press {MENU}. L The AUTO ANSWER light is ON. L You cannot change the receiving mode while the Distinctive Ring feature is activated.
-
Page 23: Case 3: Ext. Tam
2. Preparation 2.5.4 How to setup 2.5 Case 3: EXT. TAM 2.5.1 Your situation You wish to use the fax machine and your answering machine in the same room. 2.5.2 Telephone wiring image in house or office Single telephone line {MENU} {A}{B} {SET}... - Page 24 2. Preparation With the fax machine 1. When the fax machine rings, lift the handset of the fax machine. 2. When: – document reception is required, – a fax calling tone (slow beep) is heard, or – no sound is heard, press {FAX START}.
-
Page 25: Case 4: Tel Only
2. Preparation 2.6.4 How to setup 2.6 Case 4: TEL ONLY 2.6.1 Your situation You wish to use the fax machine and an extension telephone in a different room. Most incoming calls are phone calls and the fax machine is seldom used for fax reception. 2.6.2 Telephone wiring image in house or office Room... - Page 26 2. Preparation – a fax calling tone (slow beep) is heard, or – no sound is heard, press *#9 (pre-selected fax activation code) firmly. 3. Replace the handset. L The fax machine will start reception. Note: L You can change the fax activation code in feature #41 (page 48).
-
Page 27: Case 5: Fax With Pc Modem
2. Preparation 2.7.3 Connections for Case 5 2.7 Case 5: FAX with PC Remove the stopper. MODEM (one phone number) 2.7.1 Your situation You wish to use a computer connected via MODEM and the fax machine on a single telephone line. The fax machine and the computer are in the same room and you do not want the computer to answer incoming calls automatically. - Page 28 2. Preparation 2.7.4 How to setup {A}{B} {SET} Set the fax machine to FAX ONLY mode by pressing {AUTO ANSWER} repeatedly to display the following. FAX ONLY MODE 3 RINGS [±] L The display will show the number of rings before the fax machine answers a call in FAX ONLY mode.
-
Page 29: Help Function
2. Preparation Help Button 2.8 Help function 2.9 Adjusting volume The unit contains helpful information which can be printed for quick reference. Basic settings: How to set the date, time, your logo and fax number. Feature list: How to program the features. Directory: How to store names and numbers in the {A}{B}... -
Page 30: Date And Time
2. Preparation L The accuracy of the clock is approximately ±60 seconds a month. 2.10 Date and time To correct a mistake Press {<} or {>} to move the cursor to the incorrect number, and make the correction. If you have registered with openLCR service The date and time will be automatically set. -
Page 31: Your Logo
2. Preparation Keys Characters 2.11 Your logo K L j The logo can be your company, division or name. M N O m n o 6 P Q R S p q r T U V t W X Y Z w x <... -
Page 32: Your Fax Number
2. Preparation 3. Press {#}. LOGO=B| 2.12 Your fax number 4. Press {5} 3 times. LOGO=Bi| To correct a mistake Press {<} or {>} to move the cursor to the incorrect character, and make the correction. To delete a character {MENU} {STOP} Press {<} or {>} to move the cursor to the... -
Page 33: Telephone
3. Telephone 3 Telephone Automatic Dialing Note: L A hyphen or a space entered in a telephone 3.1 Storing names and number counts as two digits. telephone numbers into To correct a mistake one-touch dial Press {<} or {>} to move the cursor to the incorrect character/number, and then make the Up to 22 telephone numbers can be stored in correction. -
Page 34: Editing A Stored Entry
3. Telephone (page 32). If unnecessary, you can erase it L Confirm that there are no documents in (page 32). the document entrance. L You can confirm the stored entries in the Press {A} or {B} repeatedly to display the telephone number list (page 66). -
Page 35: Caller Id
3. Telephone 3. Press {5} repeatedly to display any name with the initial “L” (see the character table, 3.7 Viewing and calling page 29). L To search for symbols (not letters or back using caller numbers), press {*}. information 4. Press {A} or {B} repeatedly to display “LISA”. -
Page 36: Printing The Caller Id List
3. Telephone Press {STOP} to exit the program. Display while viewing 3.9.2 Erasing specific caller L When the unit did not receive name information, the display will show “NO NAME information RCVD”. L When no calls have been received, the Press {CALLER ID SEARCH}. - Page 37 3. Telephone Press {SET}. Note: L You can confirm the stored entries in the telephone number list (page 66). L The unit can only store a name of up to 10 characters long. L To edit a name or number, see page 32. L If you enter a new entry into a station key, the previous entry will be replaced.
-
Page 38: Fax
4. Fax 4 Fax Sending Faxes – “SUPER FINE”: For originals with very small printing. This setting only works with other 4.1 Sending a fax manually compatible fax machines. – “PHOTO”: For originals containing photographs, shaded drawings, etc. – “PHOTO WITH TEXT”: For originals containing photographs and text. -
Page 39: Documents You Can Send
4. Fax Document weight Sending report for confirmation L Single sheet: A sending report provides you with a printed 45 g/m to 90 g/m (12 lb. to 24 lb.) record of transmission results. To use this L Multiple sheets: feature, activate feature #04 (page 46). For an 60 g/m to 80 g/m (16 lb. -
Page 40: Broadcast Transmission
4. Fax Enter the fax number. 2. Press {A} or {B} repeatedly to select “MANUAL BROAD”. Using stations 1–11: Press {SET}. Press the desired station key. Program entries. Using stations 12–22: Press {LOWER}, then press the desired Using stations 1–11: station key. -
Page 41: Receiving A Fax Manually
4. Fax Press {DIRECTORY PROGRAM} to exit the L If one of the entries is busy or does not program. answer, it will be skipped and redialed later up to 2 times. 4.4.3 Erasing a stored entry from the broadcast memory To cancel broadcast transmission 1. -
Page 42: Receiving A Fax Automatically
4. Fax press {FAX START}. CONNECTING..4.6 Receiving a fax automatically 3. Replace the handset. L The unit will start fax reception. L If you do not answer the call within 10 rings, the unit will temporarily switch to fax reception. -
Page 43: Programming Undesired Callers
4. Fax Additionally, faxes originating from numbers that To display the junk fax prohibitor list match a programmable junk fax prohibitor list will 1. Press {MENU} repeatedly to display “JUNK not be accepted by the fax machine (page 41). L Keep the front cover page open for button FAX PROH.”. -
Page 44: Distinctive Ring Service From Your Phone Company
5. Distinctive Ring 5 Distinctive Ring Distinctive Ring How to receive calls 5.1 Distinctive Ring If the incoming call is for the fax number, the fax machine will ring with the assigned ring pattern service from your phone and automatically start fax reception. If the incoming call is for the phone number, the company fax machine will keep on ringing. -
Page 45: Programming The Ring Pattern Assigned For Fax
5. Distinctive Ring 5.4 Programming the ring pattern assigned for fax L Keep the front cover page open for button locations. Set feature #31 to “ON” (page 42). Press {MENU}. Press {#}, then {3}{2}. Press {A} or {B} repeatedly to select the ring pattern assigned for fax. -
Page 46: Copy
6. Copy 6 Copy Copying – “PHOTO WITH TEXT”: For originals containing photographs and text. 6.1 Making a copy L If you select “STANDARD”, copying will be done using “FINE” mode. To stop copying Press {STOP}. 6.1.1 More copying features To enlarge a document 1. - Page 47 6. Copy Example: Making 2 copies of a 4-page original document Uncollated Collated pages pages Note: L The unit will store the documents into memory while collating the copies. If memory becomes full while storing, the unit will only print out the stored pages. L After copying, the collating feature will turn OFF automatically.
-
Page 48: Programmable Features
7. Programmable Features 7 Programmable Features Features Summary L The setting you selected is set, and the next feature will be displayed. 7.1 Programming To exit programming, press {MENU}. To cancel programming Press {MENU} to exit the program. Programming by entering the program code number directly You can select a feature by directly entering the program code (# and a 2-digit number) instead of... -
Page 49: Advanced Features
7. Programmable Features “ON”: A sending report will be printed out after every transmission. 7.3 Advanced features “OFF”: Sending reports will not be printed out. Code #06: Changing the ring setting in FAX Code #22: Setting the journal report to print ONLY mode automatically FAX RING COUNT... - Page 50 7. Programmable Features L To cancel after programming, press {STOP} L The default code is “;#9”. then {SET}. L Do not enter “0000”. 6. Press {SET}. Code #26: Setting the Caller ID list to print 7. Press {MENU}. automatically AUTO CALL. LIST Code #44: Setting the memory reception alert MODE=ON [±]...
-
Page 51: Direct Commands For Programming Features
7. Programmable Features “ON” (default): You will hear connecting tones. {#}{0}{2} Your logo “OFF”: Deactivates this feature. L Enter your logo using the dial keypad (see page 29 for details). Code #79: Setting toner save feature {#}{0}{3} Your fax number L Enter your fax number using the dial keypad TONER SAVE MODE=OFF... - Page 52 7. Programmable Features {#}{3}{2} Ring pattern – {1}:“A” – {2}:“B” – {3}:“C” – {4}:“D” – {5}:“B-D” (default) {#}{3}{7} Auto reduction – {1}:“ON” (default) – {2}:“OFF” {#}{3}{9} Display contrast – {1}:“NORMAL” (default) – {2}:“DARKER” {#}{4}{1} Fax activation code – {1}:“ON” (default) –...
-
Page 53: Help
8. Help 8 Help 8For Fax Advantage assistance, call 1-800-435-7329. Error Messages PRESSED THE STOP KEY L {STOP} was pressed and fax communication 8.1 Error messages – was canceled. Reports THE COVER WAS OPENED L The front cover was opened. Close it and try If a problem occurs during fax transmission or again. - Page 54 8. Help L The drum life is complete. Replace the drum L Recording paper is not fed into the unit unit immediately (page 56). properly. Reinstall paper (page 13). FAILED PICK UP PAPER JAMMED L Recording paper was not fed into the unit L A recording paper jam occurred.
-
Page 55: When A Function Does Not Work, Check Here
8. Help Frequently Asked Questions During programming, I cannot enter the code 8.3 When a function does or ID number. L All or part of the numbers are the same. not work, check here Change the number: feature #12 (page 47) and #41 (page 48). -
Page 56: Fax – Receiving
8. Help L Add two pauses at the end of the telephone The other party complains that they cannot number or dial manually. send a document. 8.3.3 Fax – receiving L The memory is full of received documents due to a lack of recording paper or a recording paper jam. -
Page 57: If A Power Failure Occurs
8. Help 8.3.5 Using an answering out stating which contents in the memory have been erased. machine I cannot receive documents automatically. L Your greeting message on the answering machine is too long. Shorten the message. Record a message up to 10 seconds long. L The answering machine rings too many times. -
Page 58: Accessory Information
(page 66). To ensure that the unit operates properly, we recommend the use of Panasonic toner cartridge (Model No. KX- FA83) and drum unit (Model No. KX-FA84). See page 8 for accessory information. - Page 59 8. Help drum unit. Remove the drum and toner unit Remove the used cartridge (1) from the (1) by holding the two tabs. drum unit (2). L Do not touch the transfer roller (2). L If you replace the toner cartridge and the drum unit at the same time, skip to step 7.
-
Page 60: Recording Paper Jam
8. Help Turn the two levers (1) on the toner L If the lower glass (2) is dirty, clean it with cartridge firmly. a soft and dry cloth. Close the front cover (1) by pushing down on both sides, until locked. Make sure that the triangles (1) match, to install the toner cartridge correctly. - Page 61 8. Help Lift open the front cover (1), holding OPEN allow the jammed paper (3) to pull free (2). from the rear cabinet. Caution: 2. Lift both green levers (1) forward until The fuser unit (3) gets hot. Do not they stop.
-
Page 62: Document Jams - Sending
8. Help 4. Push back the levers (1) to the original L Before re-inserting, make sure to fan and position. straighten the recording paper. Close the front cover (1) by pushing down on both sides, until locked. Pull the tension plate forward (2) and re-insert the recording paper (3), then push back the tension plate. -
Page 63: Cleaning The Inside Of The Unit
8. Help Hold the center part of the front cover (1), Note: and pull open the inner cover (2). L Do not pull out the jammed document forcibly before opening the front cover. L Do not touch the transfer roller (3). Cleaning Remove the jammed document carefully (1). - Page 64 8. Help Caution: Remove the drum and toner unit (1) by The fuser unit (3) gets hot. Do not holding the two tabs. touch it. Clean the document separation roller (1) with a cloth moistened with isopropyl rubbing alcohol, and let all parts dry thoroughly. Clean the lower glass (1) with a soft and dry cloth.
- Page 65 8. Help Close the front cover (1) by pushing down on both sides, until locked. Reconnect the power cord and the telephone line cord. Note: L Do not touch the transfer roller (1). For Fax Advantage assistance, call 1-800-435-7329.
-
Page 66: Openlcr Service For The Caller Iq Feature
L If you have any questions regarding the openLCR service, call openLCR’s customer service department at 1-866- openLCR (1-866-673-6527). L NEITHER PANASONIC COMMUNICATIONS CO., LTD. (PCC) NOR MATSUSHITA ELECTRIC CORPORATION OF AMERICA (MECA) IS IN ANY WAY AFFILIATED WITH, OR RESPONSIBLE FOR THE ACTS OR OMISSIONS OF, OPENLCR.COM, INC. -
Page 67: Downloading Information
9. Caller IQ Feature Follow the voice prompt to start During download downloading. L The CALLER IQ indicator will flash and the display will show the following. 9.5 Viewing information DOWNLOADING L Keep the front cover page open for button L While downloading, you cannot do other locations. -
Page 68: General Information
10. General Information 10 General Information Printed Reports 10.1 Reference lists and reports You can print out the following lists and reports for your reference. Setup list: Provides you with the current settings of the basic and advanced programming features (page 46 to page 49). -
Page 69: Technical Data About This Product
10. General Information 10.2 Technical data about this product Applicable lines: Public Switched Telephone Network Document size: Max. 216 mm (8 ") in width, Max. 600 mm (23 ") in length Effective scanning width: 208 mm (8 ") Effective printing width: Letter/Legal: 208 mm (8 ") A4: 202 mm (7... - Page 70 10. General Information ITU-T No. 1 Test Chart Paper specifications Letter: 216 mm × 279 mm (8 " × 11") Recording paper size: Legal: 216mm × 356 mm (8 " × 14") A4: 210 mm × 297 mm (8 " × 11 ") Recording paper weight: 60 g/m...
- Page 71 10. General Information Toner life Toner life depends on the amount of content in a received, copied or printed document. The following is the approximate relationship between image area and toner life for replacement toner cartridge (Model No. KX-FA83). Toner life varies in actual usage. 5% image area 10% image area 15% image area...
-
Page 72: Fcc And Other Information
10. General Information FCC and Other Information 10.3 FCC and Other Information This equipment complies with Part 68 of the FCC Connection to party line service is subject to state rules and the requirements adopted by the ACTA. tariffs. Contact the state public utility commission, On the rear of this equipment is a label that public service commission or corporation contains, among other information, a product... - Page 73 10. General Information — Reorient or relocate the receiving antenna. — Increase the separation between the equipment and receiver. — Connect the equipment into an outlet on a circuit different from that to which the receiver is connected. — Consult the dealer or an experienced radio/TV technician for help.
-
Page 74: Limited Warranty
Panasonic ink film, toner cartridge or drum unit, or failures which result from accidents, misuse, abuse, neglect, mishandling, misapplication, alteration, faulty installation, set-up... - Page 75 Continued Services Technical prepaid and adequately insured. Support Line at 1-900-555-PANA (1-900-555- • Do not send your unit to the Panasonic 7262) for support on a fee basis. Consumer Electronics Company or to any executive or regional sales office. These...
-
Page 76: Customer Services Directory
Web Site. Service in Puerto Rico Matsushita Electric of Puerto Rico, Inc. Panasonic Sales Company / Factory Servicenter: Ave. 65 de Infantería, Km. 9.5, San Gabriel Industrial Park, Carolina, Puerto Rico 00985 Phone (787) 750-4300 Fax (787) 768-2910... -
Page 77: Index
11. Index 11. Index Collation: 44 Enlarge: 44 11.1 Index Reduce: 44 # #00 Quick Setup: 15 D Date and time (Feature #01): 28 #01 Date and time: 28 Delayed transmission (Feature #25): 47 #02 Your logo: 29 Dialing mode (Feature #13): 47 #03 Your fax number: 30 Direct command: 49 #04 Sending report: 37, 46... - Page 78 11. Index Receiving alert (Feature #44): 48 Recording paper: 13 Recording paper size: 68 Redialing: 36, 38 Remote activation ID (Feature #12): 47 Reports Broadcast programming: 66 Broadcast sending: 39 Caller ID: 34, 48 Journal: 37, 66 Power down: 55 Printer test: 66 Sending: 37, 46 Setup: 66...
- Page 82 The Panasonic Fax Advantage Consumer Service Program. If our 1-800-HELP-FAX technicians determine that your unit Panasonic knows that if your fax machine is not up and running, may be an “out-of-box failure” , we will attempt to provide you neither is your business.
Need help?
Do you have a question about the KX-FL511 and is the answer not in the manual?
Questions and answers
Which drum unit is for the fx-fl511 fax machine
The compatible drum unit for the Panasonic KX-FL511 fax machine is the HXOULP KX-FA84 (KXFA84) Drum Unit.
This answer is automatically generated