Table of Contents
Advertisement
Quick Links
Thank you for purchasing this Panasonic Home Photo Printer.
Please read this manual carefully to ensure proper operation. Especially, be sure
to read the "Important Safety Instructions" (pages 6 – 9) before using this product.
Store this manual and warranty in a safe place for future references.
Accessory Purchases
Purchase Parts, Accessories and Instruction Books online for all
Panasonic Products by visiting our Web Site at:
http://www.pasc.panasonic.com
or, send your request by E-mail to:
npcparts@us.panasonic.com
Operating Instructions
Home Photo Printer
Model No.
KX-PX20M
Advertisement
Table of Contents

Related Manuals for Panasonic KX-PX20M


Summary of Contents for Panasonic KX-PX20M
-
Page 1: Operating Instructions
Home Photo Printer KX-PX20M Model No. Thank you for purchasing this Panasonic Home Photo Printer. Please read this manual carefully to ensure proper operation. Especially, be sure to read the “Important Safety Instructions” (pages 6 – 9) before using this product. - Page 2 Thank you for purchasing a Panasonic Home Photo Printer. For your future reference Date of purchase Serial number (found on the rear of the unit) Dealer’s name and address Dealer’s telephone number Attach your sales receipt here. Caution: Note that the images of printed documents will remain on the used ink sheet. Use discretion when disposing of the used ink cassette.
-
Page 3: Package Contents
Package Contents Check that you have all of the following before using the product. If any items are found to be defective or missing during your check, please contact your dealer. Note that a Paper and Ink set (sold separately) is required in order to print p. -
Page 4: Table Of Contents
Table of Contents Before Use Package Contents ..............3 Important Safety Instructions ..........6 Notes on Use ................10 Names and Functions of Each Part ........12 Preparation Connecting a Power Source ..........14 Inserting Battery into the Remote Control ......14 Paper and Ink Cassettes (Sold Separately) ...... - Page 5 Advanced Operations Searching for Images ............55 Selecting All Images .............. 58 Slide Show ................60 Slide show of selected images ........... 62 Slide show settings ..............63 Trimming/Rotating Images ............ 65 Creating Calendars ..............67 Composite Printing ..............74 Printing with a TV ..............
-
Page 6: Important Safety Instructions
Important Safety Instructions When using this unit, basic safety 14. Never push any objects through slots precautions should always be followed in this unit. This may result in the risk to reduce the risk of fire, electric shock, of fire or electric shock. Never spill or personal injury. - Page 7 Remove the plug from has stopped emitting and contact the the wall outlet if you will not be using Panasonic Call Center at 1-800-211- the unit for an extended period of PANA (1-800-211-7262). time. Place the unit so the plug can be easily removed.
- Page 8 Responsible party: with the instructions, may cause harmful Panasonic Corporation of North America interference to radio communications. One Panasonic Way, However, there is no guarantee that Secaucus, New Jersey 07094...
- Page 9 Information on Disposal in other Countries outside the European Union This symbol is only valid in the European Union. If you wish to discard this product, please contact your local authorities or dealer and ask for the correct method of disposal.
-
Page 10: Notes On Use
Notes on Use Usage locations Printer usage location • Do not use in the following locations: • Locations subject to a lot of dust or lint, as this may lead to inability to print cleanly. • In direct sunlight, near an air conditioner, or in any other location where temperature may rise above 35 °C (95 °F) or fall below 5 °C (41 °F). -
Page 11: About The Lcd Monitor
Storage Storing paper and ink cassettes After use, remove the paper cassette from the printer, close the cassette lid, leaving any remaining paper in the paper cassette. Then insert the paper cassette into a plastic bag and store so that it lies flat. Avoid placing the paper and ink cassette in locations subject to high temperature, high humidity or direct sunlight. -
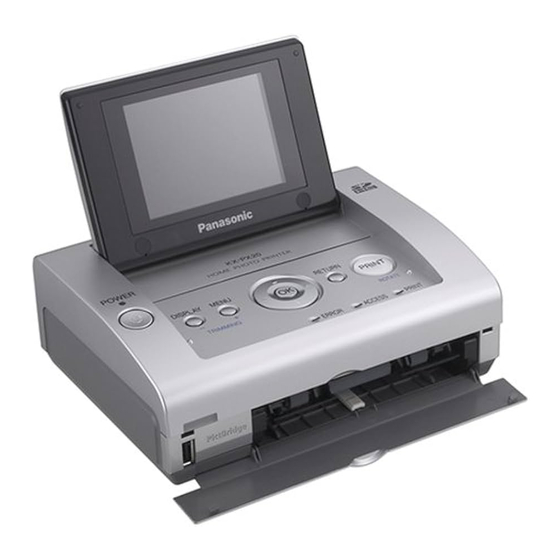
Page 12: Names And Functions Of Each Part
Names and Functions of Each Part Front View LCD monitor POWER Button Remote Control Paper Cassette Receiver Compartment Receives signals from the Cover remote control. Do not block. Paper Support Lever p. 102) OK Button RETURN Button Direction Buttons Selects menu items PRINT Button (ROTATE) and images. -
Page 13: Rear View
Rear View Air Vent Do not block. Ink Cassette Eject USB Port Lever p. 85) p. 21) Video Output Ink Cassette Terminal (VIDEO Compartment Cover OUT) p. 80) Paper Jam Removal DC IN Port Lever p. 89) Memory Card Slot p. -
Page 14: Connecting A Power Source
Connecting a Power Source POWER lamp DC IN port AC adaptor Power cord Wall outlet Connect to household power supply (120 V AC) When the power cord is connected to wall outlet, the POWER lamp lights up in red (standby mode). - Page 15 To remove the coin battery • Pressing down on the tab, slide out the coin battery and remove. Caution • Risk of explosion if the battery is incorrectly replaced. Replace only with type CR2025. • Dispose of used batteries according to local regulations. For residents of the state of California This product contains a CR Coin Cell Lithium Battery which contains Perchlorate Material –...
-
Page 16: Paper And Ink Cassettes (Sold Separately)
Paper and Ink Cassettes (Sold Separately) • Starter kit is included (5 sheets of postcard size paper). Use only paper and ink cassettes in the Paper and Ink set described below. Paper and ink cassettes are kits consisting of paper and ink together. Do not use postcard and ink jet type paper. -
Page 17: After Printing
After printing • Do not remove unused sheets of paper from the paper cassette. Close the cassette lid, then insert the paper cassette into a plastic bag and store so that it lies flat. • After removing the paper cassette, close the paper cassette compartment cover to prevent dust from getting inside the printer. -
Page 18: Inserting The Paper
Inserting the Paper For details on paper, refer to page 16. Open the paper cassette lid. • Push in the direction of the arrow. • If the lid does not open, slide the Click lid until “ ” and “ ” marks align (until you hear the lid catch in place). - Page 19 Insert the paper cassette to the printer. Slide the paper cassette lid Pull the paper stop upwards. forward until it catches in Click place. Slide the lid to align “ ” and “ ” marks. • If you do not slide the lid far enough, it will not attach properly to the printer.
-
Page 20: Inserting The Ink Cassette
Inserting the Ink Cassette For details on ink cassette, refer to page 16. If the ink sheet is slack, tighten Ink sheet • Turn in the direction of the arrow displayed on the ink cassette. Turn the spool in the direction of the arrow. - Page 21 Removing the ink cassette Open the ink cassette compartment cover. Pull the ink cassette eject lever (green) upward. Pull the ink cassette as shown in the figure to the right. Close the ink cassette Pull the ink cassette straight out. compartment cover.
-
Page 22: Pictbridge Printing With A Digital Camera
PictBridge Printing with a Digital Camera Camera Printer You can connect the printer to a PictBridge compatible digital camera or digital video camera to print recorded images. An example of connecting to the Panasonic digital camera LUMIX (DMC-FX9) is described here. POWER lamp • Printer... -
Page 23: Usb Cable
Follow the on-screen instructions on the digital camera to proceed the printing operation. When printing has finished, turn the printer off and disconnect the USB cable. Important • Connect only PictBridge compatible devices to the PictBridge terminal. • Do not connect a USB flash drive to the printer. This printer does not support USB flash drives. -
Page 24: Printing With The Lcd Monitor
Printing with the LCD Monitor Printer You can print images stored on SD Memory Card or MultiMediaCard. Do not change the paper size during operations. Otherwise, printing will be impossible. Performing the procedures in "Preparation" p. 14 – 21) Inserting a memory card This printer supports SD Memory Cards, SDHC Memory Cards, MultiMediaCards, and miniSD Memory Cards (adaptor required). -
Page 25: Turning The Power On
Turning the power on Press the POWER button. POWER lamp on the printer will light up in green. POWER lamp • Printer POWER button Same operations are also possible using the remote control. (For the button names on the remote control, refer to page 13.) Turning off the power (Standby mode) •... -
Page 26: Changing The Language
Printing with the LCD Monitor (continued) Printer • Printer • The direction buttons are Direction buttons represented in this manual as PRINT follows. RETURN Press Up, Down, Left or Right. MENU Press Up or Down. DISPLAY Same operations are also possible using the remote Press Left or Right. - Page 27 Press to select [OK] and press (OK). To cancel changes Press to select [Cancel] and press (OK) or press (RETURN). • If the screen shown to the right is displayed, press to select [Yes] and press (OK).
-
Page 28: Simple Mode And Normal Mode
Printing with the LCD Monitor (continued) Printer Simple Mode and Normal Mode You can select "Simple Mode" or "Normal Mode". "Simple Mode" allows beginners to easily operate the printer by limiting the functions used to basic functions only. "Normal Mode" is more advanced as it allows you to use all functions. - Page 29 Switching Simple Mode and Normal Mode The "heart" icon appears Press (MENU). when using Simple Mode. • In Simple Mode, the explanation of the item is shown on the bottom of the screen. Press to select [To Normal Mode] and press (OK).
-
Page 30: Printing Single Image
Printing with the LCD Monitor (continued) Printer Printing single image Press to move the cursor and select the image you want to print. Press (PRINT). Check the preview. ("Print" screen of Normal Mode) Then press (PRINT). • In Simple mode, Press to select [Without Date Print] or [With Date Print] and press... -
Page 31: Image Display
Image display To change pages ● Image number/ Remaining number of • When displaying a “Summary View” Total number copies to be printed display of images Press Print status Paper error display • When displaying a “Single-Shot View” display Shooting date Ink cassette Press or File number... -
Page 32: Printing Multiple Images
Printing with the LCD Monitor (continued) Printer Printing multiple images Press to move the cursor and select the image you want to print. Press (OK) to set the number of copies. • The number of copies will increase one by one each time you press this button. - Page 33 Check the preview. ("Print" screen of Normal Mode) Then press (PRINT). • In Simple mode, Press to select [Without Date Print] or [With Date Print] and press (OK). • If the date has already been added on the image by a digital camera, etc., the date may be printed twice (doubled) when you select The first image is displayed.
-
Page 34: Printing All Images On A Memory Card
Printing with the LCD Monitor (continued) Printer Printing all images on a memory card This function is available in “Normal mode” only. Switch to “Normal mode” ( p. 29). You can print all images on a memory card, one image per sheet. Press (MENU). -
Page 35: Printing An Index
Printing an index This function is available in “Normal mode” only. Switch to “Normal mode” ( p. 29). You can print an index of images on the memory card, showing 25 thumbnail images per sheet of paper (30 thumbnail images when using wide size paper). Index print Press (MENU). - Page 36 Printing with the LCD Monitor (continued) Printer Check the preview. Then press (PRINT). • Printing begins. • You can select [ON] or [OFF] in the [Date] setting of the [Print Sttngs]. • You can select [Oldest to Newest] or [Newest to Oldest] in the [Print Order] setting of the [Print Sttngs].
-
Page 37: Printing Using Dpof Settings
Printing using DPOF settings This function is available in “Normal mode” only. Switch to “Normal mode” ( p. 29). You can select the images to be printed and the number of copies to be made using a DPOF compatible digital video camera or digital camera. When you have inserted a memory card containing DPOF settings into the printer, you can print images according to the setting. - Page 38 Printing with the LCD Monitor (continued) Printer To stop print job midway ● • Press and hold (RETURN) ( p. 33). • You can also stop from the menu ( p. 33). • The printing for the paper currently being printed will be completed and subsequent printing is halted.
-
Page 39: Print Settings
Print Settings Printer Settings in the [Print Settings] are not applied when printing a calendar ( p. 67 – 73) and printing a composite image ( p. 74 – 79). Direction buttons • Printer PRINT RETURN Same operations are also possible using the remote control. (For the button names on the remote control, refer to page 13.) Printing date This function is available in “Normal mode”... - Page 40 Print Settings (continued) Printer Press to select [OK] and press (OK). To cancel changes Press to select [Cancel] and press (OK) or press (RETURN). • If the screen shown to the right is displayed, press to select [Yes] and press (OK).
-
Page 41: Borderless Printing
Borderless printing This function is available in “Normal mode” only. Switch to “Normal mode” ( p. 29). You can select whether to print images with borders or not. Press to select [Print Sttngs] on the “Print” screen and press (OK). Press to select [Borders] and press... - Page 42 Print Settings (continued) Printer With borders Borderless Whole part of the image is printed Part of the image is cut off and on the paper with margins on the there is no margin spacing on the paper edges. paper edges. To cancel changes Press to select [Cancel] and press...
-
Page 43: Lumix Date Printing
This function is available in “Normal mode” only. Switch to “Normal mode” ( p. 29). If date and age information has been recorded for images using LUMIX Travel Date and Baby mode with a Panasonic LUMIX digital camera, they are printed in the lower right corner of the image. Before operation Insert a memory card containing the images for which information has been recorded using LUMIX Travel Date and Baby mode. - Page 44 Note • For details on settings available in LUMIX Travel Date and Baby mode, refer to the operating instructions provided with the Panasonic LUMIX digital camera. • Factory setting for [LUMIX Date] is [OFF]. • LUMIX Travel Date and age using LUMIX Baby mode are not displayed on the LCD monitor and the TV screen.
-
Page 45: Image Adjustment Of Printing Image
Image Adjustment of Printing image Printer This function is available in “Normal mode” only. Switch to “Normal mode” ( p. 29). You can adjust the image quality on “Image Adjustment” screen. Direction buttons • Printer RETURN Same operations are also possible using the remote control. (For the button names on the remote control, refer to page 13.) Press to select [Image Adjust]... - Page 46 Image Adjustment of Printing image (continued) Printer After you have made image Example: Density/Balance adjustments by pressing , press (OK). Press to select [OK] and press (OK). Press to select [OK] and press (OK). To cancel changes Press to select [Cancel] and press (OK) or press (RETURN).
- Page 47 Image Adjustment items Effect ● Gives special effects to an image when printed. You can select from the following items. Item Result Prints images without special effects. Warm Monochrome Prints images with a warm monochrome effect. Cool Monochrome Prints images with a cool monochrome effect. Sepia Prints images with a sepia effect.
- Page 48 Image Adjustment of Printing image (continued) Printer Auto Mode ● Automatically adjusts the brightness and contrast. Item Result No brightness/contrast adjustment. Auto Adjusts image brightness/contrast automatically. Soft Skin Adjusts image brightness/contrast to make skin appear smoother. Indoor Adjusts image brightness/contrast to give darker images brighter exposure.
-
Page 49: Other Settings
Other Settings ● Set brightness and contrast values to suit your taste. (Density/Balance, Color Levels, White Balance) Item Result Density/Balance Adjusts image brightness, color saturation, contrast, edge sharpness. • Brightness: Adjusts image brightness. • Saturation: Adjusts image color brilliance. • Contrast: Adjusts image brightness contrast. •... -
Page 50: Device Settings
Device Settings Printer You can change the print date format, language used for the setting screen, automatic LCD monitor OFF, image information format, TV aspect ratio. Direction buttons • Printer RETURN MENU Same operations are also possible using the remote control. (For the button names on the remote control, refer to page 13.) Press (MENU). - Page 51 Press to select the desired option on the option select screen and press (OK). Press to select [OK] and press (OK). To cancel changes Press to select [Cancel] and press (OK) or press (RETURN). • If the screen shown to the right is displayed, press to select [Yes] and press (OK).
- Page 52 Device Settings (continued) Printer Setting options Item Description (Bold item indicates initial setting) Date Format Specifies print date format as YY/MM/DD year (YY), month (MM) and day DD/MM/YY (DD). MM/DD/YY Language Changes the display language. Deutsch (German) English Español (Spanish) Français (French) Italiano (Italian) Japanese...
-
Page 53: Saving Printer Settings
Saving Printer Settings Printer This function is available in “Normal mode” only. Switch to “Normal mode” ( p. 29). You can save the customised settings in [Print Settings], [Image Adjustment] and [Device Settings]. These settings will be saved even if the printer’s power is turned off. Direction buttons •... -
Page 54: Restoring Default Settings
Restoring Default Settings Printer This function is available in “Normal mode” only. Switch to “Normal mode” ( p. 29). Performing this operation initializes all settings to the default values (factory settings). Direction buttons • Printer RETURN MENU Same operations are also possible using the remote control. (For the button names on the remote control, refer to page 13.) Press (MENU). -
Page 55: Searching For Images
Searching for Images Printer This function is available in “Normal mode” only. Switch to “Normal mode” ( p. 29). You can search for images within a specified period and display these images in “Summary View” display. Direction buttons • Printer RETURN MENU Same operations are also possible using the remote control. - Page 56 Searching for Images (continued) Printer Specify the start date and end date. Moves within the date items (year, month, day). Specifies year, month, day. The "magnifying glass" icon Press (OK). appears when using the [Search by Date] feature. • When the search has finished, a list of images that fall within the specified range appears.
-
Page 57: Exiting Search Mode
Exiting search mode To return to a “Summary View” display of all images, perform the following procedures. Press (MENU). Press to select [Search] and press (OK). Press to select [Cancel Search] and press (OK). When using the remote control ● Press the [SEARCH] button on the remote control. -
Page 58: Selecting All Images
Selecting All Images Printer This function is available in “Normal mode” only. Switch to “Normal mode” ( p. 29). You can set the number of copies for all images on the memory card to a single print. After you have selected all images, you can increase or decrease the number of copies to be made for each separate image ( 32 –... - Page 59 To clear the number of copies for all images You can set the number of copies for all images to 0. Press (MENU). Press to select [Select All/ Clear] and press (OK). Press to select [Clear All] and press (OK). Press to select [Yes] and press...
-
Page 60: Slide Show
Slide Show Printer The slide show feature is used to display images on the memory card one-by-one for a specified period of time each. You can change the display time for each image in the [Slide Show Setting]. Slide Show display Direction buttons •... - Page 61 Press to select [All images] and press (OK). • To print the currently displayed image, press (PRINT). Button functions during a slide show Button Function Previous image/Next image Pause/Resume Operation guide On/Off Stops slide show. Prints currently displayed image. When using the remote control ●...
-
Page 62: Slide Show Of Selected Images
Slide Show (continued) Printer Slide show of selected images This function is available in “Normal mode” only. Switch to “Normal mode” ( p. 29). To display only selected images in a slide show, first select the images from the “Summary View”... -
Page 63: Slide Show Settings
Slide show settings This function is available in “Normal mode” only. Switch to “Normal mode” ( p. 29). You can make changes to the various slide show settings. Press (MENU). Press to select [Slide Show] and press (OK). Press to select [Slide Show Setting] and press (OK). - Page 64 Slide Show (continued) Printer Press to select [OK] and press (OK). Setting options Item Description (Bold item indicates initial setting) Interval Specifies the display time for 3 seconds, 5 seconds, 7 seconds, an image. 10 seconds Pattern Specifies the transition Normal: effect.
-
Page 65: Trimming/Rotating Images
Trimming/Rotating Images Printer This function is available in “Normal mode” only. Switch to “Normal mode” ( p. 29). You can reduce/enlarge or rotate an image and print. These settings are available on the “Print” screen ( p. 30). • Printer •... - Page 66 Trimming/Rotating Images (continued) Printer Press (OK) when finished editing the image. • A preview is displayed. Press (PRINT). Or press to select [Print] and press (OK). • If you press to select [Cancel] and press (OK), the display will return to the "Summary View"...
-
Page 67: Creating Calendars
Creating Calendars Printer This function is available in “Normal mode” only. Switch to “Normal mode” ( p. 29). You can create original calendars with your favorite images. Do not change the paper size during operations. Otherwise, printing will be impossible. •... - Page 68 Creating Calendars (continued) Printer Press to select [Print Calendar] and press (OK). Press to select the desired frame and press (OK). Press to select [Start Year/ Month] and press (OK). Specify the start year and month, and press (OK). Moves between the year and month setting items.
- Page 69 Press to select [Start Day] and press (OK). Press to select the start day of week and press (OK). Press to select [OK] and press (OK). Continued on next page...
- Page 70 Creating Calendars (continued) Printer Select image. Press to select the image insert position and press (OK). • The selected image position is outlined with a yellow border. Press to select an image and press (OK). • To switch to “Single-Shot View” display, press (DISPLAY).
-
Page 71: Add Clip Art
Add clip art. Press to select [Add Clip Art] and press (OK). • Up to 8 clip art can be applied. Press to select clip art and press (OK). Edit the clip art using (Reduce/Enlarge), (Rotate), (Move) and press (OK). •... - Page 72 Creating Calendars (continued) Printer Print. Press (PRINT). Or press to select [Print] and press (OK). • Printing begins. Then the display will return to the screen shown to the right. • If you press to select [Cancel] and press (OK), the screen ( p.
- Page 73 To return to the “Menu” screen Press (RETURN). If the screen shown to the right is displayed, press to select [Yes] and press (OK). Note • The preview is not exact print image. Actual printouts may differ from the preview. •...
-
Page 74: Composite Printing
Composite Printing Printer This function is available in “Normal mode” only. Switch to “Normal mode” ( p. 29). You can create composite images by adding a frame and clip art. Do not change the paper size during operations. Otherwise, printing will be impossible. - Page 75 Press to select [Print Composite] and press (OK). Press to select the desired frame and press (OK). Continued on next page...
- Page 76 Composite Printing (continued) Printer Select image. Press to select the image insert position and press (OK). • The selected image position is outlined with a yellow border. Press to select an image and press (OK). • To switch to “Single-Shot View” display, press (DISPLAY).
- Page 77 Add clip art. Press to select [Add Clip Art] and press (OK). • Up to 8 clip art can be applied. Press to select clip art and press (OK). Edit the clip art using (Reduce/Enlarge), (Rotate), (Move) and press (OK). •...
- Page 78 Composite Printing (continued) Printer Print. Press (PRINT). Or press to select [Print] and press (OK). • Printing begins. Then the display will return to the screen shown to the right. • If you press to select [Cancel] and press (OK), the screen ( p.
- Page 79 To return to the “Menu” screen Press (RETURN). If the screen shown to the right is displayed, press to select [Yes] and press (OK). Note • The preview is not exact print image. Actual printouts may differ from the preview. •...
-
Page 80: Printing With A Tv
Printing with a TV Printer You can operate the printer while viewing a TV screen by connecting the printer to a TV. Methods used for operating the printer and displaying contents are exactly the same as when you use the LCD monitor. However, the TV screen will remain on even if the LCD monitor is turned off using the "Sleep"... -
Page 81: Printing With A Computer
(hereafter Windows XP) Important • Do not play the supplied CD-ROM on an audio CD player. Doing so may emit loud sound resulting in damage to the speaker. • Do not connect more than 2 Panasonic home photo printers to a computer. -
Page 82: Installing The Printer Driver
Printing with a Computer (continued) Printer Installing the printer driver To print from the computer, you must first install the printer driver to your computer as follows. For details on printer driver operations, see the printer driver’s help. Important • Do not connect the printer to a computer before installing the printer driver. Also, be sure to turn off the printer’s power before making connections. - Page 83 Select the language for the installation. Click [Next]. • When the screen displaying the message “Before setup, make sure the printer is off.” appears, click [OK]. Read the License Agreement carefully. p. 87) Select [I accept the terms of the license agreement] and click [Next].
- Page 84 Printing with a Computer (continued) Printer Connect the printer to the computer with the USB cable when “Connect the printer and switch it on.” screen is displayed. Then turn the printer on. p. 85) If “Printer not found. Check the •...
-
Page 85: Uninstalling The Printer Driver
Disconnect the USB cable before uninstalling the printer driver. Quit all other active applications. Select [Start] → [All Programs (Programs)] → [Panasonic] → [Panasonic KX-PX20] and then click [Uninstall]. Click [Yes] when “Do you want to completely remove the selected application and all of its features?”... -
Page 86: Printing From The Computer
Printing with a Computer (continued) Printer Printing from the computer Use the application software installed on your computer to print images from the computer. Refer to the application software’s operating instructions for details on the printing operation. Open the image file to be printed using the application software. -
Page 87: License Agreement
PANASONIC or its licensor. 2. LICENSE: (1) You may use the SOFTWARE solely for the purpose of operation of your Panasonic Printer which is compatible with the SOFTWARE. (2) You may make a copy of the SOFTWARE for the use defined in subparagraph (1) above, or for internal back-up purpose only. -
Page 88: If A Paper Jam Occurs
If a Paper Jam Occurs The error message “Paper is jammed.” is displayed on the TV screen or status monitor of the computer screen. Turn off the printer’s power once Front panel and turn it back on again with both the paper cassette and ink cassette still inserted. - Page 89 If paper is not ejected Turn off the power and remove the paper cassette. Remove the paper from either the front panel p. 88) or the rear panel p. 88) while pressing down on the paper jam removal lever. Paper jam removal lever Important If the paper has stopped moving and no error message appears, wait for a while, leaving the paper as it is.
-
Page 90: Led Indicators
LED Indicators The operational and error status of the printer is displayed using a combination of lit and blinking LED indicators. Messages can be displayed on the LCD monitor, TV screen, and the status monitor of the computer screen ( p. -
Page 91: Troubleshooting
Troubleshooting Follow the procedures described below. If you are not able to solve the problem, contact your dealer. Power source Problem Cause and Remedy Page The power is not on. • Are the power cord and AC adaptor connected correctly? ⇒... - Page 92 Troubleshooting (continued) Printing Printer Camera Printer Printer Printer Problem Cause and Remedy Page The ink cassette • When attaching the ink cassette, if it does not catch in — cannot be inserted. place when inserted, manually rotate the ink sheet reel slightly as described below and try again.
- Page 93 Problem Cause and Remedy Page The printer printed • Even if the number of copies has been set to each a different number image when selecting images, only one copy will be of copies than printed if “All Images” or “ Index” is selected. selected.
- Page 94 Troubleshooting (continued) 3 Cleaning thermal heads If photo images are marred by Bottom of the printer horizontal lines and you are not able to print high-quality photo images, use a commercially available cotton swab, approximately 15 cm (6″) in length, to clean the full length of the thermal heads in the ink cassette slot.
- Page 95 Problem Cause and Remedy Page The message "The • When "Sleep" is set to [10min] or [5min], this message — monitor is entering is displayed if the printer has not been used for the time sleep mode following selected. The message is cleared by pressing any the set period of button.
- Page 96 Troubleshooting (continued) Problem Cause and Remedy Page It takes considerable • It may take some time until the image is displayed, — time for the image to depending on the image format or size of the image. be displayed. This is not a malfunction. It takes considerable •...
-
Page 97: Printer Driver
Problem Cause and Remedy Page The printed image • You can adjust the image quality on the [Image — has poor tone Adjustment] tab of the printer driver balance. • The printed image • Changing [Auto Mode] setting to [OFF] on the [Image —... -
Page 98: Message Display
Message Display Paper cassette and ink cassette related messages • LED indicators POWER lamp ERROR lamp ACCESS lamp PRINT lamp Lit (Green) Lit (Red) 1 Sometimes the PRINT lamp blinks or lights up during printing. • Messages Message Remedy Page Load a new ink •... -
Page 99: Internal Error
Paper size error/Paper jam LED indicators • POWER lamp ERROR lamp ACCESS lamp PRINT lamp Lit (Green) Blink (Red) • Messages Message Remedy Page Paper is jammed. • Remove the jammed paper. Check the paper and the paper cassette. (U2E/U28) Paper has been •... - Page 100 Message Display (continued) Others • LED indicators: No special indication. • Messages Message Remedy Page Maximum number of • Up to 99 copies can be printed at once. Perform the print copies exceeded. operation again after current print job is finished. Print after this job.
- Page 101 Message Remedy Page No SD card or • Insert a memory card. Multimedia card. (U35) • Unable to use • You are using a memory card that is not compatible. this SD card or Memory cards formatted by a computer may not be able Multimedia card.
-
Page 102: Maintenance
Maintenance • When the feed roller and/or paper support lever are dirty Clear prints may become impossible if the feed roller or paper support lever become dirty. Feed roller Paper support lever Wipe clean with a damp cloth that has been wrung thoroughly. •... -
Page 103: Specifications
Specifications Power Source AC adaptor Input voltage: 100 V to 240 V AC ±10 % 50/60 Hz Rated output: 24 V DC, 1.8 A Power During printing: Approx. 72 W Consumption When the power lamp is lit in green: Approx. 8 W When the power lamp is lit in red: Approx. -
Page 104: List Of Factory Settings
Specifications (continued) Allowable Storage: –20 °C to 55 °C (–4 °F to 131 °F) Temperature Operation: 5 °C to 35 °C (41 °F to 95 °F) Allowable Storage: 0 % to 90 % Humidity Operation: 35 % to 80 % External Approx. -
Page 105: Additional Information
Copyright laws prevent their use in any other way without the written permission of the copyright holders. Disclaimer • Panasonic makes no warranties for damages, whether directly or indirectly, resulting from corrupted or lost data due to power failures, etc. Sudden drops in voltage •... - Page 106 Additional Information (continued) Trademarks • Microsoft, Windows and Windows NT are either registered trademarks or trademarks of Microsoft Corporation in the United States and/or other countries. This document uses the following abbreviation protocols: Microsoft® Windows® 98 Second Edition is referred to Windows 98 SE Microsoft®...
-
Page 107: Warranty
Carry-In or Mail-In Service For Carry-In or Mail-In Service in the United States call 1-800-211-PANA (1-800-211-7262). For assistance in Puerto Rico call Panasonic Puerto Rico, Inc. (787)-750-4300 or fax (787)-768-2910. When shipping the unit carefully pack, include all accessories, and send it prepaid, adequately insured and preferably in the original carton. - Page 108 Warranty (continued) IF REPAIR IS NEEDED DURING THE LIMITED WARRANTY PERIOD THE PURCHASER WILL BE REQUIRED TO FURNISH A SALES RECEIPT/PROOF OF PURCHASE INDICATING DATE OF PURCHASE, AMOUNT PAID AND PLACE OF PURCHASE. CUSTOMER WILL BE CHARGED FOR THE REPAIR OF ANY UNIT RECEIVED WITHOUT SUCH PROOF OF PURCHASE.
-
Page 109: Customer Services
Monday-Friday 9 am-9 pm; Saturday-Sunday 10 am-7 pm, EST. TTY users (hearing or speech impaired users) can call 1-877-833-8855. Accessory Purchases Purchase Parts, Accessories and Instruction Books online for all Panasonic Products by visiting our Web Site at: http://www.pasc.panasonic.com or, send your request by E-mail to: npcparts@us.panasonic.com... -
Page 110: Index
Index ACCESS Lamp ........12, 90 Reducing Images ........65 Air Vent ............13 Remote Control ........13, 14 Auto Mode ..........48 Rotating Images ......... 65 Calendar Printing ........67 SDHC Memory Card ........24 Composite Printing ........74 SD Memory Card ........ - Page 111 Notes...
- Page 112 Puerto Rico 00985 Copyright: • This material is copyrighted by Panasonic Communications Co., Ltd., and may be reproduced for internal use only. All other reproduction, in whole or in part, is prohibited without the written consent of Panasonic Communications Co., Ltd.
Need help?
Do you have a question about the KX-PX20M and is the answer not in the manual?
Questions and answers