
Subscribe to Our Youtube Channel
Related Manuals for Rohnson R-98041


Summary of Contents for Rohnson R-98041
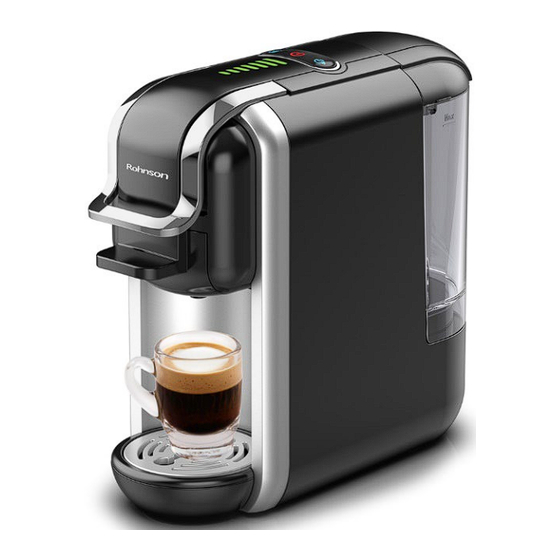
- Page 1 Instructions Manual Multi Capsule Coffee Machine R-98041 Please read this Instruction Manual and the safety instructions before operating the appliance!
-
Page 2: Safety Precautions
Safety Precautions Please take time to read these safety precautions carefully before connecting your machine to the power supply. It is essential to follow them and the operating instructions. First read this entire operating manual. – Danger of electric shock! Never immerse the machine in water or any other –... -
Page 3: Important Tips
– Only use the machine in dry rooms. – Danger of tripping! Do not let the power cable hang down. This machine is only intended for household use. – – Pull out the power plug and allow the machine to cool down completely before cleaning and or Maintenance. - Page 4 * Bed and breakfast type environments. Notes on This Operating Manual This operating manual cannot cover all possible circumstances. For further information or in case of problems not adequately covered in this operating manual, please contact the service and sales centre. Please keep this operating manual safe and pass it on to the next user.
-
Page 5: Overview Of Machine Parts And Controls
Starting up Before using for the first time: Caution: Improper handling of electrical equipment is dangerous and can be lethal. Please pay attention to the safety precautions in this manual, in particular the following: • Danger of scalding: beware of hot water! Do not operate the machine with an empty water tank or water is less than •... - Page 6 Before using for the first time or after long pauses (e.g. holidays) the machine must be flushed out. This short procedure can flush out and cleans the internal piping thoroughly. There are two ways to fill the water tank: directly into the machine, by using for example a jug, or by removing the water tank.
- Page 7 Before using for the first time or after long pauses (e.g. holidays) the machine may be difficult to pump water, this short procedure can help pump to self-priming by using the pipe to fill water into the circuit manually prior to turn on the machine for first refill. Remove the water tank Inject a small amount of Push the pump down to...
- Page 8 COFFEE VOLUME ADJUSTMENT FOR BREW Tips: The machine has different adaptor for different capsules, details refer to below: For Nespresso Capsule For Dolce Gusto Capsule For LAVAZZA Blue Capsule For E.S.E Coffee Pod For Coffee Powder...
- Page 9 For Nespresso capsules - Open the handle. - Pull out the Adapter. - Open the Adapter cover lid. - Put Nespresso capsule into the Adapter and close down the lid, press the lid with a little force. - Insert the Adapter into the machine, make sure you put it into the end, then close the Handle.
- Page 10 For LAVAZZA Blue (or Dolce-Gusto) Capsule - Open the handle. - Pull out the Adapter. Put LAVAZZA Blue (or Dolce-Gusto) capsules into the Adapter. Insert the Adapter into the machine, make sure you put it into the end, then close the Handle. Place a cup under the dispenser.
- Page 11 For Coffee Powder Open the handle. Pull out the Adapter. Coffee powder Press down the coffee powder. Note: You must use espresso powder and full, flatten and compact the pods. Ground coffee that is too fine, too coarse, or too little will affect the flavor of the coffee and take too long to drip, as well as unsuccessful extraction.
- Page 12 For E.S.E coffee Pod Open the handle. Pull out the Adapter. Change the Put the E.S.E coffee brewing coffee pod into the adaptor. for E.S.E coffee pod. Insert the Adapter into the machine, make sure you put it into the end, then close the Handle. Place a cup under the dispenser.
-
Page 13: Standby Mode
Standby Mode Factory Default setting: Standby Mode Time: 15 mins It means the machine will be turned off after 15 inactive mins, and all the indicators’ lights will be off. To press the switch button to cancel the standby mode again if the machine is in Standby mode. Standby mode setting Keep pressing the Volume button and Brew button, meanwhile insert the plug to the socket. -
Page 14: Factory Default Setting
Factory Default Setting Press the Brew button, and meanwhile insert the plug to the socket. The indicator light of buttons will Flash twice. It means the machine Come back to factory default setting. Cleaning Risk of fatal electrical shock and fire. Never immerse the appliance or part of it in water. - Page 15 Warning tips Prohibit to pull water to the machine. Prohibit to open the handle when brewing. There is sharp needle upper the capsule Adaptor. Prohibit to put the hand or finger to any part near the needle. After the adaptor removed.
-
Page 16: Energy Saving Mode
Energy saving mode he machine enters energy saving mode automatically once the machine is idle for 15 minutes, the back light of two buttons and power indicator will off. To quite energy saving mode, please press power button, appliance will start warming up with lights blinking, when the buttons are lit steadily, the machine is ready to brew coffee. -
Page 17: Troubleshooting
Troubleshooting PROBLEM POSSIBLE SOLUTION CAUSE No coffee is brewed. The water tank is empty. - Fill water in the water tank. - Preheat cup / mug. The Cold cups / mugs. Descale. The coffee is not Scale build-up in For cold machine, brewing a cup of water hot enough. - Page 18 IMPORTANT INFORMATION FOR CORRECT DISPOSAL OF THE PRODUCT IN ACCORDANCE WITH EC DIRECTIVE 2012/19/EU. At the end of its working life, the product must not be disposed of as urban waste. It must be taken to a special local authority differentiated waste collection center or to a dealer providing this service.
Need help?
Do you have a question about the R-98041 and is the answer not in the manual?
Questions and answers