Table of Contents
Advertisement
Quick Links
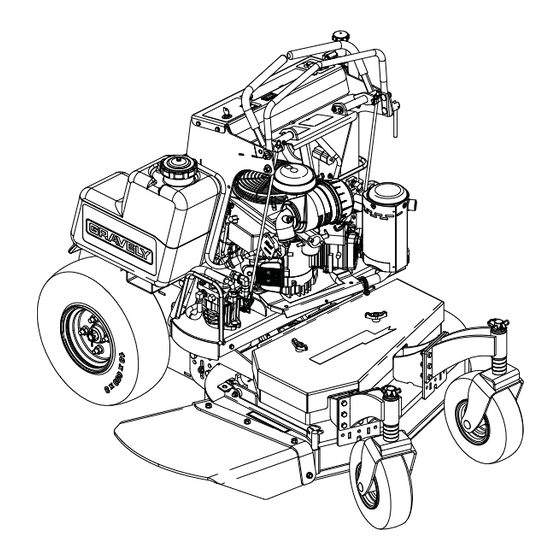
Pro-Stance
Owner/Operator Manual
Manuel Du Propriétaire/Utilisateur
Gasoline containing up to 10% ethanol (E10) or up to 10% MTBE (methyl tertiary butyl ether)
is acceptable for use in this machine.
The use of any gasoline exceeding 10% ethanol (E10) or 10% MTBE will void the product
warranty.
Il est possible d'utiliser de l'essence contenant jusqu'à 10% d'éthanol (E10) ou 10% de
MTBE (éther méthyl-tertiobutylique) sur cette machine.
L'utilisation d'une essence contenant plus de 10% d'éthanol (E10) ou de 10% de MTBE
annulent la garantie.
™
ENGLISH
FRANÇAIS
Models
994106 – 1634FX
04352200 5/11
Printed in USA
Advertisement
Table of Contents

Related Manuals for Gravely Pro-Stance 1634FX


Summary of Contents for Gravely Pro-Stance 1634FX
- Page 1 Pro-Stance ™ Owner/Operator Manual Manuel Du Propriétaire/Utilisateur Models 994106 – 1634FX Gasoline containing up to 10% ethanol (E10) or up to 10% MTBE (methyl tertiary butyl ether) is acceptable for use in this machine. The use of any gasoline exceeding 10% ethanol (E10) or 10% MTBE will void the product warranty.
-
Page 2: Table Of Contents
English may be obtained from your completely read your manuals. The contents Dealer. Visit your dealer or will provide you with an understanding of www.gravely.com for a list of safety instructions and controls during normal languages available for your operation and maintenance. -
Page 3: Product Registration
PRODUCT REGISTRATION Serial Number Label The Gravely dealer must register the product at the time of purchase. Registering the product will help the company process warranty claims or contact you with the latest service information. All claims meeting requirements during the limited warranty period will be honored, whether or not the product registration card is returned. -
Page 4: Safety
SAFETY WARNING: This cutting machine CAUTION: POTENTIALLY is capable of amputating hands HAZARDOUS SITUATION! If not and feet and throwing objects. avoided, MAY RESULT in minor Failure to observe the safety or moderate injury. It may also be instructions in the manuals and used to alert against unsafe on decals could result in serious practices. - Page 5 C. DANGER E. CAUTION: To avoid injury from rotating blades and • Never fill tank when engine is running, hot or unit is indoors. thrown objects, stay clear of deck edge • Never overfill fuel tank. and keep others away. Do not mow with- •...
-
Page 6: Emission Control System
EMISSION CONTROL SYSTEM • Use only an approved container. • Never remove gas cap or add fuel This equipment and/or its engine may include when engine is running. Do not exhaust and evaporative emissions control smoke. system components required to meet U.S. •... - Page 7 • Look behind and down before backing Checking Mowing Area up to be sure of a clear path. • Evaluate the terrain to determine what • Never carry passengers and keep pets accessories and attachments are and bystanders away. needed to properly and safely perform •...
- Page 8 • Shut off blades when you are not • Stay alert to the presence of children. mowing. Never assume that children will remain where you last saw them. Turn the • Park machine safely before leaving machine off if a child enters the work the operator station for any reason area.
- Page 9 • Riders obstruct the operator’s view • Disengage drives, lower implement, resulting in the machine being lock parking brake, stop engine and operated in an unsafe manner. remove key or disconnect spark plug (for gas engines). Wait for all Avoid High Pressure Fluids movement to stop before adjusting, •...
- Page 10 • Check grass catcher components and • Extinguish all cigarettes, cigars, pipes, the discharge guard frequently and and other sources of ignition. replace with manufacturer’s • Use only an approved fuel container. recommended parts, when necessary. Use only non-metal, portable fuel Grass catcher components are subject containers approved by the to wear, damage, and deterioration...
-
Page 11: Assembly
• For gasoline engines, do not use gas • See your local Recycling Center or with methanol. Methanol is harmful to authorized dealer to learn how to your health and to the environment. recycle or get rid of waste products. •... - Page 12 Check Engine Oil Level 1. Lift thigh pad. Figure 5 Check Hydraulic Oil Level Figure 7 2. Clean area around dipstick cap (A). 3. Remove dipstick cap (A) from tube. Wipe dipstick clean. NOTE: Do not tighten dipstick cap when checking oil level.
-
Page 13: Operation
1. Locate two 1/4 x 5/8 in. washer-head Transport bolts and two 1/4 in. lock nuts from Position literature pack. 2. Connect positive (red) cable to battery positive (+) terminal. Install red terminal cover (A). 3. Connect negative (black) cable to battery negative (-) terminal. -
Page 14: Operator Station Controls
• Be careful not to spill fuel on machine. MISCELLANEOUS CONTROLS Fuel may damage surface. Wipe up spilled fuel immediately. • Prolonged exposure to sunlight will damage the hood surface. OPERATOR STATION CONTROLS Figure 11 A.Free-Wheeling Valves Mounting and Dismounting Machine Safely Figure 10 Picture Note:... - Page 15 Raising and Lowering Thigh Pad 1. Park machine safely. (See Parking Safely in the SAFETY section.) Figure 14 3. Loosen bolts (A). 4. Loosen and remove bolts (B). 5. Move deck (C) up or down to desired height and tighten bolts (A) to 47 – 54 N•m (35 –...
-
Page 16: Setting Cutting Height
SETTING CUTTING HEIGHT NOTE: Before setting cut height, ensure the tires are all set at the correct tire pressures. Figure 16 Caster to deck mounting position Caster to deck mounting - Upper Position Rear of Deck Front Casters Rear Deck Nominal Height C-Spacers C-Spacers... - Page 17 Caster to deck mounting - Lower Position Rear of Deck Front Casters Rear Deck Nominal Height C-Spacers C-Spacers Height of Deck Rake Hole Position Bottom (inches) (inches) Testing Safety Systems CAUTION: Avoid injury! Engine exhaust fumes contain carbon monoxide and can cause serious 1, 3 illness or death.
- Page 18 Testing PTO Switch 1. Stand on operator’s platform with motion CAUTION: Avoid injury! Thrown objects can be dangerous. Before control levers in the neutral position. operating the attachment: 2. Lock park brake. Clear area of bystanders, 3. Pull PTO switch up to engage. especially children.
- Page 19 USING PARK BRAKE Using the Throttle Locking Park Brake Raise park brake lever (A) to lock park brake. Figure 21 • Push throttle lever (A) forward to the fast position (B) when mowing. Figure 19 • Move throttle lever (A) to the half fast position (C) when starting and warming the engine.
-
Page 20: Using The Motion Control Levers
USING THE MOTION CONTROL 3. Push motion control levers forward to LEVERS begin forward motion. The further forward the control levers are moved, the faster the machine will travel. CAUTION: Avoid injury! Learn • Forward speed range: 0–14.0 km/h use of the motion control levers (0–8.7 mph) and practice at half throttle until 4. - Page 21 Gentle Left Turn: • Push right motion control lever forward and pull left motion control lever rearward at the same time. Sharp Right Turn: Figure 26 Figure 29 • Push right motion control lever further forward than the left motion control •...
- Page 22 3. Put motion control levers (A) in the NOTE: In cold weather or with a new machine, allow engine to reach operating NEUTRAL position. temperature before engaging PTO to prevent 4. Push PTO switch knob (B) down to engine from stalling. disengage PTO.
- Page 23 • Mow with sharp blades. • Properly level mower deck for a smooth cut. • Mow grass high and often. Use a travel speed that fits the conditions: • Mow tall or wet grass twice. Cut grass at half desired height – then cut at desired height.
-
Page 24: Maintenance Schedule
MAINTENANCE SCHEDULE • Remove screws on blower fan screen and clean behind. WARNING: AVOID INJURY. Every 100 Hours Read and understand entire Safety section before proceeding. • Lubricate mower deck spindles. • Clean and gap spark plugs. SERVICING YOUR MACHINE •... - Page 25 Lubricating Front Caster Lubricating Mower Deck Spindles Spindles and Wheels CAUTION: Avoid injury! Fingers or loose clothing can get caught in rotating parts. Stop engine and wait for all moving parts to stop before servicing. Figure 35 • Lubricate three mower deck spindle grease fittings (A).
-
Page 26: Service Engine
SERVICE AND ADJUSTMENTS WARNING: AVOID INJURY. Read and understand entire Safety section before proceeding. SERVICE ENGINE Avoid Fumes CAUTION: Avoid injury! Engine exhaust fumes contain carbon monoxide and can cause serious illness or death. Move the machine to an outside area before running the engine. - Page 27 Changing Engine Oil and Filter NOTE: Refer to engine manufacturer’s operating manual for correct type and grade of oil. CAUTION: Avoid injury! Touching 14. Add approximately 1.7 L (1.75 qt.) of oil. hot surfaces can burn skin. The 15. Insert dipstick. Tighten cap. engine, components, and fluids 16.
- Page 28 Checking and Cleaning Air Filter Replacing Fuel Filter Elements CAUTION: Avoid injury! Fuel vapors are explosive and CAUTION: Avoid injury! Touching flammable: hot surfaces can burn skin. The engine, components, and fluids • Do not smoke while handling will be hot if the engine has been fuel.
-
Page 29: Service Transmission
SERVICE TRANSMISSION Changing Hydraulic Oil and Filter Hydraulic Oil CAUTION: Avoid injury! Escaping Use only 20W-50 engine oil with and SL API fluid under pressure can penetrate classification. the skin causing serious injury. Checking Hydraulic Oil Level Avoid the hazard by relieving pressure before disconnecting IMPORTANT: Avoid Damage! Check oil level hydraulic or other lines. - Page 30 6. Apply a film of clean hydraulic oil to gasket of new filter. 7. Install new filter. Turn filter clockwise until gasket makes contact with mounting surface. Tighten 1/2 to 3/4 turn after gasket contact. 8. Remove dipstick cap from hydraulic reservoir filler neck.
- Page 31 Removing Traction Drive Belt: Installing Traction Drive Belt: 1. Park machine safely. (See Parking NOTE: Install the traction drive belt (E) in front of anchor cap screw (F). Safely in the SAFETY section.) 2. Remove mower deck drive belt. (See Replacing Mower Deck Drive Belt in the SERVICE MOWER section.) 4-5/8 –...
- Page 32 Checking Motion Control Linkages: Adjusting Motion Control Return to Neutral Linkages: 1. Park machine safely. (See Parking Safely in the SAFETY section.) CAUTION: Avoid injury! Fingers or loose clothing can get caught in rotating parts. Stop engine and wait for all moving parts to stop before servicing.
- Page 33 CHECKING AND ADJUSTING • If machine tracks to the right, remove spring pin (D) and rotate left control TRANSMISSION TRACKING rod swivel one turn clockwise. Install spring pin (D). CAUTION: Avoid injury! Engine • If machine tracks to the left, remove exhaust fumes contain carbon spring pin (D) and rotate right control monoxide and can cause serious...
- Page 34 Adjusting Reverse Speed: SERVICE STEERING & BRAKES 1. Park machine safely. (See Parking Adjusting Park Brake Safely in the SAFETY section.) Testing Park Brake: 2. Loosen jam nut (C) on cap screw (D) on 1. Inflate tires to correct pressures. each side of machine.
-
Page 35: Service Mower
3. Remove rue clip (B). 17.5 - 18.1 cm 4. Turn brake linkage yoke in one-turn (6-7/8 - 7-1/8 in) increments on the brake link rod (C) clockwise to increase braking force; counterclockwise to decrease braking force. 5. Install rue clip (B). 6. - Page 36 IMPORTANT: Avoid Damage! When 3. Install mower deck shield. replacing mower blades, always use genuine Gravely Service Parts. 4. Adjust mower deck to desired cutting height. NOTE: Only replace blades. Never straighten or weld them. GB - 36...
- Page 37 Checking Mower Blades Sharpening Blades 1. Park machine safely. (See Parking Safely in the Safety Section). CAUTION: Avoid injury! Mower 2. Raise the mower deck to the transport blades are dangerous! position (also the 12.7 cm [5 in.] cutting Always wear gloves while working height position).
-
Page 38: Removing And Installing Battery
Service the Battery Safely REMOVING AND INSTALLING BATTERY Removing: 1. Park machine safely. (See Parking Safely in the SAFETY section.) CAUTION: Avoid injury! Battery electrolyte contains sulfuric acid. It is poisonous and can cause serious burns: • Wear eye protection and gloves. - Page 39 6. Apply general purpose grease or silicone spray to terminal to prevent corrosion. 7. Install battery. Jump-Starting Gravely does not recommend jump-starting your unit. Jump-starting can damage engine and electrical system components. See your engine manual for more detailed information. Replacing Fuse...
-
Page 40: Filling Fuel Tank
GASOLINE IMPORTANT: ALWAYS use gasoline that meets the following guidelines: • Clean, fresh gasoline. • A minimum of 87 octane/87 AKI (91 RON). High altitude use may require a different octane. Consult your engine manual. • Gasoline with up to 10% ethanol (gasohol) or up to 10% MTBE (methyl tertiary butyl ether) is acceptable. - Page 41 2. Lift machine with a safe lifting device 3. Remove nut (A) and wheel cap screw centered under tire support frame (A) on (B). the side where tire is being removed. 4. Remove wheel and spacers from yoke assembly (C). Installing: 1.
- Page 42 Checking Tire Pressure Servicing Caster Wheel Roller Bearings 1. Park machine safely. (See Parking Safely in the SAFETY section.) 2. Raise and securely support front of machine. 3. Remove locknut (A), cap screw (B), and wheel assembly (C). 4. Remove seals (D) and bearings (E) from wheel.
-
Page 43: Troubleshooting
TROUBLESHOOTING When you have checked all the possible causes listed and you are still experiencing WARNING: AVOID INJURY. the problem, see your authorized dealer. Read and understand entire Safety section before proceeding. Using Troubleshooting Chart If you are experiencing a problem that is not listed in this chart, see your authorized dealer for service. - Page 44 Engine Check Engine Knocks • Engine oil level low. • Reduce load. (Slower ground speed.) • Fuel is bad. Fill tank with fresh fuel, correct octane. • Idle speed too slow. Engine Overheats • Clean cooling fins. • Low oil level. •...
- Page 45 Electrical System Check Starter Will Not Work • Blown fuse. • Park brake switch is faulty. • OPC Switch faulty or not adjusted properly. • Loose or corroded battery connections. • Neutral switches faulty or not adjusted properly. See your authorized dealer. •...
- Page 46 Steering Check Steering Not Working • Pump free-wheel valves partially open. • Improper tire inflation. • Hydrostatic transmission oil level low. • Traction drive loose or broken. • Hydraulic pump or wheel motor faulty. Mower Deck Check Discharge Chute Plugged •...
-
Page 47: Storage
STORAGE Add fuel stabilizer (Gravely p/n 00592900) according to manufacturers’ instructions. WARNING: AVOID INJURY. Run engine for at least 10 minutes after Read and understand entire adding stabilizer to allow it to reach the Safety section before proceeding. carburetor. STORING SAFETY... -
Page 48: Service Parts
NLGI Grade No. 2 Rating 21548200 Air Filter Element Getting Quality Service Service Literature ACCESSORIES Manuals are available online at See your authorized Gravely dealer to add www.gravely.com. the additional accessories available to your model. Parts Part No. Description We recommend Gravely quality parts available at your Gravely dealer. -
Page 49: Specifications
SPECIFICATIONS Model Number 994106 Model Pro-Stance 1634FX Engine Engine Kawasaki Engine Model Number FX481V Maximum Engaged Engine Speed 3600 RPM Air Cooled Air Cooled Speed Forward Maximum – mph (km/h) 0–8.7 (0–14.0) Reverse Maximum – mph (km/h) 0–4.0 (0–6.4) Turning Radius... -
Page 50: Warranty
Commercial Mowing Equipment Limited Warranty Ariens Company (Ariens) warrants to the original purchaser that Ariens, Gravely and Countax brand products purchased on or after 1/1/2011 and designated or labeled commercial products by Ariens Company will be free from defects in material and workmanship for the time period noted in the chart below. Equipment put to personal use around a single household or residence is considered "Consumer Use";... - Page 51 Exclusions - Items Not Covered by This Warranty • Parts that are not genuine Ariens, Gravely or Countax service parts are not covered by this warranty and may void the warranty. • Damages resulting from the installation or use of any part, accessory, or attachment which is not approved by the Ariens Company for use with product(s) identified herein are not covered by this warranty.
- Page 52 GRAVELY 655 West Ryan Street Brillion, WI 54110-1072 920-756-4688 Fax 920-756-2407 www.gravely.com...
Need help?
Do you have a question about the Pro-Stance 1634FX and is the answer not in the manual?
Questions and answers