
Related Manuals for Axminster PROFESSIONAL AP305SBD


Summary of Contents for Axminster PROFESSIONAL AP305SBD
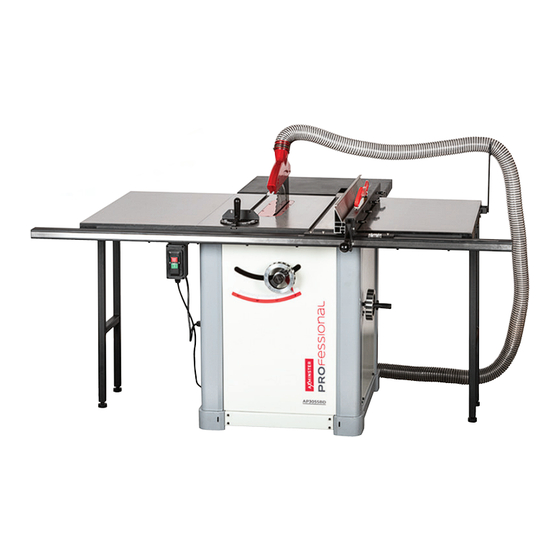
- Page 1 Code AP254SB: 108516 Code AP305SBD: 110642 Original Instructions AP254SB Saw Bench & AP305SBD Table Saw 230V AP254SB AP305SBD AT: 28 /10/2024 BOOK VERSION: 02...
- Page 2 INDEX OF CONTENTS What’s in the box 02-03 Safety 04-05 Assembly 05-06-07-08-09-10-11 Set up / Levelling / Fine Tuning 12-13-14 General Use / Operation 15-16-17-18 Troubleshooting Maintenance 19-20-21 Optional Accessories 22-23-24-25 Exploded Diagram/Parts Lists 26-27-28-29-30 Wiring Diagram Declaration of Conformity 38-39 2022 The machines Serial Number is...
-
Page 3: What's In The Box
WHAT’S IN THE BOX Fig A Fig F Fig B Fig H Fig C Fig I Fig D Fig E Fig J... - Page 4 SAFETY The following is a list of safety precautions you must consider when using a Table saw: ALWAYS REMEMBER TO DISCONNECT THE POWER TO THE TABLE SAW WHEN MAKING REPAIRS OR ADJUSTING BLADES AND GUARDS. ALWAYS REMEMBER TO READ THROUGH THE MACHINE INSTRUCTIONS SUPPLIED. •...
- Page 5 SAFETY Tips for Kickback Protection Kickback can happen even if precautions are taken to • Never place your hand behind the blade & never pull the prevent it. Listed below are some tips to protect you if timber through the cut. If kickback occurs, your hand will kickback does occur: be pulled into the blade.
- Page 6 ASSEMBLY Fitting The Cast Iron Extension Tables WARNING! WE ADVISE YOU GET ASSISTANCE AS THE CAST IRON TABLE IS HEAVEY. 1. Locate The right hand extension table ( E ) and the four long bolts / flat washers ( S ), see fig 10. Fig 10 The 100mm spigot placed on the outside...
- Page 7 ASSEMBLY Fitting the Rear Table Extension Table Fig 17 1. Locate the rear extension table ( F ), two angle support brackets, four short caphead bolts and four flat washers ( G ), see fig 17-18. Fig 18 2. To the rear of the of the cabinet there are four threaded holes on each support...
- Page 8 ASSEMBLY Fig 21 Fitting the Front Fence Rail & Fence Assembly 1. Locate the front fence rail ( B ) and five short bolts and flat washers ( S ), see fig 25. Lineup the pre-drilled holes in the fence rail with the ones to the front of the saws cast iron table and secure using the five bolts and washers ( S ) see fig 26-27.
- Page 9 ASSEMBLY AP305SB Shown Fig 33 Fig 34 Fig 29 3. Locate the Aluminum sub fence ( D ). Position the sub fence against the rip fence assembly ( A ), lineup the ‘T’ slots in the fence ( D ) with the ‘T’ bolts in the rip fence and slide the sub fence on.
- Page 10 ASSEMBLY Fig 40 Fitting Flexible Hose Support Bracket 1. Locate the flexible hose support bracket and two small caphead screws / washers ( L ), see fig 37. Fig 37 Fig 41-42 Down 2. LIneup the holes in support bracket ( L ) with the two threaded holes to the side of the right hand extension table ( E ) and secure in place with the caphead screws / Rise &...
- Page 11 ASSEMBLY Fig 44-45 Fig 49 Fig 50 Fitting the Extraction Hose 1. Locate the long hose ( Q ) and the two remaining hose clips ( M ). 2. Place a hose clip over one end of 63mm hose, slide the hose over the extraction outlet on the crown guard ( J ).
- Page 12 SET UP/ LEVELLING / FINE TUNING Always follow the step by step procedure in the Fig 55-56 instruction manual. A poorly set up saw will not perform to its full potential and may be dangerous to use. Three crucial things when setting up any table saw or panel saw- •...
- Page 13 SET UP/ LEVELLING / FINE TUNING Fig 62-63-64 Rear Extension Table - 5. Loosely Attached the rear extension table, then using the straight edge move the table up or down to align the main saw table, lock in place when aligned, see fig 59. Fig 59 6.
- Page 14 SET UP/ LEVELLING / FINE TUNING 5. To square the fence to the table firstly slide the sub Fig 72 Fig 71 fence on at its high fence position, move it over towards the blade then with the fence locked check for square, see fig 68.
- Page 15 GENERAL USE / OPERATION Fig 77 ALWAYS REMEMBER TO DISCONNECT THE POWER TO THE TABLE SAW WHEN MAKING REPAIRS OR ADJUSTING BLADES AND GUARDS. ALWAYS REMEMBER TO READ THROUGH THE MACHINE INSTRUCTIONS SUPPLIED. 1. Before you begin to use your Table saw, you will need to establish that the machine and the blade you are intending to use are suitable for the material you are going to be cutting.
- Page 16 GENERAL USE / OPERATION Fig 80-81 Fig 83-84 6. Use a push stick for all cuts that will bring your hands Bevel Cuts - within 250mm of the blade. 1. Make sure the timber is planed flat, square, and with 7.
- Page 17 GENERAL USE / OPERATION Fig 86 Fig 89 3. Position the sub fence to the lower position & the rip 9. Always push the workpiece completely past the blade fence to the desired cut width, see fig 86. at the end of a cut to reduce the possibility of kickback, see fig 90.
- Page 18 GENERAL USE / OPERATION Fig 94-95 Cross cuts - Cutting Across the Grain 20-25mm above the timber Crosscuts are usually made with a medium to fine tooth blade. See Blade Selection Info on page…. 20 1. Make sure the saw guard and riving knife are in place when crosscutting.
-
Page 19: Troubleshooting
TROUBLESHOOTING Table saws & panel saws are relatively simple machines, with all machinery regular cleaning, servicing & the use of extraction (all preventative maintenance) are essential to get the best from your saw. ‘My table saw won’t cut straight” “Why am I getting a lot of splintering along the cut edge”... - Page 20 MAINTENANCE Fig 99 Blade Selection/Info - ALWAYS ensure that you are using the correct blade dimensions, the blade diameter, the bore size & the kerf (cutting width) match the blade that is supplied with the table saw from new. Coarse Blade - Low tooth count, around 20 - 30 teeth, ideal for table saws to do ripping cuts down the grain where a smooth finish is not so important, see fig 97.
- Page 21 MAINTENANCE Fig 102 Fig 105 Outer clamping flange Inner clamping flange Left handed thread 3. Remove the nut, the outer clamping flange and the 3. Refit the outer clamping flange & retighten the blade blade. Take care not to lose the blade locating bush, also clamping nut.
-
Page 22: Optional Accessories
OPTIONAL ACCESSORIES Dado Blade Set This 204mm diameter Dado Blade Set comprises 2 x 24 tooth TCT outer blades, 6 inner chipper blades and 4 spacers. The chippers and spacers fit between the outer TCT blades. Simply select the inner chippers and spac- ers required to cut the width of slot required. - Page 23 OPTIONAL ACCESSORIES Wrong! DO NOT OVERLAP the blade teeth. Use the supplied spacers between the blades to make small adjustments in the height. Outer TCT blade Correct! The teeth equally spaced and pointing forward. Wrong! Place the outer TCT blade on top and check the tooth is the same depth as the timber.
- Page 24 OPTIONAL ACCESSORIES Inner TCT blade Spacer Turn the ‘Dado’ blade assembly over so the inner TCT blade is on top in preparation for installation. Plate flange Outer plate flange/nut Clean the inner and outer plate flanges Make sure the plate flange slots over the nut’s recess. Teeth forward Slide the inner TCT blade over the shaft and up against the inner plate flange.
- Page 25 OPTIONAL ACCESSORIES Sliding Table Accessory Overhead Crown Guard Accessory...
- Page 26 AP254SB EXPLODED DIAGRAM/PARTS LISTS Diagram/Parts List A...
- Page 27 AP254SB EXPLODED DIAGRAM/PARTS LISTS Description Hex.Nut M12 Mitre Gauge Assembly Tie-In B Main Worktable Tie-In A Washer 8Mm Dust Collection Hose Spring Washer 8Mm Supporting Bracket A,Rear Extension Table Extension Table Supporting Bracket B,Rear Extension Table Rear Fence Rail Semi-Round Key 3X16 Front Fence Rail Big Washer 4 End Cap,Front Fence Rail...
- Page 28 EXPLODED DIAGRAM/PARTS LISTS Diagram/Parts List B Description Thin Nut M20X1.5 Driving Pulley B Stopping Hoop B Shaft Pulley Locking Nail B Shaft Base Lifting Worm Wheel Arbor Shaft Sleeve Press Board,Riving Knife Arbor Shaft Ending Bushing Hex.Socket Countersunk Head M8X20 Blade Shaft Pulling Rod Shaft Hex.Socket Cap Head Screw M8X25...
- Page 29 EXPLODED DIAGRAM/PARTS LISTS Thrust Washer 30X17X0.8 Hex.Socket Set Screw M6X6 Hex.Nut M8 Handle Hex.Socket Flat Head Set Screw M8X6 Pointer Seat Motor Pointer B Torsion Spring Hex.Socket Cap Head Screw M10X80 Dust Collection Cover Thin Nut M16X2 (Left) Dust Outlet,Dust Collection Cover Variable Diameter Sleeve Cross Recessed Pan Head Screw M5X10 Hex.Nut M6...
- Page 30 AP305SBD EXPLODED DIAGRAM/PARTS LISTS Diagram/Parts List D...
- Page 31 AP305SBD EXPLODED DIAGRAM/PARTS LISTS Description Description Mechanism Assembly Levering Foot Rear Trunnion Connecting Board,Machine Body Front Trunnion Switch Retainer Ring Handwheel Tilt Limit Block Knob Mounting Support Hex.Socket Set Screw M6X6 Stopping Hoop Tilt Leadscrew Sling Rail Carrier Tilt Leadscrew Nut Locking Block Worktable Locking Cam...
- Page 32 AP305SBD EXPLODED DIAGRAM/PARTS LISTS D i agr am B Diagram/Parts List E Description Description Driving Pulley B Hex.Socket Cap Head Screw M6X12 Shaft Pulley Hex.Socket Set Screw M8X6 Shaft Base Hex.Bolt M8X16 Arbor Shaft Sleeve Cross Recessed Pan Head Screw M5X8 Arbor Shaft Ending Bushing Hex.Socket Cap Head Screw M8X16 Blade Shaft...
- Page 33 D i agr am C AP305SBD EXPLODED DIAGRAM/PARTS LISTS Diagram/Parts List F Description Description Hex.Socket Set Screw M10X10 Sling Rail Carrier Rip Fence Locking Block Hex.Socket Cap Head Screw M6X12 Locking Cam Hex.Nut M6 Nylon Screw Semi-Round Step Bolt M6X35 Fence Lock Knob Semi-Round Step Bolt M8X35 Pointer...
- Page 34 AP305SBD EXPLODED DIAGRAM/PARTS LISTS Diagram/Parts List G D I AG R AM E O PTI O N AL 4 76...
- Page 35 AP305SBD EXPLODED DIAGRAM/PARTS LISTS Description Description Front Supporting Bracket,Sliding Table Rail Sliding Table Rail Rear Supporting Bracket,Sliding Table Rail Thin Hex.Nut M10 Sliding Table Hex.Nut M10 Roller A Washer 10 Roller B Stud,Hold Down Hex.Socket Flat End Set Screw M6X10 Arm,Hold Down Bearing Mounting Base Locking Knob...
- Page 36 AP254SB & AP305SBD EXPLODED DIAGRAM/PARTS LISTS Mitre Fence Diagram/Parts List H Description Mitre Gauge Guide Rod Cross Recessed Countersunk Screw Rail Washer Hexagon Socket Set Screws M6X12 Hex.Socket Pan Head Screw M6X20 Hex.Socket Set Screw M6X6 Mitre Gauge Base Scale Stop Pin Block Indicator Spring Washer 5Mm...
-
Page 37: Wiring Diagram
WIRING DIAGRAM... -
Page 38: Declaration Of Conformity
DECLARATION OF CONFORMITY... - Page 39 DECLARATION OF CONFORMITY...
- Page 40 The packaging is suitable for recycling. Please dispose of it in a responsible manner. EU Countries Only Do not dispose of electric tools together with household waste material. By law they must be collected and recycled separately. Axminster Tools, Axminster Devon EX13 5PH axminstertools.com...
Need help?
Do you have a question about the PROFESSIONAL AP305SBD and is the answer not in the manual?
Questions and answers