
Subscribe to Our Youtube Channel
Related Manuals for Midea D70M30D0


Summary of Contents for Midea D70M30D0
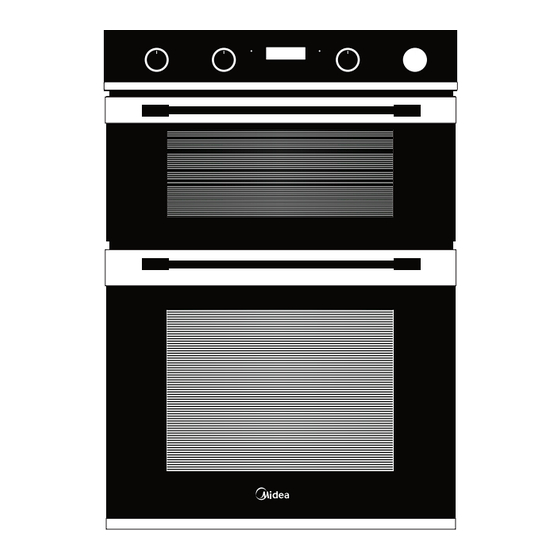
- Page 1 Built-in Electric Oven Instructions for installation and use D70M30D0 KEEP THESE INSTRUCTIONS IN A SAFE PLACE Product picture only for reference...
-
Page 2: Contents & Introduction
contents & IntRoDUctIon contents our policy is one of constant development and improvement, therefore • SAFETY we cannot guarantee the strict accuracy • USING THE PRODUCT of all of our illustrations and specifications - changes may have been • ClEANING made subsequent to publishing. • INSTAllATION INSTRUCTIONS IntRoDUctIon thank you for buying this... - Page 3 Safety shall not play with the BefoRe UsInG tHe pRoDUct Make sure that you have removed all appliance. c leaning and packaging and wrapping. Some of the items inside this appliance may have user maintenance shall additional wrapping. not be made by children GeneRal without supervision.
- Page 4 Safety and performance, installed. Ensure that the particularly in kitchen is well ventilated relation to surface especially when the temperatures appliance is in use: becoming hot and gas prolonged intensive use operated parts not of the appliance may call working efficientl . for additional ventilation, The cooling fan (if for example opening fitted) is designed...
- Page 5 Safety WaRnInG! - Never put items directly use, so take extra care on the base of the oven to avoid touching it. or cover the oven base WaRnInG! - d o not with foil, as this can cause the base element use harsh abraisive to overheat.
- Page 6 Safety oven / GRIll WaRnInG! - • Always take care when removing food The steam cleaner is not from the oven as the area around the to be used. cavity may be hot. • Always use oven gloves when WaRnInG! - handling any utensils that have been in the oven as they will be hot.
- Page 7 UsInG tHe GRIll - electRIc caution: accessible parts may be Using aluminium foil hot when the grill is used - young Using aluminium foil to cover the grill pan, children should be kept away. or putting items wrapped in foil under the grill creates a fire hazard.
- Page 8 UsInG tHe top oven - electRIc (if fitted) When you are cooking keep children preheat the oven until the indicator light away from the vicinity of the oven. switches off for the first time, this will take up to 15 minutes depending on the caution: The top element gets temperature selected.
- Page 9 USING THE TOP OVEN - ELECTRIC (if fitted) top oven BakInG GUIDe cooking temperatures cooking times The temperature settings and time given in the Baking Guides are based on dishes These times are based on cooking in a made with block margarine. If soft tub preheated oven.
- Page 10 UsInG tHe MaIn oven - electRIc accessible parts may be Manual operation (fanned only) hot when the oven is used. the cooling fan young children should be The cooling fan may operate when the kept away. main oven is on and may continue to op- erate for a period after the oven has been switched off.
- Page 11 UsInG tHe MaIn oven - electRIc aluminium foil Because the 2 oven shelves are wider than in many ovens, it is possible to cook Use foil only to cover food or cooking 2 items per shelf - eg; 2 victoria sand- dishes, using foil to cover the shelves or wiches or 2 casseroles.
- Page 12 UsInG tHe MaIn oven - electRIc Be safe There is no need to interchange dishes onto different shelves part way through do not defrost stuffed poultry using this cooking, as with a conventional oven. method. to help the air circulate freely do not defrost larger joints of meat and position the shelves evenly within the poultry over 2kg/4lb using this method.
-
Page 13: Shelf Position
UsInG tHe MaIn oven - electRIc Note: This is a high efficient oven, there- conventional temperatures need to be fore some adjustment will have to be converted to ‘A’ efficient temperatures. made to conventional cooking tempera- For example, an item which would nor- tures. The table below shows conven- mally cook at a conventional temperature tional cooking temperatures, ‘A’ efficient of 180 °c , will now cook at the ‘A’... - Page 14 UsInG tHe MaIn oven - electRIc traditional fruit cakes Roast turkey It should be remembered that ovens can roasting turkey involves cooking two vary over time, therefore cooking times different types of meat - the delicate light can vary, making it difficult to be precise breast meat, which must not be allowed when baking fruit cakes.
- Page 15 UsInG tHe MaIn oven - electRIc Roasting guide notes: The times given in the roasting guide • When cooking stuffed meat or poultry are only approximate, because the size calculate the cooking time from the and age of the bird will influence cooking total weight of the meat plus the times as will the shape of a joint and the stuffing proportion of the bone.
- Page 16 using the OVen/gRiLL - muLti-functiOn oven & Grill Functions The chart below details all of the functions which are available. Your oven may not have all of the functions shown here. symbol function / Recommended Uses feature Grill, small area For grilling small amounts of steaks, sausages, toast and pieces of fish.
- Page 17 UsInG tHe oven/GRIll - MUltI-fUnctIon GRIllInG In tHe MaIn oven Grill, , , , , large area The main oven grill & fanned grill are fi ed settings using the inner element The door must be closed when the only. Make sure that the programmer is large area grilling is used.
- Page 18 UsInG tHe oven/GRIll - MUltI-fUnctIon Using the main oven to help the air circulate freely Caution: Accessible parts may • position the shelves evenly within the be hot when the appliance is in oven and maintain a clearance from use - keep children away from the oven roof and base.
- Page 19 UsInG tHe oven/GRIll - MUltI-fUnctIon fan oven • Never place uncooked food which is to be defrosted next to cooked food (i) Turn the selector control knob to the which is to be cooled, as this can lead fan oven symbol. to cross contamination. please refer to the cooking Guide f or (ii) Turn the main oven control knob to more information on using the def rost the required temperature.
- Page 20 UsInG tHe clock/pRoGRaMMeR-elec Alarm Lock D uration Clock End time Function Minus Plus Lock 2) If there’s no operation for 2 minutes, After power on, ‘0:00’and the clock icon buzzing will stop. will flash on the screen, press any button to quit.
- Page 21 UsInG tHe clock/pRoGRaMMeR-elec 3) After counting down stopping, if 5、Other notification there’s no operation for 2 minutes, buzzing will stop. 1) If setting alarm, duration time and end time, alarm time will display, and alarm, 4) If set duration time before end time, duration, end time icons will display.
- Page 22 cleaning General • Some foods are corrosive eg; vinegar, fruit juices and especially salt - they • It is important to clean the product can mark or damage the metal if they regularly as a build up of fat can af- are left on the surface.
- Page 23 CLEANING REMOVING OVEN PARTS FOR The inner door glass panel can be removed for cleaning but it must be CLEANING replaced the right way up. If there is To remove the door, open the door to • any writing on the glass, you must be the maximum angle.Then pull the able to read it clearly when the cavity buckle at the door hinge backward.
-
Page 24: Bulb Replacement
CLEANING Warning: Do not operate BULB REPLACEMENT • the appliance without the For replacement, process as follows: 1. Disconnect power from the mains outlet or glass panel correctly fitted. switch off the circuit breaker of the unit's mains outlet. • For your safety, glass door panels are 2. -
Page 25: Installation
installation do not lift the appliance by the door handle. Whilst every care is taken to elimi- nate burrs and raw edges from this product,please take care when handling - we recommend the use of protective gloves during installation. please note that the weight of this appliance is approximately 45kg (unpacked). Take care when lifting it into Housing dimensions... -
Page 26: Securing The Oven To The Cabinet
SECURING THE OVEN TO THE CABINET 1. Fit oven into the cabinet recess. 2. Open the oven door. 3. Secure the oven to the kitchen cabinet with two distance holders " A " which fit the holes in the oven frame and fit the two screws "... -
Page 27: Connection Of The Oven
CONNECTION OF THE OVEN This appliance is marked according to the European directive 2012/19/EU on Waste Electrical and Electronic Equipment (WEEE). By ensuring this product is disposed correctly, you will help prevent potential negative consequences for the environment and human health, which could otherwise be caused by inappropriate waste handling of this product.
Need help?
Do you have a question about the D70M30D0 and is the answer not in the manual?
Questions and answers