Table of Contents
Advertisement
Advertisement
Table of Contents

Related Manuals for Leica V-LUX 20


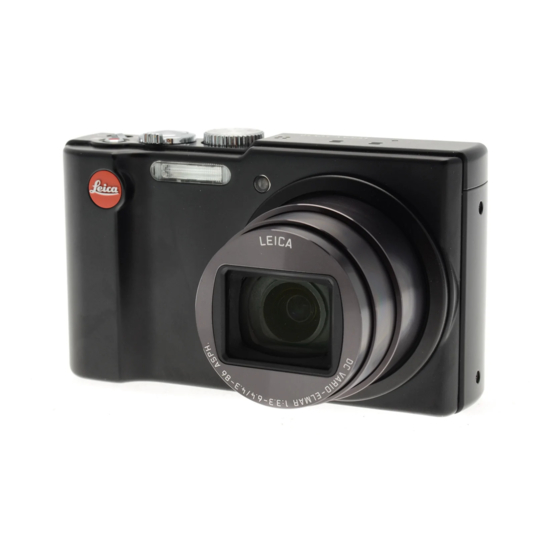
Summary of Contents for Leica V-LUX 20
- Page 1 LEICA V - LUX 20 Instructions...
-
Page 2: Table Of Contents
Quick start guide Table of Contents The battery is not charged Charge the battery Before use Basics when the camera is shipped. Charge the Before use ..........6 Basic shooting operation ....28 battery and set the Clock Read first ............6 Taking still pictures ........28 before use. - Page 3 Leica Academy ........164 Useful features for travel the exposure [CATEGORY PLAY] ......114 [TRAVEL MODE] ........84 Leica on the Internet ......164 [MANUAL EXPOSURE] Mode ..... 54 [FAVORITE PLAY] ......115 [TRAVEL DATE] ........84 Leica information service ....165 Register your own settings and record Using the [PLAYBACK] menu ..
-
Page 4: Before Use
Leica will not provide compensation even can apply pressure against it.) • Do not leave the lens exposed to direct ■ if damage is caused by faults with camera Software on the DVD supplied •... -
Page 5: About Gps
Before use Scope of delivery (Continued) Names of parts Order No. About GPS Rechargeable battery ■ BP-DC7-U 18 702 About the camera’s location name Camera ON/OFF switch Card/Battery door (→13) BP-DC7-E 18 701 information (→15) Tripod thread Battery charger Before using the camera, read “User BC-DC7-U 423-082.001-010 Shutter button... -
Page 6: Charging The Battery
• [PROGRAM AE] Mode Image Stabilizer function is set to [AUTO].) which do not support this function cannot be used). Leica cannot in any way • [GPS SETTING] is set to [OFF] • Recording once every 30 seconds with full •... -
Page 7: Inserting And Removing The Card (Optional)/The Battery
● To remove the card or battery, turn the camera off and wait until the Leica logo on the LCD monitor goes off. (Failure to wait may cause the camera to malfunction and may damage the card or recorded data.) ●... -
Page 8: Picture Save Destination (Cards And Built-In Memory)
Inserting and removing the card (optional)/ Setting the Clock ( The Clock is not set when the the battery camera is shipped.) (Continued) Set REC/PLAY switch to before turning on the power. Picture save destination (cards and built-in memory) Turn on the power Pictures will be saved to a card if one is inserted, or to the built-in memory if not. -
Page 9: To Change Time Setting
Setting the Clock (Continued) If automatically correcting time of day, select [YES] To change time setting • To manually set date and time →select [NO]. When resetting date and time, select [CLOCK SET] from the [SETUP] menu. • To return to the previous screen, press •... -
Page 10: Setting The Menu
Setting the menu Settings display may vary according to items. Menu items displayed vary according to mode dial setting. Refer to the following procedures to operate menus such as the [SETUP] menu, [REC] Menu type menu, [TRAVEL MODE] menu and [PLAYBACK] menu. (Example) While in [PROGRAM AE] Mode (→33), change [LCD MODE] on the [SETUP] menu. -
Page 11: Using The [Setup] Menu
Using the [SETUP] menu For details about the setting procedure in the [SETUP] menu (→18) For details about the setting procedure in the [SETUP] menu (→18) Item Settings, notes Make general camera settings such as adjusting the Clock, extending the battery life, and changing the Beep sounds. -
Page 12: [Auto Review]/ [Zoom Resume]/ [No.reset]
Using the [SETUP] menu For details about the setting procedure in the [SETUP] menu (→18) (Continued) For details about the setting procedure in the [SETUP] menu (→18) Item Settings, notes Item Settings, notes [OFF]: No auto review [AUTO REVIEW] [1 SEC.]/[2 SEC.]: Automatically displayed for 1 or 2 [OFF]/[ON] This section is not [REC AREA]... -
Page 13: [Reset]/ [Usb Mode]/ [Video Out]/ [Tv Aspect]
Using the [SETUP] menu For details about the setting procedure in the [SETUP] menu (→18) (Continued) For details about the setting procedure in the [SETUP] menu (→18) Item Settings, notes Item Settings, notes [HDMI MODE] [AUTO]: The output resolution is automatically determined based on information from the connected TV. -
Page 14: [Version Disp.]/ [Format]/ [Language]
• Formatting the built-in memory may take several the data cannot be minutes. restored. Check the • Consult your nearest Leica service facility (→165) if content of the card/ formatting cannot be successfully completed. built-in memory carefully before formatting. -
Page 15: Basic Shooting Operation
Basic shooting operation Please set the Clock before shooting (→15). Turn on the power Holding the camera Shutter button • Stand with your arms close to your body and with AF Assist Lamp your legs apart. Flash • Do not touch the lens. Set to •... -
Page 16: Taking Pictures With Automatic Settings
Taking pictures with automatic settings [SNAPSHOT MODE] Recording Mode: ■ Optimum settings are made automatically from information such as ‘face’, ‘movement’, To use flash ‘brightness’, and ‘distance’ just by pointing the camera at the subject, meaning that clear Select either (Auto) or (Forced Flash Off). -
Page 17: About Happy Colors
Taking pictures with automatic settings Taking pictures with your own settings (Continued) [SNAPSHOT MODE] [PROGRAM AE] Mode Recording Mode: Recording Mode: Using the [REC] menu to change settings and set up your own recording environment. About Happy colors Turn on the power If [COLOR EFFECT] is set to[Happy], both still and motion pictures are clearer, with more Zoom lever vivid coloring. -
Page 18: Align Focus For Desired Composition
Taking pictures with your own settings Taking pictures with zoom (Continued) [PROGRAM AE] Mode Recording Mode: Recording Mode: You can zoom in up to 12 times with ‘Optical Zoom’, and up to 23.4 times with ‘Extended Align focus for desired composition Optical Zoom’... -
Page 19: [I.zoom]
Taking pictures with zoom (Continued) Recording Mode: ● Maximum zoom ratios by resolution [i.ZOOM] Optical Zoom Extended Optical Zoom The camera uses super resolution technology to increase the zoom ratio. Using super 12 M 0.3 M resolution technology, the zoom ratio can be increased up to about 1.3 times higher than [PICTURE SIZE] 11.5 M 7.5 M... -
Page 20: [Digital Zoom]
Taking pictures with zoom Viewing your pictures (Continued) [NORMAL PLAY] Recording Mode: Playback Mode: When a card is in the camera, pictures are played back from the card, and without a card, [DIGITAL ZOOM] pictures are played back from the built-in memory. (Clipboard pictures can only be played back in [CLIPBOARD] Mode (→101).) Zoom 4 times further than Optical/Extended Optical Zoom. -
Page 21: Deleting Pictures
Deleting pictures Playback Mode: Pictures deleted will be from the card if the card is inserted, or from the built-in memory if To delete multiple (up to 50) or all pictures the card is not inserted. (Deleted pictures cannot be recovered.) (after step Select type of deletion Delete... -
Page 22: Changing Recording Information Display
Taking pictures with flash Changing recording information display Recording Mode: Change between different LCD monitor displays, such as Histograms. Display [FLASH] Press to change display Select the desired type ● In Recording Mode Recording Motion picture recording information ∗ information ∗ ∗... -
Page 23: Taking Close-Up Pictures
Taking pictures with flash Taking close-up pictures (Continued) Recording Mode: Recording Mode: ■ Available types in each mode When you want to enlarge the subject, setting to [AF MACRO] ( ) enables you to take (○: Available, –: Not available, : Default setting) pictures at an even closer distance than the normal focus range (up to 3 cm (0.10 feet) for max. -
Page 24: [Macro Zoom]
Positioning camera and subject within Taking close-up pictures (Continued) the accessible range for focusing Recording Mode: ■ Available recording range in ([PROGRAM AE] Mode) Taking pictures at even closer range [MACRO ZOOM] Focus range To take even larger images of the subject, setting to [MACRO ZOOM] enables the subject to appear even larger than when using [AF MACRO]. -
Page 25: Taking Pictures With Self-Timer
Taking pictures with self-timer Taking pictures with Exposure Compensation Recording Mode: Recording Mode: We recommend using a tripod. This function can also be used to avoid camera shake Compensates the exposure when an adequate exposure is not obtained automatically caused by pressing the shutter button, by setting the self-timer to 2 seconds. (if difference between brightness of object and background, etc.). -
Page 26: Taking Picture Series With Automatically Changing Exposure ([Auto Bracket])
Taking picture series with automatically changing Taking pictures with automatically changing exposure aspect ratios ([AUTO BRACKET]) [MULTI ASPECT] Recording Mode: Recording Mode: Records 3 pictures in continuous succession while exposure is changed automatically. In this mode, pressing the shutter button once automatically takes 3 pictures in each of 3 After exposure adjustment, the adjustment value is set as the standard. -
Page 27: Using A Pre-Set Aperture To Determine The Depth Of Field [Aperture-Priority] Mode
Using a pre-set aperture to determine the depth of Using a pre-set shutter speed to determine the field rendition of moving subjects [APERTURE-PRIORITY] Mode [SHUTTER-PRIORITY] Mode Recording Mode: Recording Mode: By setting the aperture, you can control the depth of field (i.e. the area appearing in By setting the shutter speed, you can control how sharp moving subjects are rendered. -
Page 28: Using A Pre-Set Aperture/Shutter Speed Combination To Achieve Full Control Of The Exposure [Manual Exposure] Mode
Using a pre-set aperture/shutter speed combination to Register your own settings and record achieve full control of the exposure [MANUAL EXPOSURE] Mode [CUSTOM] Mode Recording Mode: Recording Mode: This mode of recording lets you set any aperture value and shutter speed. Registering your preferred Recording Mode, [REC] menu settings, etc. -
Page 29: Taking Pictures According To The Scene
Register your own settings and record Taking pictures according to the scene (continued) [CUSTOM] Mode [SCENE MODE] Recording Mode: Recording Mode: Using [SCENE MODE] enables you to take pictures with optimum settings (exposure, [CUSTOM] Switch to your own settings and record coloring, etc.) for given scenes. -
Page 30: [Transform]
Taking pictures according to the scene How to select a scene (→57) (Continued) [SCENE MODE] Using flash in Scene Modes (→44) Recording Mode: Scene Uses, Tips Notes Scene Uses, Tips Notes Improves the skin tone of subjects for a • [AF MODE] default setting is Takes clear pictures of wide, distant subjects. -
Page 31: [Night Portrait]/ [Night Scenery]/ [Food]/ [Party]
Taking pictures according to the scene How to select a scene (→57) (Continued) [SCENE MODE] Using flash in Scene Modes (→44) Recording Mode: Scene Uses, Tips Notes Scene Uses, Tips Notes Takes pictures of people and nightscapes • When the camera is set to Brings out the atmosphere of a candlelit •... -
Page 32: [High Sens.]
Taking pictures according to the scene How to select a scene (→57) (Continued) [SCENE MODE] Using flash in Scene Modes (→44) Recording Mode: Scene Uses, Tips Notes Scene Uses, Tips Notes Prevents blurring of subjects in dark, indoor • Pictures may appear slightly Enables continuous recording in dim •... -
Page 33: [Aerial Photo]/ [Pin Hole]
Taking pictures according to the scene How to select a scene (→57) (Continued) [SCENE MODE] Using flash in Scene Modes (→44) Recording Mode: Scene Uses, Tips Notes Scene Uses, Tips Notes Takes clear pictures of fireworks in the night • Shutter speed can be set to 1/4 Produces black and white pictures with a •... -
Page 34: [Photo Frame]
Taking pictures according to the scene Registering commonly used scenes [MY SCN MODE] (Continued) [SCENE MODE] Recording Mode: Recording Mode: You can register a commonly used Scene Mode in on the mode dial. Scene Uses, Tips Notes After the settings are made, pictures can be taken in the preset Scene Mode by simply A frame is superimposed over the image. -
Page 35: Taking Motion Pictures
Taking motion pictures Recording Mode: ■ Enables motion pictures to be recorded with (stereo) audio. (Recording with muted sound Recording motion pictures in is not possible.) Zoom can also be used during recording. The camera automatically detects the scene to record motion pictures with optimal settings. -
Page 36: Recordable Time On 2 Gb Sd Memory Card
20 min 50 s electromagnetic waves, etc. ● It may not be able to be played back in other Leica compact digital cameras. (On the [VGA] 21 min 40 s other hand, motion pictures recorded with other Leica compact digital cameras can be [QVGA] played back with the LEICA V-LUX 20). -
Page 37: [Face Recog.]
Recording with the Face Recognition function [FACE RECOG.] Recording Mode: Registering face pictures To enable the Face Recognition function, register a face picture (→73), or set the automatic registration of face pictures (→76) to [ON]. (The Face Recognition function is Up to 6 people’s face pictures can be registered along with such information as name and not enabled at the time of purchase.) birth date. -
Page 38: Editing Or Deleting Information About Registered Persons
Recording with the Face Recognition function (continued) [FACE RECOG.] Recording Mode: ■ Select [FACE RECOG.] from the [REC] menu (→18) To set the Face Recognition function to [OFF] Select [FACE RECOG.] from the [REC] menu (→18) Select [OFF] with ▲▼, and then press [MENU/SET] Select [MEMORY] with ▲▼, and then press [MENU/SET] ●... -
Page 39: Automatically Register Face Pictures
Recording with the Face Recognition function (continued) [FACE RECOG.] Recording Mode: ● The registration screen is displayed for the third time (estimate). (This does not occur Automatically register face pictures in [SELF PORTRAIT] Scene Mode, [BURST], [AUDIO REC.], [AUTO BRACKET] or [MULTI ASPECT].) You can set the camera so that the registration screen is automatically displayed after ●... -
Page 40: Recording The Place Of Recording With Gps
Recording the place of recording with GPS Before use, read “About GPS” (→8) and “User License Agreement for Location Name data” (→153). ∗ ∗ Recording Mode: Record only (Cannot set) [GPS SETTING]: Using GPS What is GPS? GPS is an abbreviation for Global Positioning System, which enables people to find their locations ■... -
Page 41: Change The Recorded Place Name Information
Recording the place of recording with GPS (continued) ∗ ∗ Recording Mode: Record only (Cannot set) ■ ● When [GPS SETTING] is set to [ON] or The location name information consists of location names and landmarks that are found via a search of the camera’s database based on the latitude and longitude that In Recording Mode, an icon that indicates the positioning status is displayed on the were acquired in positioning, and the most appropriate items are displayed in the LCD monitor. -
Page 42: Changing The Display Of Location Name Information
Recording the place of recording with GPS (continued) ∗ ∗ Recording Mode: Record only (Cannot set) ■ If you do not wish to record place names and landmarks Return to the menu screen In step , select [DELETE ALL PLACE-NAMES] and place names and landmarks will not be recorded. -
Page 43: [Travel Mode]
Useful features for travel [TRAVEL MODE] ∗ ∗ ∗ Recording Mode: Recording only. (Cannot be set.) [TRAVEL DATE] [LOCATION] If you set your travel schedule and record pictures, which day of your trip the picture was Record your destination. recorded will be recorded. Once the [TRAVEL SETUP] is set, you can set the destination. -
Page 44: [World Time]
Useful features for travel (Continued) [TRAVEL MODE] ∗ ∗ ∗ Recording Mode: Recording only. (Cannot be set.) ■ Using GPS to make automatic settings [WORLD TIME] Following step of the previous page, you can select [AUTO] to use the GPS function Set the recording date and time with the local time at your destination. -
Page 45: Using The [Rec] Menu
Using the [REC] menu For [REC] menu setting procedures (→18) ● For [REC] menu setting procedures (→18) [QUALITY] ● ‘Quick menu’ (→104) is useful to easily call up frequently-used menus. Set quality of picture. ■ [PICTURE SIZE] Recording Mode: ■ Settings: Fine (High quality, priority to picture quality) Set the resolution. -
Page 46: [Sensitivity]
Using the [REC] menu For [REC] menu setting procedures (→18) (Continued) ● ● Slow-moving subject Fast-moving subject [WHITE BALANCE] Adjust coloring to suit light source if colors otherwise appear unnatural. ■ Recording Mode: ■ Settings: [AWB] (automatic) / (outdoor, clear sky) / (outdoor, cloudy sky) / (outdoor, shade) / (Incandescent lighting) /... -
Page 47: [Face Recog.]/ [Af Mode]
Using the [REC] menu For [REC] menu setting procedures (→18) (Continued) [FACE RECOG.] Determined position for 1-area-focusing (High speed)/ Spot-focusing: focus 1-area-focusing: Focuses on smaller, Registering people that appear frequently in your pictures allows them to be given priority Focuses on AF area in center of limited area. -
Page 48: [Pre Af]/ [Metering Mode]
Using the [REC] menu For [REC] menu setting procedures (→18) (Continued) [PRE AF] [I.EXPOSURE] Focus is continually aligned according to movement of subject even when shutter button Automatically adjusts contrast and exposure to give more lifelike colors when there is is not pressed. -
Page 49: [Digital Zoom]/ [Color Effect]/ [Pict.adj.]
Using the [REC] menu For [REC] menu setting procedures (→18) (Continued) [BURST] [DIGITAL ZOOM] Enables a rapid succession of still pictures to be taken. Succession of still pictures taken Multiplies effect of Optical Zoom or Extended Optical Zoom by up to 4 times. For details while shutter button is held down. -
Page 50: [Stabilizer]/ [Audio Rec.]
Using the [REC] menu For [REC] menu setting procedures (→18) (Continued) [AF ASSIST LAMP] [STABILIZER] Automatically detects camera shake and reduces the effects. Illuminates lamp when dark to facilitate focus alignment. ■ ■ Recording Mode: Recording Mode: ■ Settings: [OFF] : Lamp off (taking pictures of animals in dark, etc.) ■... -
Page 51: Using The [Motion Picture] Menu
Taking/viewing clipboard pictures Using the [MOTION PICTURE] menu [CLIPBOARD] Mode Mode: ● For [MOTION PICTURE] menu setting procedures (→18) Useful for taking pictures of timetables and maps instead of taking memos. ● ‘Quick menu’ (→104) is useful to easily call up frequently-used menus. Regardless of presence of card, pictures will always be saved to the clipboard folder of the built-in memory, so that they can be distinguished from normal pictures and viewed immediately. -
Page 52: Viewing Clipboard Pictures
Taking/viewing clipboard pictures (Continued) [CLIPBOARD] Mode Mode: Viewing clipboard pictures Zoom Mark Set REC/PLAY switch to Useful for enlarging and saving parts of maps, etc. ■ To register zoom enlarged size and position • To change zoom and Enlarge with Press Set mode dial to position: Perform steps... -
Page 53: Using Quick Menu
Using Quick menu Entering Text Recording menu items can be called up easily. Use the cursor buttons to enter names with the Face Recognition function and in Scene Modes [BABY] and [PET], or to register destinations in [TRAVEL DATE] etc. (On the setting screen of each menu) Display the character selection screen Set to... -
Page 54: Viewing As List (Multi Playback/Calendar Playback)
Viewing as list Watching motion pictures/still pictures with audio (Multi Playback/Calendar Playback) Playback Mode: Playback Mode: You can view 12 (or 30) pictures at once (Multi Playback), or view all pictures taken on a Motion pictures and still pictures with audio can be played back just as you view still certain date (Calendar Playback). -
Page 55: [Playback Mode]
Different playback methods [PLAYBACK MODE] Playback Mode: Recorded pictures can be played back in a variety of ways. [SLIDE SHOW] Automatically play pictures in order and to music. Recommended when viewing on TV Set to screen. Select the playback method •... -
Page 56: [Gps Area Play]
Different playback methods [PLAYBACK MODE] For switching [PLAYBACK MODE] procedure (→108) (Continued) Playback Mode: ■ Operations during Slide Show [GPS AREA PLAY] During motion picture playback During still picture playback You can select the place name or landmark of the place where pictures were recorded to Pause/play Pause/play play them back. -
Page 57: [Travel Play]
Different playback methods [PLAYBACK MODE] For switching [PLAYBACK MODE] procedure (→108) (Continued) Playback Mode: ■ Play back by destination [TRAVEL PLAY] Pictures can be played back by destination if [LOCATION] was set at the time of their Play back only pictures recorded at your destination. recording. -
Page 58: [Category Play]
Different playback methods [PLAYBACK MODE] For switching [PLAYBACK MODE] procedure (→108) (Continued) Playback Mode: [FAVORITE PLAY] [CATEGORY PLAY] Pictures can be classified automatically and viewed by category. Automatic classification Manually play pictures set in [FAVORITE] (displayed only when [FAVORITE] pictures are starts when [CATEGORY PLAY] is selected from the Playback Mode selection menu. -
Page 59: Using The [Playback] Menu
Using the [PLAYBACK] menu For the [PLAYBACK] menu setting procedure (→18). Playback Mode: (Set mode dial to any except You can edit or protect recorded pictures. [PLACE-NAME EDIT] • Depending on the Playback Mode, some [PLAYBACK] menu items are not displayed. •... -
Page 60: [Text Stamp]
Using the [PLAYBACK] menu (Continued) For the [PLAYBACK] menu setting procedure (→18). Playback Mode: (Set mode dial to any except ■ Items that can be stamped [TEXT STAMP] [SHOOTING DATE] [W/O TIME]: Stamps recording date The recording date and time, location name information and the text registered in the [WITH TIME]: Stamps recording date and time [BABY], [PET] Scene Modes, [TRAVEL DATE] and [TITLE EDIT] are stamped on the still [NAME]... -
Page 61: [Resize]
Using the [PLAYBACK] menu (Continued) For the [PLAYBACK] menu setting procedure (→18). Playback Mode: (Set mode dial to any except [RESIZE] [CROPPING] Resolution can be reduced to facilitate e-mail attachment and use in web pages, etc. Enlarge your still pictures and crop unwanted areas. (Still pictures recorded at the smallest recording pixel level cannot be further reduced.) Set-up: Press [MENU/SET]→... -
Page 62: [Aspect Conv.]/ [Rotate Disp.]
Using the [PLAYBACK] menu (Continued) For the [PLAYBACK] menu setting procedure (→18). Playback Mode: (Set mode dial to any except [FAVORITE] [ASPECT CONV.] Convert still pictures taken in for printing. By labeling your favorite pictures with a star ( ), you can enjoy [SLIDE SHOW] or [FAVORITE PLAY] of these pictures only, or you can delete all pictures except your Set-up: Press [MENU/SET] →... -
Page 63: [Print Set]
Using the [PLAYBACK] menu (Continued) For the [PLAYBACK] menu setting procedure (→18). Playback Mode: (Set mode dial to any except [PROTECT] [PRINT SET] Set protection to disable picture deletion. Prevents deletion of important pictures. Picture/picture no./date printing settings can be made for when printing with DPOF print- compatible shops or printers. -
Page 64: [Face Rec Edit]
● The print settings and protection settings are not copied. Set them again after copying. ● Only pictures made with Leica compact digital cameras can be copied. ● ● Original pictures will not be deleted after copying (to delete pictures (→40)). -
Page 65: Keep The Recorded Still Pictures And Motion Pictures
Keep the recorded still pictures and Using with your PC motion pictures The methods for copying still and motion pictures recorded with this camera to other Some computers can read directly from the camera’s memory card. devices vary according to the file format (JPEG, Motion JPEG). Follow the correct method For details, see the manual for your computer. - Page 66 Drives are displayed on PRIVATE1 (clipboard pictures) Built-in the desktop. MEMO0001.JPG memory (Displayed as ‘LEICA’, ‘NO_NAME’, or ● ‘Untitled’.) Do not use any other USB connection cables except the supplied one. ● Turn off power before inserting or removing memory cards.
-
Page 67: Printing
Printing Some printers can print directly from the camera’s memory card. For details, see the manual for your printer. You can connect directly to a PictBridge- Turn on power of camera Printing multiple pictures compatible printer for printing. and printer Select [MULTI PRINT] in Select item Print... -
Page 68: Print With Date And Text
Printing (Continued) Print with date and text Making print settings on camera ■ With [TEXT STAMP] Recording date and following information can be embedded into still pictures (→118): (Make settings before selecting [PRINT START]) ● ● Recording date [NAME] and [AGE] from [BABY] and [PET] Scene Modes Select item Select setting ●... -
Page 69: Viewing On Tv Screen
■ ● When TVs or DVD recorders have an SD card slot Do not use any other cables except the Leica HDMI mini cable (→8). ● Playback cannot be performed in [CLIPBOARD] Mode. Insert the SD memory card into the SD card slot ●... -
Page 70: Hdtv Link (Hdmi)
Viewing on TV screen (Continued) HDTV Link (HDMI) ● Do not use any other cables except the Leica HDMI mini cable (→8). ● Cables that do not comply with HDMI standards will not work. What is HDTV Link (HDMI)? ●... -
Page 71: List Of Lcd Monitor Displays
List of LCD monitor displays Press the [DISPLAY] button to change display (→42). In recording In playback 11, 12 1 Recording Mode (→29) 13 Optical Image Stabilizer (→98)/ 1 Playback Mode (→108) Recorded date and time Destination ∗ (→85) Flash (→43) Camera shake alert (→33) Protected picture (→125) Name ∗... -
Page 72: Message Displays
[NOT ENOUGH SPACE ON BUILT-IN MEMORY] [NOT ENOUGH MEMORY ON THE CARD] ● Use only LEICA BP-DC7 type batteries. ● ● There is no space left on the built-in memory or the card. When you copy pictures from the built-in Battery cannot be recognized as terminal is dirty. -
Page 73: Q&A Troubleshooting
Try checking these items (→144 - 150) first. Q&A (Restoring menu settings to default values may solve certain problems. Troubleshooting Try using [RESET] in [SETUP] menu in Recording Mode (→24).) Battery, power Recording Camera does not work even if power is turned on. Cannot record pictures. - Page 74 Q&A (Continued) Troubleshooting Recording (continued) Flash Pictures appear dark or have poor coloring. No flash emitted. ● ● Colors may appear unnatural due to the effects of light source. Flash set to [FORCED FLASH OFF] (→43). ● → Use [WHITE BALANCE] to adjust the coloring. (→91) When set to [AUTO] , flash may not be emitted in certain conditions.
- Page 75 Motion pictures and pictures with audio taken with this camera may not always be able to be played Set [USB MODE] to [PictBridge (PTP)] (→24). back with cameras by other manufacturers. Playback may also not be possible with other Leica Cannot get the date printing.
-
Page 76: Usage Cautions And Notes
Q&A Usage cautions and notes (Continued) Troubleshooting Others When in use ● Menu not displayed in desired language. Camera may become warm if used for long periods of time, but this is not a fault. ● ● Change [LANGUAGE] setting (→26). To avoid the effects of camera shake, use a tripod and place in a stable location. -
Page 77: User License Agreement For Location Name Data
Leica will not be liable for any damage that occurs, direct or indirect, as a result of the alteration or comprehensive geographic data, any of for any purpose, except to the extent loss of data containing personal information. - Page 78 LICENSORS (INCLUDING THEIR any part of the data provided to you or any The latitude and longitude standard Leica Camera AG and its licensors (and LICENSORS AND SUPPLIERS) SHALL direct product thereof except in compliance (geographical coordinate system) recorded...
- Page 79 Usage cautions and notes (Continued) ■ Countries and regions for which landmarks can be displayed and Australia Copyright. Based on data provided under license from PSMA Australia recorded Limited (www.psma.com.au). Austria © Bundesamt für Eich- und Vermessungswesen Screen display Country or area Screen display Country or area Croatia, Cyprus, Estonia,...
- Page 80 Usage cautions and notes (Continued) ■ Countries and regions with no landmark information Screen display Country or area • Some location name information is available, such as country name, region name, SWITZERLAND Switzerland and city or town name. LIECHTENSTEIN Liechtenstein THAILAND Thailand Screen display...
- Page 81 Usage cautions and notes (Continued) ■ Landmark types Screen display Country or area Screen display Country or area The following points of interest, such as tourist spots and public facilities, are displayed VANUATU Vanuatu BOLIVIA Bolivia as landmarks. MICRONESIA, ECUADOR Ecuador Federated States of •...
-
Page 82: Recording Picture/Time Capacity
● Recording picture/time capacity Figures given are estimates. May vary according to conditions, card type, and subject. ● Recording capacities/times displayed on LCD monitor may not be reduced regularly. Recording picture capacity (still pictures) ● ● Varies according to [ASPECT RATIO] (→89), [PICTURE SIZE] (→88), or [QUALITY] (→89) When the number of recordable pictures exceeds 99,999, ‘+99999’... -
Page 83: Leica Academy
The Leica information service can provide you with an answer to any technical questions photographs, for many years we have also been offering the special services of the Leica relating to the Leica range either in writing, on the telephone or by e-mail. - Page 84 • QuickTime and the QuickTime logo are trademarks or registered trademarks of Apple Inc., used under license therefrom. • Leica is a registered trademark of Leica Microsystems IR GmbH. • Elmar is a registered trademark of Leica Camera AG. • Other names, company names, and product names printed in these instructions are trademarks or registered trademarks of the companies concerned.
- Page 85 Leica Camera AG / Oskar-Barnack-Straße 11 / 35606 Solms / Germany Telephone +49(0)6442-208-0 / Telefax +49(0)6442-208-333 www.leica-camera.com...
Need help?
Do you have a question about the V-LUX 20 and is the answer not in the manual?
Questions and answers