LG LRM-519 User Manual
Digital media recorder with microsoft program guide
Hide thumbs
Also See for LRM-519:
- Service manual (192 pages) ,
- Specifications (2 pages) ,
- Warranty (1 page)
Table of Contents
Advertisement
Quick Links
Digital Media Recorder with
Microsoft
Program Guide
®
User's Guide
Model: LRM-519
Before connecting, operating or adjusting this product,
please read this instruction booklet carefully and completely.
Call us toll-free for
technical support,
or to subscribe
to the Microsoft
®
Program Guide service:
1-800-984-6306
www.microsoftprogramguide.com
© Copyright 2005, LG Electronics U.S.A., Inc.
Advertisement
Table of Contents

Related Manuals for LG LRM-519


Summary of Contents for LG LRM-519
- Page 1 Before connecting, operating or adjusting this product, please read this instruction booklet carefully and completely. Call us toll-free for technical support, or to subscribe to the Microsoft ® Program Guide service: 1-800-984-6306 www.microsoftprogramguide.com © Copyright 2005, LG Electronics U.S.A., Inc.
- Page 2 • If trouble is experienced with this product, for repair or as vases, should be placed on the apparatus. warranty information, please contact LG Electronics Inc. If the product is causing harm to the telephone network, the CAUTION: Danger of explosion if battery is incorrectly telephone company may request that you disconnect the replaced.
-
Page 3: Important Safety Instructions
IMPORTANT SAFETY INSTRUCTIONS CAUTION: PLEASE READ AND OBSERVE ALL WARNINGS AND INSTRUCTIONS IN THIS USER’S GUIDE AND THOSE MARKED ON THE UNIT. RETAIN THIS MANUAL FOR FUTURE REFERENCE. This set has been designed and manufactured to assure personal safety. Improper use can result in electric shock or fire hazard. - Page 4 ON COPYRIGHTS: It is forbidden by law to copy, broadcast, show, broadcast via cable, play in public, or rent copyrighted material without permission. This product features the copy protection function developed by Macrovision. Copy protection signals are recorded on some discs. When recording and playing the pictures of these discs on a VCR, picture noise will appear.
-
Page 5: Table Of Contents
Table of Contents LG LRM-519 FRONT PANEL AND SET UP THE RECORDER ....31 REAR PANEL ......9 Welcome to Setup . - Page 6 USING THE RECORDER ....48 Parental Controls and Locks ....40 Create a Parental Control PIN .
- Page 7 Create a DVD......58 Copying Copy-protected Shows ..58 LRM-519 Limited Warranty . . . Rear Cover Copy of Commercial/Retail Copyrighted DVDs .
- Page 8 POWER PAUSE Turns on or turns off the Pause a DVD, CD, song, live TV, Recorder. or recorded TV program. When the Recorder is turned TV INPUT Change the video inputs on off, the Recorder is actually in a your TV. For example, the Re- standby mode.
-
Page 9: Rear Panel
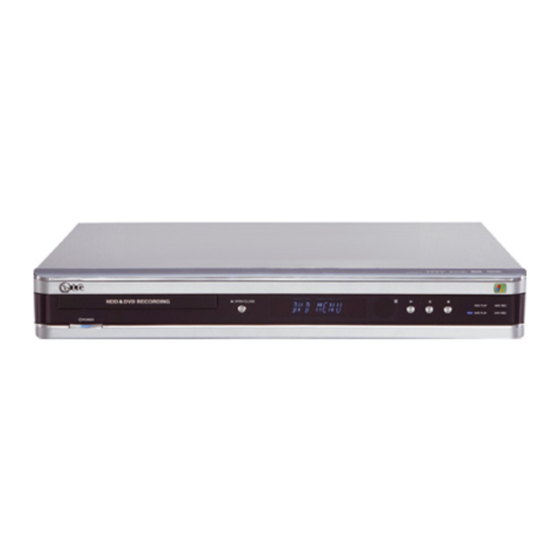
LG LRM-519 Front Panel and Rear Panel HDD PLAY: DVD PLAY: HDD REC.: DVD REC.: Disc Tray: OPEN/CLOSE: Indicates Insert a Opens or Indicates a Indicates a Indicates a a DVD is DVD or closes the recorded show is recorded playing. -
Page 10: Package Contents
Package Contents Recorder Quick Setup Guide, User’s Guide Remote control HDD & DVD RECORDING OPEN/CLOSE 2 AAA Batteries Composite audio/video cable RF (coax) cable IR Control Cable Power cord Phone cable (RJ-11) USB extender Telephone cable splitter Serial data control cable Optional accessories Ethernet cable (RJ-45) Component video cable... -
Page 11: Subscribe To The Microsoft ® Program Guide
Subscribe to the Microsoft Program Guide ® To receive all of the features of the LG LRM-519 Digital Media Recorder, you must subscribe to the Microsoft Program Guide. Without a ® subscription to this service, the Recorder will have limited features. -
Page 12: Connect The Recorder To The Tv, Audio Components, And Internet
Connect the Recorder to the TV, Audio Components, and Internet There are four steps to connecting the Recorder. • Connect a TV source or multiple TV sources (standard cable, digital cable, satellite receiver, or antenna) to the Recorder. • Connect the video and audio from the Recorder to the TV. (If you have a Home Theater system, you can connect the audio to the amplifier or receiver instead of the TV.) •... -
Page 13: Digital Cable
Digital Cable Note Using an RF/coax cable to connect a cable set-top box to the Recorder is not supported. If you use composite cable (Included) Wall Outlet Digital Cable Set-Top Box Recorder Connect the composite audio/video cables (red/white/yellow) to the composite out connection on the digital cable set-top-box. On the Recorder, connect the composite video cable (yellow) to VIDEO IN. -
Page 14: Satellite
Satellite Notes • The Recorder does not support satellite set-top boxes that do not have Composite (red/white/yellow), or S-Video output connections. • Using an RF/coax cable to connect a satellite set-top box to the Recorder is not supported. If you use composite cable (Included) Wall Outlet Satellite Receiver Recorder... -
Page 15: Antenna
Antenna Connect an antenna Antenna Wall Outlet Recorder Connect the antenna leads Connect an RF/coaxial cable to an Antenna to an to the antenna connection RF/coaxial converter. in the wall. On the Recorder, connect On the Recorder, connect the RF/coaxial converter to the RF/coaxial cable to the the ANT.IN connector. -
Page 16: Multiple Tv Sources
Multiple TV sources The Recorder supports multiple TV sources connected at the same time. You can connect satellite service and an antenna (for example, if you use an antenna to receive local channels and satellite for all other channels), or satellite service and standard cable service. Satellite and Antenna Connect the satellite receiver Wall Outlet... -
Page 17: Satellite And Standard Cable
Connect the antenna Antenna Wall Outlet Recorder Connect the antenna leads to an Antenna to RF/coaxial converter or connect an RF/coaxial cable to an antenna wall connector. On the Recorder, connect the Antenna to RF/coaxial converter or the RF/coaxial cable to the ANT.IN connector. Satellite and Standard Cable Note This configuration does not support standard cable with premium services that require a set-top box... - Page 18 Connect the standard cable Wall Outlet ANT. PASS Recorder Connect the RF/coaxial cable to the cable wall connection. On the Recorder, connect the RF/coaxial cable to the ANT.IN connector.
-
Page 19: Connect The Recorder To The Tv
Connect the Recorder to the TV To connect the Recorder to the TV, you can use S-Video, Composite, or Component cables. You may need to change the TV video source to use the Recorder. On your TV remote control or the front panel of your TV, press TV/VIDEO until you see the Recorder Welcome screen. -
Page 20: Use Component Cables
Connect the audio cables (red and white) from the AUDIO OUT connections on the Recorder to the audio in (red and white) connections on the TV. Use Component Cables Recorder COMPONENT IN AV IN On the Recorder, connect the component cables (Y/Pr/Pb) (not included) to the COMPONENT OUT connections. -
Page 21: The Ir Control Cable And The Serial Data Control Cable
The IR Control Cable and the Serial Data Control Cable If you have digital cable TV service or satellite TV service, you must use the IR control cable or the serial data control cable to connect the Recorder to the digital cable set-top box or the satellite receiver set- top box. - Page 22 Connect the IR control cable Digital Cable Set-Top Box/ Satellite Receiver Front Recorder On the Recorder, connect the mini-jack of the IR control cable to the IR port. On the IR control cable, attach the adhesive tape (included) to the flat surface just below of the blaster on the IR control cable.
-
Page 23: Digital Or Optical Audio Setup
Digital Coaxial or Optical Audio Setup Digital Audio cable Digital audio cable provides 5.1 channel audio to an amplifier or TV that supports 5.1 channel audio. Notes • If the Recorder is connected to a home entertainment center amplifier/receiver or a TV that supports Dolby Digital playback (a ©... -
Page 24: Tos Cable
TOS cable Recorder Entertainment Center OPTICAL IN On the Recorder, connect an optical audio cable (not included) to the DIGITAL OUT – OPTICAL connector. On your home entertainment center amplifier/receiver or your TV, connect the optical audio cable to the Optical In connector. Connect to the Microsoft Program Guide service ®... -
Page 25: Connect To A Wireless Network (802.11)
Connect to a wireless network (802.11) The Recorder supports 802.11a, 802.11b, or 802.11g wireless networks. Important The USB wireless network adaptor must be supported by the Recorder. See the following list of supported USB wireless network adaptors. Additional USB wireless network adaptors that are supported can be found on the technical support website (www.LGusa.com/ DigitalMediaRecorders). -
Page 26: Connect Using Dial-Up
Connect using dial-up The Recorder supports dial-up connections to the Microsoft Program ® Guide service. The Recorder attempts to dial the Microsoft Program Guide service once a day. If the Recorder receives a busy signal or no answer, another attempt is made. So your telephone usage is not interrupted, the Recorder dials the service during early morning hours. -
Page 27: To Program The Remote Control
If the buttons do not turn the TV off or on, change the volume, or mute the TV, repeat steps 2 to 5 using a different code for the TV manufacturer. Notes The remote control is programmed to control LG brand TVs by • default. •... -
Page 28: Tv Manufacturing Remote Control Codes
TV Manufacturer Remote Control Codes Brand Codes Brand Codes A MARK 112 143 034 038 070 083 145 ADMIRAL 072 081 161 AKAI 006 146 KENWOOOD 006 070 AMPRO 073 167 KLOSS 002 059 AMSTRAD ANAM 026 043 054 056 080 104 108 112 115 118 121 006 043 143 154 004 006 058 112 001 004 102 106 110 112 113 116 119 122 127... - Page 29 Brand Codes Brand Codes RUNCO 168 169 TECHWOOD SAMPO 004 006 058 116 TEKNIKA 002 003 004 006 024 028 031 043 072 077 101 103 143 SAMSUNG 004 050 089 101 105 113 116 127 133 137 143 TELEFUNKEN 037 046 086 087 SANYO 007 020 021 033 039 053 057 082 166...
-
Page 30: Connect The Power To The Recorder And Turn On The Tv
Connect the Power to the Recorder and Turn on the TV Attach the power cord to the Recorder and plug the power cord into a power strip/surge protector or a wall outlet. Turn on the TV. Press POWER on the Recorder. The TV should now display the Welcome screen for the Recorder Setup Wizard. -
Page 31: Set Up The Recorder
Remember The first time you schedule a recording, LG will guide you through the process for free. Contact LG at 800-984-6306. Subscribe to the Microsoft Program Guide To receive all of the features of the LG LRM-519 Digital Media Recorder powered by Windows Media Center Technologies, you must subscribe ®... -
Page 32: Terms Of Service And End-User License
Terms of Service and End-User License Agreement You must agree to the Terms of Service and the End-User License Agreement before you can use the Recorder. 1. Set up Connection The Recorder can connect to the Microsoft Program Guide service ®... -
Page 33: If You Select "Use Wired (Ethernet) Connection
If You Select “Use Wired (Ethernet) Connection” If your network uses dynamic IP addresses and no Proxy server, select Next. If your network uses a static IP address or a Proxy server, select Configure Network. Select Static IP address, and then use the numeric keypad on the remote to enter the IP address, subnet mask, default gateway address, and DNS address. -
Page 34: Phone Connection
Phone Connection Select Next and the Recorder attempts to dial out using the phone line. If the dial-out is successful, the Choose Dial-up Number screen appears. Note If the dial-out is not successful, try the following: check to your phone connections; check to see if there is a voice mail message indicator (tone) on your phone;... -
Page 35: Subscription Status
3. Subscription Status At this point, the Recorder checks the status of your subscription to the Microsoft Program Guide service. If a subscription was found, select ® Next to continue. Note If the connection to the Microsoft Program Guide service fails, see Troubleshooting in Appendix B. -
Page 36: Tv Service Provider
TV Service Provider Select your TV service provider, including standard cable provider, digital cable provider, or satellite provider. If you have digital cable service or satellite TV service, select the brand of TV service set-top box. If you do not know the brand, see your TV service documentation or contact your TV service provider. -
Page 37: Set Up The Recorder To Change Channels On The Set-Top Box
6. Set up the Recorder to Change Channels on the Set-top Box If you have digital cable or satellite TV service, you must connect the cable set-top box or the satellite set-top box to the Recorder so the Recorder can change the channels on the set-top box. Important For the Recorder to record programs received through a cable set-top box or a satellite set-top box, the cable set-top box or the satellite set-top box must remain turned on at all times. -
Page 38: Test Changing Channels
Test Changing Channels This test checks to see if the code you selected will change channels. Use the numeric keypad on the Recorder remote to change to the lowest channel you receive through your set-top box—such as channel 2. Note In this test the channel does not need to change to the lowest channel;... -
Page 39: Downloading The Program Guide And Software Updates
Downloading the Program Guide and Software Updates To receive the Program Guide, subscribe to the Microsoft Program ® Guide service. For more information about the service, see The Microsoft Program Guide service in Appendix A. ® Note The Recorder can connect to a network by using broadband and download Guide listings by using a dial-up connection, at the same time. -
Page 40: Parental Controls And Locks
Future Software Updates Software updates download as necessary during updates to the Program Guide. Important · If you have a broadband connection, a software update download can take 5 minutes or longer, followed by the Program Guide download and update. The download time can be shorter or longer depending on network traffic. -
Page 41: Lock By Channel
Set the Parental Control Policy The Parental Control Policy sets which shows and channels are restricted based upon ratings (both motion picture ratings such as G-rated, PG-rated, or R-rated, and TV rating such as TV-MA or TV-17) or you can lock by channel. You can also restrict the viewing of DVDs based upon the DVD rating. -
Page 42: Reset
Reset To remove all parental control locks and the Parental Control PIN, select Reset. Forgot the Parental Control PIN? If you forget the Parental Control PIN, you can change the PIN by using the Change PIN Authorization Number. If a message requests the Parental Control PIN (see Parental Control Locks earlier), select Forgot PIN. -
Page 43: Dvd Settings
DVD Settings Set the default language options for DVD playback. Note You cannot access DVD Settings during DVD playback. • DVD Language • Set the default DVD subtitle language. • Change the language of the default audio track (such as English, French, or Spanish). -
Page 44: Parental Controls
Parental Control Create a parental control PIN, assign the lock code to different types of shows or change the parental lock code PIN. For more information, see Set the Parental Control Policy. Phone and Network Setup Select Phone and Network Setup to update dial-up and networking settings. -
Page 45: Windows Media Connect: Access Pictures And Music Stored On A Computer
Media Connect will display a message on the computer that a new device has been connected to the network. Follow the instructions onscreen to add the Recorder (LRM-519) to the list of devices. Select the folders you want to access from the Recorder. -
Page 46: Getting Around The Recorder Menus
Getting Around the Recorder Menus The Recorder remote control (referred to in this User’s Guide as the remote or the Recorder remote) is used to change channels while watching live TV and pause, record, rewind, and fast forward through live TV; control playback of recorded TV programs and DVDs; view pictures;... -
Page 47: Enter Text By Using The Remote
Enter Text by Using the Remote To enter text on-screen, use the numeric keypad on the remote control by pressing the number repeatedly for the desired letter. To enter the letter “b” press the number 2 twice; to enter word “bl” (for example, shows beginning with “blue”), press 2 twice for “b”, and then press number 5 three times for the letter “l”. -
Page 48: Using The Recorder
Using the Recorder With the Recorder, you can watch TV shows, record shows, pause live TV, replay live TV, and copy shows to a DVD. Many of these features can be used at the same time. For example: • You can watch a recorded show while recording a different show and copying a recording to a DVD. -
Page 49: Controlling Live Tv
Controlling Live TV When you begin watching live TV, you can pause, instant replay the last seven seconds of live TV, and fast forward through live TV. The Recorder temporarily records the previous 90 minutes of live TV. The Recorder even tracks when you switch channels during the previous 90 minutes. -
Page 50: Turn The Tv Off Or On
Turn the TV Off or On Press TV POWER to turn the TV off or on. Note To turn the TV off or on by pressing TV POWER, you must program the Recorder remote to control the TV. For more information, see Program the Remote to Control the TV. -
Page 51: Turn Off The Guide
Turn off the Guide To turn off the Guide, press GUIDE or CLEAR on the remote. Navigating within the Program Guide Press: Scroll through the show list Up or down arrows Scroll one page up or down in the show list CH/PG +/- Scroll to the right or left one show at a time Left or right arrows... -
Page 52: Record A Show Using The Guide
Record a Show Using the Guide • To record a show in the Guide, display the mini-Guide or the Guide, select the show, and then press REC on the remote. • To record the current and future episodes of a series, press REC twice. Record Using Search Note Program search does not contain listings unless you have a subscription to the Microsoft... -
Page 53: Record A Tv Series
Record a TV Series Note To record a TV series, you must subscribe to the Microsoft ® Program Guide service. For more information, see The Microsoft ® Program Guide in Appendix A. Display the mini-Guide or the Guide. Select an episode of the series. Press REC on the remote twice. -
Page 54: Recording Conflicts
Recording Conflicts If you schedule a recording when another show is scheduled to be recorded, you will have a recording conflict. When a recording conflict occurs, you must decide which show to be recorded. If there is a recording conflict, a message will appear warning you of the conflict. -
Page 55: View A Recorded Show
View a Recorded Show On the Start menu, select Recorded TV. From the list of recordings, select the recorded show you want to watch. Note To change the list of recordings, select Sort by Date or Sort by Title. View Scheduled Recordings On the Start menu, select Recorded TV. -
Page 56: Connect A Usb Drive For Storage
Connect a USB drive for storage Make sure the Recorder is turned on. If you are viewing pictures (My Pictures) or listening to music (My Music), press Start on the remote to exit My Pictures or My Music and display the Start menu. Connect the USB drive to one of the USB ports on the Recorder. -
Page 57: Search
Search Search finds shows based upon different conditions you specify. Note Search does not contain listings unless you have a subscription to the Microsoft Program Guide service. For more information, see ® The Microsoft Program Guide in Appendix A. ® •... -
Page 58: Dvd Controls
DVD Controls On the Recorder remote, use the following buttons on the remote to control DVD playback. Press Start DVD playback PLAY Pause DVD playback PAUSE Stop the DVD STOP Fast forward through the DVD Rewind through the DVD Advance to the next chapter/track SKIP Move back to the beginning of the current chapter/track REPLAY... -
Page 59: Copyrighted Dvds
Copy of Commercial/Retail Copyrighted DVDs The Recorder cannot copy or record commercial or retail copyrighted DVDs (such as, motion picture DVDs or retail DVDs of TV shows) to the Recorder disk drive, a USB device, or a computer. Copy a Recording to a DVD Insert a blank DVD into the disc tray. -
Page 60: My Pictures
Copy the Next Portion of a Recording onto a DVD Insert the next DVD you want to copy to. In the list of recorded shows, select the recorded show to continue copying. If the remaining portion of the show will fit on the DVD, you may select additional shows to copy to the DVD (if there is enough room). -
Page 61: My Music
My Music The Recorder is a great way to play music on your TV. If you connect the Recorder to your home entertainment center amplifier, the music will play through the amplifier, providing a rich music experience. Find Music to Play When you select My Music on the Start menu, the Recorder searches for collections of music stored on a CD or DVD in the disc tray, on an attached USB device, or on computers connected to the home network... -
Page 62: Play Music On A Usb Device Or Another Computer
Use PLAY, PAUSE, SKIP, and REPLAY on the remote to control playback. For more information, see the Remote Control Reference. Play Music on a USB Device or Another Computer On the Start menu, select My Music. Select the USB device or a computer. (If a CD or DVD is inserted in the Recorder, it will also appear. -
Page 63: Send To Pc
Send to PC A recorded show that is not copy-protected can be copied from the Recorder to a shared folder on a computer connected to a network. Before you send a recording to a computer, you must know if the computer is running •... -
Page 64: The Shared Folder And The Location Of The Folder
If you do not have a network user account: • Create a new user account. For more information, search for the topic Create a new user account in Help and Support on the Windows ® XP Start menu. Note The Recorder does not support spaces in network user account names. -
Page 65: Use Send To Pc To Copy A Recording To A Computer
You must know the network name of your computer. This is usually • the name of the computer. For example, the name of your home computer may be HomePC. • The location of the shared folder on the network is the path to the folder in the form \\ComputerName\FolderName. -
Page 66: Program Guide
• Record TV series To subscribe to the service or for more information, visit www. microsoftprogramguide.com or contact LG Customer Support at 1-800-984-6306. Note If the Program Guide does not download after you subscribe to the Microsoft Program Guide service, select Start > Settings > Guide Settings >... -
Page 67: Appendix B: Troubleshooting
Appendix B: Troubleshooting Issue Solution The Recorder Setup Wizard The Setup Wizard automatically dismisses from the screen after disappeared. 30 minutes of inactivity. Depending on your TV service, you may see live TV or a snowy picture. To resume Setup, select Start > Settings > Run Setup Again. The Program Guide •... - Page 68 <<< continued If using wireless broadband connection: • Make sure the Recorder is receiving an IP address. On the Start menu, select Settings > System Information and confirm there is an IP address and that the IP address is correct. •...
- Page 69 Issue Solution The TV picture is lost when Make sure the Recorder is in Standby mode or the Recorder is turned the Composite/480i/480p off if you change the Composite/480i/480p switch. switch is changed. • Standby mode: Press Power on the front of the Recorder, or press POWER on the remote.
- Page 70 Issue Solution There is no audio. • Make sure the remote is programmed to change the volume on the TV or mute the TV. For mor information, see Program the Remote to Control the TV. • Check the audio connections between the cable set-top box or the satellite set-top box and the Recorder.
- Page 71 Issue Solution Cannot change channels or The IR control cable may not be properly positioned or the IR settings the cable set-top box or for the remote may be incorrect. satellite set-top box Make sure: changes to the wrong • The cable set-top box or satellite set-top box is turned on.
- Page 72 Issue Solution Channels do not change Restart both the satellite set-top box and the Recorder. If this channels with the serial data control still do not change, use the IR control cable instead. cable connected. Notes: • Some satellite set-top boxes support the use of the serial data control cable to change channels and the IR control cable.
-
Page 73: Specifications
Specifications General Television System NTSC, Analog American Standard (480i) Channel Coverage Unscrambled Air/Analog CATV 1-135 Power Requirement AC 120V, 60Hz Power Consumption Hard Disk Drive 160GB Operating Temperature 41°F to 95°F Operating Humidity 5 % to 90 % Dimension (W x D x H) 16.9 x 11.8 x 2.3 inches Weight 11 lbs... - Page 74 LRM-519 Limited Warranty - USA This LG Electronics product, will be repaired or replaced, at LG’s option, if it proves to be defective in material or workmanship, under normal use, during the warranty period (“Warranty Period”) listed below, effective from the date (“Date of Purchase”) of original consumer purchase of the product.
Need help?
Do you have a question about the LRM-519 and is the answer not in the manual?
Questions and answers