Advertisement
Owner's Manual
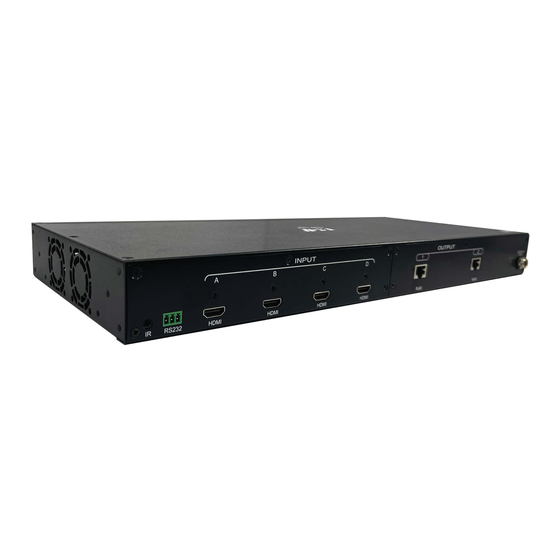
HDMI over Cat6
Matrix Switch Kits,
2-Output Switch Kit: B127A-4X2-BH2PH
4-Output Switch Kit: B127A-4X4-BH4PH
Este manual está disponible en español en la página de
Ce manuel est disponible en français sur le site Web de
Русскоязычная версия настоящего руководства представлена на веб-сайте
компании Tripp Lite по адресу: tripplite.com/support
Dieses Handbuch ist in deutscher Sprache auf der Tripp Lite-Website verfügbar:
WARRANTY REGISTRATION
Register your product today and be
automatically entered to win an ISOBAR
surge protector in our monthly drawing!
tripplite.com/warranty
1111 W. 35th Street, Chicago, IL 60609 USA • tripplite.com/support
Copyright © 2022 Tripp Lite. All rights reserved.
4K/60 Hz
Tripp Lite: tripplite.com/support
Tripp Lite : tripplite.com/support
tripplite.com/support
®
1
Advertisement
Table of Contents

Summary of Contents for Tripp Lite B127A-4X2-BH2PH
- Page 1 Ce manuel est disponible en français sur le site Web de Tripp Lite : tripplite.com/support Русскоязычная версия настоящего руководства представлена на веб-сайте компании Tripp Lite по адресу: tripplite.com/support Dieses Handbuch ist in deutscher Sprache auf der Tripp Lite-Website verfügbar: tripplite.com/support WARRANTY REGISTRATION Register your product today and be automatically entered to win an ISOBAR ®...
-
Page 2: Product Features
Cat6 cable • Boost the signal distance between each source and display to a total of 400 ft. by adding Tripp Lite B127A-010-H signal boosters (maximum of 2 with B127A-4X2-BH2PH, 4 with B127A-4X4-BH4PH) • Included mounting hardware allows the switch to be wall- , rack- or pole-mounted •... -
Page 3: Package Contents
• 2-Port or 4-Port Matrix Switch • Pigtail Receiver Units (2x B127A-4X2-BH2PH or 4x B127A-4X4-BH4PH) • External Power Supply o B127A-4X2-BH2PH - Input: 100-240V, 50/60 Hz, 1.5A; Output: 24V 1A o B127A-4X4-BH4PH - Input: 100-240V, 50/60 Hz, 1.5A; Output: 24V 2A • IR Cable •... - Page 4 Disclaimer Before installation, please check the following settings of your source(s) and TV/monitor(s): 1. Set display(s) to 60 Hz. Double-check factory settings, as default can be set to a lower frequency (Hz) than advertised. 2. Ensure the input setting of your monitor is set at HDMI 2.0. Some displays may have default setting at HDMI 1.4.
-
Page 5: Mounting Instructions
Mounting Instructions The B127A-4X2-BH2PH and B127A-4X4-BH4PH include mounting hardware that allows for a variety of mounting methods. The following images illustrate how the included mounting brackets can be attached for different installations. Note: The model shown in the below images is for illustrative purposes only. Your ai162864491833_page_7.pdf 1 8/10/2021 8:21:58 PM... -
Page 6: Installation
24 AWG will result in shorter extension distance. Higher gauge cabling, such as 26 AWG, has a more limited transmission capability than lower gauge cabling. All Tripp Lite N202-Series Cat6 cables are made with 24 AWG solid wire cabling. •... - Page 7 7. Connect the external power supply to the switch. Plug it into an available wall outlet or a Tripp Lite surge protector, PDU or UPS system. The Power (green) LED on the switch will illuminate to indicate the unit is receiving power from the external power supply.
- Page 8 24 AWG will result in shorter extension distance. Higher gauge cabling, such as 26 AWG, has a more limited transmission capability than lower gauge cabling. All Tripp Lite N202-Series Cat6 cables are made with 24 AWG solid wire cabling. •...
- Page 9 7. Connect the external power supply to the switch. Plug it into an available wall outlet or a Tripp Lite surge protector, PDU or UPS system. The Power (green) LED on the switch will illuminate to indicate the unit is receiving power from the external power supply.
-
Page 10: Rs-232 Serial Control
RS-232 Serial Control Before using RS-232 Serial Control, you must first access the Terminal Emulation Software and update the COM port settings. 1 Go to the Setup drop-down menu and select the Serial Port option. 2 Select the COM port that is being used, and update the remaining settings as follows: Baud Rate (9600), Data (8 bit), Parity (none), Stop (1 bit), Flow Control (none). - Page 11 RS-232 Serial Control 3 Next, you will need to configure your software to allow input control. Go to the Setup drop-down menu and select the Terminal option. 4 Update the following settings: Receive (LF), Local Echo (enable). The other settings can remain unchanged. 5 Once these settings are updated, the Terminal Emulation Software will recognize the switch, allowing you to enter commands to control the unit.
-
Page 12: Warranty And Product Registration
PRODUCT REGISTRATION Visit tripplite.com/warranty today to register your new Tripp Lite product. You’ll be automatically entered into a drawing for a chance to win a FREE Tripp Lite product!* * No purchase necessary. Void where prohibited. Some restrictions apply. See website for details.


Need help?
Do you have a question about the B127A-4X2-BH2PH and is the answer not in the manual?
Questions and answers