
Related Manuals for Solahart SunCell Solahart440R1


Summary of Contents for Solahart SunCell Solahart440R1
- Page 1 Installation Instructions Three-Phase PV Systems Solahart440R1 SunCell Modules Solahart PV Systems must be installed and serviced by a suitably qualified person.
- Page 2 It is also important to observe relevant local codes and regulations for health and safety and accident prevention. Only Solahart parts and Solahart approved parts may be used. No substitute parts may be used without prior approval from Solahart Industries Pty Ltd. Only parts supplied by Solahart Industries Pty Ltd are covered by the Solahart warranty.
-
Page 3: Table Of Contents
CONTENTS Contents ..........................3 Overview ..........................4 Wiring Diagrams ......................... 6 Earthing Arrangements – All Systems................21 Installation Procedure ...................... 22 Planning ........................... 23 Racking ..........................29 Rooftop Isolator........................ 47 Wiring ..........................48 Power Optimizers (SolarEdge only) .................. 50 PV Modules ........................57 Inverter .......................... -
Page 4: Safety Requirements
Design Dead Load and Live Load at each mounting point. • Ensuring only parts supplied by Solahart Industries and installer supplied parts as specified by Solahart Industries are utilised (substitution of parts may void the warranty and invalidate certification). •... -
Page 5: Disclaimer Of Liability And Warranty
IEC 61730 INFORMATION Modules supplied by Solahart are designed to fulfil the criteria of application Class A requirements according to IEC 61730. Modules are qualified for application Class A: Hazardous voltage (Higher than 50 V DC) and hazardous power (higher than 240 W) applications where general contact access is anticipated. For the purposes of AS/NZS 3000, modules are classified as Class I equipment. -
Page 6: Wiring Diagrams
WIRING DIAGRAMS GOODWE GW5KL-ET INVERTER SYSTEMS for DC Isolator Wiring refer to “DC Isolator Wiring” on page 49. Note: The recommended circuit breaker rating for each inverter model is provided in the table below. GOODWE GW5KL-ET INVERTER SYSTEMS SOLAHART440R1 Modules Max No of Max No of Max System... - Page 7 WIRING DIAGRAMS SOLAREDGE SE5K AND SE10K INVERTER SYSTEMS (<600 VDC) for DC Isolator Wiring refer to “DC Isolator Wiring” on page 49. Note: Do not install additional external PV array DC Isolators adjacent to the inverter. Note: Do not combine Arrays into a single DC Isolator at the Array. SOLAREDGE SE5K AND SE10K INVERTER SYSTEMS SOLAHART440R1 Modules Max No...
- Page 8 WIRING DIAGRAMS GOODWE GW10KL-ET & GW5000-SDT-20INVERTER SYSTEMS For DC Isolator Wiring refer to “DC Isolator Wiring” on page 49. STRING CONFIGURATION OPTIONS...
- Page 9 WIRING DIAGRAMS GOODWE GW10KL-ET & GW5000-SDT-20 INVERTER SYSTEMS SOLAHART440R1 Modules Max No Max No Max No Min No Max No of Circuit (A)* System Inverter Modules Strings Strings Modules Breaker (V)* Power Modules per String for Input for Input size String Rating Inverter...
- Page 10 WIRING DIAGRAMS GOODWE GW10KAU-DT AND GW15KAU-DT INVERTER SYSTEMS No strings to be paralleled roof. Goodwe recommends all strings should be terminated at the Inverter. No strings to be paralleled roof. Goodwe recommends all strings should be terminated at the Inverter. For DC Isolator Wiring refer to “DC Isolator Wiring”...
- Page 11 WIRING DIAGRAMS GOODWE GW10KAU-DT & GW15KAU-DT INVERTER SYSTEMS SOLAHART440R1 Modules Max No No of Min No Max No of Circuit (A)* No of Strings System Inverter Modules Modules Breaker (V)* MPPTs Power Modules per String size String MPPT Rating Inverter (A)*** (W) * GW10KAU-DT...
- Page 12 WIRING DIAGRAMS GOODWE GW15K/20K/25K/29.9K-ET AND GW29.9K-MT INVERTER SYSTEMS No strings to be paralleled roof. Goodwe recommends all strings should be terminated at the Inverter. No strings to be paralleled roof. Goodwe recommends all strings should be terminated at the Inverter. No strings to be paralleled roof.
- Page 13 WIRING DIAGRAMS STRING CONFIGURATION OPTIONS GOODWE GW15K/20K/25/29.9K-ET AND GW29.9K-MT INVERTER SYSTEMS (<600 VDC) SOLAHART440R1 Modules Max No No of Min No Max No of Circuit No of Strings System (A)* per Inverter Modules Modules Break (V)* MPPTs Power String Modules per String er size MPPT...
- Page 14 WIRING DIAGRAMS GOODWE GW50KN/60KN-MT AND GW100K-HT INVERTER SYSTEMS (<1000 VDC) No strings to be paralleled roof. Goodwe recommends strings should be terminated at the Inverter. No strings to be paralleled roof. Goodwe recommends strings should be terminated at the Inverter. For DC Isolator Wiring refer to “DC Isolator Wiring”...
- Page 15 WIRING DIAGRAMS STRING CONFIGURATION GOODWE GW50KN/60KN-MT AND GW100K-HT INVERTER SYSTEMS (<1000 VDC) SOLAHART440R1 Modules Max No No of Max No of Circuit (A)* No of No of Strings System Inverter Modules Modules Breaker (V)* Modul MPPTs Power per String size String MPPT Rating...
- Page 16 WIRING DIAGRAMS FIMER PVS-10/12.5/15/30-TL SYSTEMS (<1000 VDC) * For DC Isolator Wiring refer to “DC Isolator Wiring” on page 43. SOLAHART440R1 Modules Max No of Min No Max No of Max System (A)* Circuit No of Modules Inverter Modules No of Power (V)* Breaker...
- Page 17 WIRING DIAGRAMS FIMER PVS-100-TLSYSTEMS (<1000 VDC) * For DC Isolator Wiring refer to “DC Isolator Wiring” on page 49. ** The chosen AC Circuit Breaker/Isolator must be rated for > 145A and compliant to AS/NZS 3000. *** For system sizes above 30kVA DC, additional central protection is required by AS/NZS 4777.1 see Network Protection for System Sizes ≥...
- Page 18 WIRING DIAGRAMS STRING OPTIONS FOR SOLAREDGE COMMERCIAL INVERTERS (>600 VDC) 1. Single-module Optimiser The following guidelines are applicable to SolarEdge Commercial (>600 Vdc) Inverter and S4xx-xxxxxxxxx** & P5xx-xxxxxxxxx** Optimisers only. SOLAHART440R1 Modules No of Modules per Max No of (A)* Max System AC Circuit No of...
- Page 19 WIRING DIAGRAMS For earthing arrangement and wiring diagram refer to “Earthing Arrangements – All Systems” on page 21. STRING COMBINATION RULES FOR SOLAREDGE COMMERCIAL SYSTEMS (>600 VDC) The following design rules must be followed: 1. Modules per string must satisfy the minimum and maximum requirements as indicated in the table above.
- Page 20 WIRING DIAGRAMS VOLTAGE TABLES FOR FIMER AND GOODWE SYSTEMS SOLAHART440R1 (Voc = 38.80 V) No of Modules * of the No of Modules * of the per String String (V) per String String (V) 116.4 543.2 155.2 582.0 194.0 620.8 232.8 659.6 271.6...
-
Page 21: Earthing Arrangements - All Systems
Earth wires must be sized in accordance with requirements set out in Earthing and bonding arrangements of AS/NZS 5033. Solahart approved Universal clamp with built-in earthing plates may be used to earth modules via the racking, instead of wiring directly to the module frames. Refer to “Earthing” on page 59 for more information. -
Page 22: Installation Procedure
INSTALLATION PROCEDURE Planning – Design the system and layout. Refer to “Planning” on page 23. Determine the spacing of the Rail Supports, using tables in section “Maximum Rail Support Spacing for Metal and Tile Roof” starting on page 30, and considering the following factors (refer to “Planning” on page 23): Wind Region Terrain Category... -
Page 23: Installation Tools
PLANNING INSTALLATION TOOLS • 4,5 & 6 mm Allen keys or 4,5 & 6 mm Allen Key fittings to suit torque adjustable drill (for racking components and inverter) • Torx T20 screwdriver (FIMER inverter systems only) • Cordless torque adjustable drill •... - Page 24 PLANNING • Modules should be installed facing toward true north. Where this orientation is not practical, a system facing up to 45° (NW or NE) from true north is satisfactory however losses of up to approximately 6% will occur. A module facing due east or due west will experience a loss in performance of approximately 18%.
- Page 25 Corrugated < Latitude minus 15° Note: For roof pitch more than 30°, consult Clenergy or Solahart for details on the design. ROOF AREA There are 4 different roof zones for tilt leg installation: Internal Zone, Intermediate Zone, Edge Zone and Corner Zone.
- Page 26 PLANNING Warning: If any part of the system array is located in one of the edge zones, the entire array must use the support spacing specified for the edge zones. ROOF DEFINITION Roof Pitch < 10° Flat/Mono – Slope Roof > 10° Flat/Mono –...
- Page 27 PLANNING For further installation steps refer to the latest Clenergy Installation Guides on Clenergy website or Dealer portal. https://www.solahart.com.au/dealers/pv-and-batteries/panels-racking/clenergy-racking/ https://www.clenergy.com.au/downloads/...
- Page 28 PLANNING Module spacing and dimensions Worked Example: Number of rows: 2 Number of modules per row: 10 Total number of modules = 20 Calculating H: × ( 1,722+20 ) -20 rows H=2×1,742 -20 H= 3,464 mm Calculating W: × ( 1,134+20 ) + ( 2×25 ) -20 modules/row W=10×1,154+50-20 W= 11,570 mm...
-
Page 29: Racking
RACKING OVERVIEW OF RACKING COMPONENTS Overview of components for tile roof Rail Rail splices Tile roof Z-modules with Wood screws M6 Interfaces (b) Allen head bolt x 80 Overview of components for metal roof Rail Rail splices Metal roof Z-modules with Wood screws M6 interfaces (b) Allen head bolt... - Page 30 RACKING MAXIMUM RAIL SUPPORT SPACING FOR METAL AND TILE ROOFS STEP-1 Have all the details and calculations for wind region, terrain category, roof pitch, roof position area (Edge Zone or Centre Zone) and maximum height of the installation. You should have the h/d and h/b ratios of the installation site, where h= height, b= width and d= length of the building.
- Page 31 RACKING TABLE-1 TILE INTERFACE SPACING FOR ECO (ER-R-ECO & ER-I-01) & ELITE RAIL (ER-R-ELT & ER-I-01) SOLAR PANEL SIZE 1722 x 1134 x 30 mm TILE INTERFACE SPACING TABLES FOR SOLAHART SUNCELL PANELS ROOF ANGLE 0° < α ≤ 10°...
- Page 32 1028 1021 TABLE-2 TIN INTERFACE SPACING FOR ECO (ER-R-ECO & ER-I-05) SOLAR PANEL SIZE 1722 x 1134 x 30 mm TIN INTERFACE SPACING TABLES FOR SOLAHART SUNCELL PANELS ANGLE TO THE HORIZONTAL 0° < α ≤ 10° BUILDING HEIGHT (m) <...
- Page 33 RACKING ANGLE TO THE HORIZONTAL 10° < α ≤ 20° BUILDING HEIGHT (m) < 5 5<H≤10 10<H≤15 15<H≤20 20<H≤30 UW&DW Central UW&DW Central UW&DW Central UW&DW Central UW&DW Central 2007 2289 2007 2289 1907 2170 1834 2083 1753 1990 1749 1984 1749 1984...
- Page 34 RACKING TABLE-3 TIN INTERFACE SPACING FOR ELITE RAIL (ER-I-05 & ER-R-ELT) SOLAR PANEL SIZE 1722 x 1134 x 30 mm NOTE: Use these tables when h/d ≤ 0.5 and h/b ≤ 0.5. Where h= height, b= width and d= length of the building. Angle 0°...
- Page 35 RACKING TABLE-4 TIN INTERFACE (ER-I-05) AND TILT LEG SPACING FOR ELITE RAIL (ER-R-ELT) SOLAR PANEL SIZE 1722 x 1134 x 30 mm h/b or h/d is > 0.5 NOTE: - For flush mount installations, use these tables when . Where h= height, b= width and d= length of the building.
- Page 36 RACKING Angle α = 10° Building < 5 5<H≤10 10<H≤15 15<H≤20 20<H≤30 Height (m) Internal Intermediate Edge Corner Internal Intermediate Edge Corner Internal Intermediate Edge Corner Internal Intermediate Edge Corner Internal Intermediate Edge Corner 1805 1569 1458 1805 1569 1458 1712 1491 1644...
- Page 37 RACKING Angle α = 15° Building < 5 5<H≤10 10<H≤15 15<H≤20 20<H≤30 Height (m) Internal Intermediate Edge Corner Internal Intermediate Edge Corner Internal Intermediate Edge Corner Internal Intermediate Edge Corner Internal Intermediate Edge Corner 1610 1504 1452 1433 1340 1424 Angle 15°...
- Page 38 NOTE – Spacing tables are subject to use of specified rails and accessories as per Clenergy Installation guides and General Certificates. Link1: https://www.clenergy.com.au/wp-content/uploads/2023/03/Clenergy-PvezRack-SolarRoof-Penetrative- Flush-Installationguide-english.pdf Link2: https://www.clenergy.com.au/wp-content/uploads/2023/10/clenergy-pvezrack-solarroof-penetrative- flush-and-tilt-with-eliterail-installationguide-english.pdf Scan the QR Code: Link1 Link2 These documents are also available on the dealer portal - https://www.solahart.com.au/dealers/pv-and-batteries/panels-racking/clenergy-racking/...
- Page 39 RACKING MAXIMUM RAIL SUPPORT SPACING FOR TILT LEG SYSTEMS FOR ECO RAILS Use the following tables to determine the rail support spacing for the relevant roof type based on the previously determined wind region, terrain category, roof pitch, roof position area (Corner Zone, Edge Zone, Intermediate Zone or Internal Zone) and maximum height of the installation.
- Page 40 RACKING ANGLE TO THE 15° ≤ α < 20° HORIZONTAL BUILDING < 5 5≤H<10 10≤H<15 15≤H<20 HEIGHT (m) Internal Intermediate Edge Corner Internal Intermediate Edge Corner Internal Intermediate Edge Corner Internal Intermediate Edge Corner 1.763 1.475 1.439 1.275 1.221 0.915 0.854 1.213 0.864...
- Page 41 RACKING Steel purlins must meet the following minimum requirements: Roof interface Minimum steel purlin specification Metal roof interface 1.50 mm BMT G450 Grade Tilt leg interface Min 2 screws at 1.5 mm BMT G450 Grade Roof interfaces must be fixed to rafters or purlins under the roof cladding. Screw minimum embedment into timber rafters or battens is 35 mm.
- Page 42 RACKING Rail Support Spacing = x Rail Overhang < x/2 Note: Drawings not to scale TILE ROOF INSTALLATION Note: The tile roof interface is only suitable for installation on timber rafters. 1. Determine and mark the position of the tile roof interfaces according to your plans.
- Page 43 RACKING 3. For thick tiles (such as grooved tiles), if necessary, use an angle grinder to chase a recess (or remove raised groves) on the tile that covers the tile roof interface at the point where the interface protrudes through so that the tile lies flat.
- Page 44 RACKING METAL ROOF INSTALLATION Note: Screws supplied with the roof interfaces are wood screws suitable for timber only. Screws used in metal purlins must be suitable for metal structures and have a TPI (threads per inch) of 14. Determine and mark position of the metal roof interfaces according to your plans.
- Page 45 RACKING TILT LEG INSTALLATION Note: Screws supplied with the tilt legs are wood screws suitable for timber only. Screws used in metal purlins must be suitable for metal structures and have a TPI (threads per inch) of 14. 1. Determine and mark position of front feet according to your plans.
-
Page 46: Rail Installation
RACKING RAIL INSTALLATION 1. Install rails onto the roof interfaces. If the assembly consists of rails of different lengths, always begin with the shortest piece. Install the rail loosely onto the roof interfaces using the Allen head bolt, washer, retaining washer and Z-modules supplied (2 to 3 turns of the bolt are adequate for loose installation). -
Page 47: Rooftop Isolator
ROOFTOP ISOLATOR The rooftop DC isolator must be mounted to the rail by following the steps below. To help prevent UV degradation, the rooftop isolator should be mounted as far from the north side of the array as possible. When installing the rooftop isolator the following points should be observed: •... -
Page 48: Wiring
(i.e. do not connect or disconnect plug connectors under load conditions). Only use plug connectors supplied with your Solahart PV system, or which are the same type/model and from the same manufacturer as those on the PV module. Ensure that all plug connectors and plug wiring are in good electrical and mechanical condition and are not subjected to mechanical stress. - Page 49 It is recommended the maximum voltage drop between the PV array and the inverter is 3%. DC ISOLATOR WIRING The DC isolators utilised in Solahart PV Systems are not polarity sensitive (non polarised type) however for uniformity they should be wired as shown in the DC isolator wiring diagram below.
-
Page 50: Power Optimizers (Solaredge Only)
POWER OPTIMIZERS (SOLAREDGE ONLY) POWER OPTIMIZERS (SOLAREDGE ONLY) Warning: Input and output connectors are not watertight until mated. Open connectors should be mated to each other or plugged with appropriate watertight caps. Warning: Cutting the power optimizer input or output cables is prohibited and will void product warranty. Warning: Do not connect / disconnect DC connectors or wiring while under load. - Page 51 POWER OPTIMIZERS (SOLAREDGE ONLY) Attach each power optimizer to the mounting rail using the Z-module assembly. See figure below. Apply a tightening torque of 9.5 Nm. Z-module assembly Note: It is recommended that the power optimizers be placed face down to ensure clearance between the back of modules and power optimizers.
- Page 52 POWER OPTIMIZERS (SOLAREDGE ONLY) Ensure the Rooftop DC Isolator is in the OFF position, strip 12 mm of insulation from the end of each extension lead and connect the two extension leads to the Rooftop DC Isolator terminals. The Rooftop DC Isolator should be wired in a consistent manner.
-
Page 53: System Layout
POWER OPTIMIZERS (TIGO) POWER OPTIMISERS (TIGO) Warning: Do not install TS4s if they have been physically damaged or with damaged or substandard wiring or connectors. Warning: Do not connect of disconnect TS4s under load. Do not connect / disconnect DC connectors or wiring while under load. - Page 54 POWER OPTIMIZERSERROR! NO BOOKMARK NAME GIVEN. TS4 MOUNTING OPTIONS INSTALLING TS4 OPTIMISERS Warning: All PVRSE (Photovoltaic Rapid Shutdown Equipment) components must be installed and maintained by qualified personnel in accordance with applicable electrical codes and instructions in the TS4- A with CCA and TAP Installation Manual. Warning: Improper installation may cause damage not covered by the warranty.
-
Page 55: Tap Installation
POWER OPTIMIZERS (TIGO) TAP INSTALLATION One TAP can communicate with up to 300 TS4s. Warning: Ensure the TAP is within 10m of a TS4. Warning: Ensure the cable glands of TAP face down and cannot collect moisture. Warning: Make all connections to the CCA before powering on the CCA. - Page 56 POWER OPTIMIZERSERROR! NO BOOKMARK NAME GIVEN. INSTALL A CCA Warning: The CCA must be on the same AC branch as the Inverter. Warning: Rapid shutdown occurs when an AC disconnect (Inverter or switch) disconnects power to the CCA/TAP. Warning: Make all connections to TAPs before powering CCAs. 1.
-
Page 57: Module Handling
The Solahart mounting system requires the use of modules of equal thickness for correct clamping. Note: Ensure only modules of the same type (model & thickness) are clamped side-by-side and electrically connected. - Page 58 PV MODULES The following procedure should be adhered to whilst wiring module strings to prevent the risk of electric shock or inadvertent short circuiting of live cables whilst wiring the Rooftop DC Isolator: Two extension leads per string should be constructed using the DC extension cable provided in the BOS Kit.
-
Page 59: Module Mounting
Warning: All inverters supplied by Solahart are transformerless, functional earthing of PV array is strictly prohibited. Refer to AS/NZS 5033 for details. - Page 60 PV MODULES For Solahart440R1 in Wind Region - A: Flush Mount Systems (tin/tile roof interface) Terrain Category Roof Angle Building Height Clamping Zone (mm) Building Height Clamping Zone (mm) TC 2 (open terrain) 0° ≤ α ≤ 10° TC 2 (open terrain) 10°...
- Page 61 PV MODULES MODULE MOUNTING PROCEDURE 1. When using as end clamp, slide the universal clamp to the position to be fastened. Ensure there is at least 25 mm from the rail end. Then slightly slide the PV Module frame onto the earthing plate of universal clamp.
-
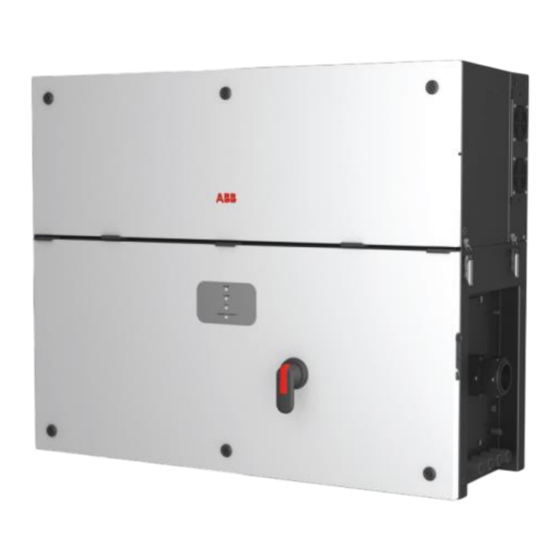
Page 62: Inverter
INVERTER For inverter installation instructions and warranty exclusions refer to the documents supplied with the inverter. Warning: Inverters referenced in this manual have a maximum weight of 61 kg. Moving, holding or restraining these inverters is considered a hazardous manual task. Proper manual handling procedures must be utilised when installing these inverters. - Page 63 PV MODULES FIMER INVERTERS AC Cable Sizing Table Inverter AC cabling must be sized and installed in accordance with AS/NZS 3000, AS/NZS 3008 and any local applicable codes. Cables selected must have an appropriate current carrying capacity for the maximum fault current output of the inverter, and the Inverter AC isolator, taking into consideration relevant de-rating factors.
- Page 64 PV MODULES Earth Fault Alarms The installation of an earth fault alarm compliant with AS/NZS 5033 requirements is mandatory for all arrays. For earth fault management please refer to the respective Inverter installation manual as per the inverter list on page 72. AC Cable Sizing table Inverter AC cabling must be sized and installed in accordance with AS/NZS 3000, AS/NZS 3008 and any local applicable codes.
-
Page 65: Meter (Solaredge Only)
Note: The meter is an optional accessory for use in battery systems and for zero export requirements. For more information on Meter installation and commissioning please refer to the SolarEdge Inverter Installation manual and Solahart Quick Start Guide. Installation manual reference is available in the Inverter list on page 72. -
Page 66: Labelling
DC Isolator labels however installations using Disconnection Points will require extra set of labels for disconnection points, warnings for ceiling access and cables etc. The following table details labels that are supplied with Solahart PV Systems. Label... - Page 67 Distribution board number to be entered by installer i.e. DB1 Prominent position adjacent Black and white to the inverter Black text Added below the shutdown sign (Solahart PV Operating yellow background Procedure)
- Page 68 LABELLING Label Colour Location Black text Prominent position adjacent to the inverter yellow background Black text Prominent position adjacent to the inverter yellow background Signs for junction boxes Black text containing PV d.c. cable terminations (only for yellow background disconnection point type installation) Black text Attached to the PV module or...
-
Page 69: Commissioning
COMMISSIONING Systems must be commissioned according to AS/NZS 5033. Commissioning tests are required to ensure that the system complies with the aforementioned standard. Commissioning information is provided here as a guide only and it is the installer’s responsibility to ensure that the requirements of AS/NZS 5033 are met. A copy of the relevant commissioning documents must be provided to the responsible officer and a copy kept by the installer. - Page 70 COMMISSIONING SOLAR ISOLATION DEVICE(S) TEST – ROOFTOP DC ISOLATOR(S) This test is performed to ensure the Rooftop DC Isolator(s) are isolating the string(s) from the inverter when in the OFF position. Ensure that the Inverter AC Isolator(s) are in the OFF position. Switch all string DC Isolators to the ON position (Rooftop and Inverter DC Isolators).
-
Page 71: Insulation Resistance Test
COMMISSIONING INSULATION RESISTANCE TEST This test is performed to verify the insulation resistance between the positive DC string wiring and earth and the negative DC string wiring and earth are both greater than or equal to 1 Megaohm (1 MΩ) as required by AS/NZS 5033:2014 clause D4. - Page 72 COMMISSIONING Following table provides the Indicative string voltage to enable you check that the ‘Input Voltage’ is within ±5% of the value for the number of modules in each string: SOLAHART440R1 Modules No. of modules Indicative String V No. of modules Indicative String V *Values measured at standard test conditions (STC) defined as: irradiance of 1000 W/m , Spectrum AM 1.5,...
-
Page 73: Engineering Certification
ENGINEERING CERTIFICATION... - Page 74 ENGINEERING CERTIFICATION...
- Page 75 ENGINEERING CERTIFICATION...
- Page 76 ENGINEERING CERTIFICATION...
- Page 77 Clenergy PV-ezRack Solar Roof - Penetrative Flush Installation Clenergy PV-ezRack Solar Roof - Penetrative Tilt Legs Clenergy PV-ezRack Solar Roof - Penetrative Flush & Tilt with Elite Rail Installation Solahart Industries Pty Ltd (A.B.N. 45064945848) For SERVICE Telephone - 1800 638 011 Registered Office...
- Page 78 ENGINEERING CERTIFICATION...
Need help?
Do you have a question about the SunCell Solahart440R1 and is the answer not in the manual?
Questions and answers