
Related Manuals for HJM VERA500


Summary of Contents for HJM VERA500
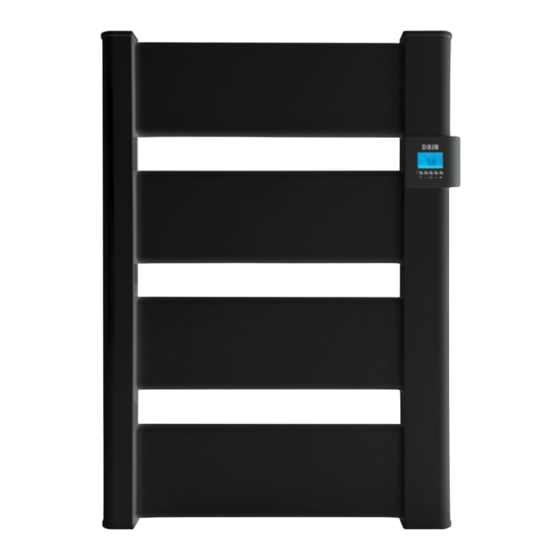
- Page 1 INSTALLATION & OPERATING INSTRUCTIONS TOWEL RAIL REF: VERA500; VERA750 HJM-VERA_ENG-Rev.0-24-09-2024 1/33...
-
Page 2: Important Warnings
13. This device can be used by children under 8 years of age, as well as by people with reduced physical, sensory or mental capabilities when suitably supervised and only when they have been provided the instructions regarding the use of the device and have understood the risks that could derive from it. Cleaning HJM-VERA_ENG-Rev.0-24-09-2024 2/33... - Page 3 This appliance should be installed at higher level to avoid anyone touching the heater. 24. WARNING: This appliance is only intended for drying towels that have become damp with fresh water and not any other substance as this could result in damaging the heater and invalidate its warranty. HJM-VERA_ENG-Rev.0-24-09-2024 3/33...
-
Page 4: Installation
Zone 1: Appliances supplied to Safety Extra Low Voltage (SELV). Zone 2: Electrical Appliances Class II – IP X24 Fig.1 WALL-MOUNTING The towel radiator is equipped with the following components: - 4 towel radiator suspension brackets as shown in (Fig 1). HJM-VERA_ENG-Rev.0-24-09-2024 4/33... - Page 5 4 x M4 washers as shown in Fig 3. Fig. 3 6. Insert the brackets ( 19) fixed to the heater into the brackets ( 26) fixed to the wall and secure using the fixing screws as shown in Fig 4 & 5. HJM-VERA_ENG-Rev.0-24-09-2024 5/33...
-
Page 6: Electric Supply Connection
Fig. 4 Fig. 5 ELECTRIC SUPPLY CONNECTION This appliance is equipped with a H05V2V2-F 2x1.0mm² power cable and a two- pole plug without earth connection. Connect the plug to a power socket. HJM-VERA_ENG-Rev.0-24-09-2024 6/33... -
Page 7: Technical Characteristics
Hang the towels on the heater horizontally across the rail from back to front. It is recommended to use the upper horizontal tube of each tube set. Do Not Cover completely as this will cause the rail to overheat! HJM-VERA_ENG-Rev.0-24-09-2024 7/33... - Page 8 ➢ 11: Current day of the week or Eco design information (comfort mode) ➢ 12: Pictogram for pilot wire indication or for edit program mode or for consumption power menu ➢ 13: Overrid function in AUTO mode or ITCS function if blinking ➢ 14: Opened window detection HJM-VERA_ENG-Rev.0-24-09-2024 8/33...
- Page 9 (see paragraph II.3.g). 2. Menu for mode selection To change the current mode of the thermostat, the user has to push the right navigation key to display the working mode line. HJM-VERA_ENG-Rev.0-24-09-2024 9/33...
- Page 10 With touch , user acceds directly to Off mode : If there isn’t any validation, thermostat returns to an old selected mode: Parameter menu is available by pressing and maintaining during 5 seconds (see paragraph parameter menu). HJM-VERA_ENG-Rev.0-24-09-2024 10/33...
- Page 11 From the screensaver, permits switch displaying between measured temperature and setting temperature. pressing key, thermostat is turned off. pressing key, navigation menu displayed. Default Value: 21 °C Range: 5.0°C to 30°C HJM-VERA_ENG-Rev.0-24-09-2024 11/33...
- Page 12 AUTO mode during low step of selected program From screensaver, permits switch displaying between measured temperature setting temperature. By pressing key, navigation menu is displayed. By pressing key, thermostat is turned off. Default Value: 19 °C Range: 5.0°C to 19°C HJM-VERA_ENG-Rev.0-24-09-2024 12/33...
- Page 13 This override will continue until the next step (program switch to another temperature setpoint) or during 2H maximum. pressing key, navigation menu displayed. pressing key, thermostat is turned off. HJM-VERA_ENG-Rev.0-24-09-2024 13/33...
- Page 14 In standby mode, only mode logo displayed. After pressing one of 4 keys ( measured temperature is displayed. Another pressing permits display the time. After few seconds, these informations aren’t displayed. touch pressing, thermostat will wake last selected mode HJM-VERA_ENG-Rev.0-24-09-2024 14/33...
- Page 15 Pressing permits to display measured temperature. Pressing permits to change settings. Pressing stops timer. Pressing stops product and clear timer counter. Timer end: thermostat returns to the old selected mode. HJM-VERA_ENG-Rev.0-24-09-2024 15/33...
- Page 16 If there isn’t any touch pressing, thermostat returns automatically to the old selected mode. Modifications will saved automatically. Pressing stops product and clears edited values if there aren’t be validated at the end of date setting HJM-VERA_ENG-Rev.0-24-09-2024 16/33...
- Page 17 If the seventh day is validated, thermostat returns to Auto mode (see paragraphe “User program editing”). Default: Reduced set point temperature every day Pressing stops product and clear program selection and program edition if the last day wasn’t validated. HJM-VERA_ENG-Rev.0-24-09-2024 17/33...
- Page 18 Pressing one second resets power consumption values. Pressing stops product. Estimated values are saved EEPROM memory every 4 hours and each time user displays this menu. If there is powercut, estimated values are kept during 12 hours after there resetted. HJM-VERA_ENG-Rev.0-24-09-2024 18/33...
- Page 19 4. Built-in program description Morning (7h-9h), Evening (17h-23h) & Week-end (8h-23h) Morning (7h-9h), Afternoon (12h-14h), Evening (18h-23h) & Week-end (8h-23h) Week (6h-23h), Saturday (7h-24h) & Sunday (night (0h-1h), day (7h-23h)) HJM-VERA_ENG-Rev.0-24-09-2024 19/33...
- Page 20 Evening (15h-23h) & Saturday (7h-24h) & Sunday (night(0h-1h), day(7h-23h)) Morning (6h-8h), Evening (21h-23h) & Saturday (Morning (6h-8h), Evening (18h-24h)) & Sunday (Morning (6h-8h), Evening (18h-23h)) Morning (6h-8h), Afternoon (14h-21h) & Week-end (7h-21h) HJM-VERA_ENG-Rev.0-24-09-2024 20/33...
- Page 21 Office: Monday to Friday (7h-19h) & Week-End (stop) Shop: Monday to Friday (8h-19h) & Saturday (8h- 18h) & Sunday (stop) Sacond home: Friday (13h) to Monday (7h) HJM-VERA_ENG-Rev.0-24-09-2024 21/33...
- Page 22 Auto mode. 6. EEPROM saving settings This thermostat saves its data (setpoint values, user program and settings) automatically when: • User validates setting modifications by pressing validation key HJM-VERA_ENG-Rev.0-24-09-2024 22/33...
- Page 23 This function can be activated with the “window parameter” in menu parameter (see chapter “parameter menu”). If the function is activated, the icon will appear on the screen: This function is done by measuring and recording the temperature evolution within the last 30 minutes: HJM-VERA_ENG-Rev.0-24-09-2024 23/33...
- Page 24 ») and in menu for mode selection. The icon will be displayed on the screen: To unlock key board, the user will have to repaet the same procedure. NOTE: If there is a power loss, the configuration is kept. HJM-VERA_ENG-Rev.0-24-09-2024 24/33...
- Page 25 To leave the parameter menu, the user has to choose “End” parameter and press key. Type of degrees displayed “dEG” Default value Other choices °C (Celsius) °F (Fahrenheit) Selecting the clock display format “time”: ➢ 24H → 24:00 ➢ 12H → 12:00 AM/PM Default value Other choices HJM-VERA_ENG-Rev.0-24-09-2024 25/33...
- Page 26 Default value Value range 5°C 5 to 10°C ITCS – Intelligent Temperature Control System (adaptive start heating in AUTO mode) This function is described in the paragraphe Fout! Verwijzingsbron niet gevonden..Fout! Verwijzingsbron niet gevonden. “Special functions”. HJM-VERA_ENG-Rev.0-24-09-2024 26/33...
- Page 27 5 seconds, thermostat resets parameters. Thermostat will be reset with the factory default setting: ➢ Set point temperatures 21°C , 19°C , 5°C ➢ program U1 to U4, ➢ boost 30 minutes ➢ user parameters: o time displaying “24H”, HJM-VERA_ENG-Rev.0-24-09-2024 27/33...
-
Page 28: Thermal Safety
If the sensor is out of order or disconnected, an error message is displayed on thermostat screen. The message « Err » Problem on logo sensor blink. THERMAL SAFETY In the case of overheating, a safety device automatically cuts the radiators operation. After cooling the radiator will automatically reset. MAINTENANCE HJM-VERA_ENG-Rev.0-24-09-2024 28/33... -
Page 29: Questions And Answers
It works properly heat up. the room temperature mode You must lower the and detects that it is temperature set in lower than the set economy mode. temperature. HJM-VERA_ENG-Rev.0-24-09-2024 29/33... - Page 30 Calibrate the probe The temperature measurement measured by the according to the radiator does not It works properly Poor probe calibration indications in Section correspond to the room 5: Installation temperature parameters menu HJM-VERA_ENG-Rev.0-24-09-2024 30/33...
- Page 31 Polígono Industrial “Los Villares”. 37184 Villares de la Reina. Salamanca. España Tf.+34 923 222 277 +34 923 222 282. Fax +34 923 223 397 http://www.hjm.es Hereby declare, that the following equipment complies with all the essential requirements for health and safety of European Directives.
- Page 32 With adaptive start control. HERMANOS JULIÁN M., S.L. Oficina: Esposos Curie,44 / Fábrica: Gutenberg,91-93 Polígono Industrial “Los Villares”. 37184 Villares de la Reina. Salamanca. España Tf.+34 923 222 277 +34 923 222 282. Fax +34 923 223 397 http://www.hjm.es HJM-VERA_ENG-Rev.0-24-09-2024 32/33...
- Page 33 HERMANOS JULIAN M., S.L. Fábrica: Gutenberg,91-93 Polígono Industrial “Los Villares” ES-37184 Villares de la Reina . Salamanca . Spain +34 923 222 277 - +34 923 222 282 Fax: +34 923 223 397 Web: www.hjm.es ESB-37295664 HJM-VERA_ENG-Rev.0-24-09-2024 33/33...
Need help?
Do you have a question about the VERA500 and is the answer not in the manual?
Questions and answers