
Related Manuals for HJM ESD-C


Summary of Contents for HJM ESD-C
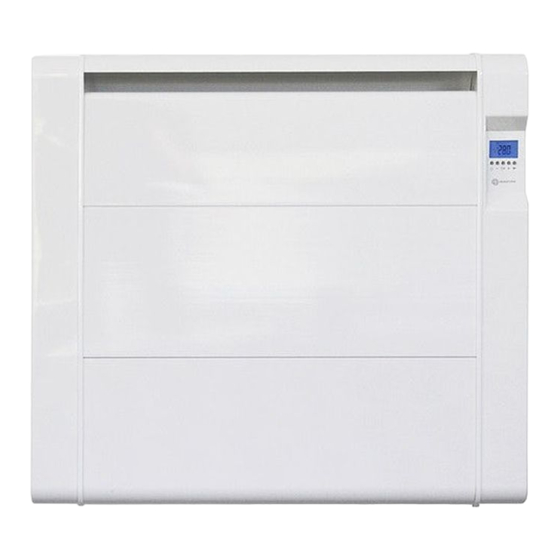
- Page 1 ORIGINAL OPERATING INSTRUCTIONS Read carefully and retain for future reference CERAMIC HEATER ESD-C Type: ESD-C750; ESD-C1000; ESD-C1500; ESD-C2000 Models: 1/22 HJM_ESD-C_ENG_Rev.3_09-02-2018 Made in Spain...
-
Page 2: Important Warnings
IMPORTANT WARNINGS Dear Customer: Thank you for your confidence in us by purchasing this radiator. These appliances are extremely safe, silent and easy to install. They do not require special maintenance. They are made of extruded aluminum, a material of high durability respectful to the environment. Before starting it for the first time, carefully read these instructions. - Page 3 12. Children under the age of three should not be allowed to touch or play with the radiator and should be supervised at all times. 13. This device can be used by children under 8 years of age, as well as by people with reduced physical, sensory or mental capabilities when suitably supervised and only when they have been provided the instructions regarding the use of the device...
-
Page 4: Installation
21. Do not attempt to service the device yourself. Contact a qualified technician. 22. To disconnect the transmitter from the mains pull the plug, never of the supply cord. 22. Respect the "SPECIFIC SAFETY INSTRUCTIONS FOR THIS APPLIANCE" listed below SPECIFIC SAFETY INSTRUCTIONS FOR THIS DEVICE The appliance must remain in a vertical position. -
Page 5: Wall Mounting
We advise against installing the appliance under the windows, because it is favoring the heat loss. The radiator must be away, at a minimum distanceof15cmfrom any combustible material, curtains, furniture, chairs, etc.(Fig. 1). Allow for a minimum distance of 1 m, from the front of the unit to any obstacles (furniture, walls, curtains, for example) that could hinder its operation. -
Page 6: Electric Supply Connection
Place the supports and fastening tab and tighten the screws until the piece is sufficiently fixed. Hang the device from the safely wall-mounted supports and lastly, screw the safety piece as far as it will go. ELECTRIC SUPPLY CONNECTION This appliance is equipped with a supply cord H05V2V2-F 2x1.0mm²... - Page 7 DIGITAL PROGRAMMABLE THERMOSTAT The radiator is equipped with a digital, programmable thermostat. Operation Guide 1.- Presentation The programmable electronic thermostat has been specially designed to regulate electric radiators screens. It will become your best ally to optimize its energy consumption while increasing your comfort.
-
Page 8: First Use
1.2 Keypad Radiator Start / Stop Key (On / Off) " " Minus Key (-) Validation Key (OK) Plus Key (+) Right Navigation Key (►) 2.- First Use This section will guide you when putting the device into operation for the first time. NOTE: To restore the factory settings, consult section 5 "System Settings Menu". -
Page 9: Operation Modes
3. Operation Modes Press ► to move along the display and select the different operation modes “ ”, selecting the one required and press (OK). 3.1 Timer Mode The Timer mode “ ” will allow setting a temperature for a specific amount of time. You can use this mode during a holiday period or to temporarily cancel a programme. -
Page 10: Eco Mode
If you want to modify, in a timely manner, the preset temperature during the current time slot, press the (OK) key and adjust with the keys (-) or (+) and displayed the symbol “ ” which will keep the set temperature until end of the time slot. 3.4 ECO Mode In ECO mode “... - Page 11 “USER” Programs from U1 to U4: You can modify the programme according to your needs. You can also store up to 4 of your own programmes (U1 to U4). To modify a user program, press the (OK) key. The following symbols will be shown when making your own programme: Comfort Temperature applied to the selected half-hour.
- Page 12 IMPORTANT: The consumption control is only for checking the consumption of your radiator. Making alterations in this menu may inhibit the performance of your radiator. The thermostat calculates the constant consumption. Once you have checked your radiator consumption, if you have not carried out any actions, the thermostat screen automatically returns to AUTO mode.
-
Page 13: System Settings Menu
- Press any key to stop this function. The radiator will become operative again and the window detection will be reset. 5. System Settings Menu Your thermostat has a Settings Menu. To access this menu, hold down the (OK) button for 5 seconds. - Page 14 Preset Values and options : Minimum Temperature: This menu allows setting the minimum temperature used for the “Frost Protection” mode. The default value of this setting is 5.0°C Use the keys (-) and (+) to change the value and confirm its setting by pressing (OK).
-
Page 15: Troubleshooting
6. Troubleshooting The appliance does not turn on. Supply - Check the power supply The appliance's screen shows the text “Err” - The symbol “ ”and the message “Err” are flickering. Error message There is an error in the internal probe. - Contact your installer or retailer. - Page 16 PRESET PROGRAMMES (P1 TO P9) P1: Morning, Afternoon & Weekend P2: Morning, Noon, Evening & Weekend P3: Week & Weekend P4: Afternoon & Weekend P5: Morning & Afternoon (Bathroom) P6: Morning, Afternoon & Weekend P7: 7H - 19H (Office) P8: 8H - 19H & Saturday (Shop) P9: Weekend (Secondary House) * The sections indicate the comfort times.
- Page 17 EU Declaration of Conformity Ceramic Heater Product: Trademark: ESD-C750; ESD-C1000; ESD-C1500 & ESD-C2000 Models: Mx YYDDD-XXX Batch & Serial No.: (1) Explanation of code "Lot & Serial No." Batch = Mx YYDDD; where: Mx = Assembly Line No. YY = year (15,16,17...99) DDD = Correlative day (001,..., 365) Serial No.
- Page 18 Model: ESD-C Item Value Unit Item Unit Symbol Type heat output/room Heat output temperature control 2000 (select one) single stage heat output Nominal heat output room temperature control more Maximum manual stages, no continuous heat max,c room temperature output control...
- Page 19 electronic room temperature control plus week timer Other control options Heat output (multiple selections 1500 possible) room temperature control, with Nominal heat output presence detection Maximum room temperature continuous heat control, with open max,c output window detection Auxiliary electricity with distance consumption control option...
- Page 20 output Auxiliary electricity consumption nominal heat output In standby mode 0.0005 Heat output Nominal heat output 0.75 Maximum continuous heat 0.75 max,c output Auxiliary electricity consumption nominal heat 0.75 output In standby mode 0.0005 HERMANOS JULIÁN M., S.L. Head Office: Esposos Curie,44 / Factory: Gutenberg,91-93 Polígono Industrial “Los Villares”...
- Page 21 RECYCLING (Disposal of the product at the end of its useful life) According to European Directive 2012/19/UE, on waste electrical and electronic equipment (WEEE), old electrical household appliances cannot be disposed of in the usual municipal containers; they have to be collected separately to optimise the recycling of the components and materials that comprise it, and reduce the impact on human health and the environment.
- Page 22 Made by HERMANOS JULIAN M., S.L. Head Office: Esposos Curie,44 Factory: Gutenberg,91-93 Polígono Industrial “Los Villares” . 37184 Villares de la Reina . Salamanca . España Tf.+34 923 222 277 +34 923 222 282 . Fax +34 923 223 397 http://www.calorhjm.es ESB-37295664 22/22...
Need help?
Do you have a question about the ESD-C and is the answer not in the manual?
Questions and answers