Page 1
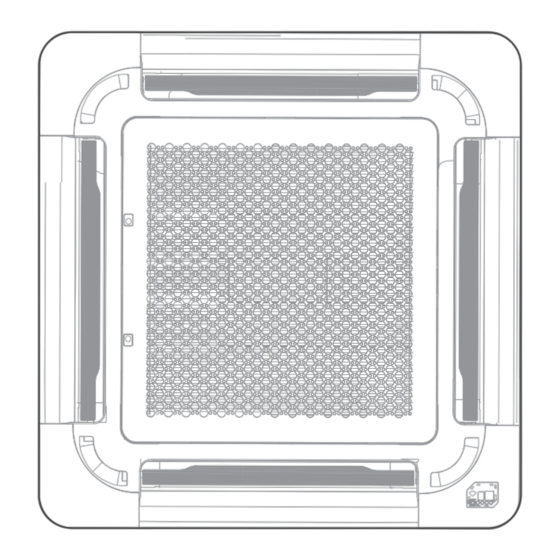
FOUR-WAY CASSETTE TYPE AIR CONDITIONER USER MANU AL MODEL NUMBER: MCD1-24HRFNX(GA) MCD1-30HRFNX(GA) MCD1-36HRFN8(GA) MCD1-42HRFNX(GA) MCD1-48HRFNX(GA) MCD1-55HRFNX(GA) Warning notices: Before using this product, please read this manual and SAFETY MANUAL(if any)carefully and keep it for future reference. The design and specifications are subject to change without prior notice for product improvement.
THANK YOU LETTER Thank you for choosing Midea! Before using your new Midea product, please read this manual thoroughly to ensure that you know how to operate the CONTENTS THANK YOU LETTER SAFETY PRECAUTIONS SPECIFICATIONS PRODUCT OVERVIEW PRODUCT INSTALLATION Install Your Indoor Unit...
SAFETY PRECAUTIONS It’s really important you read Safety Precautions Before Operation and Installation Incorrect installation due to ignoring instructions can cause serious damage or injury. The seriousness of potential damage or injuries is classified as either a WARNING or CAUTION. Explanation of Symbols Warning of electrical voltage This symbol indicates that there is a danger to life and health of...
WARNING FOR PRODUCT USE If an abnormal situation arises (like a burning smell), immediately turn o the unit ● and disconnect the power. Call your dealer for instructions to avoid electric shock, fire or injury. Do not insert fingers, rods or other objects into the air inlet or outlet. This may ●...
Page 6
TAKE NOTE OF FUSE SPECIFICATIONS The air conditioner’s circuit board (PCB) is designed with a fuse to provide overcurrent protection. The specifications of the fuse are printed on the circuit board, such as: T5A/250VAC, T10A/250VAC, T20A/250VAC, T30A/250VAC etc. NOTE: For the units with R32 or R290 refrigerant , only the blast-proof ceramic fuse can be used.
Page 7
CLEANING AND MAINTENANCE WARNINGS Turn o the device and disconnect the power before cleaning. Failure to do so ● can cause electrical shock. Do not clean the air conditioner with excessive amounts of water. ● Do not clean the air conditioner with combustible cleaning agents. Combustible ●...
PRODUCT OVERVIEW NOTE ON ILLUSTRATIONS: Illustrations in this manual are for explanatory purposes. The actual shape of your indoor unit may be slightly di erent. The actual shape shall prevail. Type A Air outlet Display panel Drain pipe Air inlet Outdoor Unit (A) Connecting pipe Front grille...
Page 10
PRODUCT OVERVIEW NOTE ON ILLUSTRATIONS: Illustrations in this manual are for explanatory purposes. The actual shape of your indoor unit may be slightly di erent. The actual shape shall prevail. Type B Air outlet Display panel Drain pipe Air inlet Outdoor Unit (A) Connecting pipe Front grille...
PRODUCT INSTALLATION ACCESSORIES The air conditioning system comes with the following accessories. Use all of the installation parts and accessories to install the air conditioner. Improper installation may result in water leakage, electrical shock and re, or cause the equipment to fail. The items are not included with the air conditioner must be purchased separately.
Page 12
INSTALLATION SUMMARY - INDOOR UNIT Install the indoor unit Install the drainpipe Install the outdoor unit L(L1) N(L2) Evacuate the Connect the wires Connect the refrigerant refrigeration system pipes Install the front panel Perform a test run...
Install Your Indoor Unit Select installation location NOTE Before installing the indoor unit, refer to the label on the product box to make sure that the model number of the indoor unit matches the model number of the outdoor unit. Panel installation should be performed after piping and wiring have been completed.
Page 14
Confirm various sizes Recommended distances between the indoor unit and the ceiling The distance between the mounted indoor unit and the internal ceiling should meet the following specifications. Ceiling Front panel B (Ceiling hole) Ceiling board >250cm / 98.4” Ground Distance from ceiling relative to height of indoor unit TYPE MODEL...
Page 15
Hang indoor unit 1. Use the included paper template to cut a rectangular hole in the ceiling, leaving at least 1m (39”) on all sides. The cut hole size should be 4cm(1.6”) larger than the boby size. Be sure to mark the areas where ceiling hook holes will be drilled. Refrigerant piping side Drain hose side Refrigerant piping side...
Page 16
5. Mount the indoor unit. You will need two people to lift and secure it. Insert suspension bolts into the unit’s hanging holes. Fasten Refrigerant piping side Drain hose side them using the included washers and nuts. 770mm / 30.3” (Suspension bolt) 830mm / 32.7”(Body) 900mm / 35.4”(Ceiling opening) 950mm / 37.4”(Panel)
Page 17
NOTE FOR NEW HOME INSTALLATION When installing the unit in a new home, the NOTE: The bottom of the unit should be ceiling hooks can be embedded in advance. 10-25mm(0.4-0.98”)higher than the ceiling Make sure that the hooks do not come loose board.
Page 18
Indoor Drainpipe Installation Wall Install the drainpipe as illustrated in the following CAUTION Figure. When drilling the wall hole, make sure to Drain hose avoid wires, plumbing, and other sensitive components. ≈ 12mm / 0.5 inch Step 5: Connect drain hose Insulation Drainpipe Metal clamp...
Page 19
NOTE ON DRAINPIPE INSTALLATION • 0-53cm When using an extended drainpipe, tighten (20.8”) the indoor connection with an additional protection tube to prevent it from pulling loose. The drainpipe should slope downward at a • ≥10cm gradient of at least 1/100 to prevent water (4”) from flowing back into the air conditioner.
Install Your Outdoor Unit Select installation location : PRIOR TO INSTALLATION NOTE Before installing the outdoor unit, you must choose an appropriate location. The following are standards that will help you choose an appropriate location for the unit. Proper installation locations meet the following standards: 60cm(24")...
Page 21
Install drain joint(Heat pump unit only) Base pan hole of outdoor unit Step 1: Find out the base pan hole of outdoor unit. Seal Step 2: Fit the rubber seal on the end of the drain joint that will connect to the ●...
Anchor Outdoor Unit WARNING WHEN DRILLING INTO CONCRETE, EYE PROTECTION IS RECOMMENDED AT ALL TIME. The outdoor unit can be anchored to the ground or to a wall-mounted bracket with bolt(M10). Prepare ● the installation base of the unit according to the dimensions below. The following is a list of di erent outdoor unit sizes and the distance between their mounting feet.
Refrigerant Piping Connection When connecting refrigerant piping, DO NOT let substances or gases other than the specified refrigerant enter the unit. The presence of other gases or substances will lower the unit’s capacity, and can cause abnormally high pressure in the refrigeration cycle. This can cause explosion and injury.
Connection Instructions—Refrigerant Piping CAUTION • The branching pipe must be installed horizontally. An angle of more than 10° may cause malfunction. DO NOT install the connecting pipe until both indoor and outdoor units have been installed. • • Insulate both the gas and liquid piping to prevent condensation. Step 1: Cut pipes Step 2: Remove burrs When preparing refrigerant pipes, take...
Outdoor unit Liquid side piping (Smaller diameter) • Clamp flare from on the end of the pipe. The end of the pipe must extend beyond the flare form. (Bigger Flare form Pipe • Place flaring tool onto the form. • Turn the handle of the flaring tool clockwise Torque wrench until the pipe is fully flared.
Page 26
Installation Of The Throttle (Some Models) Throttle Liquid pipe Gas pipe CAUTION For ensuring throttled e ciency, please mount the throttle as horizontally as possible. Outdoor Indoor Indoor Outdoor Indoor Outdoor • Wrap the supplied anti-shock rubber at external of the throttle for denoise. Anti-shock rubber Throttle...
Wiring precautions WARNING BEFORE PERFORMING ANY ELECTRICAL WORK, READ THESE WARNINGS. All wiring must comply with local and national Do not let wires touch or rest against ● ● electrical codes, regulations and must be installed refrigerant tubing, the compressor, or any by a licensed electrician.
NOTE ON AIR SWITCH When the maximum current of the air conditioner is more than 16A, an air switch or leakage protection switch with protective device shall be used(purchased seperately). When the maximum current of the air conditioner is less than 16A, the power cord of air conditioner shall be equipped with plug (purchased seperately).
Page 29
Minimum Cross-Sectional Area of 4. Clamp down the cable with the cable clamp. Power and Signal Cables-For reference 5. Insulate unused wires with electrical tape. (Not applicable for North America) Keep them away from any electrical or metal parts. Nominal Cross-Sectional Rated Current of Appliance (A) Area (mm )
Page 30
OUTDOOR UNIT WIRING 1. Prepare the cable for connection Magnetic ring (if supplied and packed with the accessories) a. Using wire strippers, strip the rubber jacket from both ends of the signal cable to reveal about 15cm (5.9”) of the wire. 1 2 3 b.
Page 31
Power Specifications(Not applicable for North America) NOTE Electric auxiliary heating type circuit breaker/fuse need to add more than 10 A. The circuit breaker/fuse specification shall be subject to the unit nameplate. (applicable for Australian model) Indoor Power Supply Specifications MODEL(Btu/h) ≤18K 19K~24K 25K~36K...
AIR EVACUATION NOTICE When opening valve stems, turn the hexagonal wrench until it hits against the stopper. Do not try to force the valve to open further. Close the Low Pressure side of the manifold Preparations and precautions gauge, and turn o the vacuum pump. Wait for 5 minutes, then check that there Air and foreign matter in the refrigerant circuit has been no change in system pressure.
Electrical And Gas Leak Checks CAUTION DO NOT mix refrigerant types. Some systems require additional charging depending on pipe lengths. The standard pipe length varies according to local regulations. For example, in North America, the standard pipe length is 7.5m (25’). In other areas, the standard pipe length is 5m (16‘).
PANEL INSTALLATION Adjust the panel by turning it to the arrowed CAUTION direction so that the ceiling opening is completely covered. DO NOT place the panel facedown on the Latch floor, against a wall, or on uneven surfaces. Piping side Drain side Super-Slim models Step 1: Remove the front grille.
Page 36
Decoration Water condensation panel CAUTION Screws (M5) Failure to tighten screws can cause water (supplied with leakage. the panel) After installing the decoration panel, ensure that there is no space between the unit body Loosen upper nut and decoration panel. Otherwise air may leak through the gap and cause dewdrop.
Page 37
Step 3: Install the panel Step 5: Fasten the control box lid with 2 screws . Align the front panel to the main body, taking into account the position of the piping and drain sides. Hang the four latches of the decorative panel to the hooks of the indoor unit.
Page 38
Hang the intake grille on the panel, and then NOTE: If the height of the indoor unit needs connect the lead connectors of the louver motor to be adjusted, you can do so through the and the control box on the panel to the openings at the panel’s four corners.
TEST RUN CAUTION Failure to perform the test run may result in unit damage, property damage, or personal injury. f. Check to see that the drainage system is Before test run unimpeded and draining smoothly. g. Ensure there is no vibration or abnormal A test run must be performed after the entire noise during operation.
Packing And Unpacking The Unit Instructions for packing unpacking the unit: Unpacking: Indoor unit: 1.Cut the packing belt. 2. Unpack the package. 3. Take out the packing cushion and packing support. 4. Remove the packing film. 5. Take out the accessories. 6.
OPERATION INSTRUCTIONS NOTE Di erent models have di erent front panel and display window. Not all the indicators describing ● below are available for the air conditioner you purchased. Please check the indoor display window of the unit you purchased. Illustrations in this manual are for explanatory purposes.
Page 42
(A-3) Display panel Infrared Manual display receiver button Louver Air outlet Air inlet Operation Alarm Timer indicator indicator indicator PRE-DEF (pre-heating/defrost) indicator Display panel Electric heating indicator Alarm indicator ( some models) When wireless control LED display feature is activated ( some models) Timer PRE-DEF indicator...
Operating Temperature When your air conditioner is used outside of the following temperature ranges, cer- tain safety protection features may activate and cause the unit to disable. Inverter Split Type COOL Mode HEAT Mode DRY Mode Room 17°C~32°C(62°F~90°F) 0°C~30°C(32°F~86°F) 10°C~32°C(50°F~90°F) Temp.
Other features Default Setting Refrigerant Leak Detection System (some models) When the air conditioner restarts after a power failure, it will default to the factory settings In the event of a refrigerant leak, the LED (AUTO mode, AUTO fan, 24°C (76°F)). This DISPLAY will display refrigerant leak error code may cause inconsistencies on the remote and the LED indicator light will flash.
Remote Control Operations Model RG10N3(2HS)/BGEF, RG10N3(2HS)/BGEFU1 Rated Voltage 3.0V( Dry batteries R03/LR03×2) Signal Receiving Range Environment -5°C~60°C(23°F~140°F) Quick Start Guide SELECT MODE FIT BATTERIES SELECT TEMPERATURE AUTO COOL HEAT PRESS POWER BUTTON POINT REMOTE TOWARD UNIT SELECT FAN SPEED AU-100% NOT SURE WHAT A FUNCTION DOES? Refer to the How to Use Basic Functions and How to Use Advanced Functions sections of this manual for a detailed description of how to use your air conditioner.
Handling the Remote Controller Inserting and Replacing Batteries Battery Performance Your air conditioning unit may come with two For optimal product performance: batteries(some units). Put the batteries in the Do not mix old and new batteries, or batteries remote control before use. Slide the back cover from the remote control Do not leave batteries in the remote control downward, exposing the battery compartment.
Buttons and Functions Description ON/OFF No.1 MODE No.2 Auto > Cool > Dry > Heat > Fan NOTE: HEAT mode is not supported by the cooling only appliance. BUTTON No.3 Enjoy evener comfortable cooling without a noticeable breeze. TEMP. Increases temperature in 0.5°C (1°F) increments. No.4 Max.
Page 48
Remote Screen Indicators Information are displayed when the remote controller is power up. Not applicable Breeze Not applicable Breezeless Not applicable Away for this unit for this unit display for this unit Sleep Air magic/ Follow Wireless Low battery Active mode UV lamp control...
How to Use Basic Functions Basic operation ATTENTION! Before operation, please ensure the unit is plugged in and power is available. SETTING TEMPERATURE The operating temperature range for units is 16-30°C (60-86°F). You can increase or decrease the set temperature in 0.5°C (1°F) increments. AUTO Mode In AUTO mode, the unit will automatically select the COOL, FAN, or HEAT operation based on the...
DRY Mode (dehumidifying) 1. Press the MODE button to select DRY. 2. Set your desired temperature using the or TEMP button. TEMP 3. Press the ON/OFF button to start the unit. NOTE: FAN SPEED cannot be changed in DRY mode. Swing Boost Vane...
Setting the TIMER TIMER ON/OFF - Set the amount of time after which the unit will automatically turn on/off. TIMER ON setting Press TIMER button to initiate Press Temp. up or down button for Point remote to unit and wait 1sec, the ON time sequence.
How to Use Advanced Functions Vane function Press Vane button when the unit is turned on. The system will exit the louver setting mode If Vane there is no operations during a 10 seconds period. 4 Louvers Press this button to activate the louver setting feature.Each time you press the Vane button button, the display panel will display the selected louver in an order as(“-0”...
ECO/GEAR function Press this button to enter the energy e cient mode in a sequence of following: GEAR(75%) GEAR(50%) Previous setting mode ECO..Note:This function is only available under COOL mode. ECO operation: Under cooling mode, press this button, the remote controller will adjust the temperature automatically to 24°C/75°F, fan speed of Auto to save energy (only when the set temperature is less than 24°C/75°F.
LOCK function Press together the two buttons at the same time more Vane than 5 seconds to activate Lock function. All buttons will Boost not response except pressing these two buttons for two seconds again to disable locking. SET function Press the SET button to enter the function setting, then press SET button or TEMP or TEMP button to select the desired function.
Page 55
Follow me function ( Active clean function( ) (some units) : The FOLLOW ME function enables the The Active Clean Technology washes away remote control to measure the temperature dust, mold, and grease that may cause odors at its current location and send this signal to when it adheres to the heat exchanger by theair conditioner every 3 minutes interval.
Page 56
Breezeless function of dip switch. NTOE: This feature is only available under cool mode. This feature is for some models. INDOOR UNIT MAIN BOARD SW2 has 2 dip switch: SW2-1 and SW2-2 SW2-2 is to control the breezeless function. SW2-2 SW2-1 SW2-2 dip switch to be “ON”, turn on the breezeless.
CLEANING AND MAINTENANCE CAUTION , Make sure to clean the lter every two weeks. • Always TURN OFF your AC system and disconnect its power supply before cleaning or maintenance. • Only use a soft, dry cloth to wipe the unit clean. You can use a cloth soaked in warm water to wipe it clean if the unit is especially dirty.
CAUTION • Before changing the filter or cleaning, turn o • Do not expose filter to direct sunlight when the unit and disconnect its power supply. drying. This can shrink the filter. • When removing filter, do not touch metal •...
TROUBLESHOOTING CAUTION If any of the following conditions occurs, turn o your unit immediately! • The power cord is damaged or abnormally warm • You smell a burning odor • The unit emits loud or abnormal sounds • A power fuse blows or the circuit breaker frequently trips •...
Page 60
Issue Possible Causes The outdoor unit The unit will make di erent sounds based on its current operating mode. makes noises Dust is emitted from The unit may accumulate dust during extended periods of non-use, which will be either the indoor or emitted when the unit is turned on.
Page 61
Problem Possible Causes Solution Wait for the power to be restored Power failure The power is turned o Turn on the power The unit is not The fuse is burned out Replace the fuse working Replace batteries Remote control batteries are dead The Unit’...
Midea Group and/or its a liates (“Midea”), to which Midea owns trade- marks, copyrights and other intellectual property rights, and all goodwill derived from using any part of an Midea trademark.
MideaDPO@midea.com. To exercise your rights such as right to object your personal date being processed for direct marketing purposes, please contact us via MideaDPO@midea.com. To find further information, please follow the QR Code. The design and specifications are subject to change without prior notice for product improvement.
Need help?
Do you have a question about the MCD1-24HRFNX and is the answer not in the manual?
Questions and answers