Advertisement
Quick Links
TM
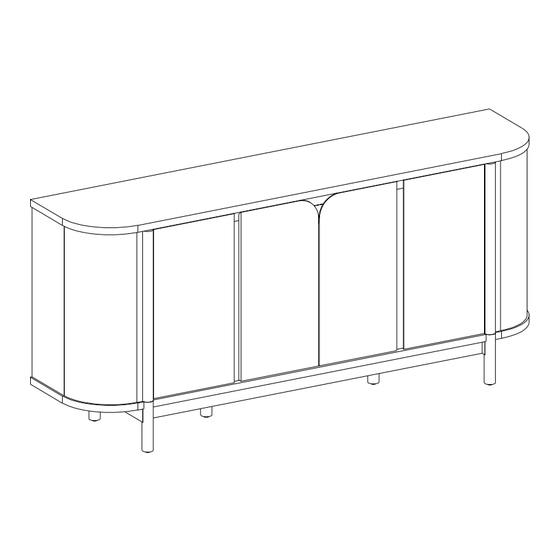
Ezra 70" Sideboard
SKU# WEEZR11704
For Residential Use Only
Please visit our website for the most current instructions, assembly tips, report damage,or request parts. www.walkeredison.com
Revised 13/08/2024 (D)
©
1
1
Copyright
2024 by Walker Edison Furniture Co., LLC. All rights reserved.
Advertisement

Related Manuals for Walker Edison Ezra WEEZR11704


Summary of Contents for Walker Edison Ezra WEEZR11704
- Page 1 Ezra 70” Sideboard SKU# WEEZR11704 For Residential Use Only Please visit our website for the most current instructions, assembly tips, report damage,or request parts. www.walkeredison.com Revised 13/08/2024 (D) © Copyright 2024 by Walker Edison Furniture Co., LLC. All rights reserved.
- Page 2 You can cause cracking or damage to the material and easily strip the hardware. If you choose to use a power tool, your product will no longer be covered under Walker Edison’s warranty. Glue is provided to secure wood dowels in place When inserting dowels, locate the appropriate hole, place a small amount of glue in the hole, and then insert the dowel.
-
Page 3: Parts List
Parts List Description Quantity Part Number Top Panel Bottom Panel Left Panel Right Panel Left Front Panel Right Front Panel Left Trim Right Trim Left Dividing Panel Right Dividing Panel Middle Left Trim Middle Right Trim Top Trim Left Shelf Right Shelf Middle Shelf Side Door... -
Page 4: Hardware List
Hardware List Part Size Name Quantity 8x30mm Wooden dowel 6x35mm Cam bolt 15x11mm Cam lock 30mm Sticker Rubber pad 8x2mm European hinge 35mm European hinge 35mm 3.5x14mm Screw 6x50mm Bolt 6x50mm Bolt Hex key M4x57mm Shelf support pin 8x5x16mm... - Page 5 Hardware List Part Size Name Quantity Plastic wedge 3x17mm Screw 4x12mm Screw Screw 4x25mm Plastic strap Wall Anchor Glue tube The hardware quantities listed above are required for proper assembly. Extra hardware pieces may be included.
- Page 6 Step 1 Let’s get started! Screw Cam Bolts (B) and insert Wooden Dowels (A) into the Left and Right Dividing Panels (9 & 10). The provided glue is to secure wood dowels in place. When first inserting dowels, locate the appropriate hole for the dowel, place a small amount of glue in the hole and insert the dowel.
- Page 7 Step 2 Now, screw your Cam Bolts (B) into the Left and Right Trim Pieces (11 & 12). Then, insert Wooden Dowels (A) into the Left & Right Shelves (14 & 15).
- Page 8 Step 3 Attach the Middle Left Trim (11) to the Left Dividing Panel (9). Secure with Cam Locks (C). See the provided tip for more detailed instructions on securing cam locks. Cam Locks Cam Locks help securely join two pieces together. Follow these easy steps.
- Page 9 Step 4 Now repeat for the other side. Attach the Middle Right Trim (12) to the Right Dividing Panel (10). Secure with Cam Locks (C).
- Page 10 Step 5 Insert Wooden Dowels (A) and screw Cam Bolts (B) into the Left and Right Panels (3 & 4). Insert more Wooden Dowels (A) into the Left and Right Trim pieces (7 & 8).
- Page 11 Step 6 Screw more Cam Bolts (B) into both the Left and Right Front Panels (5 & 6).
- Page 12 Step 7 Next, you will attach the Left and Right Trim (7 & 8) to the Left and Right Front Panels (5 & 6). Use the graphic to ensure you are getting proper placement.
- Page 13 Step 8 Attach the Left Panel (3) to the Left Front Panel (5) and the Right Panel (4) to the Right Front Panel (6). Secure with Cam Locks (C). C C C...
- Page 14 Step 9 Connect the Left Shelf (14) to the Left Dividing Panel (9) and secure with Cam Locks (C).
- Page 15 Step 10 Now, you’ll repeat the same process for the other side. Connect the Right Shelf (15) to the Right Dividing Panel (10) and secure with Cam Locks (C).
- Page 16 Step 11 Attach the Left Panel (3) to the Left Shelf (14) and secure with Cam Locks (C).
- Page 17 Step 12 Then, you’ll attach the Right Panel (4) to the Right Shelf (15) and secure with Cam Locks (C).
- Page 18 Step 13 Screw Cam Bolts (B) into the Top Panel (1). Insert Wooden Dowels (A) into the Top Trim (13).
- Page 19 Step 14 Attach the Top Trim (13) to the Top Panel (1) and then secure with Cam Locks (C).
- Page 20 Step 15 Now attach the left and right panels to the Top Panel. On the left side, you will secure the Left Panel (3), Left Front Panel (5), Left Trim (7), and Left Dividing Panel (9) to the Top Panel (1) using Cam Locks (C).
- Page 21 Step 16 Unfold your back panels (24, 25). Insert the Side Back Panels (24) on the left and right sides, and the Middle Back Panel (25) into the middle. Use the grooves as your guides to slide into place. 24 OR 25...
- Page 22 Step 17 It’s time to attach the Bottom Panel (2) to the body of the sideboard. Using Bolts (K) and your Hex Key (L), secure the panel into place.
- Page 23 Step 18 Insert Wooden Dowels (A) into the two Apron pieces (20) and the Left and Right Legs (21 & 22). Screw Cam Bolts (B) into the legs as well.
- Page 24 Step 19 Connect the Left and Right Legs (21 & 22) to the two Aprons (20) and secure with Cam Locks (C).
- Page 25 Step 20 Screw Cam Bolts (B) into the Bottom Panel (2).
- Page 26 Step 21 Attach the Aprons (20) and Legs (22 & 21) to the Bottom Panel (2). Secure with Cam Locks (C) and screw into place using Bolts (J).
- Page 27 Step 22 Attach the two Middle Feet (23) to the Bottom Panel (2) by screwing them into place.
- Page 28 Step 23 Cover any visible Cam Locks with your Stickers (D).
- Page 29 Step 24 Now insert the Plastic Wedges (N) into place by spreading evenly across the back panels. You will slide the wedge between the back panels and the frame and then secure with Screws (P).
- Page 30 Step 25 Insert the Shelf Support Pins (M) into your desired shelf location. Then slide the Middle Shelf (16) into place.
- Page 31 Step 26 Stick Rubber Pads (E) into place.
- Page 32 Step 27 Connect your European Hinges (F) to the two Side Doors (17) and secure with Screws (H).
- Page 33 Step 28 Connect European Hinges (G) to the Center Doors (18 & 19) and secure with Screws (H).
- Page 34 Step 29 It’s starting to look like a sideboard! Let’s connect the doors. Attach the European Hinges to the frame using Screws (H) to secure. Need help adjusting doors once you’ve got them into place? See our tip below. Adjusting The Cabinet Doors Adjust horizontal width Adjust depth position Adjust vertical height...
- Page 35 Step 30 Now attach the hinges on the remaining doors.
- Page 36 Step 31 Adjust your sideboard to create a level surface.
- Page 37 Step 32 Lastly, we take your safety seriously. Let’s secure the sideboard to your wall. Attach the Plastic Straps (S) to the back of the sideboard using Screws (Q).
- Page 38 Step 33 Secure the Wall anchors (T) into the wall and connect the Plastic Straps (S) to the wall using Screws (R). Warning Serious or fatal injuries can occur from furniture tipping over. To prevent the furniture from tipping over we recommend that it is permanently fixed to the wall. Wall anchor and hardware are included with this product.
-
Page 39: Final Assembly
Final Assembly Sit back and admire your hard work. Enjoy your beautiful new sideboard! Congratulations on your new piece of furniture! We would love to hear about it and see it. Please leave us a review or post a picture with #mywalkeredisonhome... - Page 40 Assembling furniture can be tricky sometimes. Our customer service team, located in Utah, is here for product information, help assembling a product, or for any other customer support issue Call us at 801-433-3008 Email us at service@walkeredison.com Visit our Customer Service website at walkeredison.com/pages/customer-service We are available to help Monday -Thursday 8am-5pm, Friday 8am-3pm MST...
Need help?
Do you have a question about the Ezra WEEZR11704 and is the answer not in the manual?
Questions and answers