
Related Manuals for Shure QLX D Series


Summary of Contents for Shure QLX D Series
- Page 1 QLX-D Wireless System Shure QLXD wireless system user guide. Includes dimensions, frequency bands, error codes, and more. Version: 7.2 (2024-D)
-
Page 2: Table Of Contents
Step 2: Scanning for the Best Available Channel Setting the Transmitter RF Power Step 3: Install Batteries into Transmitter Using QLX-D with a Shure ULX-D System Step 4: IR Sync to Create an Audio Channel Setting Regional TV Channel Spacing... - Page 3 Shure Incorporated Error Codes and Solutions Frequencies for European Countries Contact Customer Support IMPORTANT SAFETY INSTRUCTIONS Accessories WARNING Optional Accessories Important Product Information Specifications LICENSING INFORMATION QLXD4 Information to the user QLXD1 Australia Warning for Wireless QLXD2 Certifications Receiver Output Connectors...
-
Page 4: Qlx-D Wireless System
Automatic channel scan and IR sync make finding and assigning an open frequency quick and easy. ® Ethernet connection provides networked channel scanning across multiple receivers and Shure Wireless Workbench control software compatibility for advanced frequency coordination. AES-256 encryption comes standard and can be easily enabled for secure wireless transmission. -
Page 5: System Components
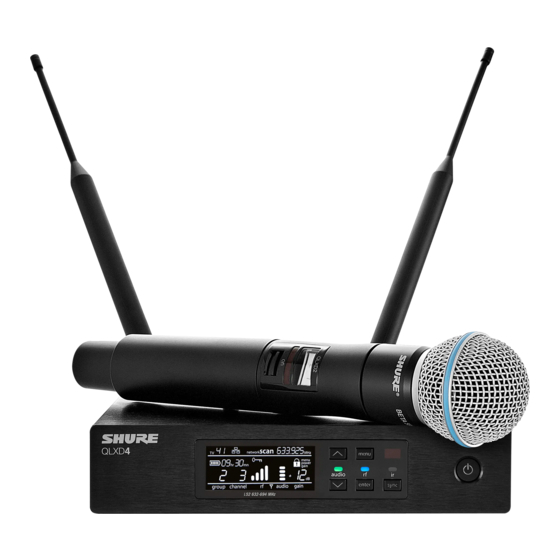
• Compatible with external control systems such as AMX or Crestron • Professional-grade all-metal construction • Transmitters use 2 AA batteries or Shure rechargeable battery System Components ① QLXD4 Receiver ② PS24 Power Supply ③ 1/2 Wave Antennas (2) ④ 2 ft. BNC Cables with Bulkhead Adapters (2) ⑤... - Page 6 MX153 (black or tan) • SM35 Zipper Bag Bodypack and Handheld Combo System • QLXD1 bodypack transmitter with WL185 Microflex cardioid lavalier microphone • QLXD2 handheld transmitter with Shure SM58 microphone cartridge • Battery Contact Cover • Zipper Bag (2) 6/57...
-
Page 7: Single And Dual Rackmount Assembly
Shure Incorporated Single and Dual Rackmount Assembly Securing the AC Power Cord 7/57... -
Page 8: Quickstart Instructions
Shure Incorporated Installing Footpads Quickstart Instructions Step 1: Power and Antenna Connection ① Connect an antenna to each of the antenna connectors. ② Connect the power supply to the receiver and plug into an AC power source. ③ Connect the receiver audio output to a mixer or amplifier. -
Page 9: Step 2: Scanning For The Best Available Channel
AA batteries: Place batteries (note polarity markings) and AA adapter as shown ◦ Shure rechargeable battery: Place battery as shown (note polarity markings), remove AA adapter from bodypack trans- mitter, stow AA adapter in door for handheld transmitter Note: If using AA batteries, select a battery type from the transmitter menu to ensure accurate battery metering. -
Page 10: Step 4: Ir Sync To Create An Audio Channel
Shure Incorporated Step 4: IR Sync to Create an Audio Channel Turn on the transmitter. Press the sync button on the receiver. The red ir LED will blink indicating that sync mode is active. Align the IR sync windows of the transmitter and receiver at a distance of <15 cm (6 in.). When the transmitter and re- ceiver are aligned, the red ir LED remains on and the sync will automatically occur. -
Page 11: Hardware Interface
Shure Incorporated Hardware Interface Receiver Front and Back Panels ① Display Shows menu options, receiver and transmitter settings. ② Arrow Buttons Adjust gain setting or change menu parameters. ③ Enter Button Press to save menu or parameter changes. ④ Sync Button Press to activate IR sync. - Page 12 Shure Incorporated ⑦ Menu Button ◦ Press to access or select menu screens ◦ Press to cancel pending changes ◦ Press and hold to return to the home screen ⑧ RF LED Illuminates when RF link with transmitter is active.
-
Page 13: Receiver Display
Shure Incorporated ⑮ Antenna Connectors BNC connector for receiver antennas ⑯ Mic/Line Switch Sets output level to microphone or line. ⑰ XLR Audio Output Balanced (1: ground, 2: audio +, 3: audio - ) ⑱ 1/4" Instrument/Auxiliary Output Impedance Balanced (Tip: audio, Ring: no audio, Sleeve: ground) Receiver Display ①... -
Page 14: Navigating The Receiver Menus
Enable the Low Battery Alert to flash the receiver display when battery runtime is less than 30 minutes. ⑮ Rechargeable Battery Runtime When the transmitter is powered by a Shure rechargeable battery, remaining runtime is displayed in hours:minutes. Navigating the Receiver Menus The receiver has a main menu for setup and configuration and an advanced menu to access additional receiver functions. - Page 15 Shure Incorporated ① Scan Receiver automatically scans for the best available frequency ② Network Scan Scans to find frequencies for networked receivers operating in the same frequency band (available when connected to a network with receivers in the same band) ③...
- Page 16 Shure Incorporated ⑤ Firmware Update Displays what kind transmitter firmware the receiver has available. See Firmware Updates for more details. ◦ HH BP = handheld or bodypack firmware ◦ BN GN = boundary or gooseneck firmware ⑥ IP Settings Use to select and edit IP settings and subnet masks ⑦...
-
Page 17: Transmitters
Shure Incorporated Transmitters ① Power LED ◦ Green = unit is powered on ◦ Red = low battery ② On/Off Switch Powers the transmitter on or off. ③ Display: View menu screens and settings. Press any control button to activate the backlight. -
Page 18: Transmitter Display
⑥ Battery Compartment Requires 2 AA batteries or a Shure rechargeable battery. ⑦ AA Battery Adapter Secures batteries when powering transmitter with AA batteries instead of Shure rechargeable battery. ⑧ Bodypack Antenna For RF signal transmission. ⑨ Handheld Integrated Antenna For RF signal transmission. -
Page 19: Transmitter Menu Options And Navigation
Each additional press of the menu button advances to the next menu screen. ① Home Screen Use the arrow keys to select one of the following home screen displays: ◦ Battery Icon/group and channel ◦ Battery Icon/frequency ◦ Battery Icon/Battery Runtime (if Shure rechargeable battery is installed) 19/57... - Page 20 ⑧ battery type Use to set the battery type to match the installed AA battery type to ensure accurate battery metering. Menu is not dis- played when Shure rechargeable batteries are installed. Tips for Editing Menu Parameters • To access the menu options from the home screen, press the menu button. Each additional press of the menu button ad- vances to the next menu screen.
-
Page 21: Control Lock Options For The Receiver And Transmitter
Shure Incorporated • A menu parameter will blink when editing is enabled • To increase, decrease or change a parameter, use the arrow buttons • To save a menu change, press enter • To exit a menu without saving a change, press menu... -
Page 22: Battery Installation
To ensure accurate display of transmitter runtime, set the battery type in the transmitter menu to match the installed AA battery type. If a Shure rechargeable battery is installed, selecting a battery type is not necessary and the battery type menu will not be displayed. -
Page 23: Aa Battery Installation
Fully insert the batteries as shown to ensure proper battery contact and to allow the door to latch securely. Shure SB900 Series Rechargeable Battery Shure lithium-ion batteries offer a rechargeable option for powering the QLX-D transmitters. Batteries quickly charge to 50% capacity in one hour and reach full charge within three hours. - Page 24 Fault: check connections and battery No battery in bay Important Tips for Care and Storage of Shure Rechargeable Batteries Proper care and storage of Shure batteries results in reliable performance and ensures a long lifetime. • Always store batteries and transmitters at room temperature •...
-
Page 25: Low Battery Alert
Shure Incorporated Low Battery Alert The receiver display can be configured to flash when the battery runtime for a transmitter is less than 30 minutes. The alert displays the following information based on the type of batteries installed in the transmitter: •... -
Page 26: System Set Up
Shure Incorporated Creating an Encrypted Audio Channel Press the menu button to navigate to the encryption menu, indicated by the key icon. Use the arrow buttons to select an encryption option: ◦ on = encryption enabled ◦ OFF = encryption disabled Press enter to save. -
Page 27: Scan And Ir Sync
Shure Incorporated The QLX-D system provides 3 methods for tuning the receiver and transmitter to the same frequency: • Scan and IR Sync: The receiver scans the RF spectrum for the best available frequency and an IR sync automatically tunes the transmitter to the receiver frequency •... -
Page 28: Step 2: Ir Sync For Automatic Transmitter Set Up
Shure Incorporated Step 2: IR Sync for Automatic Transmitter Set Up Performing an IR Sync automatically tunes the transmitter to match the receiver frequency, forming a wireless audio channel. Turn on the transmitter. Press the sync button on the receiver. The red ir LED will blink indicating that sync mode is active. -
Page 29: Linking Two Transmitters To A Receiver
Shure Incorporated Use the arrow buttons to adjust the frequency. Press and hold for faster scrolling. Press enter to save. Setting the Transmitter Frequency Press menu to navigate to the frequency setting option. Use the arrow buttons to adjust the frequency. Press and hold for faster scrolling. -
Page 30: Radio Frequency (Rf) Settings
Use the arrow buttons to select Hi or Lo. Press enter to save. Using QLX-D with a Shure ULX-D System Transmitters and receivers from QLX-D and ULX-D component groups can be paired to form audio channels. To ensure functionality, use the following settings on receivers and transmitters: •... -
Page 31: Setting Regional Tv Channel Spacing
Shure Incorporated If using ULXD6 or ULXD8 transmitters with a QLX-D receiver, you can only make changes to transmitter presets using Wire- less Workbench. Open receiver properties in WWB. Make changes to transmitter presets and click Apply. The new settings will be sent to the QLX-D receiver. On the receiver front panel, hold enter while pressing menu to enter the advanced menu. - Page 32 Shure Incorporated Creating Custom Groups The receiver has 6 custom groups available named U1, U2, U3, U4, U5, and U6. Press menu while holding the enter button to access the Custom Group screen. Selecting A Custom Group Press enter to enable editing of a group (indicated by the group flashing).
-
Page 33: Networking
Use shielded Cat 5 or better Ethernet cables to ensure reliable network performance • The LEDs on the Ethernet port illuminate indicating a network connection is active • The network icon illuminates when the receiver detects additional Shure devices on the network • All components must operate on the same subnet •... -
Page 34: Setting The Ip Address And Subnet Mask Manually
Shure Incorporated If the ping returns success (no packet loss), then the computer can communicate with the device on the network. If the ping returns failure (100% packet loss), then verify that the IP address of the computer is on the same subnet as the re- ceiver. If the pings are successful and the devices still do not show up in the WWB6 inventory, check to ensure all firewalls are either disabled or allow the WWB network traffic to pass to the application. -
Page 35: Factory Reset
(including transmitters), must have the same MAJOR and MINOR firmware version numbers (e.g., 1.2.x). Downloading and Updating Firmware A free Shure Update Utility tool is available by visiting www.shure.com. The Shure Update Utility is also bundled with Shure Wireless Workbench software. -
Page 36: Updating The Receiver
CAUTION! Ensure that receiver power and network connections are maintained during a firmware update. Do not turn off the receiver until the update is complete. Connect the receiver and computer to the same network. Open the Shure Update Utility. Click on the firmware tab to find available updates. Use the Import button if manually importing firmware files. -
Page 37: Troubleshooting
Shure Incorporated 6. When the update is complete, "TX Update good" is shown on the receiver display. If the screen shows Err. 09, update again with a transmitter type that matches the firmware held by the receiver. Troubleshooting Issue See Solution... No Sound... -
Page 38: Error Codes And Solutions
Shure Incorporated Custom Group IR Sync When using Custom Groups, always perform an IR sync from the Custom Groups menu in the receiver to ensure accurate dis- play of group and channel information. See Custom Groups topic for additional details. Radio Frequency (RF) The blue RF LED will illuminate when a linked transmitter is within range of the receiver. Measure the transmitter range before a performance to avoid operating beyond the specified transmitter range. - Page 39 Err.006 No Frequencies Found Rescan, select a different group, or use WWB to find a frequency. Receivers: Use the Shure Update Utility to update the receiver to the latest firmware. If the error persists, contact Shure support. Err.007 Firmware Version Self-Test Failed Transmitters: Update the transmitter firmware again using the QLXD4 receiver.
-
Page 40: Contact Customer Support
Shure Incorporated Error Description Solutions Code If the condition persists, contact Shure support. Contact Customer Support Didn't find what you need? Contact our customer support to get help. Accessories Optional Accessories Batteries and Chargers Shure Lithium-Ion Rechargeable Battery.Shure Lithium- SB900B... - Page 41 Shure Incorporated UHF Antenna Power Distribution System UA844SWB/LC-E UHF Antenna Power Distribution Amplifier UA844SWB/LC-J UHF Antenna Power Distribution Amplifier UA844SWB/LC-K UHF Antenna Power Distribution Amplifier UA844SWB/LC-UK UABIAST UABIAST-US UABIAST-UK UABIAST-BR UABIAST-AR UABIAST-E In-Line Power Supply UABIAST-CHN UABIAST-K UABIAST-J UABIAST-AZ UABIAST-TW...
- Page 42 Shure Incorporated Front Mount Antenna Kit (Includes 2 Cables And 2 Bulk- UA600 head) 1/2 Wave Antenna Remote Mount Kit UA505 PWS Helical Antenna, 480-900 MHz HA-8089 Helical Antenna, 944-954 MHz HA-8241 Cables and Connectors 2 ft. BNC-BNC Coaxial Cable UA802 6 foot (1.8m) BNC to BNC Coaxial Cable for Remote An-...
-
Page 43: Specifications
Premium Guitar Cable TQG Threaded Connector WA305 Premium Guitar Cable TQG Latching Connector WA306 Cable, Microphone, 4-foot (1.3m), 4-pin Mini Connector (TA4F) to XLR Connector (F), used with Shure Bodypack WA310 Transmitters. In-Line On/Off Switch WA360 In-Line Bodypack Mute Switch... - Page 44 Shure Incorporated Image Rejection >70 dB, typical RF Sensitivity -97 dBm at 10 BER Latency <2.9 ms Audio Frequency Response QLXD1 20 – 20 kHz (±1 dB) QLXD2 Note: Dependent on microphone type Audio Dynamic Range System Gain @ +10 >120 dB, A-weighted, typical Total Harmonic Distortion −12 dBFS input, System Gain @ +10 <0.1%...
-
Page 45: Qlxd4
Shure Incorporated QLXD4 Dimensions 41 mm x 197 mm x 151 mm (1.63 in. x 7.75 in. x 5.94 in.), H x W x D Weight 777 g (1.71 lbs), without antennas Housing steel Power Requirements 12 V DC @ 0.4 A, supplied by external power supply (tip positive) RF Input Spurious Rejection >80 dB, typical Connector Type Impedance 50 Ω Audio Output Gain Adjustment Range -18 to +42 dB in 1 dB steps Configuration 1/4" (6.35 mm) Impedance balanced (Tip=audio, Ring=no audio, Sleeve=ground) balanced (1=ground, 2=audio +, 3=audio −) Impedance 1/4" (6.35 mm) 100 Ω (50 Ω Unbalanced) -
Page 46: Qlxd1
Shure Incorporated Phantom Power Protection 1/4" (6.35 mm) Networking Network Interface Single Port Ethernet 10/100 Mbps Network Addressing Capability DHCP or Manual IP address Maximum Cable Length 100 m (328 ft) QLXD1 Mic Offset Range 0 to 21 dB (in 3 dB steps) Battery Type Shure SB900B Rechargeable Li-Ion or AA batteries 1.5 V Dimensions 86 mm x 65 mm x 23 mm (3.38in. x 2.57 in. x 0.92 in.) H x W x D, without antenna Weight 138 g (4.9 oz.), without batteries... -
Page 47: Qlxd2
Shure Incorporated RF Output Connector Antenna Type 1/4 wave Impedance 50 Ω Occupied Bandwidth <200 kHz Modulation Type Shure proprietary digital Power 1 mW or 10 mW See Frequency Range and Output Power table, varies by region QLXD2 Mic Offset Range 0 to 21 dB (in 3 dB steps) Battery Type Shure SB900B Rechargeable Li-Ion or AA batteries 1.5 V Dimensions 269 mm x 51 mm (10.6 in. x 2.0 in.) L x Dia. -
Page 48: Receiver Output Connectors
Shure Incorporated RF Output Antenna Type Integrated Single Band Helical Occupied Bandwidth <200 kHz Modulation Type Shure proprietary digital Power 1 mW or 10 mW See Frequency Range and Output Power table, varies by region Receiver Output Connectors TA4M Input Connector Diagram ① Ground ②... -
Page 49: Frequency Range And Transmitter Output Power
Shure Incorporated Frequency Range and Transmitter Output Power Band Frequency Range ( MHz) Power ( mW RMS )* 470 to 534 1 / 10 470 to 534 1 / 10 479 to 534 1 / 10 470 to 510 1 / 10... -
Page 50: Frequencies For European Countries
Shure Incorporated Band Frequency Range ( MHz) Power ( mW RMS )* 902 to 928 (All Americas except Brazil) 1 / 10 902 to 907.500, 915 to 928 (Brazil) 1 / 10 915 to 928 (Australia) 1 / 10 1492 to 1525... - Page 51 Shure Incorporated H51 534-598 MHz Country Code Frequency Range Code de Pays Gamme de frequences Codice di paese Gamme di frequenza Código de país Gama de frequencias Länder-Kürzel Frequenzbereich A, B, BG, CH, CY, CZ, D, EST 534 - 598 MHz*...
- Page 52 Shure Incorporated L52 632-694 MHz Country Code Frequency Range Code de Pays Gamme de frequences Codice di paese Gamme di frequenza Código de país Gama de frequencias Länder-Kürzel Frequenzbereich A, B, BG, CH, CY, CZ, D, DK, EST, F FIN, GB, GR, H, HR, I, IRL, IS, L, LT...
-
Page 53: Important Safety Instructions
Shure Incorporated Q51 794-806 MHz Country Code Frequency Range Code de Pays Gamme de frequences Codice di paese Gamme di frequenza Código de país Gama de frequencias Länder-Kürzel Frequenzbereich A, B, BG, CH, CY, CZ, D, DK, E, EST F, FIN, GB, GR, H, HR, I, IRL, IS, L, LT... - Page 54 Shure Incorporated FOLLOW all instructions. DO NOT use this apparatus near water. CLEAN ONLY with dry cloth. DO NOT block any ventilation openings. Allow sufficient distances for adequate ventilation and install in accordance with the manufacturer’s instructions. DO NOT install near any heat sources such as open flames, radiators, heat registers, stoves, or other apparatus (in- cluding amplifiers) that produce heat. Do not place any open flame sources on the product.
-
Page 55: Warning
Important Product Information LICENSING INFORMATION Licensing: A ministerial license to operate this equipment may be required in certain areas. Consult your national authority for possible requirements. Changes or modifications not expressly approved by Shure Incorporated could void your authority to operate the equipment. Licensing of Shure wireless microphone equipment is the user’s responsibility, and licensability de- pends on the user’s classification and application, and on the selected frequency. Shure strongly urges the user to contact the ... -
Page 56: Australia Warning For Wireless
Note: Please follow your regional recycling scheme for batteries and electronic waste CE Notice: Hereby, Shure Incorporated declares that this product with CE Marking has been determined to be in compliance with European Union requirements. The full text of the EU declaration of conformity is available at the following site: https:// www.shure.com/en-EU/support/declarations-of-conformity. -
Page 57: Qlxd1, Qlxd2
Shure Incorporated Authorized European representative: Shure Europe GmbH Department: Global Compliance Jakob-Dieffenbacher-Str. 12 75031 Eppingen, Germany Phone: +49-7262-92 49 0 Fax: +49-7262-92 49 11 4 Email: EMEAsupport@shure.de Industry Canada ICES-003 Compliance Label: CAN ICES-3 (B)/NMB-3(B) QLXD1, QLXD2 Certified under FCC Part 74.
Need help?
Do you have a question about the QLX D Series and is the answer not in the manual?
Questions and answers