Advertisement
Quick Links
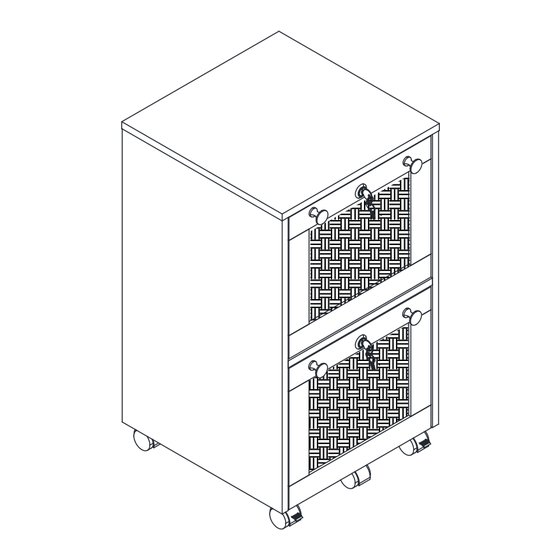
VINGLI FILE CABINET
ASSEMBLY INSTRUCTION FOR MODELS: FC
2PERS
Please contact us via email if parts are missing or damaged,we will
gladly ship your replacement parts free of charge.Please attach your
Order ID so that we can assist you better.
EMAIL
support@vingli.com
Tool Required Not Provided
Thank you for purchasing from VINGLI!
www.vingli.com
0W2RL
WEBSITE
IMPORTANT
!
THIS INSTRUCTION BOOKLET
CONTAINS IMPORTANT SAFETY
INFORMATION.PLEASE READ
AND KEEP FOR FUTURE
REFERENCE.
Advertisement

Related Manuals for VINGLI FC0W2RL


Summary of Contents for VINGLI FC0W2RL
- Page 1 ASSEMBLY INSTRUCTION FOR MODELS: FC Tool Required Not Provided 2PERS Thank you for purchasing from VINGLI! Please contact us via email if parts are missing or damaged,we will gladly ship your replacement parts free of charge.Please attach your Order ID so that we can assist you better.
-
Page 5: Overall Size
MODEL&ASSEMBLY TIPS OVERALL SIZE: 15 7 ·Rolling File Cabinet ·Locking File Cabinet Max Weight Capacity:110lbs... -
Page 6: Identify Parts
IDENTIFY PARTS... -
Page 7: Part List
PART LIST Right Panel Top Panel Left Panel Bottom Panel Back Panel Brace Drawer Right Panel Dawer Left Panel Upper Drawer Front Drawr Back Panel Lower Drawer Front Drawer Bottom Panel Anti-Tip Wheel Mounting Plate... - Page 8 PART LIST Ax20 (+1) Bx20 (+1) Cx10 (+1) 6x35mm 6x30mm 15x10mm Cam Lock Wood Dowel Cam Bolt Dx8 (+1) Fx20 (+1) Ex24 (+2) 4x35mm 3.5x12mm 4x14mm Screw Screw Screw 3x16mm Mending Wedge Screw Round Handle Screw 3.5x16mm Screw Drawer Slide File Lock Castor Hanging Rod...
- Page 9 ASSEBMLY STEPS...
- Page 10 ASSEBMLY STEPS STEP 1 Front Back Helpful Tip: The pre-drilled holes for locating the slides may be small, so please examine them 3.5x12mm A x6 J-1x4 Ex12 carefully. Don't worry, they are there.
- Page 11 ASSEBMLY STEPS STEP 2 Assemble the Panels #2, #4, #5, and #3 together. You can start by completing the left half and then proceed to assem- ble the right half. 15x10mm...
- Page 12 ASSEBMLY STEPS STEP 3 Insert the back panel #6 into the grooves of the cabinet. A x4...
- Page 13 ASSEBMLY STEPS STEP 4 Start by inserting the wood dowel into the hole, then place the top panel #1 over it. Finally, secure it in place using the cam lock. 15x10mm 6x30mm...
- Page 14 ASSEBMLY STEPS STEP5 Place the locking casters at the front. F x16...
- Page 15 ASSEBMLY STEPS STEP 6 Fix the Mending Wedge(H) with Screw(G) as picture shows for more stability 3x16mm H x4...
- Page 16 ASSEBMLY STEPS STEP 7 Front J- 2 Back J- 2 Front 3.5x12mm Ex12 J- 2x4...
- Page 17 ASSEBMLY STEPS STEP 8 4x35mm...
- Page 18 ASSEBMLY STEPS STEP 9 A x10...
- Page 19 ASSEBMLY STEPS STEP 10 Don't worry about the number of components used in this step. Take K -2 your time and proceed at a comfortable pace. K -1 L x4 K -2 K -1 L x4 K -2 K -1 L x4 K -1 K -2...
- Page 20 ASSEBMLY STEPS STEP 11 Make sure to assem- ble the hanging rod during the process of installing the drawer front panels. 15x10mm...
- Page 21 ASSEBMLY STEPS STEP 12 4x14mm F x4 N x1...
- Page 22 ASSEBMLY STEPS STEP 13 Begin by pulling out the drawer slide (J-1) along with the ball to the front. Ensure that the drawer remains level while inserting it, aligning the drawer with the slides. Note! Failure to level may result in damage to the slides.
- Page 23 ASSEBMLY STEPS STEP 14 WALL...
- Page 24 Q1: What should I do if I receive a defective item or if there are missing parts? A1:Please feel free to contact VINGLI customer service via the link where you purchased this item with your order ID, pictures & sticker number of the defective/missing parts to us.
Need help?
Do you have a question about the FC0W2RL and is the answer not in the manual?
Questions and answers