Table of Contents
Advertisement
Quick Links
Advertisement
Table of Contents

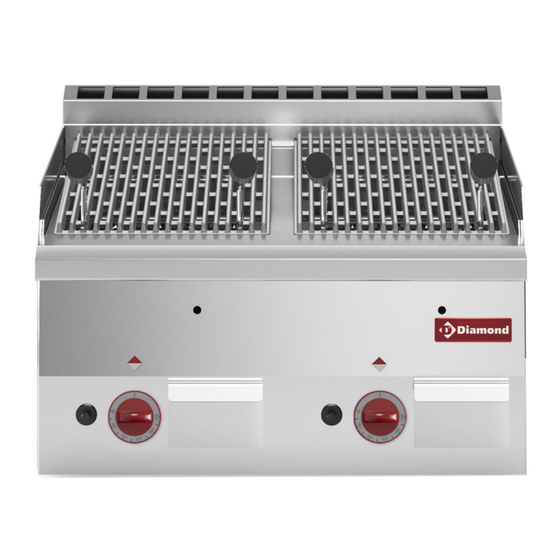
Summary of Contents for Diamond 60/30 GRL Series
- Page 1 MOD : G60/GPL6T-N Production code : F60/60GRLG/T 03/2024...
- Page 2 GRILL / GAS LAVA STONE GRILL Installation-Use-Maintenance MOD. _70/40 GRG… _60/30 GRL _65/40 GRG _70/70 GRG… _60/60 GRL _65/70 GRG _70/40 GRE… _65/40 GRL _70/80 GRE… _65/70 GRL _70/40 GRL… _70/80 GRL… _70/40 GRACQE _70/80 GRACQE Doc.n° 252.445.00 Edition...
-
Page 3: Table Of Contents
UK - INSTALLATION – USE - MAINTENANCE ..........................16 GENERAL PRESCRIPTIONS ..................................16 DISPOSAL OF PACKING AND OF THE APPLIANCE ................................16 INSTRUCTIONS FOR INSTALLATION ................................17 REMINDERS FOR THE INSTALLER ....................................17 REFERENCE STANDARDS AND LAWS .................................... 17 UNPACKING ..........................................17 POSITIONING .......................................... -
Page 4: Uk - Installation - Use - Maintenance
UK - INSTALLATION – USE - MAINTENANCE Do not leave de appliance unattended in presence of children and ensure that the latter do not have GENERAL PRESCRIPTIONS acces to the appliance. The appliance must be used by trained personnel. READ THIS MANUAL CAREFULLY. IT Do not leave the appliance unattended when PROVIDES IMPORTANT INFORMATION operating. -
Page 5: Instructions For Installation
Polyethylene - PE). THE MANUFACTURER WILL NOT BE LIABLE FOR ANY DAMAGE OR INJURY - the straps (in Polypropylene - PP). RESULTING FROM FAILURE TO OBSERVING THE FOLLOWING RULES. Identify the specific appliance model. The model APPLIANCE number is detailed on the packing and on the - The appliance is manufactured 90% from recyclable appliance dataplate. -
Page 6: Connections
If the appliance is to be be placed near walls, and appliance. dividers, kitchen furniture, decorative elements etc. - Convert the appliance to the local gas type, if this must be made of non-combustible materials necessary. Follow the instructions at the next paragraph “Conversion to a different type of gas”. -
Page 7: Conversion To Another Type Of Gas
CONNECTION TO THE WATER SUPPLY REPLACING THE NOZZLE AND THE MAIN BURNER PRIMARY AIR REGULATION - The appliance must be connected to a potable water supply. The water inlet pressure must be Remove the control panel. between 150 kPa and 300 kPa. Use a pressure Remove nozzle UM and replace it with the one reducer if the inlet pressure is above the maximum indicated in table TAB1. -
Page 8: Instructions For Use
Do not allow the appliance to operate empty for CHECKING THE GAS SUPPLY PRESSURE prolonged periods. Only pre-heat the oven just To measure the gas supply pressure use a before use. manometer with a minimum definition of 0,1 mbar. Do not leave the appliance unattended while in operation. -
Page 9: Using The Electric Grill
positions: The appliance is designed for cooking foods placed on the grilles provided. The grill must not be used to heat pans or saucepans. SWITCHING ON AND OFF PILOT IGNITION The thermostat control knob has the following MAX. FLAME positions: MIN. -
Page 10: Using The Gas Lava Stone Grill
Any grease from cooking which drips into the grill - Press and turn knob to “pilot on”. and passes through the brazier is collected in the - Press the knob down fully and light the pilot using grease collection tray. Periodically empty and clean the piezoelectric igniter. -
Page 11: Instructions For Maintenance
THE MANUFACTURER WILL NOT BE collection drawer and then wipe with a damp cloth. LIABLE FOR ANY DAMAGE OR INJURY RESULTING FROM FAILURE TO - Take care not to damage the pilot ignition unit. OBSERVING THE FOLLOWING RULES. - Refit the tile, taking care to insert the front pins in DISCONNECT THE APPLIANCE ELECTRIC their seats. -
Page 12: Conversion To Another Type Of Gas
appliance dataplate. THOUGH PILOT IS LIT). Possible causes: The appliance must be installed in a well-ventilated - Defective burner (gas outlet holes clogged). room. Do not obstruct any air vents or drains present on the appliance. ELECTRIC GRILL Do not tamper with appliance components. Appliance maintenance and conversion to a THE APPLIANCE DOES NOT HEAT. - Page 13 - Remove the control knob. SHUT THE GAS SHUT-OFF VALVE - Remove the bottom front panel. AND/OR SWITCH THE APPLIANCE OFF - Remove and replace the component. AT THE MAIN SWITCH INSTALLED - Reassemble all parts. For assembly, proceed in UPSTREAM.
-
Page 14: Cleaning The Interior
- Reassemble all parts. For assembly, proceed in reverse order. CLEANING THE INTERIOR Check the condition of the inside of the appliance. Remove any built-up dirt. Check and clean the fumes exhaust system. MAIN COMPONENTS GAS GRILL - Gas Cock - Main Burner - Pilot burner - Thermocouple...


Need help?
Do you have a question about the 60/30 GRL Series and is the answer not in the manual?
Questions and answers