Advertisement
Quick Links
IMPORTANT! – READ BEFORE INSTALLATION
•
NOT SUITABLE for vehicles equipped with front mounted center radiator
electric fan!
•
When installed in accordance with these instructions, the front protection bar does
not affect the operation of the vehicles SRS airbags.
•
This product must be installed exactly as per these instructions using only
hardware supplied.
•
Take a few moments to read instructions thoroughly before beginning work.
•
In the event of damage to any bar component please contact OFFROAD ANIMAL
to arrange repair/replacement of components.
•
Do not use this product for any vehicle make or model other than that specified on
these instructions.
•
Do not remove labels from this product.
•
This product and its fixings must not be modified in any way unless stated in these
fitting instructions.
•
The installation of this product is recommended for trained personnel.
•
These instructions are correct at time of publication. OFFROAD ANIMAL cannot
be held responsible for the impact of any changes subsequently made by the
vehicle manufacturer. If you find something has changed, please contact us to let
us know!
•
During installation it is the duty of the installer to check correct
operation/clearances of all components.
•
If Instructions are to be printed for reference in the workshop, it is recommended
that they are printed in color, for best legibility.
Fitting Difficulty 9/10
Approx install time 6-8 Hours
REV B
FB-LDF-L663-20-PR-ASM0
Fitting Instruction
23/09/2024
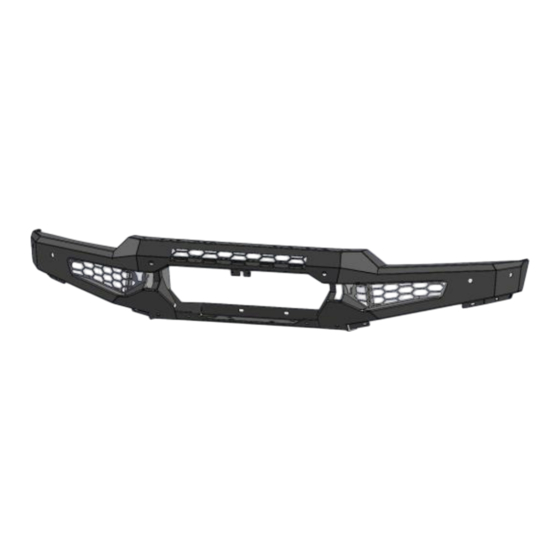
Land Rover Defender L663 20+
Predator & Toro Front Bar
Page 1 of 84
Advertisement

Related Manuals for Offroad Animal FB-LDF-L663-20-PR-ASM0

Summary of Contents for Offroad Animal FB-LDF-L663-20-PR-ASM0
- Page 1 • Take a few moments to read instructions thoroughly before beginning work. • In the event of damage to any bar component please contact OFFROAD ANIMAL to arrange repair/replacement of components. • Do not use this product for any vehicle make or model other than that specified on these instructions.
- Page 2 FB-LDF-L663-20-PR-ASM0 Land Rover Defender L663 20+ Fitting Instruction Predator & Toro Front Bar IMPORTANT: Check all parts are present before beginning work! Contact OFFROAD ANIMAL if something is missing. Main Parts – In the Box Part Number Description Image FB-LDF-...
- Page 3 FB-LDF-L663-20-PR-ASM0 Land Rover Defender L663 20+ Fitting Instruction Predator & Toro Front Bar L663 Defender Lower B-1127 Brace Bracket L663 Defender Centre U-0075 Bash plate L663 Defender Fog Light B-1133L Bracket L663 Defender Fog Light B-1133R Bracket L663 Defender Winch Brace...
- Page 4 FB-LDF-L663-20-PR-ASM0 Land Rover Defender L663 20+ Fitting Instruction Predator & Toro Front Bar L663 Defender Bash Plate B-1132R Support L663 Defender Bash B-1132L Plate Support L663 Defender Aux Rad B-1269L Top Outer Air guide L663 Defender Aux Rad B-1269R Top Outer Air guide...
- Page 5 FB-LDF-L663-20-PR-ASM0 Land Rover Defender L663 20+ Fitting Instruction Predator & Toro Front Bar L663 Defender Aux B-1271R Radiator Lower Air guide PWS-TOP- Pinch Weld PWS51T - No Image 1000 Top Bulb Seal 1000mm PWS-SIDE- Pinch Weld PWS53S - No Image...
- Page 6 FB-LDF-L663-20-PR-ASM0 Land Rover Defender L663 20+ Fitting Instruction Predator & Toro Front Bar Predator Small Parts – Contained in Small Parts Kit Bag QTY. PART NO. DESCRIPTION M6x16 BHCS BLACK SCREW, BUTTON HEAD CAP, M6X16X1 ZINC GR12.9, ISO4042 ZnNi BLACK...
- Page 7 FB-LDF-L663-20-PR-ASM0 Land Rover Defender L663 20+ Fitting Instruction Predator & Toro Front Bar M8 X 30 BHCS BLACK SCREW, BUTTON HEAD CAP, ZINC M8X30X1.25, ISO4042 ZnNi BLACK PASSIVATED FINISH M6CN2MM CAGE NUT M6x1.6-2.5 M8 Cage nut NUT, CAGE, M8X1.25 ZINC PLATE...
- Page 8 FB-LDF-L663-20-PR-ASM0 Land Rover Defender L663 20+ Fitting Instruction Predator & Toro Front Bar The following tools will be required to install the product. Hand Tools Power Tools Workshop Supplies Metric Socket Set 8- Electric/Air Impact Panel Stand or Soft 19mm...
- Page 9 FB-LDF-L663-20-PR-ASM0 Land Rover Defender L663 20+ Fitting Instruction Predator & Toro Front Bar It is the responsibility of the installer to always complete works in a safe manner. Make sure the following safety equipment is available, and precautions are observed whilst fitting this product.
-
Page 10: Tools Required
Trim Tool with front mounted center radiator electric T30 Torx Screwdriver fan! Contact Offroad Animal before beginning work if front center fan is equipped. If vehicle is equipped with Air Suspension, raise to offroad height to provide more room to work. - Page 11 FB-LDF-L663-20-PR-ASM0 Land Rover Defender L663 20+ Fitting Instruction Predator & Toro Front Bar Disconnect the radar electrical harness connector, TOOLS REQUIRED Located near the top of the LH headlight. FASTENERS REV B 23/09/2024 Page 11 of 84...
- Page 12 FB-LDF-L663-20-PR-ASM0 Land Rover Defender L663 20+ Fitting Instruction Predator & Toro Front Bar Side Clips Push Tab In TOOLS REQUIRED There are 4x clips securing each side of the grille. Working from the top push in the center tab (with...
- Page 13 FB-LDF-L663-20-PR-ASM0 Land Rover Defender L663 20+ Fitting Instruction Predator & Toro Front Bar Center Lift Screws Clips Hidden Screw Screw Center Lift Clip 12. Remove the 4 Posidrive screws securing the inner TOOLS REQUIRED wheel arch liner to the bumper Trim Tool 13.
- Page 14 FB-LDF-L663-20-PR-ASM0 Land Rover Defender L663 20+ Fitting Instruction Predator & Toro Front Bar Release First 3 Clips To approx. location Start from bottom 16. Starting from the bottom edge of the wheel arch TOOLS REQUIRED flare trim, unclip the first 3 clips securing to the fender by pulling the trim away from the fender.
- Page 15 FB-LDF-L663-20-PR-ASM0 Land Rover Defender L663 20+ Fitting Instruction Predator & Toro Front Bar Disconnect Harnesses 19. Using trim tool, release the main wiring harness TOOLS REQUIRED from clips securing it to the bumper. Trim Tool 20. Disconnect the main wiring harness and front camera connector.
- Page 16 FB-LDF-L663-20-PR-ASM0 Land Rover Defender L663 20+ Fitting Instruction Predator & Toro Front Bar Remove bolt TOOLS REQUIRED 21. Remove the 10mm head bolt securing the headlight surround trims to the radiator support panel. Trim Tool 10MM Socket 22. Starting from the bottom corner carefully but firmly pull the trim away from the vehicle to release the clips.
- Page 17 FB-LDF-L663-20-PR-ASM0 Land Rover Defender L663 20+ Fitting Instruction Predator & Toro Front Bar Clips along this edge Flat Head Screws 25. On the underside at the front of the bumper, TOOLS REQUIRED remove the 4x flat head screws that hold the recovery point cover to the bumper.
- Page 18 FB-LDF-L663-20-PR-ASM0 Land Rover Defender L663 20+ Fitting Instruction Predator & Toro Front Bar 27. Using T30 Torx Screwdriver Remove the 4x Torx TOOLS REQUIRED head screws securing the bottom of the bumper to the vehicle. FASTENERS REV B 23/09/2024 Page 18 of 84...
- Page 19 FB-LDF-L663-20-PR-ASM0 Land Rover Defender L663 20+ Fitting Instruction Predator & Toro Front Bar 28. Remove the 5x 10mm head bolts securing the top TOOLS REQUIRED edge of the bumper to the vehicle. 10mm Socket / Spanner (The bolts have been removed already in this...
- Page 20 FB-LDF-L663-20-PR-ASM0 Land Rover Defender L663 20+ Fitting Instruction Predator & Toro Front Bar 29. Starting from the wheel arch firmly but carefully TOOLS REQUIRED pull the bumper away from the retaining clips on the fender. 30. With assistance, complete clip release on both sides simultaneously.
- Page 21 FB-LDF-L663-20-PR-ASM0 Land Rover Defender L663 20+ Fitting Instruction Predator & Toro Front Bar Unplug 31. If equipped, unplug the fog light harness from the TOOLS REQUIRED fog lights. Torx Screwdriver / Bit 32. Remove the fog light, by removing the 3x Torx screws securing 33.
- Page 22 FB-LDF-L663-20-PR-ASM0 Land Rover Defender L663 20+ Fitting Instruction Predator & Toro Front Bar Pry tabs outwards and push from front of bar to remove sensor 34. Pry the two retaining tabs on the parking sensor TOOLS REQUIRED housing outwards whilst applying pressure to the face of the sensor from the front side of the bumper.
- Page 23 FB-LDF-L663-20-PR-ASM0 Land Rover Defender L663 20+ Fitting Instruction Predator & Toro Front Bar 36. Lift the center plastic bar to reveal the 3x Torx TOOLS REQUIRED screws securing the front camera to the bumper. Torx Screwdriver / Bit 37. Remove the 3x Torx screws to release camera.
- Page 24 FB-LDF-L663-20-PR-ASM0 Land Rover Defender L663 20+ Fitting Instruction Predator & Toro Front Bar 41. Using a trim tool, unclip all the clips securing the TOOLS REQUIRED wiring harness to the bumper. Trim Tool 42. Remove wiring harness from the bumper and set aside in safe place for re-fitment to the new front bar.
- Page 25 FB-LDF-L663-20-PR-ASM0 Land Rover Defender L663 20+ Fitting Instruction Predator & Toro Front Bar Hex Head Screw Loosen / Remove Side Bolts Torx Head Brake Duct Screw Clip 43. Undo the 6x Torx Head and 2x 10mm Hex head TOOLS REQUIRED screws securing the center air guides.
- Page 26 FB-LDF-L663-20-PR-ASM0 Land Rover Defender L663 20+ Fitting Instruction Predator & Toro Front Bar 47. Release the clips holding the aux radiator coolant TOOLS REQUIRED hoses to the tubular lower radiator guard. 13mm Socket 48. Remove the Factory bolts securing the tubular...
- Page 27 FB-LDF-L663-20-PR-ASM0 Land Rover Defender L663 20+ Fitting Instruction Predator & Toro Front Bar 50. It is now time to remove the main impact beam. TOOLS REQUIRED 51. This is much more difficult than it first appears due 3/8” Drive Ratchet to the vertical bolts securing the top edge of the 3/8”...
- Page 28 FB-LDF-L663-20-PR-ASM0 Land Rover Defender L663 20+ Fitting Instruction Predator & Toro Front Bar Impact Beam Bolt Access 53. On the RHS, in the engine bay adjacent to the TOOLS REQUIRED headlight locate the wiring harness bracket shown. Below this you will be able to see the bolts that 10mm Socket need to be removed to remove the impact bar.
- Page 29 FB-LDF-L663-20-PR-ASM0 Land Rover Defender L663 20+ Fitting Instruction Predator & Toro Front Bar Remove 8mm Bolt 55. On the LHS, the impact beam top bolts are in the TOOLS REQUIRED same location. This side is obstructed by the coolant overflow tank.
- Page 30 FB-LDF-L663-20-PR-ASM0 Land Rover Defender L663 20+ Fitting Instruction Predator & Toro Front Bar Access Hole 58. Remove the impact beam top bolts. TOOLS REQUIRED 59. On LHS we found it best to insert the socket 3/8” Extension bar contraption through the access holes in the top of the body.
- Page 31 FB-LDF-L663-20-PR-ASM0 Land Rover Defender L663 20+ Fitting Instruction Predator & Toro Front Bar Remove Bolt That obstructs access Front View Top View TOOLS REQUIRED 62. On RHS there is a bolt that obstructs access to one of the vertical impact beam bolts. Back out the 3/8”...
- Page 32 FB-LDF-L663-20-PR-ASM0 Land Rover Defender L663 20+ Fitting Instruction Predator & Toro Front Bar 67. Remove the 8x Factory flange bolts (4 Per side) TOOLS REQUIRED securing the impact beam to the chassis, using 13mm Socket 13 mm Socket 68. Remove set aside the impact beam.
- Page 33 FB-LDF-L663-20-PR-ASM0 Land Rover Defender L663 20+ Fitting Instruction Predator & Toro Front Bar 69. Next step is to remove the plastic bumper TOOLS REQUIRED retainer. 10mm socket / spanner 70. Remove the 10mm head factory bolt securing the Trim tool Aux radiator shroud to the bumper retainer.
- Page 34 FB-LDF-L663-20-PR-ASM0 Land Rover Defender L663 20+ Fitting Instruction Predator & Toro Front Bar Top Inside Access Through Engine Bay Clip 74. Remove the plastic auxiliary radiator air guides. TOOLS REQUIRED These are clipped onto the radiator supports in 4x places.
- Page 35 FB-LDF-L663-20-PR-ASM0 Land Rover Defender L663 20+ Fitting Instruction Predator & Toro Front Bar 78. Remove the 10mm head factory screw securing TOOLS REQUIRED the bottom of the plastic radiator support to the 10mm Socket chassis. This bolt is accessed from behind.
- Page 36 FB-LDF-L663-20-PR-ASM0 Land Rover Defender L663 20+ Fitting Instruction Predator & Toro Front Bar Tab In Front 79. Reposition the plastic radiator support such that TOOLS REQUIRED the plastic tab sits in front of the chassis horn. 10mm Socket Use the flex in the plastic to manipulate the tab around the chassis end.
- Page 37 FB-LDF-L663-20-PR-ASM0 Land Rover Defender L663 20+ Fitting Instruction Predator & Toro Front Bar 45 Deg Down at edge Cut Line shown 10mm from corner 20mm from edge, Parallel with Ground 82. Using a ruler and paint marker, mark out the...
- Page 38 FB-LDF-L663-20-PR-ASM0 Land Rover Defender L663 20+ Fitting Instruction Predator & Toro Front Bar 83. Using a sharp utility knife, air hacksaw or TOOLS REQUIRED oscillating multi tool, carefully cut along marked lines and remove center section of radiator Utility Knife shroud.
- Page 39 FB-LDF-L663-20-PR-ASM0 Land Rover Defender L663 20+ Fitting Instruction Predator & Toro Front Bar Parallel to front Level with flat edge face on back side 84. Mark out the following trim to remove the TOOLS REQUIRED triangular shaped section of the outer flange on the plastic radiator support.
- Page 40 FB-LDF-L663-20-PR-ASM0 Land Rover Defender L663 20+ Fitting Instruction Predator & Toro Front Bar 10mm from 10mm from edge of edge of molded rib molded rib 10mm from edge of molded rib In line with front of molded rib 88. Using Paint pen and ruler mark out the following...
- Page 41 FB-LDF-L663-20-PR-ASM0 Land Rover Defender L663 20+ Fitting Instruction Predator & Toro Front Bar Mark Line Level with bottom of fender Measure from Corner TOOLS REQUIRED 90. Measure approx. 90mm from the bottom of the Ruler fender flares and place masking tape across that Marker location.
- Page 42 FB-LDF-L663-20-PR-ASM0 Land Rover Defender L663 20+ Fitting Instruction Predator & Toro Front Bar Hold Flare away from fender during cut 94. Using an Oscillating Multi Tool or Air Hacksaw TOOLS REQUIRED carefully trim along the line marked, whilst holding the flare away from the fender. Take extra care to Oscillating Multi Tool ensure this cut is straight and clean.
- Page 43 FB-LDF-L663-20-PR-ASM0 Land Rover Defender L663 20+ Fitting Instruction Predator & Toro Front Bar 100. Finally, it’s time to start putting some new bits on! TOOLS REQUIRED 16mm Socket 101. First fit the subframe bracket, using the 2x 16mm Torque Wrench head factory flange bolts removed from the tubular radiator guard.
- Page 44 FB-LDF-L663-20-PR-ASM0 Land Rover Defender L663 20+ Fitting Instruction Predator & Toro Front Bar 2x M8 Factory Flange Bolts – From Impact Beam M8 Flange Nuts (Supplied) 4x M10 Factory Flange Bolts – From Impact Beam, into chassis Captive Nuts 103. Fit the impact assemblies to the chassis, using TOOLS REQUIRED fasteners shown in the image above.
- Page 45 FB-LDF-L663-20-PR-ASM0 Land Rover Defender L663 20+ Fitting Instruction Predator & Toro Front Bar Fit 1x M12x40 Hex Bolt + Flat Washer (Supplied) Hold Nut Plate from underneath 105. Hold one of the M12 short stem nut plates in TOOLS REQUIRED position behind the bottom of the chassis end.
- Page 46 FB-LDF-L663-20-PR-ASM0 Land Rover Defender L663 20+ Fitting Instruction Predator & Toro Front Bar Fit 1x M12x40 Hex Bolt + Flat Washer (Supplied) Hold Nut Plate from Behind, Access through bonnet or wheel arch 108. With assistance from another person, hold one of...
-
Page 47: Tape Measure
FB-LDF-L663-20-PR-ASM0 Land Rover Defender L663 20+ Fitting Instruction Predator & Toro Front Bar MEASURE Adjust 112. Measure Distance between outside edges uprights TOOLS REQUIRED on bar using tape measure. Write distance below for reference if required. TAPE MEASURE Bar Upright Width = ___________mm 13, 15 &... - Page 48 FB-LDF-L663-20-PR-ASM0 Land Rover Defender L663 20+ Fitting Instruction Predator & Toro Front Bar Re-Tighten Bolt Loosened for Access on Front Tighten Top Bolts using same technique as removal 115. Once happy with alignment, with the front face TOOLS REQUIRED bolts snug, tighten the impact assembly bolts in 3/8”...
- Page 49 FB-LDF-L663-20-PR-ASM0 Land Rover Defender L663 20+ Fitting Instruction Predator & Toro Front Bar Torque Factory M10 First Torque M12 Second 118. Next tighten the Factory M10 Flange bolts using a TOOLS REQUIRED torque Wrench and extension bar. 13mm Socket 18/19mm Socket IMPORTANT.
- Page 50 FB-LDF-L663-20-PR-ASM0 Land Rover Defender L663 20+ Fitting Instruction Predator & Toro Front Bar 123. Re fix the wiring bracket and coolant overflow TOOLS REQUIRED tank that were loosened for access to the top 10mm socket impact assembly bolts. 8mm socket 124.
- Page 51 FB-LDF-L663-20-PR-ASM0 Land Rover Defender L663 20+ Fitting Instruction Predator & Toro Front Bar M10x25 Hex Bolt-> M10 HD Flat Washer-> Impact Assy -> Bash Plate Support -> M10 Flange Nut Slide Rubber supports to prevent hose touching bracket Fit M8 Cage nut to bash...
- Page 52 FB-LDF-L663-20-PR-ASM0 Land Rover Defender L663 20+ Fitting Instruction Predator & Toro Front Bar Slots Vertical Brackets angled inwards Bottom to top M10x25 Hex Bolt-> M10 HD Flat Washer-> Subframe Bracket -> Winch Strap -> M10 Flange Nut TOOLS REQUIRED 130. Fit the Winch support straps to the slots on the...
- Page 53 FB-LDF-L663-20-PR-ASM0 Land Rover Defender L663 20+ Fitting Instruction Predator & Toro Front Bar Re- Fit OE Bolt 133. Re Fit headlight surround trims. TOOLS REQUIRED 10mm Socket 134. Push into place from the front to secure clips then replace the original 10mm head factory bolt.
- Page 54 FB-LDF-L663-20-PR-ASM0 Land Rover Defender L663 20+ Fitting Instruction Predator & Toro Front Bar Re-Fit Shroud Harness Clips Clips Reconnect Harness 136. Re Fit Grille, push into position to re-seat clips TOOLS REQUIRED securing down both sides of the grille. T30 Torx Screwdriver 137.
- Page 55 FB-LDF-L663-20-PR-ASM0 Land Rover Defender L663 20+ Fitting Instruction Predator & Toro Front Bar B-1269L Top Outer Air Guide B-1270L Top Inner Air Guide B-1271L Lower Air Guide Trim to Push On Length 139. Unpack and identify the 3x air guide brackets for TOOLS REQUIRED each side of the vehicle.
- Page 56 FB-LDF-L663-20-PR-ASM0 Land Rover Defender L663 20+ Fitting Instruction Predator & Toro Front Bar Note different cage thickness Thin Cage (Air Guides) Thick Cage (Impact Assembly) 143. Fit M6x3mm cage (thicker cage) nuts to the 2x TOOLS REQUIRED rectangular slots in the impact assembly. Place nut behind slot and squeeze into position.
- Page 57 FB-LDF-L663-20-PR-ASM0 Land Rover Defender L663 20+ Fitting Instruction Predator & Toro Front Bar B-1269L Sits on TOP of B-1270L Prepare Bolts for Fitting 146. Pre-Assemble upper air guide, using M6x20 TOOLS REQUIRED Black Button head screws and Cage nuts into the cage nuts placed in last step.
- Page 58 FB-LDF-L663-20-PR-ASM0 Land Rover Defender L663 20+ Fitting Instruction Predator & Toro Front Bar Brackets behind bodywork Secure M6x20, Flat washer and Flange Nut to Slot in Impact Assy Secure with Factory Bolts to Fender 150. Fit the pre-assembled upper air guide to the TOOLS REQUIRED vehicle.
- Page 59 FB-LDF-L663-20-PR-ASM0 Land Rover Defender L663 20+ Fitting Instruction Predator & Toro Front Bar Secure with M6x20, Flat washer into Cage Nuts Remove bolt before fitting, re fit with lower guide 154. Remove the inner most factory bolt from the TOOLS REQUIRED fender again.
- Page 60 FB-LDF-L663-20-PR-ASM0 Land Rover Defender L663 20+ Fitting Instruction Predator & Toro Front Bar Pre Fit Bolts Insert Remaining Bolts From Other Side 159. Prepare bar for fitment. Start Fitting the TOOLS REQUIRED Auxiliary tow points to the bar. 15,16/17mm Spanner 160.
- Page 61 FB-LDF-L663-20-PR-ASM0 Land Rover Defender L663 20+ Fitting Instruction Predator & Toro Front Bar 165. Route the Wiring harness through the bar such TOOLS REQUIRED that all plugs are in the correct location. The main harness connector should sit to the OUTSIDE of the mid wing brace on the LH side of the vehicle as shown in the image above.
- Page 62 FB-LDF-L663-20-PR-ASM0 Land Rover Defender L663 20+ Fitting Instruction Predator & Toro Front Bar Angled tab to outside Plug in before Securing 168. Fit the fog lights to the fog light brackets using TOOLS REQUIRED supplied M6x16 black button head bolts and flange nuts.
- Page 63 FB-LDF-L663-20-PR-ASM0 Land Rover Defender L663 20+ Fitting Instruction Predator & Toro Front Bar Clean All surfaces with isopropyl Alcohol, TOOLS REQUIRED 173. Clean area on back side of bar adjacent to sensor holes with isopropyl alcohol. Isopropyl Alcohol, 174. Clean area on Front of parking sensor housings with isopropyl alcohol.
- Page 64 FB-LDF-L663-20-PR-ASM0 Land Rover Defender L663 20+ Fitting Instruction Predator & Toro Front Bar Break Bulb to activate primer stick Prime all areas adjacent to sensor holes Prime sensor Housings 176. Break the bulb of the supplied Primer 94 ampule to TOOLS REQUIRED activate the primer dispensing.
- Page 65 FB-LDF-L663-20-PR-ASM0 Land Rover Defender L663 20+ Fitting Instruction Predator & Toro Front Bar 179. Whist waiting for the adhesion promoter to cure TOOLS REQUIRED fit 5x Cage nuts from small parts kit to rectangular slots in bottom of wing. Small Flat Bladed Screwdriver...
- Page 66 Fit Pan Brace 181. If fitting an integrated light bar, do so now. TOOLS REQUIRED 182. The bar is designed to fit an Offroad Animal 22in 10mm Spanner / Socket light bar. If fitting this light bar, assemble bar with...
- Page 67 FB-LDF-L663-20-PR-ASM0 Land Rover Defender L663 20+ Fitting Instruction Predator & Toro Front Bar Fit Tape to housings Fit Sensors to housing TOOLS REQUIRED 186. After waiting at least 5 minutes for the primer to cure, Fit supplied VHB tape pads to all sensor housings as shown in the inset photo.
- Page 68 FB-LDF-L663-20-PR-ASM0 Land Rover Defender L663 20+ Fitting Instruction Predator & Toro Front Bar Re fit camera connector M5 Black Button Head 191. Ensure the camera loom is correctly routed TOOLS REQUIRED through the cut out in the gusset. 3mm Hex Key 192.
- Page 69 FB-LDF-L663-20-PR-ASM0 Land Rover Defender L663 20+ Fitting Instruction Predator & Toro Front Bar 196. With assistance, either from another person, TOOLS REQUIRED or a lifting trolley, lift the bar onto the mounts on the vehicle. Lifting Trolley 197. Secure with 4x M12x30 Bolts, Heavy Duty washers and M12 Flange Nuts per side, Finger tight at this stage.
- Page 70 FB-LDF-L663-20-PR-ASM0 Land Rover Defender L663 20+ Fitting Instruction Predator & Toro Front Bar Maintain 10-15mm Clearance IN FRONT of Closer clearance panels for top edge. OK at corner Min 10-15mm Clearance Check clearances with Ruler 198. With assistance from another person, Align the bar TOOLS REQUIRED with the edges of the vehicle.
- Page 71 FB-LDF-L663-20-PR-ASM0 Land Rover Defender L663 20+ Fitting Instruction Predator & Toro Front Bar 200. Once bar is secured in position, Secure the winch TOOLS REQUIRED support straps to the back side of the winch cradle, using M10x25 Hex Bolts, HD Flat washers and M10 16/17mm Socket Flange Nuts.
- Page 72 FB-LDF-L663-20-PR-ASM0 Land Rover Defender L663 20+ Fitting Instruction Predator & Toro Front Bar 202. Reconnect the main wiring harness and camera TOOLS REQUIRED connector. Take care to align and connect the mini co-axial connector for the camrea carefully as it is 16/17mm Socket very easy to bend the center pin.
- Page 73 FB-LDF-L663-20-PR-ASM0 Land Rover Defender L663 20+ Fitting Instruction Predator & Toro Front Bar 204. If fitting a winch, do so now. TOOLS REQUIRED 205. The bar is designed to fit most low mount winches, Refer to winch fitting instructions in foot down configuration. WARN ZEON 12 is largest winch confirmed to fit.
- Page 74 FB-LDF-L663-20-PR-ASM0 Land Rover Defender L663 20+ Fitting Instruction Predator & Toro Front Bar M8xFW M8xNyloc asher M8xFW M8x25 asher M8xNylon Washer 208. If Required, Fit winch fairlead to Mesh Panel. Use TOOLS REQUIRED M10 or 3/8” Fasteners supplied with winch. The bar...
- Page 75 FB-LDF-L663-20-PR-ASM0 Land Rover Defender L663 20+ Fitting Instruction Predator & Toro Front Bar M8x16 Button Head M8x20 Hex Head 210. Fit the Mesh Fairlead Mount to the center of the TOOLS REQUIRED bar, using M8x16 Button head (Top), M8x20 Hex...
- Page 76 FB-LDF-L663-20-PR-ASM0 Land Rover Defender L663 20+ Fitting Instruction Predator & Toro Front Bar M6x16 Button Head M8x30 Hex & Flange Nut 212. Before fitting the side under panels, insert the M6 TOOLS REQUIRED Cage nut into the upper rectangular slot on the 4mm Hex Key inside edge.
- Page 77 FB-LDF-L663-20-PR-ASM0 Land Rover Defender L663 20+ Fitting Instruction Predator & Toro Front Bar 218. Screw in 4xM6x16 Button head bolts into the TOOLS REQUIRED threaded inserts in the back of the side under Masking Tape panels. Leave Finger tight. 219. Cover each of the bolt locations with masking tape...
- Page 78 FB-LDF-L663-20-PR-ASM0 Land Rover Defender L663 20+ Fitting Instruction Predator & Toro Front Bar Push Center Clips Apply Paint Pen to Bolt Heads 220. Re fit the inner wheel arch liner, using the 2x push TOOLS REQUIRED center clips. Paint Marker 221.
- Page 79 FB-LDF-L663-20-PR-ASM0 Land Rover Defender L663 20+ Fitting Instruction Predator & Toro Front Bar Flex wheel arch liner forward to conform with under panel Mark edge with Marker / Paint pen 222. Carefully flex the inner wheel arch liner forward to TOOLS REQUIRED conform with the edge of the under panel.
- Page 80 FB-LDF-L663-20-PR-ASM0 Land Rover Defender L663 20+ Fitting Instruction Predator & Toro Front Bar Trim liner along Drill 8mm hole on intersection line witness marks 226. Drill 8mm holes at the witness mark locations for TOOLS REQUIRED the bolt heads. Electric Drill 8mm Drill bit 227.
- Page 81 FB-LDF-L663-20-PR-ASM0 Land Rover Defender L663 20+ Fitting Instruction Predator & Toro Front Bar TOOLS REQUIRED 231. Fit the Compliance Plate to the underside of the winch cradle. Remove the backing paper and secure with the pre applied adhesive. Apply pressure for 10- 20 Seconds for a good bond.
- Page 82 M10x40 Hex head, M10 HD Flat washer, into the factory thread in chassis, with a P-0394 8MM spacer 10x M8x30 Button Head washer between the Offroad animal bash plate and 10xM8 Flat Washer the factory underbody plate. 2x M6x20 Button Head 2xM6 Flat Washer 236.
- Page 83 FB-LDF-L663-20-PR-ASM0 Land Rover Defender L663 20+ Fitting Instruction Predator & Toro Front Bar TORO BARS ONLY M8x20 Button Head Flat Washer 239. If required, fit antenna brackets to the threaded TOOLS REQUIRED inserts behind bar upright using M8x20 Button Head bolts and Flat Washers.
- Page 84 FB-LDF-L663-20-PR-ASM0 Land Rover Defender L663 20+ Fitting Instruction Predator & Toro Front Bar 243. Check all Fasteners are tight. 244. Re-Fit number plate to number plate flip. 245. Head Bush and Enjoy your newly protected Defender! REV B 23/09/2024 Page 84 of 84...
Need help?
Do you have a question about the FB-LDF-L663-20-PR-ASM0 and is the answer not in the manual?
Questions and answers