
Related Manuals for Toyota 1KS CHP


Summary of Contents for Toyota 1KS CHP
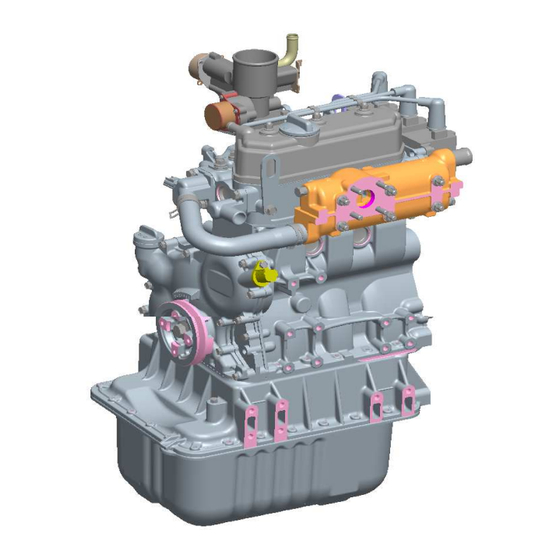
- Page 1 REPAIR MANUAL Engine Model:1KS CHP/GHP ENGINE PART NO. : 16000-UJ090 No. RP-1KS-5 Date:2013/3/5...
-
Page 2: Table Of Contents
CONTENTS Page 0. GENERAL SPECIFICATIONS HOW TO READ THIS MANUAL OPERATING TIPS POINTS FOR WHICH SPECIAL CARE MUST BE TAKEN GENERAL INSTRUCTIONS ELECTRICAL PARTS INSPECTION PRECOAT BOLTS (BOLTS WITH SEAL LOCK AGENT COATING ON THREADS)0-8 HANDLING THE FIPG (LIQUID GASKET) 1. - Page 3 CONTENTS Page 3. TIMING GEAR & GEARCASE REMOVING TIMING GEAR COVER AND GEARS CHECKING GEARS REMOVING GEAR CASE REPLACE TIMING GEAR COVER OIL SEAL ASSEMBLE TIMING GEAR CASE AND GEARS 4. RETAINER, OIL SEAL REMOVING PAN REMOVING REAR SEAL RETAINER REPLACING OIL SEAL...
- Page 4 CONTENTS Page 10. IGNITION SYSTEM REMOVING AND INSTALL ADAPTER 10-2 INSPECTION SPARK PLUG 10-2 INSPECTION IGNITION COIL 10-3 CAM POSITION SENSOR REMOVAL, INSPECTION AND INSTALLATION 10-3 INSPECTION WATER TEMPERATURE SENSOR 10-4 11. LUBRICATION SYSTEM DESCRIPTION 11-2 CHANGING OIL 11-2 CHANGING OIL FILTER 11-2 CHECKING OIL PRESSURE 11-2...
-
Page 5: General
Section0 GENERAL Section Contents Page SPECIFICATIONS 0 - 2 HOW TO READ THIS MANUAL 0 - 3 OPERATING TIPS 0 - 3 POINTS FOR WHICH SPECIAL CARE MUST BE TAKEN 0 - 3 GENERAL INSTRUCTIONS 0 - 4 ELECTRICAL PARTS INSPECTION 0 - 6 PRECOAT BOLTS (BOLTS WITH SEAL LOCK AGENT COATING ON THREADS) - Page 6 SPECIFICATIONS Engine model Toyota 1KS Type Natural gas Cycle Number of cylinder and arrangement In-line 3cylinders, longitudinal arrangement Combustion chamber type Heron Type Valve mechanism OHV, Gear drive Bore × Stroke 72.0×78.0 Piston Displacement 0.952 Firing order 1-2-3 (front, center, back) Compression ratio 12.0...
-
Page 7: How To Read This Manual
HOW TO READ THIS MANUAL EXPLANATION METHOD 1. . . . OPERATION PROCEDURE This manual describes detailed explanations of operational procedures, information, standards, and cautions with illustrations and pictures showing various components of 1KS gas engine and how to operate them. 2.... -
Page 8: General Instructions
When handling and moving the cylinder head ASSY or the cylinder block, always wear gloves and do not use your bare hands. GENERAL INSTRUCTIONS 1. For safe operation (1). Wear the correct safety gear (cap, safety goggles, gloves, safety shoes). (2). - Page 9 7. Position and orientation when reassembling (1). Reassemble each part with the same position and orientation from before it was disassembled (2). Reassemble the correct parts in the correct order, keeping to the specified standards (tightening torque, adjustment values etc. ). (Reassemble using the middle value within the range for tightening torque and adjustment values).
-
Page 10: Electrical Parts Inspection
ELECTRICAL PARTS INSPECTION 1. Always disconnect the battery plug before inspecting or servicing electrical parts. 2. Pay sufficient attention when handling electronic parts. (1). Never subject electronic parts, such as computers and relays, to impact. (2). Never expose electronic parts to high temperature or humidity. - Page 11 (2). Differences in results of measurement with circuit testers The circuit tester power supply voltage depends on the tester type : 1.5V, 3.0V and 6.0V The resistance of a semiconductor such as a diode varies with the circuit tester power supply voltage. Diode characteristics are shown in the figure to the left.
-
Page 12: Handling The Fipg (Liquid Gasket)
PRECOATED BOLTS (BOLTS WITH SEAL LOCK AGENT COATING ON THREADS) 1. Do not use precoat bolts in any of the following cases: (1) When a precoat bolt is removed (2) When a precoat bolt is removed as a result of tightening torque check, etc. -
Page 13: Troubleshooting
Section1 TROUBLESHOOTING Section Contents Page ELECTRIC TROUBLE INSPECTION WATER TEMPERATURE SENSOR INSPECTION OIL PRESSURE SWITCH INSPECTION OXYGEN SENSOR INSPECTION ADAPTER MECHANICAL TROUBLE ENGINE DOES NOT CRANK NORMALLY ENGINE DOES NOT START EASILY, OR DOES NOT START AT ALL ENGINE IS ROUGH, OR STOPS, DURING IDLING CANNOT ACCELERATE SMOOTHLY (INCLUDING HESITATION) INSUFFICIENT POWER OUTPUT... -
Page 14: Inspection Water Temperature Sensor
ELECTRIC TROUBLE INSPECTION WATER TEMPERATURE SENSOR (1) Remove the water temperature sensor. (2) Use the circuit tester, measure the resistance value between the terminals according to temperature changes. Standard Temperature ℃ ℃ ℃ ℃ Resistance kΩ 2.2 ~ ~ ~ ~ 2.6 0.29 ~ ~ ~ ~ 0.35 (3) Install the water temperature sensor. -
Page 15: Inspection Adapter
REMOVING ADAPTER 1. Remove two bolts and remove adapter Fig.1. NOTICE Remove the deposit and the foreign substance adhered in the adapter. Fig. 1 - Removing ADAPTER INSPECTION STEPMORTOR STEPMOTOR STEPMOTOR for throttle valve control for fuel control 1. A tester is attached between the combination terminals of the following table, and resistance is measured. -
Page 16: Mechanical Trouble
TROUBLESHOOTING MECHANICAL TROUBLE The causes of engine faults are divided into 3 factors of gas engines. 3 Factors of gas engines 3 factors Main functional parts Good air-fuel mixture Mixer etc Good compression Engine body (Intake and exhaust valves, piston rings, cylinders etc.) Good ignition Ignition coil, spark plugs, resistive cord and ignition The basics are as described above, however, since insufficient maintenance also gives rise to faults. -
Page 17: Engine Does Not Start Easily, Or Does Not Start At All
【Point 1】 To test whether the fault is with the circuit to the starter motor, or with the starter motor itself. connect the starter motor directly to the battery with the 30 terminal and 50 terminal leads. If the starter motor turns, then the fault is in the circui ENGINE DOES NOT START EASILY, OR DOES NOT START AT ALL Phenomenon Main places for inspection and adjustment... -
Page 18: Cannot Accelerate Smoothly (Including Hesitation)
CANNOT ACCELERATE SMOOTHLY (INCLUDING HESITATION) Phenomenon Main places for inspection and adjustment 1. Spark plugs Ignition 2. Ignition timing 3. Ignition circuit 1. Intake and exhaust valve contact 2. Piston rings Compression 3. Piston 4. Cylinder INSUFFICIENT POWER OUTPUT (INCLUDING HUNTING) Phenomenon Main places for inspection and adjustment 1. -
Page 19: Abnormal Combustion
Places for inspection and adjustment when fuel consumption has become greater than previously Classification Main places for inspection and adjustment Ignition 1. Ignition timing Fuel 1. Mixer 1. Valve 2. Piston rings Compression 3. Piston 4. Cylinder Cooling 1. Coolant temperature 【Point 1】 【Point 1】... -
Page 20: Abnormal Engine Noise, Or Noisy Engine
Back fire Item Inspection content Check the operation and adjustment of parts that might make the air-sue mixture too lean. Fuel, intake system ・ Air being sucked in from the intake manifold Inspect to see whether the ignition timing is too retarded Ignition timing, ・... - Page 21 Noise that is often heard at a certain engine speed Probable cause Example of sound Notes The knocking sound is loud when the engine is cold, and grows quieter or stops as the engine warms up. Since aluminum alloy piston expand more than the cylinder, Side knocking of the ・...
-
Page 22: Excessive Engine Oil Consumption
EXCESSIVE ENGINE OIL CONSUMPTION A classification of oil consumption by the main phenomena is as follows 1. Oil loss via the piston ring This is when the oil that lubricates the cylinder walls gets into the combustion chamber. After the engine has warmed up, after left idling or operated at about 1000 rpm for 4 to 5 minutes, if the engine is raced, a large amount of white-purple exhaust is output for the first 30 to 60 seconds, thereafter tending to become less. -
Page 23: 2. . . . Cylinder Head & Valve
Section2 CYLINDER HEAD & VALVE Section Contents Page REMOVING CYLINDER HEAD DISASSEMBLE CYLINDER HEAD INSPECTION AND REPAIR CYLINDER HEAD VALVE GUIDES VALVES DISASSEMBLE ROCKER ARM SHAFT ASSEMBLE ROCKER ARM SHAFT ASSEMBLE CYLINDER HEAD 2-10 INSTALL CYLINDER HEAD 2-11 ADJUST VALVES... - Page 24 REMOVING CYLINDER HEAD Exhaust Manifold 1. Remove Water hoses 2. Remove Intake and Exhaust Manifold Intake Manifold Fig.1-Remove Exhaust Manifold 3. Remove Intake Manifold 4. Remove Ignition plug and tube Ignition plug and tube Use an ignition plug wrench and remove ignition plugs (3pcs.) and ignition plug tube (3 pcs.) Intake Manifold Fig.2-Remove Intake Manifold...
- Page 25 7. Remove Valve rocker shaft assy Valve Stem Cap (1) Nut (3 pcs.) , Washer (3 pcs.) (2) Remove the valve rocker shaft ASSY. (3) Remove the Valve Stem Cap 8. Remove Valve push rod NOTE Mark push rods so that they may be reassembled in their original position.
-
Page 26: Inspect And Repair
1. Remove Valve (1) Set the Valve Spring Compressor to the valve to compress the valve spring, and remove two retainer locks. Fig.7-Remove the valve (2) Remove spring retainers, springs, seats, valve and oil seal. NOTE Remove parts shall be arranged orderly for each cylinders. - Page 27 3. Check Valve guide bush (1) Use a caliper gauge and measure the inside diameter of the valve guide bush. LIMIT 6.10mm If the limit is exceeded, replace the valve guide bush Fig.11-Check the valve guide bush inside diameter Remove valve guide bushing if required. (1) Use bushing driver, SST, press out valve guide bushing from combustion chamber side.
- Page 28 (2) Measure valve stem diameter at specified distance from end of valve, as shown in Fig.15. LIMIT IN: 5.952mm EX: 5.948mm 35mm If the limit is exceeded, replace the valve Fig.15-Measure Valve Stem Diameter 7. Check Valve and valve seat contact (1) Thinly coat red lead on the valve face (2) Insert the valve into the valve guide bush.
- Page 29 (3) Use a compound and lap the valve (4) After lapping, use red lead and check that the valve contact is uniform on the whole circumference CAUTION Thoroughly remove the compound after valve lapping Fig.19-Lapping the valve 9. Inspect valve stem cap for wear. Replace if cap is worn recessed.
-
Page 30: Disassemble Rocker Arm Shaft
DISASSEMBLE ROCKER ARM SHAFT Remove snap rings from ends of rocker arm shaft. Remove set screw from center rocker arm support. Disassemble rocker arm assembly. Note position of all components. SET SCREW SPRING ROCKER ARM SUPPORT, VALVE ROCKER WASHER SNAPRING SHAFT, VALVE ROCKER Rocker Arm Components (1) Snapring removal (2 pcs.) -
Page 31: Assemble Rocker Arm Shaft
ASSEMBLE ROCKER ARM SHAFT Oil all components before assembling. Small grooves in rocker shaft next to oil holes must face down. Assemble rocker arm components, noting order of assembly as shown in Fig. Note position of three thrust washers. Install set screw in center rocker arm shaft support. SET SCREW(1) SPRING(2) ROCKER ARM(6) -
Page 32: Assemble Cylinder Head
ASSEMBLE CYLINDER HEAD 1 .HEAD, CYLINDER 2 .GASKET, CYLINDER HEAD 3 .CAP, VALVE STEM 4 .LOCK, VALVE SPRING RETAINER 5 .RETAINER, VALVE SPRING 6 .SPRING, COMPRESSION 7 .VALVE 8 .SEAT, VALVE SPRING 9 .SEAL, VALVE STEM OIL 10 .BUSHING, VALVE GUIDE 11 .ROD, VALVE PUSH 12 .SHAFT ASSY, VALVE ROCKER 13 .BOLT, STUD (T=12Nm) -
Page 33: Install Cylinder Head
NOTE: ・ Thoroughly clean the parts to be assembled. ( F ) ・ Coat engine oil on the sliding contact and rotating ( E ) ( D ) surface. ・ Replace the gaskets and oil seals with new parts. ( C ) ( B ) 2. -
Page 34: Adjust Valves
3. Lubricate push rods with engine oil then install with recessed end up RECESSED END UP Fig.29-Install Push Rods 4. Install Valve rocker shaft ASSY (1) Install CAP, VALVE STEM at its original position before removal. (2) Install the valve rocker shaft ASSY to the cylinder head. - Page 35 2. Vallve clearance adjustment (1) Loosen the lock nut and turn the adjusting screw for adjustment. Standard: : : : IN 0.25±0.05mm (Cool engine) EX 0.25±0.05mm (Cool engine) (2) Tighten the lock nut and recheck the valve clearance T = 11 Nm Fig.33-Adjust Valve Clearances With No.
-
Page 36: Timing Gear & Gearcase
Section3 TIMING GEAR & GEARCASE Section Contents Page REMOVING TIMING GEAR COVER AND GEARS CHECKING GEARS REMOVING GEAR CASE REPLACE TIMING GEAR COVER OIL SEAL ASSEMBLE TIMING GEAR CASE AND GEARS 3 - 1... - Page 37 REMOVING TIMING GEAR COVER AND GEARS 1. Engine oil draining (1) Prepare a container for drained oil (2) Remove the oil pan plug to drain the engine oil WARNING ・ Please go in a cool state. There might be the burn by hot oil. Fig.1-Draining the engine oil 2.
- Page 39 Remove timing gear cover (1) Remove set bolts (12pcs), and set nuts (2pcs) cover (2) Discard timing gear cover gasket. NOTE Carefully prevent the timing gear cover and timing gear case installation surface from any damage. Fig.5-Removing the timing gear cover Remove oil pump drive gear.
-
Page 40: Removing Gear Case
3. Hold idler gear as shown and check gear backlash between camshaft timing gear and idler gear using dial indicator, Fig.9. Camshaft timing gear backlash must not exceed 0.2 mm. NOTE Idler gear must not turn while checking. Fig.9-Checking Camshaft Timing Gear Backlash REMOVING GEAR CASE (1) Remove camshaft thrust plate set bolt (2) Remove 5 set bolts... - Page 41 2. Install timing gear case with new gasket. Install camshaft retainer, Fig.13. NOTE It may be necessary to rotate oil pump drive to engage oil pump rotors. NOTE Position camshaft retainer so that center hole does not interfere with camshaft. Note position, length and number of bolts as shown.
- Page 42 7. Install timing gear cover with new gasket. Use 12 bolts and 3 nuts and install the timing gear cover with a new gasket in-between. M6×30mm(9pcs) M6×55mm(3pcs) M6 Nut(2pcs) Fig.17-Installing Timing Gear Cover 8. Install crankshaft pulley with timing mark at 12 o'clock position (#1 cylinder) NOTE: Be sure alignment pin in crankshaft gear is seated...
-
Page 43: Retainer, Oil Seal
Section4 RETAINER, OIL SEAL Section Contents Page REMOVING PAN REMOVE REAR SEAL RETAINER REPLACING OIL SEAL INSTALLING REAR SEAL RETAINER 4 - 1... -
Page 44: Removing Rear Seal Retainer
REMOVING PAN 1. Remove Oil pan (see section 3) REMOVING REAR SEAL RETAINER 1. Remove rear seal retainer and discard gasket. (1) Remove set bolts (6pcs) Fig.1-Removing Seal Retainer REPLACING OIL SEAL 1. Remove oil seal. Use a screwdriver and a hammer to tap out the oil seal Fig.2-Removing Oil Seal 2. -
Page 45: Cylinder Block Disassembly
Section5 CYLINDER BLOCK DISASSEMBLY Section Contents Page ENGINE STAND DISASSEMBLE CYLINDER BLOCK 5 - 1... - Page 46 ENGINE STAND An automotive type engine stand is recommended when complete engine disassembly is required. See drawings below for dimensions to make an engine stand mounting fixture. 5 - 2...
- Page 47 DISASSEMBLE CYLINDER BLOCK 1. Remove cylinder head. See Sec. 2. 2. Remove oil pan, oil pick up tube, timing cover, gears and gear case. See Sec. 3. 3. Remove flywheel and rear seal retainer. See Sec. 4. 4. Remove valve lifters. a.
- Page 48 8. Remove crankshaft. a. Remove crankshaft thrust washers (#3 mainbearing). b. Remove upper main bearings from saddles and place with respective bearing caps. Fig.5-Removing Crankshaft 5 - 4...
-
Page 49: Cylinder Block Inspection And Repair
Section 6 CYLINDER BLOCK INSPECTION AND REPAIR Section Contents Page CHECKING CYLINDER BLOCK REPLACING CAMSHAFT BEARING REPLACING CAMSHAFT PLUG CHECKING CYLINDER BLOCK Remove all traces of sealant and gasket material from mounting surfaces. Inspect cylinder block for damage, cracks and stripped threads. Inspect cylinder bores for damage or scores. - Page 50 3. Check cylinder bores for wear, Fig.3. Standard Bore Size: Model Series: φ72.00-72.030 mm a. Measure cylinder bore in 6 points at right angles as shown, Fig.3. b. If cylinder bore is worn more than 0.075 mm or more than 0.035 mm out of round, it must be resized.
- Page 51 2. Install camshaft bearing, Fig. 7. a. Use camshaft bearing driver, SST. SST=09215-87802-000 NOTE Notch on camshaft bearing must face out. Be sure oil hole in bearing is aligned with oil hole in cylinder block. Fig.7-Installing Cam Bearing REPLACING CAMSHAFT PLUG 1.
- Page 52 4. Remove timing gear oil nozzle, Fig.11. Fig.11-Removing Oil Nozzle 5. When re-installing oil nozzle, oil hole must be positioned at 45°angle, pointing towards idler gear, Fig.12. Fig.12-Installing Oil Nozzle 6 - 4...
-
Page 53: 7. . . . Crankshaft And Bearings
Section 7 CRANKSHAFT AND BEARINGS Section Contents Page CHECKING CRANKSHAFT CHECKING MAIN BEARING CLEARANCES CHECKING CONNECTING ROD BEARING CLEARANCES CHECKING CRANKSHAFT END PLAY CHECKING CAMSHAFT CHECKING CRANKSHAFT Inspect crankshaft journals for grooves or signs of scoring. If found, crankshaft must be re-ground or replaced. - Page 54 3. Check crankshaft timing gear teeth for damaged teeth, Fig. 3. NOTE See Section 3 for procedure to check crankshaft timing gear for wear. If crankshaft timing gear teeth are damaged or worn, the crankshaft must be replaced. Fig.3-Checking Timing Gear CHECKING MAIN BEARING CLEARANCES If main bearings show signs of flaking or scoring, bearings must be replaced.
- Page 55 CHECKING CONNECTING ROD BEARING CLEARANCES If connecting rod bearings show signs of flaking or scoring, bearings must be replaced. Connecting rod bearings and crankpin journals must be clean and free of oil. 1. With upper bearing assembled to connecting rod, install connecting rod.
-
Page 56: Checking Camshaft
CHECKING CAMSHAFT 1. Measure camshaft lobe height, Fig.11. If lobes are not to specification, replace the camshaft. Intake and Exhaust: STD: 30.065-30.135 mm Reject: 29.965 mm Fig.11-Checking Camshaft Lobes 2. Measure camshaft journals, Fig. 12. STD: Front - 35.959-35.975 mm Reject: 35.890 mm STD: Center - 35.910-35.955 mm... -
Page 57: Piston, Rings And Connecting Rod Inspection And Assembly
Section 8 PISTON, RINGS AND CONNECTING ROD INSPECTION AND ASSEMBLY Section Contents Page DISASSEMBLE PISTON AND CONNECTING ROD CHECKING PISTON AND RINGS CHECKING PISTON PIN AND CONNECTING ROD ASSEMBLE PISTON AND CONNECTING ROD ASSEMBLE PISTON RINGS TO PISTON DISASSEMBLE PISTON AND CONNECTING ROD 1. - Page 58 CHECKING PISTON AND RINGS If the cylinder bore is to be resized there is no reason to check the piston as a new oversized piston will be used. If the cylinder is not going to be resized and the piston shows no signs of scoring, the piston should be checked.
- Page 59 2. Check piston pin bearing, Fig. 7. a. Replace if greater than 17.98 mm or 0.01 mm out of round. Fig. 7 -Checking Piston Pin Bearing 3. Check crankpin bearing end of connecting rod for out of round, Fig. 8. a.
-
Page 60: Assemble Piston Rings To Piston
2. To insert Stopper in the bottom of Support. a. Turn on the ID mark of the piston. b. Piston and guide NO.2 keep to support. Press fit the piston pin to guide No.1 hit stopper. After assembly, shake from side to side and holding the Piston and Connecting rod make sure that Connecting rod is free to swing Fig.11 -Assembling Piston/Connecting Rod... -
Page 61: Cylinder Block Assembly
Section 9 CYLINDER BLOCK ASSEMBLY Section Contents Page INSTALL CRANKSHAFT INSTALL PISTONS AND CONNECTING RODS GENERAL ASSEMBLY 1 INSTALL TIMING GEAR CASE, CAMSHAFT AND GEARS GENERAL ASSEMBLY 2 INSTALL CRANKSHAFT Install main bearings in cylinder block, Fig. 1. NOTE Upper bearing has an oil groove and oil holes. 1. - Page 62 3. Install crankshaft with gear facing front of cylinder block, Fig. 3. Take care not to damage journals or bearings. a. Install crankshaft shims on #3 main bearing web with grooves facing out. b. Lubricate journals with engine oil. Fig. 3 -Installing Crankshaft 4.
-
Page 63: Install Timing Gear Case, Camshaft And Gears
GENERAL ASSEMBLY 1 1. Install gasket, oil pick-up tube and strainer, Fig. 7. a. Torque bolts to 8.0 Nm Fig. 7 - Installing Oil Pick-Up 2. Install gasket and rear seal retainer, Fig. 8. a. Torque bolts to 6.0 Nm Fig. - Page 64 2. Install timing gear case with new gasket. NOTE: It may be necessary to rotate oil pump drive to engage oil pump rotors. Note position, length and number of screws as shown, Fig. 10. A. M6 x 28 mm : 4 B.
- Page 65 7. Tighten 5 bolts Fig.14 M10×29mm(1pcs) 41Nm M8×45mm(2pcs) 25Nm M8×20mm(1pcs) 19Nm Fig.14-Torque Screws 8. Install timing gear cover with new gasket. Use 12 bolts and 3 nuts and install the timing gear cover with a new gasket in-between,Fig.15. M6×30mm(9pcs) M6×55mm(3pcs) M6 Nut(2pcs) Fig.15-Installing Timing Gear Cover 9....
- Page 66 GENERAL ASSEMBLY 2 1. Lubricate tappets with engine oil and install in cylinder block. 2. See Section 2 for install 9 - 6...
-
Page 67: Ignition System
Section 10 IGNITION SYSTEM Section Contents Page REMOVING AND INSTALL ADAPTER 10-2 INSPECTION SPARK PLUG 10-2 INSPECTION IGNITION COIL 10-3 REMOVING, INSPECTION AND INSTALLATION CAM POSITION SENSOR 10-3 INSPECTION WATER TEMPERATURE SENSOR 10-4 IGNITION SYSTEM PARTS Ignition system consists of three main component parts. 1.Cam position sensor of a permanent magnet and Camshaft rotor for ignition signals 2.Igniter which controls ignition timing based on the signal from cam position sensor 3.Ignition coil prepared for every cylinder... - Page 68 REMOVING AND INSTALL ADAPTER REMOVING AND INSTALL ADAPTER REMOVING AND INSTALL ADAPTER REMOVING AND INSTALL ADAPTER 1. Remove two bolts and remove adapter Fig.1. NOTICE Remove the deposit and the foreign substance adhered in the adapter. Fig. 1 - Removing ADAPTER 2.
- Page 69 Terminal 2nd (-) INSPECTION IGNITION COIL INSPECTION IGNITION COIL INSPECTION IGNITION COIL INSPECTION IGNITION COIL 1. Use the circuit tester, measure the resistance value between the 1st terminal (+) and (-). Terminal 1st (+) Standard: : : : 2.52 - 3.08 Ω (20℃ ℃ ℃ ℃ ) 2.
- Page 70 3. Cam position sensor installation (1) Coat clean engine oil on the O ring.Fig.9. (2) Set Cam position sensor to the engine, tighten 1 set bolt. Torque bolt to 8.0 Nm. O ring Fig.9-Installing the cam position sensor 10-4...
-
Page 71: Lubrication System
Section 11 LUBRICATION SYSTEM Section Contents Page DESCRIPTION 11-2 CHANGING OIL 11-2 CHANGING OIL FILTER 11-2 CHECKING OIL PRESSURE 11-2 DISASSEMBLE GEAR CASE, REMOVING OIL PUMP 11-3 11 - 1... -
Page 72: Changing Oil Filter
DESCRIPTION 1KS engine use a full pressure lubrication system with an oil filter. The gear driven oil pump draws oil from a screened oil pickup in the oil pan and pumps the oil through the oil filter. The filtered oil flows through oil galleries in the cylinder block and is distributed to the main bearings, connecting rod bearings, camshaft bearings and rocker arm shaft. - Page 73 DISASSEMBLE GEAR CASE, REMOVING OIL PUMP 1. Remove GEAR CASE. See Sec. 3. 2. Inspect rotors for wear or damage, Fig. 5. NOTE: If pump rotors are worn or damaged, replace the gear case. Fig. 5 - Inspect Rotors 3. Remove and check pressure relief valve assembly, Fig.
-
Page 74: Special Service Tool
Section 12 SPECIAL SERVICE TOOL ILLUSTRATION PART NO. PART NAME VALVE GUIDE BUSHING REMOVER VALVE GUIDE BUSHING REPLACER VALVE SPRING REPLACER FLYWHEEL HOLDER PISTON PIN REMOVER & REPLACER CRANKSHAFT PULLEY REPLACER 12 - 1... - Page 75 ILLUSTRATION PART NO. PART NAME CAMSHAFT BEARING REMOVER CAMSHAFT BEARING REPLACER TIMING GEAR COVER OIL SEAL REPLACER REAR OIL SEAL REPLACER 12- 2...
Need help?
Do you have a question about the 1KS CHP and is the answer not in the manual?
Questions and answers