Siemens ACEND Series Installation Manual
Hide thumbs
Also See for ACEND Series:
- Installation manual (15 pages) ,
- Installation manual (17 pages)

Subscribe to Our Youtube Channel
Related Manuals for Siemens ACEND Series


Summary of Contents for Siemens ACEND Series
- Page 1 Siemens ACEND Series SC-SP-WR-F, SC-SS-WR-F, SC-SP-WW-F SC-SS-WW-F Installation A6V12744834_en--_b 09/23/2024...
-
Page 2: General Specifications
Lens-based speaker/strobe dual-type appliances have six candela settings. They can be provided as non- synchronized or synchronized strobe appliances, depending on whether the connected Fire Alarm Control Panel (FACP) incorporates the Siemens sync protocol or the Siemens Power Supply. All appliances meet NFPA72 20 millisecond light pulse duration code requirements. -
Page 3: Sound Output
SETTING WATTAGE Sound Output Max. Initial Peak(mA) Max. Initial RMS(mA) Max. Repetitive Peak(mA) Max. Repetitive RMS(mA) Surge Current Time Frame(ms) 16.7 Table 2: Manufacturer Defined Surge Current for Strobe Input 2 SETTING WATTAGE Multiple wattage positions are field selectable using the wattage selector on the appliance. See the following table for position indications for different speaker voltages: Wattage selector Position... -
Page 4: Light Output
SETTING CANDELA LEVEL (ONLY FOR SPEAKER/STROBE DUAL-TYPE APPLIANCES) Light Output -3dB +26 / -31 degrees horizontal; +27 / -32 degrees vertical -6dB +40 / -46 degrees horizontal; +43 / -48 degrees vertical -10.9dB +90 degrees horizontal -9.9dB -90 degrees horizontal -11.5dB +90 degrees vertical -10.3dB... -
Page 5: Wiring Diagram
CURRENT DRAWS 4 CURRENT DRAWS Current Draw (mA) at Different Strobe Candela Settings (cd) Table 5: Strobe Current Draw (mA) at Different Candela Settings at Voltage Range 16 to 33V NOTICE Refer to “Compatibility list” to calculate the maximum number of appliances when the appliances are used with FACPs. - Page 6 WIRING Fig. 3: Wiring Diagram of Speaker/strobe Dual-type Appliances To next appliance or EOL From preceding appliance or FACP Note: ● Polarity is shown in the alarm state in the above diagram. The FACP reverses the polarity during supervision. ● Break all in-out wire runs on supervised circuits to ensure integrity of circuit supervision.
-
Page 7: Mounting Options
MOUNTING MOUNTING OPTIONS 6 MOUNTING 6.1 MOUNTING OPTIONS Option 1: 4" Square Backbox Gang Mount Option 2: Surface Mount 6.2 MOUNTING PROCEDURE 1. Ensure there is enough clearance and wiring room before installing backboxes and conduit, especially if sheathed multiconductor cable or 3/4-inch conduit fittings are used. 2. - Page 8 Siemens strongly recommends that the strobes installed should not present a composite flash rate in the field of view which exceeds five (5) hz at the operating voltage of the strobes. Siemens also strongly recommends that the intensity and composite flash rate of installed strobes comply with levels established by applicable laws, standards, regulations, codes and guidelines.
- Page 9 MOUNTING MOUNTING MATRIX 6.3 MOUNTING MATRIX Notification Appliances Accessories SC-SP-WR-F SC-SP-WW-F SC-SS-WR-F SC-SS-WW-F SCVR-SS-WR-EMG SCVR-SS-WW-EMG SCVR-SS-WR-ALR SCVR-SS-WW-ALR SCVR-SS-WR-AGT SCVR-SS-WW-AGT SCVR-SS-WR-HOF SCVR-SS-WW-HOF SCVR-SS-WR-BNK SCVR-SS-WW-BNK SMB-SS-WR SMB-SS-WW STLENS-R STLENS-A STLENS-B STLENS-G A6V12744834_en--_b 9 | 14...
- Page 10 DIMENSION 7 DIMENSION Speaker/strobe Dual-type Appliance Speaker-only Appliance Surface Mounting Box Decoration Cover Color Lens 10 | 14 A6V12744834_en--_b...
-
Page 11: Regulatory Compliance Information
DISASSEMBLY 8 DISASSEMBLY Insert a small flat blade screwdriver (e.g., 1/4 inch) into the slots shown in the following illustrations, push in to release snap and lift up to disassemble the appliance (a) and remove decoration cover (b) and color lens (c) if installed. -
Page 12: Order Information
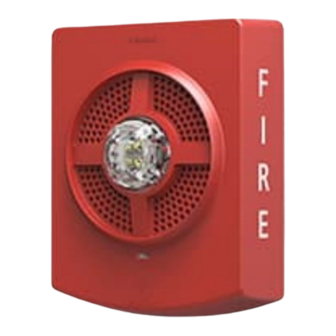
ORDER INFORMATION ACCESSORIES 10 ORDER INFORMATION Type Stock number Description SC-SP-WR-F S54361-F1-A1 Speaker (wall, red, Fire) SC-SP-WW-F S54361-F1-A2 Speaker (wall, white, Fire) SC-SS-WR-F S54361-F3-A1 Speaker-Strobe (wall, red, Fire) SC-SS-WW-F S54361-F3-A2 Speaker-Strobe (wall, white, Fire) 10.1 ACCESSORIES Type Stock number Description SCVR-SS-WR-EMG S54370-F39-A1 Decoration Cover (wall, red, Emergency) - Page 14 Issued by Siemens Industry, Inc. Smart Infrastructure 2 Gatehall Drive Parsippany, NJ 07054 +1 973-593-2600 www.usa.siemens.com/fire © Siemens 2024 Technical specifications and availability subject to change without notice. A6V12744834_en--_b...
Need help?
Do you have a question about the ACEND Series and is the answer not in the manual?
Questions and answers