TRENDnet TW100-S4W1CA User Manual
Broadband internet router with 4-port fast ethernet switch
Hide thumbs
Also See for TW100-S4W1CA:
- User manual (58 pages) ,
- Quick installation manual (39 pages) ,
- Specifications (2 pages)
Table of Contents
Advertisement
Quick Links
See also:
User Manual
Advertisement
Table of Contents

Related Manuals for TRENDnet TW100-S4W1CA


Summary of Contents for TRENDnet TW100-S4W1CA
- Page 1 TW100-S4W1CA Broadband Internet Router with 4-port Fast Ethernet Switch User’s Guide Doc. No. 101102-01...
- Page 2 FCC Certifications This equipment has been tested and found to comply with the limits for a Class B digital device, pursuant to Part 15 of the FCC Rules. These limits are designed to provide reasonable protection against harmful interference in a residential installation. This equipment generates, uses and can radiate radio frequency energy and, if not installed and used in accordance with the instructions, may cause harmful interference to radio communications.
-
Page 3: Table Of Contents
Table of Content Introduction..............................1 ........................2 AMPLE PPLICATION ............................. 3 EATURES ....................... 4 ARTS AMES AND UNCTIONS Factory Default Settings........................6 ............................6 ASSWORD ..................6 OCAL AND LOBAL DDRESSES ISP........................6 NFORMATION FROM Configuration via Web...........................8 ............................9 LOBAL CATV dynamic Mode........................9 PPPoE (DSL dynamic Mode) ....................10 Static Mode ...........................11 ............................ - Page 4 TCP/IP Network Diagnosis......................33 ISP Connectivity Checkup ......................35 Internet Connectivity Checkup ....................35 ....................36 ETTING ECHNICAL UPPORT Appendix A Specifications........................37 Appendix B Supported Internet Applications...................38 Appendix C WAN PORT LINK STATUS ..................39 ......................... 39 LINK STATUS DHCP .......................... 39 LINK STATUS ..................
-
Page 5: Introduction
Introduction The BroadBand Router is an integrated Internet IP sharing device with a built-in 4-port 10/100Mbps N-Way Fast Ethernet switch. Its superb throughput as high as up to 35Mbps between Internet and LAN makes it the perfect solution to connect a small group of PCs to a high-speed broadband Internet connection. -
Page 6: Sample Application
Sample Application Figure 1: Small Office/ Home Office Setup - 2 -... -
Page 7: Features
Features Superb performance with throughput as high as up to 35Mbps between Internet and LAN. Web UI management. Support PPPoE. Support VPN. (PPTP, IPSec pass thru) Support Auto MDI/MDIX for both LAN/WAN port. Rich Internet applications are supported such as MSN, StarCraft, AOE, Battle.net multi-user, Crazy Arcade, NetMeeting, ICQ, mIRC, Web browser, FTP, Telnet, E-Mail, News, Ping, PCAnyWhere... -
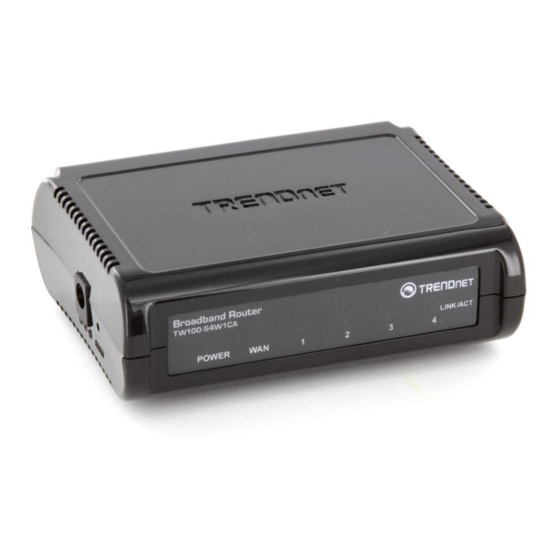
Page 8: Parts Names And Functions
Parts Names and Functions LED Indicators on the Front Panel Ports on the Rear Panel 1 2 3 4 5 Figure 2: LED Indicators and Ports Status Indicator Color Solid Flashing ? Power Green Turns solid green when N/A. power is applied to this /Err /Red device. - Page 9 Port/button Functions Connects the power adapter plug. 5V DC Internet Connects to a Cable/xDSL modem. Local (1-4) Four RJ-45 dual-speed (10/100Mbps) auto-sensing ports for connecting with either 10Mbps or 100Mbps Ethernet connections. RESET Press to restore factory settings. Table 2: Connections Ports - 5 -...
-
Page 10: Factory Default Settings
Factory Default Settings Password Default setting: No password. Setting up password: When configuring the device, press Enter to login the configuration for the first time. It is recommended that you set a password for security and management purpose. Password forgotten? If you forgot the password, you can reset the device to factory setting. Refer to the section titled “Factory Reset”... - Page 11 Under Windows 95 or 98: Click Start?Run, type in “winipcfg”, and select the network adapter (not PPP adapter). Under Windows ME, 2000 or XP: Click Start?Run, type in “command”, and press Enter. At the DOS prompt, type “ipconfig/all”. Look for Adapter “Physical Address”...
-
Page 12: Configuration Via Web
Configuration via Web Before you start setting up this IP Sharing via browser-based web configuration, make sure: Assuming the workstation’s TCP/IP is set to obtain IP automatically and the IP Sharing Device’s Local Port is set to “Distribute IP” (default), and all the cables are connected correctly, you are now ready to configure this device via Web Browser. -
Page 13: Global Port
Global Port The opening screen contains settings for the Global (Internet connection) interface. Click on the down arrow ? to select the desired Internet connection mode on the list. Obtain configuration automatically (CATV dynamic mode): For users who are using Cable Modem Internet service. -
Page 14: Pppoe (Dsl Dynamic Mode)
Domain Name: For example: yourcompany.com. The maximum input for this field is 32 alphanumeric characters and it is case insensitive. Note: 1. Your ISP may ask you to input a certain domain name. 2. Domain name is also required for internal network’s email and news functions. IP Config: This field is grayed out for the IP address is obtained dynamically. -
Page 15: Static Mode
your MAC address. To modify the address, check Modify and enter the desired MAC address. Device/Computer Name: Enter a descriptive name for identification purpose. Some Internet Service Providers (ISP) requires this information and if that is the case, they will provide you with the name. -
Page 16: Local Port
Figure 7 Adapter Address: This field is grayed out, because the Adapter Address is not supposed to be entered randomly. Do Not alter the content unless you are sure it is necessary to modify your MAC address. To modify the address, check Modify and enter the desired MAC address. - Page 17 IP address decides the number of clients allowed for the assigned IP addresses. Note that all the PC on the same LAN should use the same subnet Mask. Users can also set Static DHCP in this page. Users are allowed to set 32 Static DHCP. Using this feature, the device will assign the same IP address to a computer (according to the network adapter’s MAC address) and this computer becomes the only one able to request that IP address.
-
Page 18: Advanced Setup
The starting address of this local IP network address pool. The pool is a piece of continous IP address segment. Keep the default value 192.168.1.1 should work for most cases. Number of IP address: Maximum: 253. Default value 253 should work for most cases. Note: If “Continuous IP address poll starts”... - Page 19 Block WAN Request: Blocks requests from Internet to the local network. If this item is checked, the function of management through Web configuration will be disabled. In other words, Internet requests and the HTTP management, namely ICMP, IDENT, and HTTP will be rejected. Management via Internet: Allows management of this device via HTTP from Internet.
- Page 20 Management via Internet: this field will be automatically disabled when Block WAN Request is checked. If Block WAN Request is not enabled, you can choose to enable/disable this function. Below are coordinate results of Block WAN Request and HTTP management for this device. Refer to this table for further Internet/system management.
-
Page 21: Virtual Server
Figure 11 Modify the configuration port Enable : Check to modify web configuration port number settings. Web Configuration port: Input the port number for web configuration. The default web port for configuration is set to 80. If you want to set the port to other port, input that port number and click SAVE. - Page 22 Figure 12 Add Server Method ?By Name ? By Port You can select to set up a virtual server either by name or by port number. Application (Port): Select and click to scroll down. Select from the most popular server applications for Virtual Server.
-
Page 23: Packet Filters
Server List: Display all the virtual servers. DELETE ALL: Click to delete all the servers on the list. DELETE: Click the Index drop-down menu to select the desired server number and then click DELETE to delete only the selected server. DMZ Host Function: If the DMZ Host Function is enabled, it means that you set up DMZ host at a particular computer to be exposed to the Internet so that some applications/software, especially Internet / online game can have two-way connections. - Page 24 Port Number: The port number(s) for the filters. Port Type: TCP port: filter according to the Connection-Based Application Service on the remote server using the port number. UDP port: filter according to the Connectionless Application Service on the remote server using the port number. Figure 13 ADD: Each time you finished setting the filters, click the ADD button and the added filter will appear on the Filter List..
-
Page 25: Static Router
Static Router You can set static routes to manually administrate the network topology/traffic when the dynamic route is not effective enough. To set static routers, select “Static Route #1” or “Static Route #2”, enter the settings. You can refer to the following two example applications for settings. When finished, click “SAVE” to save settings. - Page 26 Figure 15 Example Application 2: Default Gateway: 192.168.4.2. Destination Network/Host: 192.168.3.0 Figure 16 - 22 -...
-
Page 27: Check E-Mail
Figure 17 Check E-Mail Check E-Mail: You may input your mail account on this IP Share and the device will check e- mails at the frequency that you previously set for the desired interval time. Select the LED number and enter the account name, password, the name of the incoming mail server (POP3;... -
Page 28: Dynamic Dns
Dynamic DNS The Dynamic DNS (require Dynamic DNS Service) allows you to alias a dynamic IP address to a static hostname, allowing your device to be more easily accessed by specific name. When this function is enabled, the IP address in Dynamic DNS Server will be automatically updated with the new IP address provided by ISP. -
Page 29: Network Status
Network Status WAN IP Status Display the current Internet connection status. After the device is connected to the Internet Service, you will see IP, Subnet Mask, Gateway and DNS IP addresses on the table. Figure 20 RELEASE/DISCONNECT: Click on this button to disconnect from ISP and release all the IP information on the WAN port. -
Page 30: Users List
Port Fake: Featuring NAT, the Port Fake is used to translate the local network IP addresses for connecting to the Internet. IP Remote/Port Remote: The outside network IP address/port number of the other end of the session. Idle: The idle time of the session. If the idle time is too long (more than 15 minutes), the device will disconnect the idled session. - Page 31 configurations. To load configuration from file, enter the file name or click Browse… to find the file from your computer. Figure 24 Save Configuration SAVE: Click SAVE to save the current configuration to file. Figure 25 Figure 26 When prompted the upper left screen, select “Save this file to disk”, and the upper right screen will prompt you a dialog box to enter the file name and the file location.
-
Page 32: Firmware Upgrade
LOAD: Click to start loading configuration from file when you are done with the previous settings. Firmware Upgrade Download the latest firmware from your distributor and save the file on the hard drive. Make sure all computers in the network are off or connect the IP Share directly to the PC that has the new firmware. -
Page 33: Changing Password
Changing Password The device has no password at default. It is recommended that you set a password to ensure that no one can adjust the device’s settings. At the setup home page, select Detail Setup at the left panel. Click on Advanced Setup and the click on Management. Click to check the box for Change Administrator’s Password. -
Page 34: Faq
When Should I modify the MAC address for global port settings? Some ISPs identify their clients by the accessing MAC address and the host names, therefore, entering these information is the process required to prove they are who they claim to be. MAC address required for global port settings is the adapter address for the IP Sharing you are now configuring;... -
Page 35: What's Mx (Mail Exchanger)? And Why Mx
Once Wildcard feature was enabled, your host can be reached by *.yourhost.dyndns.org. First , you need to register a dyanmic DNS account with www.dyndns.org. To use this service, you must register with the Dynamic DNS client. The Dynamic DNS Client service provider will give you a password or key. -
Page 36: Can Not Access The Internet
Can not access the Internet Check the physical connectivity of local network. Check if both the LEDs of Local and Global on the product’s front panel are lit. If yes, go to next step. Otherwise, make sure you are using the correct cables and the cables are connected to the network devices properly. -
Page 37: Diagnosis
Diagnosis TCP/IP Network Diagnosis Execute WINIPCFG.EXE or PING.EXE for TCP/IP network diagnosis. WINIPCFG The WINIPCFG program (for Win95, 98, and ME) is used to gather information about the TCP/IP connections that are active on your system. It cannot be used to dynamically adjust TCP/IP connections. - Page 38 Click here to reveal more. Figure 32: IP Configuration On the top, the “Host Name” and “DNS server” of the computer are configured to call when it is looking for a named resource. The default gateway is the server through which the client connects to the Internet.
-
Page 39: Isp Connectivity Checkup
For Win NT and Win2000, go to “Start”?”Programs”?”Accessories”?”Command Promp t” to open the Command Prompt. Type in IPCONFIG /ALL and hit “Enter” to see the adapter’s information. Type in IPCONFIG /RELEASE to release all adapters’ IP address and IPCONFIG /RENEW to renew IP addresses. For a list of the IPCONFIG commands, type in IPCONFIG /? PING.EXE Ping is used to verify that a computer is active and available. -
Page 40: Getting Technical Support
C:\> PING 168.95.192.1 –w 5000 C:\> PING www.yahoo.com –w 5000 If successful, you are connected to the Internet. If you can ping the ISP’s gateway, but cannot ping a specific site (e.g. www.yahoo.com) on the Internet, chances are, your ISP has an internal problem (DNS server not available). Getting Technical Support For further problems, please contact the distributor. -
Page 41: Appendix A Specifications
Appendix A Specifications IEEE 802.3 10Base-T Ethernet Standards IEEE 802.3u 100Base-TX Fast Ethernet IEEE 802.3x Flow Control WAN: One 10/100Mbps RJ-45 port for Cable/DSL Ports Modem LAN: Four 10/100Mbps switched ports UTP Category 3 or better (10Base-T) Cabling type UTP Category 5 or better (100Base-TX) IP, NAT, ARP, ICMP, DHCP client/server, PPPoE, PPP, Protocols Supported PAP, CHAP, NTP, HTTP, TFTP, POP3... -
Page 42: Appendix B Supported Internet Applications
Appendix B Supported Internet Applications Application Settings for Outgoing Setting Incoming Connection connection ICQ98a,99b None None ICQ2000b, DMZ function enabled DMZ function enabled ICQ2001b NetMeeting None 1503(tcp) 2.1 & 3.0 1720(tcp) 2300-2400(tcp) 2300-2400(tcp) 2300-2400(udp) 2300-2400(udp) 47624(tcp) 47624(tcp) VDO Live None None MIRC None... -
Page 43: Appendix C Wan Port Link Status
Appendix C WAN PORT LINK STATUS PPPoE link status “PPPoE offline. Ready to connect.” Device’s wan port is not connected to the ISP’s dialup server. Dialup server for connecting to the Internet is now available. "Connecting to server." Device's wan port is now dialing to dialup server. "Server found."... -
Page 44: Static Ip Assignment Link Status
Static IP assignment link status “Static assigned” IP address succeeds in manually setting up. Technical Support TRENDware provides free technical support for customers worldwide for the duration of the product’s warranty period. Technical Support via Telephone: +1-310-891-1100 Fax: +1-310-891-1111 Technical Support via Internet: Http://www.trendware.cm E-mail: support@trendware.com Technical Support Hours:...
Need help?
Do you have a question about the TW100-S4W1CA and is the answer not in the manual?
Questions and answers