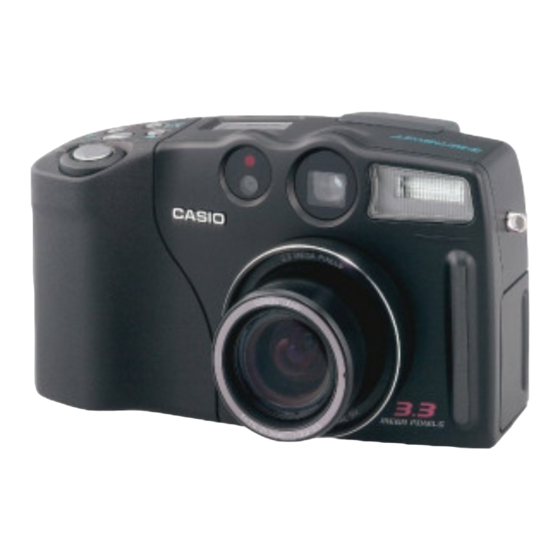
Casio QV-3500EX User Manual
Lcd digital camera
Hide thumbs
Also See for QV-3500EX:
- Quick reference (2 pages) ,
- Service manual & parts catalogue (65 pages) ,
- Manual (47 pages)
Table of Contents
Advertisement
Quick Links
Advertisement
Table of Contents

Subscribe to Our Youtube Channel
Related Manuals for Casio QV-3500EX


Summary of Contents for Casio QV-3500EX
- Page 1 LCD Digital Camera QV-3500EX English...
-
Page 2: Unpacking
INTRODUCTION INTRODUCTION To get the most out of your new CASIO Digital Camera, make sure you read this manual carefully and keep it on hand for future reference. Unpacking Check to make sure that all of the items shown below are included with your camera. If something is missing, contact your dealer as soon as possible. -
Page 3: Table Of Contents
INTRODUCTION Lens ................. E-21 Contents Installing a Conversion Lens or Close-up Lens E-21 Using a Filter E-23 Lens Precautions E-24 INTRODUCTION Monitor Screen Indicators ........E-25 REC mode E-25 Unpacking ..............E-2 PLAY mode E-26 Changing the Contents of the Monitor Screen E-27 Contents .............. - Page 4 INTRODUCTION Menu Screens ............E-44 Specifying Image Size and Quality ......E-64 Setting the Current Date and Time ......E-45 Using the Self-timer ..........E-65 Setting the Date and Time E-45 Exposure Compensation ......... E-66 Selecting the Date Format E-46 Time Stamp E-47 E-68...
-
Page 5: Deleting Images
INTRODUCTION Setting the Sensitivity Level ........E-86 Displaying the 9-image View ......... E-104 Selecting a Specific Image in the 9-image View E-105 Using the Filter Function ......... E-87 Displaying the Histogram ........E-106 Selecting White Balance ......... E-88 Adjusting White Balance Manually E-88 Using the Slide Show Feature ...... - Page 6 INTRODUCTION Making DPOF Settings for Particular Images E-119 Viewing Card Browser File Contents E-136 Making DPOF Settings for Particular Folders E-120 Saving Card Browser Files E-139 Making DPOF Settings of All Images on the Memory Card E-121 E-140 REFERENCE E-122 OTHER SETTINGS Camera Menus ............
-
Page 7: Quick Reference
INTRODUCTION Quick Reference Getting Ready Load batteries. Insert the memory card. (page E-32) (page E-39) Set the current time and date. (page E-45) -
Page 8: Recording An Image
INTRODUCTION Recording an Image (page E-48) After confirming that the Auto Point the camera at the sub- Focus operation is complete (the ject, compose the image on operation lamp lights green), the monitor screen, and press press the shutter release button the shutter release button half all the way down to record the im- way to focus the image. -
Page 9: Playback
INTRODUCTION Playback (page E-100) Use [ ] (forward) and [ ] Align the (back) to scroll through POWER/Function stored images on the Switch with PLAY. monitor screen. -
Page 10: Deleting Images
INTRODUCTION Deleting Images (page E-110) Use [ ] (forward) and [ ] (back) to Align the scroll through stored images and POWER/Function display the one you want to de- Switch with PLAY. lete. Press Press [ ] to select “Yes” Double check to make and then press sure that you really... - Page 11 INTRODUCTION • CASIO COMPUTER CO., LTD. assumes no responsibility for any damage or loss resulting from the use of this manual. • CASIO COMPUTER CO., LTD. assumes no responsibility for any loss or claims by third parties which may arise through the use of the QV-3500EX.
-
Page 12: Features
• DCF Data Storage • Image management and manipulation software DCF (Design rule for Camera File system) data storage The QV-3500EX comes bundled with a CD-ROM that’s protocol provides image inter-compatibility with printers packed with useful software. Photo Loader automates up- and other digital cameras. -
Page 13: Recording Features
INTRODUCTION Recording Features Portrait Mode Best Shot Mode page E-69 page E-71 Landscape Mode Movie Mode page E-69 page E-76 Night Scene Mode Panorama Mode page E-70 page E-78 E-13... - Page 14 INTRODUCTION Histogram page E-106 Four exposure modes Program AE, aperture priority AE, shutter speed priority AE, manual exposure pages E-79 to E-84 Three metering modes Multi-pattern, center weighted, spot pages E-85 to E-86 Four focus modes Auto focus, macro, infinity, manual pages E-59 to E-62 E-14...
-
Page 15: Precautions
After making sure there is no more smoke coming operating a motor vehicle or while walking. Doing so cre- from the camera, take it to your nearest CASIO service pro- ates the danger of serious accident. vider for repair. Never attempt your own maintenance. -
Page 16: Operating Conditions
INTRODUCTION • Never open the battery compartment cover, disconnect the Condensation AC adaptor from the camera or unplug it from the wall • When you bring the camera indoors on a cold day or other- socket while recording images. Doing so will not only make wise expose it to a sudden change of temperature, conden- storage of the current image impossible, it can also corrupt sation can form on the exterior of the camera or on internal... -
Page 17: About The Camera's Backlight
• Should the LCD image appear abnormally dark, take the camera to your dealer or an authorized CASIO service pro- vider to have the light source replaced. Note that you will be charged for this replacement. -
Page 18: Getting Acquainted
GETTING ACQUAINTED GETTING ACQUAINTED This section contains important information you should know when trying to operate the camera. General Guide The following illustrations show the names of each component, button, and switch on the camera. Indicator display Front Self-timer lamp (page E-28) (page E-29) Viewfinder... -
Page 19: Back
GETTING ACQUAINTED Back (Flash/Folder) button (pages E-56, 116) / /MF RESIZE (Focus/Resize) button (pages E-59, 108) BEST SHOT button Flash lamp (page E-71) (page E-29) (Self-Timer/Delete) Operation lamp button (page E-28) (pages E-65, 110) MENU button Zoom slider (page E-44) (Enlarge/Nine Images) (page E-54, 103, 104) [ ] [ ] [ ] [ ]... -
Page 20: Side
GETTING ACQUAINTED Side Bottom Diopter dial (page E-54) Battery compartment DIGITAL terminal lock Tripod screw hole (page E-32) (page E-123) USB port (page E-123) LOCK OPEN DC IN 6V terminal (page E-36) Battery compartment cover (page E-32) VIDEO OUT terminal (page E-123) Open Terminal Panel Cover Memory card... -
Page 21: Lens
GETTING ACQUAINTED • Canon Inc. Tele-Converter TC-DC58 Lens Focal Distance: Digital camera focal distance x 1.5 Threads are provided in the camera’s lens to allow connec- Tele-Converter tion of an optionally available Conversion Lens Adaptor (LU- (TC-DC58) 35A). After installing the adapter, you can use one of the rec- ommended converter lenses, the recommended close-up lens, or an optionally available filter. - Page 22 GETTING ACQUAINTED • Canon Inc. 58mm Close-up Lens 250D IMPORTANT! Focal Distance: In the Macro Mode, 5 cm to 14 cm from the sur- • Be sure to use the Conversion Lens Adaptor (LU-35A) face of the close up lens to the subject (when whenever you install a conversion lens or 58mm zoom is set to maximum wide angle);...
-
Page 23: Using A Filter
GETTING ACQUAINTED • When using the close-up lens, make sure to set the Using a Filter focus mode to (Macro Mode) (page E-59). Proper This camera supports use of commercially available 58mm focus of a close-up image is not possible with any filters. -
Page 24: Lens Precautions
GETTING ACQUAINTED Lens Precautions • Fingerprints, dust, or any other soiling of the lens can inter- fere with proper image recording. Never touch the lens with your fingers. You can remove dust particles from the lens surface by using a lens blower to blow them off. Next, wipe the surface of the lens with a soft lens cloth. -
Page 25: Monitor Screen Indicators
GETTING ACQUAINTED Monitor Screen Indicators The following describes the different indicators and markings that appear on the camera’s monitor screen. REC mode Focus Mode indicator Self-timer 10 SEC, 2 SEC None Auto Focus Recording Mode indicator Macro NORMAL Infinity PORTRAIT Zoom factor Manual Focus LANDSCAPE... -
Page 26: Play Mode
GETTING ACQUAINTED Screen when SHIFT is held down PLAY mode SHIFT Folder name PREVIEW Image protection indicator File number Metering Mode indicator SHIFT button Image size (multi) (center) (spot) Quality Date and time Battery capacity White balance (Auto) (Daylight) (Shade) Exposure Mode indicator (Tungsten) (program AE) -
Page 27: Changing The Contents Of The Monitor Screen
GETTING ACQUAINTED Screen when SET/DISP is pressed Changing the Contents of the Monitor Screen Each press of the SET/DISP button changes the contents of the monitor screen as shown below. SET/DISP REC mode SET/DISP button White balance Flash Mode indicator Display indicators on (page E-25) SET/DISP Display indicators off... -
Page 28: Indicator Display
GETTING ACQUAINTED Indicator display Operation Indicator Lamp The indicator display located on the top of the camera also Operation lamp shows various camera status indicators during image re- cording. The indicator display comes in handy especially The Operation lamp shows the when the monitor screen is turned off. -
Page 29: Flash Lamp
GETTING ACQUAINTED Flash lamp Flash lamp Self-timer lamp The Flash lamp also lights and The Self-timer lamp flashes when the self-timer is perform- flashes during a record operation ing a timer operation prior to releasing the shutter. as described below. MENU Self-timer lamp REC mode... -
Page 30: Using The Bundled Accessories
GETTING ACQUAINTED Attaching the Neck Strap Using the Bundled Accessories Attach the strap as shown in the illustration below. Using the Lens Cap Always keep the lens cap on the lens whenever you are not using the camera. Large loop Small loop Neck Strap ring Triangular ring... -
Page 31: Adjusting The Length Of The Neck Strap
GETTING ACQUAINTED Adjusting the Length of the Neck Strap Using the Soft Case Use the buckle to adjust the length of the neck strap. Keep the camera in its soft case to protect it when not in use. Monitor screen facing down. -
Page 32: Power Requirements
GETTING ACQUAINTED Pressing down on the battery compartment Power Requirements cover, slide it towards the side of the camera to Your camera features a two-way power supply that lets you release it, and then swing the cover up to open use either AA-size batteries or household AC current. - Page 33 GETTING ACQUAINTED Battery Life Guidelines Recording one image per minute under the above conditions The battery life guideline values given below indicate the reduces battery life to about one sixth of that noted above. amount of time at standard temperature (25 C) until power Battery life is greatly affected by how much you use flash, automatically turns off due to battery failure.
- Page 34 GETTING ACQUAINTED The following examples show how alkaline battery life About rechargeable batteries changes under different shooting conditions. Use only the nickel-metal hydride batteries (NP-H3) that are available from your dealer as options for this camera. Proper Example 1: Intermittent use of the camera shortens battery camera operation is not guaranteed when other recharge- life.
-
Page 35: Battery Handling Precautions
GETTING ACQUAINTED Battery Handling Precautions • Dead batteries are susceptible to leakage, which can cause serious damage to your camera. Remove batteries Incorrect use or handling of batteries can cause them to leak from the camera as soon as you notice they are dead. or burst and create the danger of serious damage to your •... -
Page 36: Using Ac Power
(exposed internal wiring), request a dride batteries. This AC adaptor/charger unit can be used replacement from an authorized CASIO ser- with any household power outlet rated for 100V to 240V vice provider. A damaged AC adaptor cord creates the danger of fire or electrical shock. -
Page 37: Turning The Camera On And Off
GETTING ACQUAINTED • Be sure to turn off power before connecting or disconnect- Turning the Camera On and Off ing the adaptor. Rotate the POWER/Function Switch to turn camera power • Always turn camera power off before disconnecting the AC on and off. - Page 38 GETTING ACQUAINTED AUTO POWER OFF On the screen that appears, use [ ] and [ ] to Auto Power Off turns off camera power if no operation is make the setting you want, and then press performed for five minutes in the PLAY mode. In the REC SET/DISP.
-
Page 39: Memory Cards
GETTING ACQUAINTED Eject button With the side of the Memory Cards memory card marked This camera supports use of a CompactFlash memory card with an arrow facing (CF TYPE I/II) or IBM microdrive for image storage. Note the same direction as that all mentions of “memory”... -
Page 40: Removing A Memory Card From The Camera
AC adaptor, and contact your original retailer or Eject button nearest CASIO Service Provider. Press the eject button • Never eject the memory card while the card slot is fac- ing downwards. Doing so creates the danger of the... -
Page 41: Formatting A Memory Card
GETTING ACQUAINTED Formatting a Memory Card • Use [ ] and [ ] to select each menu item, and press SET/DISP to advance to the next menu. You can format a memory card to delete all of the data stored on it. In response to the confirmation message that appears, use [ ] and [ ] to select “Yes”... -
Page 42: Memory Card Precautions
• Be sure to use only CASIO brand CompactFlash cards. • Before starting a format operation, load a full set of new Proper operation with other memory cards is not guaran- batteries (alkaline or lithium) into the camera or connect teed. - Page 43 Take extra care • Note that CASIO assumes no responsibility for any data when handling the camera while the microdrive is installed. loss you may suffer while using the microdrive.
-
Page 44: Menu Screens
GETTING ACQUAINTED Example Displays Menu Screens Pressing MENU displays the menu screen. The contents of REC mode, page 1 the menu screen depend on whether you are in the PLAY mode or REC mode. The following procedure shows opera- tion in the REC mode as an example. Items Align the POWER/Function Switch with REC. -
Page 45: Setting The Current Date And Time
GETTING ACQUAINTED Setting the Date and Time Setting the Current Date and Time Use the following procedures to set the current date and Align the POWER/Function Switch with REC or time, and to select the date format. PLAY. When you record an image, the time and date the image was shot is registered in accordance with data from the camera’s Press MENU. -
Page 46: Selecting The Date Format
GETTING ACQUAINTED Select and change the digits on the screen to Selecting the Date Format set the current date and time. You can use the following procedure to select one of the three different date formats. Align the POWER/Function Switch with REC or Green PLAY. -
Page 47: Time Stamp
GETTING ACQUAINTED Time Stamp Use [ ] and [ ] to select the setting you want, and then press SET/DISP to apply it. When it is turned on, the time stamp function digitally stamps Example: the recording date and time in the lower right corner of each Date: October 18, 2001 image as it is recorded. -
Page 48: Basic Image Recording
BASIC IMAGE RECORDING BASIC IMAGE RECORDING This section describes the basic procedure for recording an Compose the image on the monitor screen so image. the point on which you want to focus is inside the Focus frame. Recording a Simple Snapshot The camera’s Program AE Mode (P Mode) is for simple snapshots. - Page 49 BASIC IMAGE RECORDING • The monitor screen momentarily goes blank when After confirming that you press the shutter release button half way. the image is in focus, • The camera’s Auto Focus feature automatically press the shutter focuses the image. release button all the way down to record the •...
-
Page 50: About The Rec Mode Monitor Screen
BASIC IMAGE RECORDING About the REC Mode Monitor Screen Fixed Focusing Distances • The following are the fixed focusing distances when Auto • The image shown on the monitor screen in the REC mode Focus is unable to focus properly. is a simplified image for composing purposes. -
Page 51: Image Recording When The Battery Is Low
BASIC IMAGE RECORDING Image Recording when the Battery is Low Camera Orientation Detection To protect against unexpected loss of image data, each im- The camera automatically age is recorded directly to the memory card (without going detects whether it is into the buffer) whenever battery level is indicated as oriented vertically or lower. -
Page 52: Previewing The Last Image Recorded
BASIC IMAGE RECORDING — When recording portrait orientation images, position Previewing the Last Image Recorded the camera to it is standing up as straight as possible, Use the following procedure to preview the last image re- as shown in the illustration below. Holding the camera corded, without leaving the REC mode. -
Page 53: Deleting The An Image In The Rec Mode
BASIC IMAGE RECORDING Deleting the an Image in the REC Mode Using the Viewfinder for Recording You can use following procedure to delete the last image you The illustrations below show what you see when you look recorded without leaving the REC mode. through the viewfinder to compose an image for recording. -
Page 54: Using Zoom
BASIC IMAGE RECORDING • You can use the Diopter Dial to adjust the image in Using Zoom viewfinder screen to your eyesight. Your camera is equipped with both optical zoom and digital • Rotate the diopter dial to adjust the image in the viewfinder zoom capabilities. -
Page 55: Using Digital Zoom
BASIC IMAGE RECORDING NOTES Select the setting you want, and then press SET/DISP to apply it. • Changing the optical zoom factor also affects the lens aperture value. To do this Select this • The lens aperture value indicated on the camera is the Turn off digital zoom aperture when optical zoom is 1X. -
Page 56: Using The Flash
BASIC IMAGE RECORDING • Each press of cycles through the available flash Using the Flash modes described below. The following describes various flash settings you can make To do this Select this setting to suit the type of image you are trying to record. Have the flash fire automatically No display when required (Auto Flash) -
Page 57: Flash Status Indicators
BASIC IMAGE RECORDING Flash Status Indicators Adjusting the Flash Intensity You can check the current flash unit status by checking the Use the following procedure to adjust the intensity of the monitor screen indicator and flash lamp while the shutter re- flash when it fires. -
Page 58: Precautions When Using Flash
BASIC IMAGE RECORDING Precautions when Using Flash • Red-eye reduction may not work well when the camera is not pointed directly at the subject or when the subject is • Make sure that you do not touch or block the flash or the far from the camera. -
Page 59: Selecting The Focus Mode
BASIC IMAGE RECORDING Using the Auto Focus Mode Selecting the Focus Mode As its name suggests, the Auto Focus Mode adjusts focus You can use the following procedure to select from among automatically whenever you press the shutter release button four different focus modes: Auto Focus, Macro, Infinity, and about half way down. -
Page 60: Using The Macro Mode
BASIC IMAGE RECORDING Using the Macro Mode The Macro Mode automatically sets the focus for close-up shooting. Focus adjustment starts automatically whenever you press the shutter release button about half way down. Focus The following shows the relationship between the optical frame zoom factor and the focusing distance for the Macro Mode. -
Page 61: Using The Infinity Mode
BASIC IMAGE RECORDING Using the Infinity Mode Using the Manual Focus Mode The Infinity Mode sets the focus near infinity. It is a good With Manual Focus, you make the required focus settings by choice for scenery and other far-off subjects. Focus adjust- hand. -
Page 62: Using Focus Lock
BASIC IMAGE RECORDING Press SET/DISP to stop the indicator flash- Align the POWER/Function Switch with REC. ing and fix the image focus at its current level. Align the focus frame with the subject you • After stops flashing, you can use [ ] and [ ] to want to lock on and press the shutter release adjust exposure compensation (EV). -
Page 63: Specifying The Focus Frame Location
BASIC IMAGE RECORDING Press the shutter release button the rest of the Holding down SHIFT to display all of the avail- way down to record the image. able Auto Focus frame positions, use [ ], [ ], [ ], and [ ] to move the [+] mark to the focus frame location you want to use. -
Page 64: Specifying Image Size And Quality
BASIC IMAGE RECORDING IMPORTANT! Specifying Image Size and Quality • The values in the table are all approximate, and are You can specify the image size and image quality to suit the affected by the types of images you record and other type of image you are recording. -
Page 65: Using The Self-Timer
BASIC IMAGE RECORDING Self-timer Time Settings: Using the Self-timer Each press of cycles through the available self- You can set the self-timer to either one of two starting times. timer settings described below. Align the POWER/Function Switch with REC. To do this Select this setting Turn the self-timer off No display... -
Page 66: Exposure Compensation
BASIC IMAGE RECORDING Exposure Compensation Whenever program AE, shutter speed priority AE, or aper- ture priority AE is selected as the exposure mode, you can adjust the exposure compensation value (EV value) within the range shown below in order to compensate for current lighting conditions. - Page 67 BASIC IMAGE RECORDING [ ]:Decreases the EV value. A lower EV value is best for dark color subjects and for shooting outdoors on a clear day. After the EV value is the way you want, press the shutter release button to record the image. IMPORTANT! •...
-
Page 68: Other Recording Functions
OTHER RECORDING FUNCTIONS OTHER RECORDING FUNCTIONS This section describes more advanced recording operations Press the shutter release button to record the that are also provided by this camera. image. • Use the monitor screen to compose images for shooting in •... -
Page 69: Shooting Portraits
OTHER RECORDING FUNCTIONS Shooting Portraits Shooting Landscapes The Portrait Mode blurs the background slightly, which The Landscape Mode brings everything from distant scenery makes the foreground subject stand out better. to close foreground objects into focus. Align the POWER/Function Switch with REC. Align the POWER/Function Switch with REC. -
Page 70: Shooting Night Scenes
OTHER RECORDING FUNCTIONS NOTES Shooting Night Scenes • You can add more depth from the foreground to back- The Night Scene Mode uses longer exposure to produce ground, and also create a greater feeling of horizontal beautiful night scene images. expanse by using the zoom slider to adjust to maxi- mum wide-angle. -
Page 71: Instant Setup Using The Best Shot Mode
OTHER RECORDING FUNCTIONS NOTE Instant Setup Using the Best Shot Mode • You can use the Night Scene Mode in combination The Best Shot Mode comes with a library of 28 different im- with flash for slow sync shooting of people against a ages. - Page 72 OTHER RECORDING FUNCTIONS Composition Outline Use [ ] and [ ] to display the sample scene With certain Best Shot Mode Auto Focus Composition you want, and then press SET/DISP. Frame Outline images, a composition outline • You can also store your own setups. (page E-73) appears on the monitor screen to aid you when composing Press the shutter release button to record the...
-
Page 73: Specifying The Location Of Best Shot Mode Scene Images
You can register the settings of any image recorded with a of the Best Shot Mode scene images. CASIO QV-3500EX camera as a “user setup” for the Best Shot Mode. After you register a user setup, you can recall it Align the POWER/Function Switch with REC. -
Page 74: Importing A Scene From The Best Shot Library On The Cd-Rom
OTHER RECORDING FUNCTIONS Align the POWER/Function Switch with REC. NOTES • Press BEST SHOT to display the last sample scene Press BEST SHOT. you selected. • After you select a Best Shot Mode image, you can see • You can also display sample scenes by pressing the camera setup by displaying the various menus you MENU, selecting “BEST SHOT”, and then pressing normally use when setting up the camera manually. - Page 75 • This step is not required if you are using a Macintosh. card from the CD-ROM, use your computer to navi- gate to the memory card's “SCENE” folder, and then Click “CASIO” “BestShot Library” “QV delete the sample scene file (page E-131).
-
Page 76: Recording A Movie
OTHER RECORDING FUNCTIONS To record a movie using the normal mode Recording a Movie You can record movies that are approximately 30 seconds Align the POWER/Function Switch with REC. long. There are two movie recording modes: past and nor- Press MENU. mal. -
Page 77: To Record A Movie Using The Past Mode
OTHER RECORDING FUNCTIONS To record a movie using the past mode IMPORTANT! • Flash is disabled during movie recording. Align the POWER/Function Switch with REC. • To view an AVI file on your computer, install QuickTime from the CD-ROM that comes bundled Press MENU. -
Page 78: Shooting Panoramas
OTHER RECORDING FUNCTIONS Press the shutter release button to record the Shooting Panoramas first image. The Panorama Mode lets you digitally stitch together mul- • The right edge of the first image remains on the left tiple images to create a sweeping panorama. side of the monitor screen to help you compose the second image of the panorama. -
Page 79: Specifying The Exposure Mode
OTHER RECORDING FUNCTIONS NOTE Specifying the Exposure Mode • The camera uses the same exposure and white bal- You can select from among the four exposure modes listed ance settings in effect when the first image of the pan- below. You can change the shutter mode setting while in any orama is recorded for recording all of the other images of the record modes. -
Page 80: Aperture Priority Ae
OTHER RECORDING FUNCTIONS Aperture Priority AE Align the POWER/Function Switch with REC. The A Mode (aperture priority AE) is the opposite of the S Press MENU. Mode. It lets you specify an aperture setting and automati- cally adjusts shutter speed accordingly. A larger aperture Select “FUNCTION”... -
Page 81: Shutter Speed Priority Ae
OTHER RECORDING FUNCTIONS Press the shutter release button to record the Shutter Speed Priority AE image. The S Mode (shutter speed priority AE) lets you specify a shutter speed and automatically adjusts aperture accord- IMPORTANT! ingly. • It is often difficult to obtain proper brightness when Slow (1/30) Fast (1/1000) shooting a subject that is very dark or very light. - Page 82 OTHER RECORDING FUNCTIONS Select “FUNCTION” “Exposure Mode”, and IMPORTANT! then press SET/DISP. • It is often difficult to obtain proper brightness when shooting a subject that is very dark or very light. In Select “S” (shutter speed priority), and then such a case, try different shutter speed settings to find press SET/DISP.
-
Page 83: Manual Exposure
OTHER RECORDING FUNCTIONS • A shutter speed slower than 1/8 second can cause the Select “M” (manual), and then press SET/DISP. brightness of the image on the monitor screen to be different from the brightness of the image that is re- Use [ ] and [ ] to specify the shutter speed, corded. -
Page 84: Quick Exposure Mode Selection
OTHER RECORDING FUNCTIONS Press the shutter release button to record the Quick Exposure Mode Selection image. You can also use the following procedure to change the ex- posure mode, without going through the menu. IMPORTANT! • A shutter speed slower than 1/8 second can cause the Align the POWER/Function Switch with REC. -
Page 85: Selecting The Metering Mode
OTHER RECORDING FUNCTIONS Multi: Selecting the Metering Mode This mode takes readings across the Use the following procedure to specify multi metering, spot entire image, and provides balanced metering, or center-weighted metering as the metering exposure settings. mode. Center: Align the POWER/Function Switch with REC. This mode takes readings at the center of the image. -
Page 86: Quick Metering Mode Selection
OTHER RECORDING FUNCTIONS Quick Metering Mode Selection Setting the Sensitivity Level You can also use the following procedure to change the me- Use the following procedure to specify the sensitivity level. tering mode, without going through the menu. Align the POWER/Function Switch with REC. Align the POWER/Function Switch with REC. - Page 87 OTHER RECORDING FUNCTIONS IMPORTANT! Using the Filter Function • Higher sensitivity can increase the chance of noise in The camera’s filter function lets you filter the image with one the image. of a selection of different colors. • Higher sensitivity can make it difficult to obtain proper focus using Auto Focus.
-
Page 88: Adjusting White Balance Manually
OTHER RECORDING FUNCTIONS NOTE Selecting White Balance • Use “Daylight” for shooting in the Night Scene Mode. Selecting the right type of white balance can help to make You can also use manual white balance if the “Day- the colors of a subject appear most natural under the type of light”... -
Page 89: Quick White Balance Selection
OTHER RECORDING FUNCTIONS Point the camera at a piece of white paper or Quick White Balance Selection other similar object so it completely fills the You can also use the following procedure to change the monitor screen, and then press SET/DISP. white balance, without going through the menu. - Page 90 OTHER RECORDING FUNCTIONS NOTES Enhancing Certain Colors • The filter function (page E-87) produces the same ef- Use the following procedure when you want to enhance a fect as if a piece of colored cellophane paper were particular color in your recorded image. held in front of the lens of the camera.
- Page 91 OTHER RECORDING FUNCTIONS Select the setting you want, and then press Turning the On-screen Grid On and Off SET/DISP. You can display gridlines on the monitor screen to help you compose your images before recording them. To do this Select this Turn the grid off Turn the grid on Align the POWER/Function Switch with REC.
- Page 92 OTHER RECORDING FUNCTIONS Specifying Outline Sharpness Specifying Color Saturation Use the following procedure to control the sharpness of im- Use the following procedure to control the saturation of im- age outlines. age colors. Align the POWER/Function Switch with REC. Align the POWER/Function Switch with REC. Press MENU.
- Page 93 OTHER RECORDING FUNCTIONS Specifying Contrast Saving Uncompressed Images (TIFF Mode) Use the following procedure to control the difference be- Normally, the camera stores images in JPEG format only. tween the light areas and dark areas of the image. The TIFF Mode stores two versions of the same image: a JPEG (compressed) version and a TIFF (uncompressed) version.
- Page 94 OTHER RECORDING FUNCTIONS IMPORTANT! Specifying Power On Default Settings • The TIFF format image save operation takes more Configuring the camera’s “mode memory” controls power on time than the JPEG format save operation. default settings. Turning a mode memory item on specifies •...
- Page 95 OTHER RECORDING FUNCTIONS Resetting the Camera To do this when the camera is turned on Select this Restore the item’s last setting when Use the following procedure to reset all of the camera’s set- power was turned off tings to their initial defaults as shown under “Camera Menus” Restore the item’s factory default setting Off (default) on page E-140.
- Page 96 OTHER RECORDING FUNCTIONS Changing REC mode FUNCTION Menu Using the Camera’s Shortcut Features Settings Using the Shortcut Buttons The shortcut features of the camera help to make it quicker Changing REC mode FUNCTION Menu settings is normally BEST SHOT and easier to obtain the REC a multi-step process: Press MENU, use [ ], [ ], [ ] and [ ] RESIZE mode setup you want.
- Page 97 OTHER RECORDING FUNCTIONS While holding down SHIFT, press one of the To assign REC mode FUNCTION menu shortcut buttons to cycle through the settings items to shortcut buttons of the item assigned to the button. The current setting of each button is indicated by an icon Align the POWER/Function Switch with REC.
- Page 98 OTHER RECORDING FUNCTIONS • The following example shows the filter setting screen. • Assigning a menu item to a shortcut button changes the icon that appears above the button when SHIFT is pressed in the REC mode as shown below. Default Setting Icon After Button...
- Page 99 OTHER RECORDING FUNCTIONS Directly Accessing the REC mode FUNCTION Menu Use [ ] and [ ] to cycle through the settings of the currently selected item. When in the REC mode, you can hold down SHIFT and press MENU to display the FUNCTION menu. Repeat steps 2 and 3 for other items.
- Page 100 PLAYBACK PLAYBACK You can use the camera’s built in monitor screen to play NOTES back recorded images. • Holding down [ ] or [ ] scrolls images at high speed. • In order to allow for faster playback image scrolling, Basic Playback Operation the image that initially appears on the monitor screen is a preview image, which is of somewhat lower quality...
- Page 101 PLAYBACK Press the shutter release button to start play- Playing a Movie ing the movie. Use the following procedure to play back a movie recorded • The following describes operations that are available in the Movie Mode. during movie playback. Align the POWER/Function Switch with PLAY.
- Page 102 PLAYBACK Press the shutter release button to start play- Playing a Panorama ing the panorama. Use the following procedure to play back a panorama re- • The following describes operations that are available corded in the Panorama Mode. during panorama playback. Align the POWER/Function Switch with PLAY.
- Page 103 PLAYBACK Enlarging the Playback Image Use the following procedure to enlarge the playback image on the screen. You can select either 2X or 4X enlargement. Align the POWER/Function Switch with PLAY. Use [ ] and [ ] to display the image you want to enlarge.
- Page 104 PLAYBACK If you want to do this Do this Displaying the 9-image View Display on-screen guidance The following procedure displays nine images on the monitor Press SET/DISP messages screen at the same time. Shift the view right Press [ ]. Shift the view left Press [ ].
- Page 105 PLAYBACK Selecting a Specific Image in the 9-image Use [ ], [ ], [ ] and [ ] to move the pointer to the image you want to select, and then press View SET/DISP. • This displays the single-image view of the selected Display the 9-image view.
- Page 106 PLAYBACK Use [ ] and [ ] to scroll to another image if Displaying the Histogram you want. The following procedure displays a histogram of an image's luminance components. The histogram is a tool you can use To exit the histogram, press SET/DISP a num- to check the exposure of an image.
- Page 107 PLAYBACK NOTE Using the Slide Show Feature • If the histogram appears too lopsided in either direc- Slide Show automatically plays back images in sequence at tion, you should try recording the image again after a fixed interval. correcting the exposure (EV) value (page E-66), ad- justing the aperture priority AE aperture value (page E-80), adjusting the manual exposure shutter speed or aperture value setting (page E-81).
- Page 108 PLAYBACK IMPORTANT! Resizing an Image • Auto Power Off (page E-38) is disabled whenever You can use the following procedure to change an image to Slide Show is being used. This means you should not VGA size (640 x 480 pixels). leave Slide Show running when using batteries to •...
- Page 109 PLAYBACK Press /MF RESIZE. Cropping an Image Use the following procedure when you want to crop a portion In response to the confirmation message that of an enlarged image and use the remaining part of the im- appears, use [ ] and [ ] to select “Yes”. age as an e-mail attachment, Web page image, etc.
- Page 110 DELETING IMAGES DELETING IMAGES Your camera lets you use any one of the following four meth- Deleting the Displayed Image ods to delete images from its memory. You can delete the Use the following procedure when you want to delete the currently displayed image, one or more selected images, all image that is currently on the monitor screen.
- Page 111 DELETING IMAGES NOTE Deleting Selected Images • The camera does not maintain open spaces in its The following procedure lets you select one or more image memory. Deleting an image causes images following for deletion. the deleted image to be shifted up to fill in the empty space created by the deletion.The following shows how remaining images are shifted when image 100-3 Align the POWER/Function Switch with PLAY.
- Page 112 DELETING IMAGES • Any image marked with the icon is marked for de- Deleting All Images in Selected Folders letion. It will be deleted when you perform the next Use the following procedure to select one or more folder for step of this procedure.
- Page 113 DELETING IMAGES • Any folder with the icon is marked for deletion. All Deleting All Unprotected Images its images will be deleted when you perform the next Use the following procedure when you want to delete all of step of this procedure. the images currently on the camera’s memory card.
- Page 114 MANAGING IMAGES MANAGING IMAGES The image management capabilities of the camera make it Folders easy to keep track of images. You can protect images A folder is created automatically whenever you shoot the against deletion, and even use its DPOF feature to specify first image on a particular date.
- Page 115 MANAGING IMAGES Files • In addition to image files, memory cards also contain a number of other files used by the system for image data Each folder can contain up to 250 image files. If you try to management. save the 251st image to a folder, the camera automatically •...
-
Page 116: Protecting Selected Images
MANAGING IMAGES Selecting a Folder for Playback Protecting Images Against Deletion Use the following procedure to select a particular folder and Image protection guards against accidental deletion of im- play back the image files it contains. ages stored on the camera’s memory card. A protected im- age cannot be deleted until it is unprotected (page E-110). - Page 117 MANAGING IMAGES Press [ ] or [ ] to toggle the displayed Protecting and Unprotecting All Images image’s icon on and off. in Selected Folders Align the POWER/Function Switch with PLAY. Press MENU. Select “PROTECT” “Folder”, and then press SET/DISP. Use [ ] and [ ] to display the folder whose im- ages you want to protect.
-
Page 118: Protecting And Unprotecting All Images
MANAGING IMAGES • Any folder with the icon is marked for protection. Protecting and Unprotecting All Images All its images will be protected when you perform the next step of this procedure. All images in any folder Align the POWER/Function Switch with PLAY. without the icon will be unprotected. - Page 119 MANAGING IMAGES Making DPOF Settings for Particular Im- DPOF ages The letters “DPOF” stand for “Digital Print Or- der Format”, which is a format for recording on Align the POWER/Function Switch with PLAY. a memory card or other medium which digital camera images should be printed and how many copies of the image should be printed.
-
Page 120: Making Dpof Settings For Particular Folders
MANAGING IMAGES Making DPOF Settings for Particular To do this Press this button Decrease the number of copies value Folders Increase the number of copies value Toggle printing of the recording date Align the POWER/Function Switch with PLAY. PREVIEW on and off Press MENU. -
Page 121: Making Dpof Settings Of All Images On The Memory Card
MANAGING IMAGES Making DPOF Settings of All Images on To do this Press this button the Memory Card Decrease the number of copies value Increase the number of copies value Toggle printing of recording dates on Align the POWER/Function Switch with PLAY. PREVIEW and off Press MENU. - Page 122 OTHER SETTINGS OTHER SETTINGS Changing the Display Language Turning the Confirmation Beep On and Off Use the following procedure to switch the display language Use the following procedure to turn the beep that sounds between English and Deutsch. each time you press a button on and off. Align the POWER/Function Switch with REC or Align the POWER/Function Switch with REC or PLAY.
- Page 123 CONNECTING TO EXTERNAL EQUIPMENT CONNECTING TO EXTERNAL EQUIPMENT Your camera has three terminals for connection to external equipment: a VIDEO OUT terminal, a DIGITAL terminal, and a USB port. You can use these terminals to connect the camera to a television, VCR, computer, or other external equipment. Computer (page E-126) DIGITAL...
- Page 124 INPUT • This camera does not support cable transfer of data with other CASIO digital cameras. VIDEO AUDIO VIDEO OUT terminal...
-
Page 125: Selecting The Video Output Signal Mode
CONNECTING TO EXTERNAL EQUIPMENT Use the video cable to connect the camera to IMPORTANT! the television as shown in the illustration. • When you have PAL selected as the video signal out- put mode, the monitor screen is turned off when you Perform the required operation on the TV to set connect the cable to the VIDEO OUT terminal. - Page 126 CONNECTING TO EXTERNAL EQUIPMENT Connecting the Wired Remote Controller Connecting to a Computer to the Camera The CD-ROM that comes bundled with your camera in- The optionally available wired remote controller lets you op- cludes special software (Photo Loader) that makes transfer erate the camera without touching it.
-
Page 127: Usb Port Connection (Windows, Macintosh)
CONNECTING TO EXTERNAL EQUIPMENT USB Port Connection (Windows, Macintosh) Connecting to a Computer with the USB Cable The camera’s USB port and accessories make it easy to Small connector connect to a computer equipped with a USB port for image Special USB cable data uploading and downloading. -
Page 128: Using A Serial Port Connection
CD-ROM on your computer, and use a sepa- DIGITAL terminal rately available CASIO data transfer cable to make the con- nection. The type of cable you should use depends on what kind of computer you are connecting to. - Page 129 AC adaptor is recom- CompactFlash card slot. mended whenever performing data communication with the camera. • This camera does not support data communication with any of the optionally available CASIO PC link software applications: LK-1, LK-1A, LK-10V, LK-11W, LK-2, LK-2A, LK-2V, LK-21. E-129...
-
Page 130: Memory Card Data
DCF camera or printed on a DCF printer. In addition to sup- that does not have a CompactFlash card slot or PC card slot, port for the DCF protocol, your CASIO digital camera also use use a commercially available PC card reader/writer in combi-... -
Page 131: Memory Card File Structure
CONNECTING TO EXTERNAL EQUIPMENT Memory Card File Structure <¥SCENE¥> (Best Shot Folder) S3500001.JPG (Sample Image File) S3500002.JPG (Sample Image File) <¥DCIM¥> (Parent Folder) INDEX.HTM (Card Browser Main File) U3500001.JPG (Sample Image File) QVCAM.QVS (Management File) U3500002.JPG (Sample Image File) HTML (Card Browser Folder) SCENE.QVS (Best Shot Management File) -
Page 132: Image Files Supported By The Camera
• Preview Image File Image Files Supported by the Camera Contents: Preview images of still image and movie files used for temporary playback and card browser • Image files recorded with the CASIO QV-3500EX Digital previews Camera • DCF protocol image files •... -
Page 133: Precautions When Using A Memory Card On A Computer
CONNECTING TO EXTERNAL EQUIPMENT Precautions when Using a Memory Card • We also strongly recommend that after transferring data from a memory card to other external storage that you re- on a Computer format the memory card and delete its contents before us- •... -
Page 134: Specifying The Card Browser Type
CONNECTING TO EXTERNAL EQUIPMENT Specifying the Card Browser Type Using the HTML Card Browser The camera’s Card Browser generates HTML files that let Align the POWER/Function Switch with REC or you see a table of image thumbnails for easy selection, and PLAY. - Page 135 CONNECTING TO EXTERNAL EQUIPMENT Select the Card Browser setting you want. After selecting the setting you want, press SET/DISP. When you want this Select this • When you turn on any Card Browser (Type 1 through To turn off the Card Browser (no HTML files 4), the camera creates a file named “INDEX.HTM”...
-
Page 136: Viewing Card Browser File Contents
CONNECTING TO EXTERNAL EQUIPMENT IMPORTANT! Viewing Card Browser File Contents • When the Card Browser is turned on, the monitor Use your computer’s Web Browser to view the contents of screen goes blank when you turn off the camera, but the Card Browser files. - Page 137 CONNECTING TO EXTERNAL EQUIPMENT Use your Web browser to open the file named You can click the following items on the screen “INDEX.HTM”. to perform the operations described below. • This displays a gallery of thumbnails for all the images To do this Click here contained in the oldest image folder on the memory...
- Page 138 CONNECTING TO EXTERNAL EQUIPMENT • Image Properties The following is the information provided by the Image Properties screen. File Size : File size Resolution : Resolution Quality : Quality Recording mode : Recording mode : Exposure mode Light metering : Metering mode INDEX Shutter speed : Shutter speed...
- Page 139 CONNECTING TO EXTERNAL EQUIPMENT To exit the Card Browser, simply quit your Web Saving Card Browser Files browser. • To save Card Browser files, use a USB cable connection (page E-127) or memory card transfer (page E-129) to copy the folder named “DCIM” on the memory card to a hard disk, floppy diskette, MO disk, or other external stor- age.
- Page 140 REFERENCE REFERENCE Sensitivity ISO 100 / ISO 180 / ISO 300 / ISO 500 Camera Menus Filter Off / B/W / Sepia / Red / Green / Blue / The following shows lists of menus that appear in the REC Yellow / Pink / Purple mode and PLAY mode, and their settings.
- Page 141 REFERENCE PLAY mode Mode Memory Exposure Mode Off / On Metering Off / On SET UP Card Browser Off / Type1 / Type2 / White Balance Off / On Type3 / Type4 Flash Off / On Beep Off / On Focus Off / On Date Style...
-
Page 142: Settings In Each Mode
REFERENCE Mode Settings Settings in Each Mode : Available : Partially available : Not available Partial Shutter Release Focus Button Press Flash Self-timer Frame Mode Display Lock Lock Normal Portrait Landscape Night Scene Best Shot Movie (Normal) Movie (Past) Panorama P Mode A Mode S Mode... -
Page 143: Recording Mode + Exposure Mode Combinations
REFERENCE Recording Mode + Exposure Mode Combinations The following table shows to what extent each recording mode can be used in combination with each exposure mode. : Available : Not available Exposure Mode P Mode A Mode S Mode M Mode Normal Portrait Landscape... - Page 144 REFERENCE Troubleshooting Symptom Probable Cause Action No power 1. Batteries are not oriented correctly. 1. Load batteries correctly (page E-32). 2. Batteries are dead. 2. Replace batteries with a full set of new ones (page E-32). 3. Using the wrong AC adaptor. 3.
- Page 145 REFERENCE Probable Cause Symptom Action Power failure during self- Batteries are dead. Replace batteries with a full set of new ones (page timer operation. E-32). Monitor screen image is 1. Poor focusing in the manual focus mode. 1. Focus the image (page E-61). out of focus.
- Page 146 Restore power and turn the camera on. If this does not work, contact your dealer or an authorized CASIO service provider. Nothing appears on the 1. The monitor is asleep.
- Page 147 REFERENCE Messages RECORD ERROR Some problem occurred when compressing image CF ERROR There is some problem with the memory card you data to save it on the memory card. Shoot the image To use this card, you are using. Perform the following procedure to cor- again.
- Page 148 REFERENCE There is no memory card loaded in the camera. Insert memory card! Load a memory card (page E-39). MEMORY FULL There is not enough memory to record an image Change quality/size with your current quality and size settings. Change or delete unneeded the image quality and size settings and try again, or images...
- Page 149 Description ......Digital camera 30 seconds per movie (PAST) • The above figures are approximations only. Model ........QV-3500EX Recorded Image Image Deletion ....Single image; all images in a folder; all im- File Format ......Still images (including panoramas): ages in memory (with image protection) JPEG (Exif.
- Page 150 REFERENCE Shutter ........ CCD electronic shutter; mechanical Battery Life shutter, BULB, 60 to 1/1000 second The values noted below indicate the number of hours before battery failure under normal operating temperature (25 C). These values are for reference Aperture ......F2 to F8, auto switching or manual only, and do not guarantee that any particular set of batteries actually will switching provide the service life indicated.
- Page 151 REFERENCE • This camera does not have a separate battery to power its clock. Clock settings are cleared whenever power to the camera is cut off (by batteries going dead while the camera is not connected to an AC power outlet with the AC adaptor) for about 24 hours. After power is resumed, either by loading fresh batteries or connecting to an AC power outlet, you will have to set the correct time and date again.
- Page 152 QV-3500EX User Documentation Files The QV-3500EX user documentation available here has been divided among a number of files in order to facilitate downloading. You can download the entire manual, or you can save time by using the table of contents below to find specific information and then download only the files you need.
- Page 153 Specifying the Location of Best Shot Mode Scene Deleting All Images in Selected Folders ...... E-112 Images E-73 Deleting All Unprotected Images ......... E-113 Registering Your Own Scene Setups E-73 Importing a Scene from the Best Shot Library E-114 MANAGING IMAGES on the CD-ROM E-74 Folders and Files ............
Need help?
Do you have a question about the QV-3500EX and is the answer not in the manual?
Questions and answers