Nivona CafeRomantica NICR6 Series User Manual And Recommendations For Use
Automatic coffee and espresso machine
Hide thumbs
Also See for CafeRomantica NICR6 Series:
- Operating instructions and useful tips (29 pages)

Related Manuals for Nivona CafeRomantica NICR6 Series


Summary of Contents for Nivona CafeRomantica NICR6 Series
- Page 1 CafeRomatica NICR6.. Automatic coffee and espresso machine User manual and recommendations for use a passion for coffee.
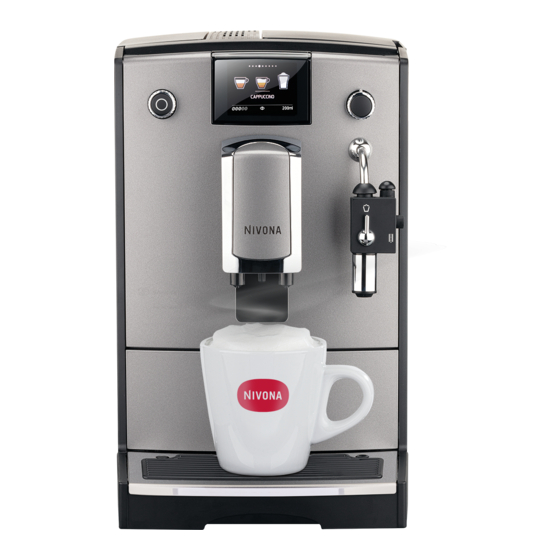
- Page 3 Display (Main menu) Rotary Steam-hot water-rotary knob Setting in the display Height-adjustable spout Cover water tank Cover Bean container On/Off switch Cup stand Cup warmer (Use of the waste heat of the heater) Service door Flap of the ground coffee chamber Drip pan Used coffee tray (interior)
- Page 5 Congratulations and many thanks for deciding on a quality product from the house of NIVONA. To enjoy your NIVONA appliance fully, please read the instruction carefully prior to the use and take note of the safety instructions prior to the first set-up.
-
Page 6: Table Of Contents
Content 1. SAFETy iNSTRUCTiONS ....................5 2. SET-UP ........................6 2.1. Preparation ......................6 2.2. The most important control elements ................ 7 2.3. Filling of water and beans ..................7 2.4. Turn on the appliance and fill the system ..............8 2.5. -
Page 7: Safety Instructions
1. Safety instructions 1. Safety instructions • The appliance must only be used for the intended purpose (domestic use only) and is not intended for the commercial use (see guarantee conditions). Otherwise the guarantee claims expire. • Operation voltage and voltage must strictly match. Please take note of the type label/the label on the appliance (see picture 1/S). • Do not use the appliance if the power cable or case is damaged. Do not bring the power cable into contact with hot parts. • Do not unplug the mains plug by pulling the power cable. • Strictly follow the cleaning and descaling information. Nonobservance will void you guarantee claims. • Ensure that the appliance is turned off and that the mains plug is unplugged prior to maintenance and cleaning. • Never let the mains plug get wet and protect it against moisture. • Put the appliance on an even, stable surface and use inside only. Never put the appliance on hot surfaces or near flames. • This device may be used by children from 8 years and older as well as of individ- uals with reduced physical, sensory or mental abilities or limited experience and knowledge, if they are supervised and instructed regarding the safe use if the device and if they understand the resulting risks. Children must not play with the device. Cleaning and maintenance by the user must not be carried out by children, unless they are 8 years old or older and are supervised. The device and its con- nection cable are to be kept away from children that are younger than 8 years. • Please unplug the mains plug during extended absence over several days. • Do not leave the appliance switched on unnecessarily. Do not submerge the appliance into water. -
Page 8: Set-Up
• Please contact the phone service or the retailer of which you have bought the appliance first in case of any repairs of the appliance that may be required - and send the appliance upon consultation and taking into consideration point 9 of this user manual to NIVONA Zentralkundendienst, Südwestpark 90, D-90449 Nürnberg. • In case the power cable is damaged, it must be replaced by the manufacturer or its customer service or a similarly qualified professional to prevent risks. Warning: Electric repairs must only be carried out by professionals! Due to inappropriate repairs serious risks may occur to the user. Is the appliance... -
Page 9: The Most Important Control Elements
(picture 1/T). 2.2. The most important control elements Your NIVONA appliance offers you diverse possibilities to prepare speciality coffees to your individual wishes. The most important control elements and their basic function are mostly identical for the different coffee specialities: • On/Off switch (picture 1/H): By pressing you turn the appliance on, by pressing once more you... -
Page 10: Turn On The Appliance And Fill The System
2. Set up Warning: Do not use beans which were treated with additives like sugar or similar products during or after the roasting process. This may cause damages to the grinder. The resulting repair costs are not covered by the guarantee. 2.4. - Page 11 2. Set up Warning: Even if the display does not show “PLEASE CHANGE FILTER’’, the filter must be changed after two month at latest, even with only a rare use of the appliance. 2.4.2. Operate appliance without filter If you would like to operate the appliance without filter, the filter setting must be set on “INSERT FILTER? NO’’.
-
Page 12: Turn On Appliance During Operation
If you have carried out the first start during the initial set up (point 2.4), proceed as follows for the following power ups: ➔ Turn the appliance on with the On/Off switch (picture 1/H). The display shows the notification “NIVONA, SYSTEM HEATING’’. When the appliance is heated, the display shows “PLEASE RINSE’’. ➔ Press the rotary. -
Page 13: Set The Operation With Or Without Filter
3. Take/change basic settings ➔ You confirm the chosen setting by pressing the rotary. ➔ By choosing “EXIT’’ and then pressing the rotary, you get to the next menu level above: From the chosen setting via the menu “SETTINGS’’ to the main menu. 3.1. -
Page 14: Set A Language
3. Take/change basic settings ➔ To change the temperature, choose the menu option “SETTINGS’’ in the main menu by turning the rotary and then press the rotary. ➔ Turn the rotary to “TEMPERATURE’’. Press the rotary. ➔ Turn the rotary to “INDIVIDUAL’’. ➔... -
Page 15: Factory Settings
You can obtain an Application (App) in an Apple-App-Store or in the Google Play-Store for your NIVONA fully automatic machine, with which you are able to control and operate the main functions of your fully automatic machine. You can approve or deactivate a connection of your device to a smartphone in the menu option “BLUETOOTH’’. -
Page 16: Prepare Coffee Specialities
“EXIT’’ and then pressing the rotary. 4. Prepare coffee specialities Your NIVONA appliance offers you diverse possibilities to prepare speciality coffees to your individual wishes. The most important control elements and their basic function are mostly identical for the different coffee specialities: • On/Off switch (picture 1/H): By pressing you turn the appliance on, by pressing once more you... -
Page 17: Espresso And Coffee Should Be Prepared Individually With Each Preparation
4. Prepare coffee specialities The process is being repeated. Particulars of the preparation of two cups: Information: 2 cups can be prepared simultaneously with beverages without milk and without hot water only. With Cappuccino and Cafe Americano, several beverages can only be prepared one after another and not at the same time. - Page 18 4. Prepare coffee specialities ➔ Turn the rotary to the beverage of your choice (i.e. Espresso). Information The display shows the current setting of the selected coffee specialities in the lower row. The strength is shown on the left, the flavour profile in the middle and the amount on the right. Information Take into consideration whether you prepare one or two cups and place the cups under the outlet respectively (picture 5 and 6).
-
Page 19: Prepare Cappuccino And Milk Foam, Change Settings For Cappuccino And Milk Foam
4. Prepare coffee specialities 4.2.2. Manual programming for Espresso and coffee You can also change the standard setting manually as follows. ➔ Choose the menu option “SETTINGS’’ in the main menu by turning the rotary and then pressing the rotary. ➔... - Page 20 4. Prepare coffee specialities You can prepare milk directly from the pack or from a different container with the special milk frother and fill directly into the cup or into the glass. ➔ Connect the suction tube to the milk frother (picture 10). ➔...
- Page 21 4. Prepare coffee specialities ➔ Turn the rotary to “BEVERAGES RECIPES’’. Press the rotary. ➔ Turn the rotary to “CAPPUCCINO’’. Press the rotary. ➔ Turn the rotary to “LIVE PROGRAMMING’’. ➔ Place a cup or glass underneath the outlet (picture 5). Information: Should you wish to cancel the Live programming after the start, hold the rotary down for longer than three seconds.
-
Page 22: Prepare Cafe Americano And Change Standard Setting For Cafe Americano
4. Prepare coffee specialities ➔ Turn the rotary to “BEVERAGES RECIPES’’. Press the rotary. ➔ Turn the rotary to “CAPPUCCINO’’. Press the rotary. Select strength ➔ Turn the rotary to “STRENGTH’’. Press the rotary. ➔ Turn the rotary to the strength of your choice. Weaker to the left and stronger to the right. Press the rotary to confirm your setting. - Page 23 4. Prepare coffee specialities ➔ Place a cup or glass underneath the outlet (picture 5). The display shows “PLEASE PLACE CUP UNDERNEATH COFFEE OUTLET’’. ➔ Place a cup underneath the coffeeoutlet. Information: The display shows the current setting of the selected coffee specialities in the lower row. The strength is shown on the left, the flavour profile in the middle and the amount on the right.
- Page 24 4. Prepare coffee specialities Information: Should you wish to cancel the Live programming after the start, hold the rotary down for longer than three seconds. The display shows “SELECT STRENGTH’’.The display shows “SELECT STRENGTH’’. ➔ Turn the rotary to select the strength of your choice (weaker to the left and stronger to the right). ➔...
-
Page 25: Set "My Coffee'' For Me And Others According To Your Gusto
4. Prepare coffee specialities ➔ Turn the rotary to the strength of your choice. Weaker to the left and stronger to the right. Press the rotary to confirm your setting. Select flavour (in case “FLAVOUR’’ (point 3.3) is set to “INDIVIDUAL’’ in the menu “SETTINGS’’) ➔... -
Page 26: Set Grinding Degree
4. Prepare coffee specialities ➔ Turn the rotary to “BEVERAGES RECIPES’’. Press the rotary. ➔ Turn the rotary to “MY COFFEE’’. Press the rotary. Now, you can change an existing recipe or create a new one. 4.5.1. Edit recipe ➔ Turn the rotary to “EDIT’’. Press the rotary. ➔... -
Page 27: Prepare Instant Coffee (I.e. Decaffeinated Coffee)
5. Cleaning and care Your NIVONA appliance requests some of the below mentioned cleaning and care activities on the display (i.e. “PLEASE RINSE THE MILK FROTHER’’. ➔ When such a cleaning or care request is displayed, turn the rotary to the “hand symbol with the raised index finger’’... -
Page 28: Rinse The System
5. Cleaning and care ➔ Press the rotary. The display shows “OPEN VENT’’. ➔ Turn the steam-hot water- rotary knob (picture 1/C) clockwise up to the stop. Occasionally, the display shows “TURN MILK FROTHER TO RINSE SETTING’’. ➔ Turn the tab of the spumatore to the horizontal position. ➔... -
Page 29: Clean The System
5. Cleaning and care The appliance starts the cleaning process. The display show “MILK FROTHER IS CLEANING, DO NOT REMOVE TUBE’’. ➔ Close the steam-hot water- rotary knob clockwise when the request appears on the display. After a short amount of time, the display shows “TUBE ON MILK FROTHER AND IN DRIP PAN’’. ➔... -
Page 30: Descale System
5. Cleaning and care The appliance starts the cleaning process. The display shows “SYSTEM CLEANING’’. The cleaning process tuns automatically and takes approximately 10 minutes. Information: Please follow an instruction should it appear on the display during the cleaning cycle. The appliance resumes the cleaning cycle automatically afterwards. -
Page 31: Regularly Clean By Hand
5. Cleaning and care ➔ Only now, add the descaler. The display shows “START DESCALING’’ and “OPEN VENT’’ in alteration. ➔ Place a big enough container (at least 0,5 l) centrally underneath the milk frother (picture 1/P). Information: Ensure that the tap of the spumatore is horizontal in the rinse setting. ➔... -
Page 32: Cleaning Of The Brewing Unit
5. Cleaning and care ➔ Clean the interior and exterior of the case with a soft, damp cloth without cleaning agents only. ➔ Empty the drip pan (picture 1/N) and the used coffee tray (picture 1/O) when the display shows it at the latest (only when the device is switched on, because the device only then recognises that the bowls have been emptied). -
Page 33: Maintenance Status
5. Cleaning and care ➔ Turn the rotary to “INSERT FILTER? YES’’ so that the appliance recognises that the filter is inserted. ➔ Empty the water tank (picture 1/F and 2) and carefully unscrew the old filter with the installation aid at the back of the measuring spoon from the mounting in the water tank (picture 4). -
Page 34: System Notification
6. System notification 6. System notification Notification Meaning Remedy Fill system Fill water pipe system ➔ Press right rotary Filter potentially faulty ➔ Remove filter or change Fill with water Water tank is empty ➔ Fill water tank Water tank is missing or ➔... -
Page 35: Solve Problems By Yourself
7. Solve problems by yourself 7. Solve problems by yourself Fault Meaning Remedy Hot water or Milk frother (picture 11) is ➔ Please, clean milk frother steam supply not possible blocked thoroughly and dismantle completely (picture 1/R and 11) System might be calcified ➔... -
Page 36: Spare Parts/Accessories
9. Customer service, guarantee, environment protection Customer service Only the highest quality standards apply for NIVONA products. If there are still questions to the use of your appliance, please write to us. Only with your help, are we able to develop and improve products so that they fully meet your needs. -
Page 37: Technische Daten
Capacity beans container: approx. 250g Capacity Coffee grounds container: max. 11 portions Length of cable: approx. 1,1 metre Weight: approx. 9 kg Measurements (WxHxD): 39,5x29,6x53,6 cm NIVONA Apparate GmbH Südwestpark 90 D-90449 Nürnberg www.nivona.com © 2017 by NIVONA • ...
Need help?
Do you have a question about the CafeRomantica NICR6 Series and is the answer not in the manual?
Questions and answers