Advertisement
Available languages
Available languages
Quick Links
Advertisement
Chapters

Subscribe to Our Youtube Channel
Related Manuals for Rumble Tuff Flo-1


Summary of Contents for Rumble Tuff Flo-1
- Page 1 Flo-1 new collection kit Instruction for use 1 - 13 Model: PA935 14 - 25...
-
Page 2: Introduction
1. Introduction Congratulations on the purchase of your new Rumble Tuff Flo-1. RumbleTuff Flo-1 provide many great features: ● NEW 2-in-1 diaphragm. Rotate to extend its life for up to three cycles before replacement.(Varies by user) ● Only Fewer parts for easy assembly and cleaning. -
Page 3: Table Of Contents
Table of Contents ..................1 1. Introduction ..............3 2. Important Information ..............4 3. Product Description 4. Start-up Procedure and Operation ..................5 4.1 Cleaning ..................8 4.2 Assembly ............10 4.3 Correct Breast Shield Fit ..........11 5. Breast Milk Storage and Thawing ............12 6. -
Page 4: Important Information
• DO NOT boil tubing or adapters. Contains small parts, which may be a choking hazard for children. • Rumble Tuff Flo-1 are a personal care item and intended for use by only one person. • This device is intended for use with any Rumble Tuff electric breast pump. -
Page 5: Product Description
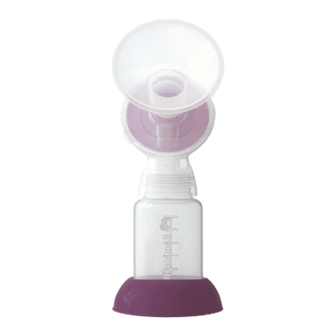
3. Product Description 2X Flange 2X Funnel Base 2X Diaphragm 2X Breastshield Body 2X Silicone connector 2X Collection Bottle 2X Bottle Base 2X Bottle Adapter Kits Note: For ordering information about accessories, please visit www.rumbletuff.com/accessories; or contact our customer service. Toll-Free: (855) 228-8388... -
Page 6: Start-Up Procedure And Operation
4. Start-up Procedure and Operation 4.1 Cleaning Sanitize Prior to First Use: Before first use, disassemble and boil all parts of the Flo-1 in water for 10 minutes. • Be sure to use enough water to keep all parts afloat while boiling. - Page 7 4. Clean Flo-1. Flo-1 are hand washable or dishwasher safe: • Rinse and wash by hand (before first use and after each use) 1. Use a wash basin. Place Flo-1 parts in a clean wash basin used only for washing infant feeding equipment. Do not place pump parts directly in the sink because germs in sinks or drains could contaminate the Flo-1 parts.
- Page 8 • Rumble Tuff breast pump tubing is designed not to touch the pumped milk and does not need to be cleaned routinely. • If the tubing has water droplets in it, disconnect it from the Flo-1, and inspect the diaphragm for damage.
-
Page 9: Assembly
4.2 Assembly Align the waterdrop mark with the outlet. Place diaphragm on top of breast shield and press around edge completely for secure fit. Note: Ensure that the stem is snug against the Valve opening. Confirm cover is properly aligned with Breastshield Body(funnel base). - Page 10 Insert the Flange into the Breastshield Body (funnel base)kit. Connect the Tubing to the Tubing Connector located on the Breastshield Body(funnel base). Note: Make sure there is no moisture in the Tubing.
-
Page 11: Correct Breast Shield Fit
• Measure nipples before pumping session. rumbletuff.com/size-matters-quick-flange-breast-shield- • Please refer to guide/ for breast shield/flange size guidance. The Flo-1 come with 25mm breast shield/ Nipple flange size. Optional 13mm~ 32mm breast shield/ flange are available for purchase at rumbletuff.com. Measure... -
Page 12: Breast Milk Storage And Thawing
5. Breast Milk Storage and Thawing Storage Location and Temperatures TYPE OF Countertop Refrigerator Freezer BREAST 77°F (25°C) or 40°F (4°C) 0°F (-18°C) colder or colder MILK (room temperature) Freshly Within 6 months Up to 4 Hours Up to 4 Days is best Expressed or Up to 12 months... -
Page 13: Connecting To Breast Pump
6. Connecting to RT Breast Pump • Insert ribbed end of connector into tubing. • Insert smooth end of connector into the opening directly above diaphragm. For single pumping Breast Pump EZ Express Whisper Breeze Note: Desired suction level may vary from standard collection combo kits. -
Page 14: Connecting To Other Breast Pumps
7. Connecting to other Breast Pumps • Flo-1 tubing adaptor for different size tubing tube from Flo-1 or your pump Silicone conncector other type of tubing Flo-1 tubing other T connector... -
Page 15: Introducción
Introducción Felicitaciones por la compra de tu nuevo Rumble Tuff Flo-1! El Rumble Tuff Flo-1 ofrece muchas características excelentes ● Nuevo diafragma 2 en 1. Gírelo para extender su vida útil hasta tres ciclos antes de reemplazarlo.(Varía según el usuario) ● Solo menos piezas para un montaje y limpieza fáciles. - Page 16 Tabla de Contenido ..................14 1.Introducción ..............16 2. Información Importante ............17 3. Descripción del Producto 4. Procedimiento de Inicio y Operación ..................18 4.1 Limpieza ................22 4.2 Ensamblaje ......... 24 4.3 Ajuste Correcto del Protector de Pecho 5. Almacenamiento y Descongelación de Leche Materna ......................
-
Page 17: Información Importante
• NO hierva la tubería ni los adaptadores. Contiene piezas pequeñas que pueden representar un peligro de asfixia para los niños. • El Rumble Tuff Flo-1 es un artículo de cuidado personal destinado para el uso de una sola persona. -
Page 18: Descripción Del Producto
3. Descripción del Producto 2X Escude 2X Base del embudo 2X Diafragma 2X Cuerpo del escudo de pecho 2X Conector de silicona 2X Botella de Colección 2X Base de Botella 2X Kits de adaptadores de botellas Nota: Para información sobre pedidos de accesorios, visite www. rumbletuff.com/accessories;... -
Page 19: Procedimiento De Inicio Y Operación
4. Procedimiento de Inicio y Operación 4.1 Limpieza Esterilizar antes del primer uso: Antes del primer uso, desassemble y hierva todas las piezas de los Flo-1 en agua durante 10 minutos. • Asegúrese de usar suficiente agua para mantener todas las partes a flote mientras hierve. - Page 20 3. Enjuague los Flo-1. Para eliminar cualquier residuo de leche, enjuague las piezas de los Flo-1 que entren en contacto con el pecho/la leche materna bajo agua. 4. Limpiar los Flo-1. Se pueden lavar a mano o en el lavavajillas de la siguiente manera: • Enjuague y lave a mano (antes del primer uso y después de cada ...
- Page 21 Si utiliza un lavavajillas, las piezas pueden decolorarse. Esto no afectará el funcionamiento de las partes. 5. Esteriliza Los Flo-1 una vez al día después de su uso. Esteriliza las partes según las indicaciones de la página 18. 6. Instrucciones de limpieza de la tubería: • Limpia el exterior de la tubería con un paño limpio y húmedo. Evita que...
- Page 22 • La tubería del sacaleches Rumble Tuff está diseñada para no tocar la leche extraída y no necesita ser limpiada rutinariamente. • Si la tubería tiene gotas de agua en su interior, desconéctala de los Flo-1 inspecciona el diafragma para detectar daños.
-
Page 23: Ensamblaje
4.2 Ensamblaje Alinea la marca de la gota de agua con la salida. Coloca el diafragma sobre el protector de pecho y presiona alrededor del borde del diafragma completamente para un ajuste seguro. Nota: Asegúrate de que el tallo esté ajustado contra la abertura de la válvula. - Page 24 Inserta el embudo en el kit del cuerpo del protector de pezón. Conecta la tubería al conector de la tubería ubicado en la tapa. Nota: Asegúrate de que no haya humedad en el tubo.
-
Page 25: Ajuste Correcto Del Protector De Pecho
4.3Ajuste Correcto del Protector de Pecho • Mida los pezones antes de la sesión de extracción. rumbletuff.com/size-matters-quick-flange-breast-shield- • Consulta guide / para obtener orientación sobre el tamaño del protector de pecho/brida. Los kits de recolección vienen con un Pezón tamaño de protector de pezón/embudo de 25mm. -
Page 26: Almacenamiento Y Descongelación De Leche Materna
Almacenamiento y Descongelación de Leche Materna LUGARES Y TEMPERATURAS DE ALMACENAMIENTO Fuera del En el Congelador TIPO DE refrigerador refrigerador 0°F (-18°C) LECHE 77°F (25°C) o 40°F (4°C) o más frío más frío (temperatura ambiente) Dentro de los 6 Hasta 4 horas Hasta 4 días meses es mejor Recién... -
Page 27: Conexión Al Sacaleches
6. Conexión al Sacaleches RT • Inserta el extremo acanalado del conector en la tubería. • Inserta el extremo liso del conector en la abertura directamente encima del diafragma. Para extracción individual Sacaleches EZ Express Whisper Breeze Nota: El nivel de succión deseado puede variar con respecto a los kits de recolección estándar. -
Page 28: Conectando A Otros Extractores De Leche
Conectando a otros extractores de leche • Adaptador de tubos de Flo-1 para diferentes tamaños tubo del Flo-1 o de su sacaleche Conector de silicona Otro tipo de tubo Tubo de Flo-1 Otro Conector T... - Page 29 865 N 1430 W Orem UT 84057-6402 Tel: (801) 609-8168 Fax: (801) 796-2688 www.rumbletuff.com 75-PA93500-RTW1 Ver : A2407...
Need help?
Do you have a question about the Flo-1 and is the answer not in the manual?
Questions and answers