Friedrich CP10E10 Installating And Operation Manual
Cp line 115 volts
Hide thumbs
Also See for CP10E10:
- Service and parts manual (30 pages) ,
- Supplementary manual (1 page) ,
- Specifications (12 pages)
Chapters
Table of Contents

Related Manuals for Friedrich CP10E10


Summary of Contents for Friedrich CP10E10
- Page 1 Timer Mode Fan Only Cool Money Saver ® Auto Power Speed Swing Temp CP10 CP12 Timer Mode Fan Only Cool Money Saver ® Auto Power Speed Swing Temp...
-
Page 2: Table Of Contents
Congratulations! Thank you for choosing Friedrich. Your Friedrich unit is designed for maximum comfort and quietness. Table of Contents Introduction ..................2 Safety Precautions...............3 How to operate your Friedrich ...........5 Adjusting the Air Flow Direction..........6 Care and Maintenance ..............7 Hardware Location ...............8 Installation Instructions............9... -
Page 3: Introduction
Introduction Before Operating Your Unit Make sure the wiring is adequate f or y our unit. If you have fuses, they should be of the time delay type. Before you install or relocate this unit, be sure that the amperage rating of the circuit breaker or time delay fuse does not exceed the amp rating listed in figure 1. DO NOT use an extension co r d. -
Page 4: Safety Precautions
• If the power cord is damaged, it must generation. be replaced by the manufacturer or a Friedrich-certified service agent. Do not modify power cord Do not operate with wet Do not direct air flow directly length. -
Page 6: Dry Operation
A ir Power P urifier Timer Mode Temp Fan Only Cool Money Saver ® Fan S peed Auto Power Speed Swing Mode T imer Temp Auto Swing S wing 6. AUTO SWING dry operation. This button can automatically control the air flow (dehumidify operation) direction. -
Page 8: Care And Maintenance
Care and Maintenance Turn the power off and unplug the power plug before cleaning the air conditioner. Air Filter The air filter behind the inlet grille should be checked and cleaned at least once every 2 weeks (or as necessary) to maintain optimal performance of the air conditioner. How to remove the air filter 1. -
Page 9: Hardware Location
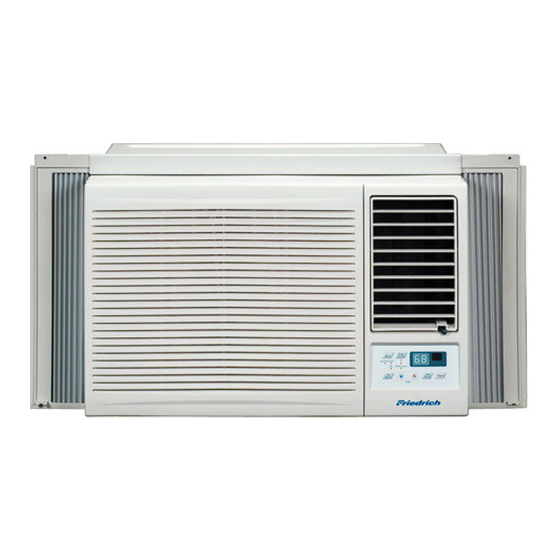
Hardware Location Product Features CAUTION This appliance should be installed in accordance with local and national wiring regulations. This manual acts as a guide to help to explain product features. Vertical Air Deflector (Horizontal Louver) Horizontal Air Deflector (Vertical Louver) Air Discharge Air Intake(Inlet Grille) Cabinet... -
Page 10: Installation Instructions
Installation Instructions Read these instructions completely and carefully. Tools You Will Need Phillips-head screwdriver Scissors or knife Flat-blade screwdriver Pencil Ruler or tape measure Level Hammer Before You Begin NOTE TO INSTALLER: Leave these CAUTION: instructions with the air conditioner after Do not under any circumstances, cut or remove installation is complete. -
Page 11: How To Install The Unit
How to Install the Unit 1. To prevent vibration and excess noise, Fence make sure the unit is installed securely Awning and firmly 2. Install the unit where the sunlight does not Cooled air Heat shine directly on the unit. radiation 3. - Page 12 Installation Kit Contents Type A:13EA Type B:3EA Type C:5EA (SCREW) (SCREW) (SCREW) Type D:2EA Type E:2EA Type F:2EA Type G:2EA (NUT) (FRAME CURTAIN) (SILL SUPPORT) (BOLT) Type H:1EA Type K:2EA Type L:1EA Type M:1EA (FOAM-STRIP) (FRAME-GUIDE) (WINDOWLOCKINGBRACKET) (FOAM-PE) Type N:1EA (DRAIN JOINT PIPE) Have the following tools available for installation: * Screwdriver (Slotted and Phillips)
-
Page 13: Suggested Tool Requirements
Suggested Tool Requirements SCREWDRIVER(+, -), RULER, KNIFE, HAMMER, PENCIL, LEVEL Shipping screws PREPARATION OF CHASSIS 1. Remove the screws which fasten the cabinet at both sides and at the back. (Fig .1) 2. Slide the unit out from the cabinet by gripping the base pan handle and pulling forward while bracing the cabinet. -
Page 14: Cabinet Installation
Cabinet Installation 1. Open the window. Mark a line on center of the window stool.Carefully place the cabinet on the window stool and align the center mark on the bottom front with the center line marked in the window stool. (Fig. 1) Upper Guide Window stool Front Angle... - Page 15 6. The cabinet should be installed with a very slight tilt (about 1/2") downward toward the outside Screw(Type B) (See Fig. 5). Adjust the bolt and the nut of Sill Support for balancing the cabinet. Sill Support 7. Attach the cabinet to the window stool by driving Sash track the screws [Type B: Length 16mm (5/8 inch)
- Page 16 12. Attach the Window Locking Bracket with a Type C screw . ( Fig. 9) Window locking bracket Fig. 9 13. Attach the front grille to the cabinet by inserting the tabs on the grille into the tabs on the front of the cabinet.
- Page 17 Through-the-Wall Installation Instructions-Optional IMPORTANT The case may be installed through the wall (cont.) in both existing and new construction. Secure with 14 wood screws anchored at Read completely, then follow step-by-step. Ieast an inch into the wall support structure. NOTE: Obtain all materials locally for NOTE: Drill pilot holes, if necessary, for mounting the air conditioner through...
-
Page 18: Troubleshooting Tips
Troubleshooting Tips Troubleshooting Tips save time and money! Review the chart below first and you may not need to call for service. Normal Operation • You may hear a pinging noise caused by water being picked up and thrown against the condenser on rainy days or when the humidity is high. -
Page 19: Warranty
PROVIDED FRIEDRICH APPLICABILITY AND LIMITATIONS: FRIEDRICH Authorized Dealer or Service Organization LIMITATIONS: THIS WARRANTY IS GIVEN IN LIEU OF ALL OTHER WARRANTIES. Anything in the warranty notwithstanding, ANY IMPLIED WARRANTIES OF FITNESS FOR PARTICULAR PURPOSE AND/OR MERCHANTABILITY SHALL BE LIMITED TO THE DURATION OF THIS EXPRESS WARRANTY. - Page 21 Vous trouverez l'information concernant l'appareil sur la plaque signalétique située sur le côté de l'appareil, près du panneau de commande. Veuillez remplir et poster la carte d'enregistrement fournie avec l'appareil ou enregistrez-vous en ligne à www.friedrich.com (USA uniquement). Veuillez consigner l'information à l'emplacement ci-dessous pour référence ultérieure. Timer...
- Page 22 Félicitations! Merci d'avoir choisi Friedrich. Votre unité Friedrich est conçue pour vous offrir le confort et le silence maximums. Table des matières Introduction ..................2 Mesures de sécurité..............3 Fonctionnement de la télécommande........5 Réglage de l'orientation du débit d'air ........6 Soins et entretien .................7 Installation du matériel ..............8...
-
Page 23: Introduction
Introduction Avant d'utiliser votre appareil Assurez-vous que votre câblage électrique est conforme aux normes de fonctionnement de l'appareil. Si votre système électrique comporte des fusibles, veillez qu'ils soient de type temporisé. Avant d'installer ou de déplacer l'appareil, veillez que l'intensité de courant du disjoncteur ou du fusible temporisé n'excède pas l'intensité... -
Page 24: Mesures De Sécurité
Mesures de Sécurité Pour éviter des accidents corporels ou des dommages matériels, suivez ces instructions. ■Un mauvais fonctionnement dû à l’ignorance de ces instructions peut provoquer des préjudices corporels ou des dommages. AVERTISSEMENT Ce symbole signale un risque de blessure grave, voire mortelle. ATTENTION Ce symbole signale un risque limité... - Page 25 ATTENTION Lorsque le filtre à air doit Ne pas nettoyer le Quand l'unité devrait être être retiré, ne pas toucher les climatiseur avec de l'eau. nettoyée, change l'unité de, et le parties métalliques de débrancher. l'appareil. • L'eau peut s'infiltrer dans •...
-
Page 27: Fonctionnement De La Télécommande
Fonctionnement de la télécommande CP A ir Power P urifier Timer Mode Temp Fan Only Cool Money Saver ® Fan S peed Auto Power Speed Swing Mode T imer Temp Auto Swing S wing OSCILLATION AUTOMATIQUE Ce bouton peut contrôler automatiquement la direction de l'air. -
Page 29: Soins Et Entretien
Soins et entretien Avant de nettoyer le climatiseur, éteignez-le et débranchez la fiche d'alimentation. Filtre à air Afin de maintenir l'efficacité du climatiseur à son meilleur niveau, vous devriez nettoyer le filtre à air, situé en arrière de la grille de prise d'air, au moins à toutes les deux semaines (ou au besoin). Comment retirer le filtre à... -
Page 30: Installation Du Matériel
Installation du matériel Caractéristiques particulières de l’ appareil ATTENTION Cet appareil doit être installé en fonction des normes électriques locales, régionales et nationales. L'illustration suivante sert à situer les différents éléments de l'appareil. DEFLECTOR DE AIRE HORIZONTAL (VENTANILLAS HORIZONTALES) DEFLECTOR HORIZONTAL DE AIRE (VENTANILLAS VERTICALES) SALIDA DE AIRE RECOLECTOR DE AIRE... - Page 32 Installation de l’ appareil 1. Installez l'appareil solidement et Clôture sécuritairement de manière à prévenir la Auvent présence de vibrations et bruits. Air refroidi Radiation de chaleur 3. Le boîtier doit sortir d'au moins 12" à l'extérieur et aucun obstacle du genre clôture ou mur doit se situer à...
- Page 33 Contenu du nécessaire d’installation Tipo B:3 EA Tipo C:5 EA Tipo A:13 EA (TORNILLO) ( TORNILLO) (TORNILLO) Tipo E:2 EA Tipo D:2 EA Tipo F:2 EA Tipo G:2 EA (TUERCA) (PANEL GUÍA) (SOPORTE DE ALFÉIZAR) (TORNILLO) 10mm Tipo M:1 EA Tipo H:1 EA Tipo K:2 EA Tipo L:1 EA...
- Page 34 Outils recommandés TOURNEVIS (+, -), RÈGLE, COUTEAU, MARTEAU, CRAYON, NIVEAU PRÉPARATION DU CADRE 1. Déposez les vis situées de part et d'autre et à l'arrière du Vis d'expédition boîtier. (Fig 1) 2. Tout en retenant le boîtier, glissez l'appareil hors du boîtier en tirant vers l'avant sur la poignée du réceptacle d'eau.
- Page 35 Installation du boîtier 1. Ouvrez la fenêtre. Tracez une ligne au centre du rebord de fenêtre. Placez le boîtier soigneusement sur le rebord de fenêtre et alignez le repère central de sa portion inférieure avant avec la ligne tracée Rail de guidage sur le rebord de fenêtre.
- Page 36 6. Installez le boîtier avec une inclinaison d'environ 1/2" (1,27 cm) vers l'extérieur Vis (Type B) (Voyez la fig. 5). Réglez l'écrou et le boulon des supports de seuil de manière à équilibrer le boîtier. Support de seuil 7. Fixez le boîtier au rebord de fenêtre à l'aide de Coulisse vis de type B (16 mm [5/5"] de long) de chassis...
- Page 37 12. Fixez l'étrier de verrouillage de fenêtre à l'aide d'une vis de type C (Fig. 9) Étrier de verrouillage de fenêtre Fig. 9 13. Fixez la grille avant au boîtier en en insérant les languettes de la grille dans les encoches situées à l'avant du boîtier.
- Page 38 Installation sur le mur - Instruction facultative La boîte cas peut être installé sur le mur dans IMPORTANT(cont.) la construction tant existante que nouvelle. Lisez complètement, puis suivez étape par A bloqué avec 14 vis en bois au moins a étape.
-
Page 40: Garantie
FRIEDRICH est défectueux à cause d’un défaut de main d’oeuvre ou de matériau dans les 60 mois à compter de la date d’achat initial, FRIEDRICH paiera une allocation pour les frais de main d’oeuvre et les pièces nécessaires pour réparer le système de réfrigération étanche. - Page 41 Complete y en envíe por correo la tarjeta de registro de propietario que se entrega con este producto, o bien regístrese por Internet en www.friedrich.com (sólo para EE.UU.) Para su conveniencia en el futuro, registre aquí la información sobre su modelo.
- Page 42 Felicitaciones! Ha comprado un acondicionador de aire para habitación Friedrich. El Friedrich está diseñado para proveer el máximo de bienestar y de tranquilidad. Contenidos Introducción..................2 Precauciones de seguridad ............3 Funcionamiento del control remoto C P ........5 Cómo hacer funcionar a su Friedrich...
- Page 43 Introducción Antes de poner en funcionamiento su unidad Asegúrese que el tipo de cable sea el adecuado a su unidad. Si tiene fusibles, deben ser del tipo de tiempo retardado. Antes de instalar o reubicar esta unidad, asegúrese que el nivel de amperaje del disyuntor o del fusible de tiempo retardado no exceda el amperaje que figura en la figura 1.
- Page 44 Precauciones de segoridad Siga estas instrucciones para que no se produzcan daños en la propiedad ni daños personales. ■ Se pueden producir daños si se utiliza el aparato de forma incorrecta al desconocer las instrucciones. ADVERTENCIA Este símbolo indica la posibilidad de lesiones mortales o graves. Este símbolo indica la posibilidad de lesiones o daños PRECAUCION materiales.
- Page 45 PRECAUCION Cuando se vaya a quitar el No limpie el acondicionador Cuándo la unidad deberá ser filtro de aire no toque las de aire con agua. limpiada, cambia la unidad partes metálicas de la unidad lejos, y lo quita. interior. •...
- Page 46 Funcionamiento del control remoto CP A ir Power P urifier Timer Mode Temp Fan Only Cool Money Saver ® Fan S peed Auto Power Speed Swing Mode T imer Temp Auto Swing S wing 6. AUTOGIRO Este botón puede controlar automáticament la dirección del flujo de aire.
-
Page 48: Cuidado Y Mantenimiento
Cuidado y mantenimiento Desconecte la energía y desenchufe la unidad antes de limpiar el acondicionador de aire. Filtro de Aire a El filtro de aire detrás de la parrilla de entrada debe ser controlado y limpiado por lo menos una vez cada dos semanas (o cuando sea necesario) para mantener el rendimiento óptimo del acondicionador de aire. - Page 49 Instalación de la unidad Funciones del producto PRECAUCIÓN Este dispositivo debe ser instalado de acuerdo con la normas nacionales de cableado. Esta guía actúa como ayuda para explicar las funciones del producto. Deflector de aire vertical (Rejilla horizontal) Deflector de aire horizontal (Rejilla vertical) Descarga de aire Entrada de aire...
- Page 51 Cómo instalar la unidad 1. Para prevenir la vibración y el ruido, Cerco asegúrese que la unidad est é instalada Protección con seguridad y firmeza. 2. Si se puede,instale la unidad en un lugar Aire fresco alejado de la luz solar directa. Radiación de calor 3.
- Page 52 Contenidos de los conjuntos de instalación Tipo C:5 EA Tipo B:3 EA Tipo A:13 EA (TORNILLO) (TORNILLO) ( TORNILLO) Tipo E:2 EA Tipo D:2 EA Tipo F:2 EA Tipo G:2 EA (TUERCA) (PANEL GUÍA) (SOPORTE DE ALFÉIZAR) (TORNILLO) 10mm Tipo K:2 EA Tipo L:1 EA Tipo M:1 EA Tipo G:2 EA...
- Page 53 Requisitos sugeridos de las ventanas DESTORNILLADOR(+, -), REGLA, CUCHILLO, MARTILLO, LÁPIZ, NIVEL PREPARACIÓN DEL CHASIS 1. Quite los tornillos que unen el gabinete a ambos lados y Tornillos a la parte posterior. de fijación FIG.1 2. Deslice la unidad desde el gabinete asiendo la manija de la base de la bandeja base mientras con la otra mano sostiene el gabinete.
- Page 54 Instalación del gabinete 1. Abra la ventana. Marque una línea en el centro del asiento de la ventana. Coloque cuidadosamente el gabinete sobre el asiento de la ventana alinee la marca central de la parte inferior frontal con la línea Guía superior marcada en el centro del asiento de la Asiento de la ventana...
- Page 55 6. El gabinete debe ser instalado con una ligera inclinación (aproximadamente 1/2") de modo Tornillo(Tipo B) que el lado externo quede hacia abajo (ver Fig. 5) Ajuste el perno y la tuerca del soporte para equilibrar el gabinete. al dintel 7.
- Page 56 12. Agregue la abrazadera de fijación con un tornillo Tipo C (ver Fig. 9) Abrazadera de fijación Fig. 9 13. Agregue la parrilla frontal al gabinete insertando las pestañas en la parrilla dentro de las pestañas del frente del gabinete. Empuje la parrilla hasta que se fije en el lugar.
- Page 58 Instrucciones de instalacion a traves de la pared opcional TERMINE LA ABERTURA EN LA PARED Calafatee los cuatro lados del lado exterior de la caja para evitar que la humedad penetre a traves de la abertura en la pared. El uso de tapajuntas (riel de goteo ) evitara aun mas que el agua gotee hacia el interior de la pared y hacia el exterior de la construccion.
- Page 60 FRIEDRICH con su unidad de aire acondicionado falla, debido a un defecto de manufactura o del material, dentro de los 60 meses siguientes a la fecha original de compra, FRIEDRICH pagará...
- Page 61 FRIEDRICH AIR CONDITIONING CO. Visit our web site at www.friedrich.com Post Office Box 1540 • 4200 N. Pan Am Expressway • San Antonio, Texas 78295-1540 • (210) 357-4400 • FAX (210) 357-4490 P/NO.: MFL42941601 920-201-00 (11/ 07 )
Need help?
Do you have a question about the CP10E10 and is the answer not in the manual?
Questions and answers