Table of Contents
Advertisement
Quick Links
Advertisement
Table of Contents

Related Manuals for Creda C60ISC


Summary of Contents for Creda C60ISC
- Page 1 INDUCTION HOB INSTRUCTION MANUAL MODEL/S C60ISC...
- Page 2 OVERVIEW NOTE: This instruction manual Thank you for purchasing this product. is suitable for multiple models within the hob range, some We aim to ensure that you features may not be relevant optimally and efficiently to your model. use this product. All of our products are produced to the Our appliances are intended highest quality in our modern...
-
Page 3: Table Of Contents
CONTENTS Safety Information General Safety Plug & Cord Power Connection Circuit Breakers Wiring Diagram Introduction of your Appliance Technical Specifications Setting up the Appliance Installation of the Appliance How to use the Appliance Before First Use & Touch Control Turning the Appliance On/Off Residual Heat Indicator Turning the Cooking Zone On/Off Child Lock Function... -
Page 4: Safety Information
SAFETY INFORMATION ATTENTION: If the glass of the Please read the Instruction manual carefully before appliance is broken, turn off any operating the appliance. heating element immediately and disconnect the appliance Installation and repair must from the power source. be performed by a qualified WARNING: Please seek medical individual, the manufacturer shall not be held responsible... -
Page 5: Plug & Cord
Do not use the appliance when Creda will not be responsible in an unfit state to do so, for for the damages that occur due example being medicated or to using the appliance without under the influence of alcohol. - Page 6 SAFETY INFORMATION Do not touch the plug with wet The appliance should be installed hands and always unplug by in a way where the electrical holding the plug and not pulling component can be completely the cord. disconnect. Disconnection from the power supply should be When using other electrical provide by the use of a switch or...
-
Page 7: Power Connection
To disconnect mains power rules/regulations. to the appliance. Creda is not responsible for FUSE ELEMENTS the damages caused by an Remove the fuse completely ungrounded socket connected to from the base. -
Page 8: Wiring Diagram
POWER CONNECTION WARNING: Take safety WIRING DIAGRAM precautions against turning on Make the electrical connection power unintentionally. according to the appropriate WARNING: The power supply wiring diagram. cable should not touch the hot 14A / 28A parts of the appliance. Input 220-240~ WARNING: If the power supply... -
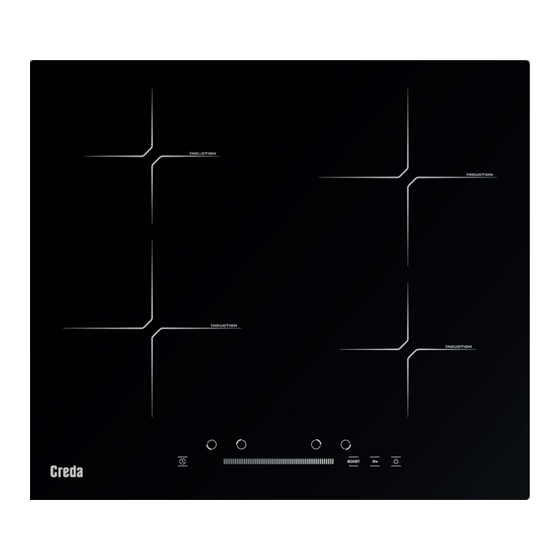
Page 9: Introduction Of Your Appliance
INTRODUCTION OF YOUR APPLIANCE NOTE: The appliance figures below are only provided for illustration purposes. Depending on the appliance in question the image may vary, Only consider your appliance. Figure One Figure Two Figure One Figure Two 1. Upper Left Cooking Zone 1. -
Page 10: Technical Specifications
TECHNICAL SPECIFICATIONS NOTE: Technical specification NOTE: The values declared in table should be taken into the markings on the appliance consideration when installing or in the Instruction Manual the appliance. The manufacturer are obtained in a laboratory will not be held responsible for environment according to the any problems rising due to faulty current regulations. - Page 11 TECHNICAL SPECIFICATIONS Cooking Cooking Zone Cooking Cooking Zone Total Zone Diameter Zone Power High Power Power Ø160mm 1400 W Model 5 Ø180mm 1800 W 6400 W Ø210mm 1800 W 2100 W Ø160mm 1400 W Cooking Cooking Zone Cooking Cooking Zone Total Zone Diameter...
-
Page 12: Setting Up The Appliance
SETTING UP THE APPLIANCE NOTE: Check the electrical IMPORTANT: Keep the system is suitable for the ventilation channels open. appliance, if it’s not suitable call IMPORTANT: Correct (PPE) a qualified electrician to arrange Personal Protection Equipment the utilities as necessary. must be worn during the All local standards/ regulations installation. -
Page 13: Installation Location
INSTALLATION LOCATION COUNTERTOP The appliance is designed in accordance with the kitchen CUTTING DIMENSIONS countertops supplied in the UK Figure Three market. A safe distance must be maintained between the appliance, kitchen walls and the furniture. If a hood or aspirator is to be installed above the appliance, follow the instructions of the manufacturer on where to... - Page 14 HOW TO INSTALL APPLIANCE 1. Turn the appliance upside 4. Secure the appliance by down and put it on a flat using the clamps and screws surface. supplied in the packaging. (See Figure Six) 2. To prevent foreign materials and liquids from entering Figure Six between the appliance and the countertop, stick the wick...
-
Page 15: How To Use The Appliance
HOW TO USE THE APPLIANCE TOUCH CONTROL Remove any protective foils and labels that may be present The control panel on the on the device. appliance reacts to touch, you do BEFORE FIRST USE not need to apply pressure to the controls. -
Page 16: Turning The Appliance On/Off
HOW TO USE THE APPLIANCE WARNING: Residual heat TURNING ON indicator symbol does not THE APPLIANCE light up and does not warn the The appliance is turned on user against heat in case of a by pressing the On/Off Key power outage. -
Page 17: Child Lock Function
HOW TO USE THE APPLIANCE NOTE: When the child lock TURNING THE function is activated, all other COOKING ZONES OFF buttons except the On/Off Key A selected cooking zone can be are disabled. turned off in three ways. To disable the child lock function 1. -
Page 18: Timer Functions
HOW TO USE THE APPLIANCE NOTE: Turning off the appliance TIMER FUNCTIONS by pressing the On/Off key will NOTE: There are two types of stop the timer, the timer will not timer functions. resume when the time is turned INDEPENDENT back on. -
Page 19: High Power Function (Boost)
HOW TO USE THE APPLIANCE NOTE: If more than one timer is 3. After setting the power level available, timer display indicates for the relevant cooking zone, the lowest remaining time the high power function value after the setting period. (BOOST) key is pressed. -
Page 20: Pot Identification & Error Codes
HOW TO USE THE APPLIANCE POT IDENTIFICATION ERROR CODES (NO POT WARNING) Please see below error codes, their probable cause and Cooking will stop if there is no recommended solutions. pot (either there is no pot or the pot is not induction-compliant) Error in the cooking zone when the Possible Cause... -
Page 21: Proper Pot Use
PROPER POT USE NOTE: The pots or pans used on the appliance must be compatible with induction. Pot Diagram Description Use dishes of the appropriate size for each cooking zone. Do not use small dishes in a large cooking zone. Do not use containers with convex or concave bases. -
Page 22: Cooking Hazards
COOKING HAZARDS WARNING: Unattended cooking WARNING: Rough pot and pan with solid or liquid oil in the bases scratch the glass-ceramic appliance is dangerous, it can surface. Use only pots and pans cause a fire. with smooth bases. BURNING HAZARD: During its WARNING: Never prepare food use, the heater elements of the directly on the glass surface. -
Page 23: Control Panel Overview
CONTROL PANEL OVERVIEW Electronic Control Panel Diagram Model 1 Model 2 Model 3 Model 4 Model 5 Model 6... - Page 24 CONTROL PANEL OVERVIEW Electronic Control Panel Keys On/Off Key Used for powering the appliance on & off. Sliding Touch Used for setting the temperature of the cooking zone. Used to increase the temperature of the cooking zones or timer Plus Key duration.
-
Page 25: Maintenance And Care
MAINTENANCE & CARE TROUBLESHOOTING The operating life of the appliance is extended and the Use the points below to see for a problems encountered are possible solution, if your problem reduced if it is cleaned at persists call the service center. regular intervals. -
Page 26: Cleaning & Care
CLEANING & CARE 1. Clean the glass surfaces 7. Do not clean the appliance with special glass cleaning with hard tools such as agents. Do not use abrasive brushes, steel sponges, or cleaners or sharp metal knives. Do not use abrasive, scratching agents, or scrapers when cleaning glass surfaces, as scratching glass... -
Page 27: Disposal Of The Appliance
DISPOSAL OF THE APPLIANCE AEEE COMPLIANCE & Please help to protect the environment and natural DISPOSAL OF WASTE resources by recycling the used This product does not contain products. the dangerous and prohibited Before disposing of the product, materials indicated in “Waste disconnect the electrical plug for Electrical and Electronic the safety of children and make it... - Page 28 Thank you! We hope you enjoy your appliance for many years... HELP & GUIDANCE YOUR CREDA GUARANTEE We’re here to help you to get the This product is guaranteed for 3 best out of your Induction Hob. years from the date of original Should you require any guidance purchase.
Need help?
Do you have a question about the C60ISC and is the answer not in the manual?
Questions and answers
When switching on the message Lo appears on left and a hyphen against each cooking zone. What is wrong?