Table of Contents
Advertisement
Quick Links
Advertisement
Table of Contents

Subscribe to Our Youtube Channel
Related Manuals for Creda C70CTC


Summary of Contents for Creda C70CTC
- Page 1 60CM & 70CM CERAMIC HOBS INSTRUCTION MANUAL MODEL/S C60CTC C70CTC V 1.0...
-
Page 2: Help And Guidance
INSTRUCTION MANUAL You’ll soon be enjoying your new Creda Ceramic Hob! It all begins here, with your instructions. Don’t worry, there’s nothing too technical coming up. Just simple, step-by-step guidance to get you up and running quickly. Sound good? Then let’s get started. - Page 3 INSTRUCTION MANUAL Contents — PAGE Safety Information Getting to Know Your Appliance Installation Advice Using Your Appliance Help and Assistance Care and Maintenance...
-
Page 4: Safety Information
Range cooker IMPORTANT: Carefully unpack and examine the appliance for any damage. If you think there is a defect, do not use the appliance and contact Creda Product Support on 01759 487836. Packaging materials should be collected together and disposed of immediately as they may be harmful to children. -
Page 5: General Safety Warnings
INSTRUCTION MANUAL WARNING: The appliance and its accessible parts become hot during use. Care should be taken to avoid touching heating elements. Children less than 8 years of age shall be kept away unless continuously supervised. WARNING: NEVER try to extinguish a cooking fire with water. Instead switch off the appliance and cover flame e.g with a lid or a fire blanket. - Page 6 INSTRUCTION MANUAL Electrical Safety 1. Have an authorized electrician set grounding equipment. Our company shall not be responsible for the damages that shall be incurred due to using the product without grounding according to local regulations. 2. The circuit breaker switches of the oven shall be placed so that end user can reach them when the oven is installed.
- Page 7 INSTRUCTION MANUAL Protecting Ceramic Glass Cooking Surface Ceramic glass surface is unbreakable and scratch resistant to a certain degree. However, to avoid any damage, please do the following: 1. Never pour cold water on hot cookers. 2. Do not stand on a ceramic glass plate. 3.
- Page 8 Get electrical connection of your appliance done to authorized person in line with the following scheme. TO MAINTAIN THE EFFICIENCY AND SAFETY OF YOUR APPLIANCE, WE RECOMMEND YOU ALWAYS USE OUR AUTHORISED SERVICE AGENTS AND ORIGINAL SPARE PARTS. FOR ASSISTANCE CALL CREDA PRODUCT SUPPORT 01759 487836...
-
Page 9: Getting To Know Your Appliance
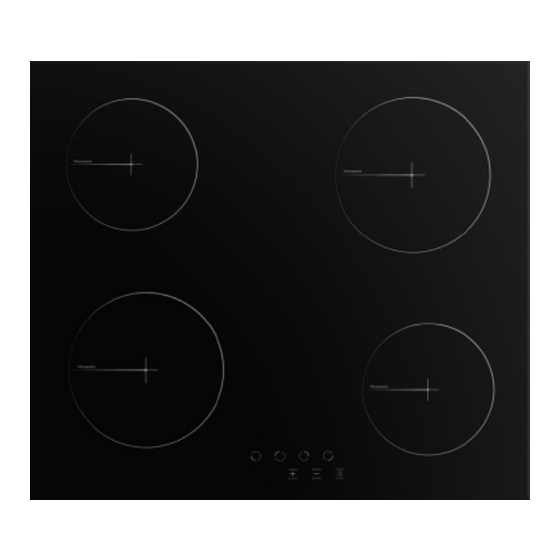
INSTRUCTION MANUAL Getting to Know Your Appliance You’ll be up and running in no time! Ready? Let’s begin... Please read these instructions carefully. They contain important information which will help you get the best from your freestanding cooker and ensure safe and correct installation and operation. If you require any further assistance, our technical experts are happy to help. - Page 10 INSTRUCTION MANUAL OVERVIEW 1. Ceramic zones positions 2. Ceramic Glass Surface 3. Controls 4. Ceramic heater (140mm) 5. Double Ceramic heater (180mm) 6. Ovaldual ceramic heater (250mm) Note: Not every symbol is on every model, only take notice of the symbols on your device.
- Page 11 INSTRUCTION MANUAL Technical Features Specification 180mm ceramic heater 1800 W 140mm ceramic heater 1200 W 140 / 250 mm ceramic heater 1800 W 1700 W 120 / 180 mm ceramic heater 220 / 300 mm ceramic heater 2400 W Supply voltage 220-240 V AC 380-415 V 3N AC 50/60 Hz WARNING: For the modification to be done by authorized service, this table should be considered.
- Page 12 INSTRUCTION MANUAL Installing your Ceramic Hob Bringing it all together Installation requirements THIS APPLIANCE MUST BE INSTALLED BY A QUALIFIED INSTALLER IN ACCORDANCE WITH LOCAL REGULATIONS Check if the electrical installation is proper to bring the appliance in operating condition. If electricity installation is not suitable, call an electrician and plumber to arrange the utilities as necessary.
- Page 13 INSTRUCTION MANUAL Installation Diagram 1. When product is mounted on a drawer, if it is possible to touch lower side of product, this section should be separated with a wooden shelf. 2. While mounting hob on a closet, as shown in the figure above, in order to separate between closet and hob, a shelf should be mounted.
- Page 14 INSTRUCTION MANUAL Counter Cut-out Dimensions Pay attention to the drawings and dimensions given below while making hob installation and adjusting counter cutting sizes.
-
Page 15: Using Your Appliance
USING YOUR APPLIANCE Using the Ceramic Hob Controls for C60CTC Lower left cooking area selection key Upper left cooking area selection key Upper right cooking area selection key Lower right cooking area selection key Plus key Minus key On / off key Temperature display icon... -
Page 16: Turning The Hob On
Turning the Hob on Note: Unit becomes operational within 1 second after it is plugged to the mains. All LEDs and displays illuminate for 1 second. Unit is turned on by pressing the key. The icon is displayed on all displays. (See Fig. 1) Figure 1 If the temperature of the glass over the hobs is above + 60°C,... - Page 17 Turning the Hob zones Turn the stove on by pressing the button. (See Fig. 5) Figure 5 2. Press the relevant hob selection key. The icon shall be displayed in the relevant hob when you touch for the first time. (See Fig. 6) Figure 6 3.
- Page 18 2. Press the relevant hob selection key once. The icon is displayed when you touch for the first time. (See Fig. 9) Figure 9 3. Then, press the key once. The icon shall be displayed in the relevant hob with this touch. (see Fig.
- Page 19 Child Lock Function (Optional) To activate the child lock; 1. Press front left hob selection key ( ) and minus key ( ) simultaneously, you shall hear a short warning signal at this time. (see Fig. 14) Then, remove your fingers from the stove control panel. Figure 14 2.
- Page 20 3. The icon is displayed on all displays. (see Fig. 19) icons are displayed alternatively if any hob is hot. Figure 19 WARNING: Child lock is deactivated until the stove is turned off only with the steps performed in this section. In other words, child lock shall be activated again if the unit is turned off and on again.
- Page 21 USING YOUR APPLIANCE Using the Ceramic Hob Controls for C70CTC Lower left cooking area selection key Upper left cooking area selection key Upper right cooking area selection key Lower right cooking area selection key Minus key Special function selection key...
- Page 22 Turning the Hob on Note: Unit becomes operational within 1 second after it is plugged to the mains. All LEDs and displays illuminate for 1 second. Unit is turned on by pressing the key. The symbol is displayed on all displays. (See Fig. 1) Figure 1 If the temperature of the glass over the hobs is above + 60°C,...
- Page 23 Turning the Hob cooking zones on Turn the stove on by pressing the button. (See Fig. 5) Figure 5 2. Press the relevant hob selection key. The symbol shall be displayed in the relevant hob when you touch for the first time. (see Fig. 6) Moreover, the relevant hob selection key functions as the after the first touch.
- Page 24 2. Press the relevant hob selection key once. The icon is displayed when you touch for the first time. (See Fig. 9) Figure 9 3. Then, press the relevant hob selection key again. icon shall be displayed in the relevant hob with this touch.
- Page 25 4. After setting the auto heating, you may set the cooking level desired using the relevant hob selection key and the key. (see Fig. 14) The icon and the cooking level selected are displayed alternatively on the screen. Figure 14 Turning the hob cooking zones off 1.
- Page 26 Child Lock Function (Optional) To activate the child lock; 1. Press front right hob selection key ( ) and minus key ( ) simultaneously (see Fig. 19), you shall hear a short warning signal at this time. Then, remove your fingers from the stove control panel.
- Page 27 3. The icon is displayed on all displays. (see Fig. 24) icons are displayed alternatively if any hob is hot. Figure 24 WARNING: Child lock is deactivated until the stove is turned off only with the steps performed in this section. In other words, child lock shall be activated again if the unit is turned off and on again.
- Page 28 WARNING: Child lock shall be deactivated in case of a power outage. Special Function Selection Key Special function selection key controls the double and ovaldual heaters. When the double or ovaldual heaters are selected for cooking, both hobs of these heaters are activated. You may select one cooking area of the double and ovaldual heaters by pressing the special function selection key.
- Page 29 INSTRUCTION MANUAL Using and Power of Hob Zones Level 1 Level 2 Level 3 Level 4 Level 5 Level 6 Level 7 Level 8 Level 9 Max 140 mm 1200 W 1200 W 1200 W 1200 W 1200 W 1200 W 1200 W 1200 W 1200 W 180 mm 1800 W 1800 W 1800 W 1800 W 1800 W 1800 W 1800 W 1800 W 1800 W 140/250 mm 1000 W 1000 W 1000 W 1000 W 1000 W 1000 W 1000 W 1000 W 1000 W 1800 W...
-
Page 30: Maintenance And Cleaning
INSTRUCTION MANUAL MAINTENANCE AND CLEANING Before starting to maintenance or cleaning, firstly unplug the plug supplying electricity to hob and turn down gas valve. If HOB is hot, wait for cooling down. 1. For the purpose that your hob has long and economic life, regular cleaning and maintenance should be performed on your hob. - Page 31 INSTRUCTION MANUAL This page is intentionally blank...
-
Page 32: Help And Assistance
Local call rates apply* Lines open 9am-5:30pm Monday to Friday *Calls to Creda enquiry lines may attract a charge and set up fee from residential lines depending on your call plan/tariff. Mobile and other providers costs may vary, see www.bt.com/pricing for details. - Page 33 Call us now and activate your 3 year guarantee Thank you for choosing Creda. Your new product is guaranteed against faults and breakdowns for 3 years. Don’t forget to register it with us today so we can provide you with our best possible after-sales service and useful updates.
- Page 34 Declaration of conformance to product standards This appliance conforms to all relevant standards applicable to domestic appliances sold in the UK. Disposal This appliance/fitting is marked according to the European directive 2012/19/EU on Waste Electrical and Electronic Equipment (WEEE). By ensuring this product is disposed of correctly, you will help prevent potential negative consequences for the environment and human health, which could otherwise be caused by inappropriate waste handling of this product.
- Page 35 This page is intentionally...
Need help?
Do you have a question about the C70CTC and is the answer not in the manual?
Questions and answers