Advertisement
Quick Links
INSTALLATION INSTRUCTIONS
BEFORE BEGINNING | AVANT DE COMMENCER | ANTES DE EMPEZAR
•
Please read all instructions carefully.
•
Familiarize yourself with all parts (see
"PARTS") and check quantities.
•
Follow all safety precautions (see
"SAFETY PRECAUTIONS").
© ClosetMaid Corporation 2017 | Ocala, FL 34471 | 1-800-874-0008 | www.closetmaid.com
01-80799 02/17
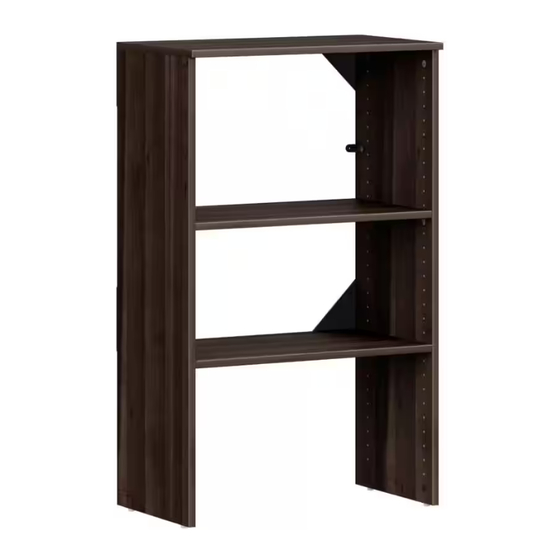
Standard 3-Shelf Base Unit
Étagère de base standard 3 tablettes
Unidad base estándar de 3 estantes
DIRECTIVES D'INSTALLATION
•
Prière de lire avec soin toutes les directives
fournies.
•
Se familiariser avec les pièces nécessaires
à l'installation (voir « PIÈCES ») et vérifier
les quantités présentes.
•
Respecter toutes les consignes de sécurité
(voir « CONSIGNES DE SÉCURITÉ »).
INSTRUCCIONES DE INSTALACIÓN
•
Lea todas las instrucciones cuidadosamente.
•
Familiarícese con todas las piezas (VEA
"PIEZAS") y verifique las cantidades.
•
Siga todas las precauciones de seguridad (vea
"PRECAUCIONES DE SEGURIDAD").
What you will need:
Vous aurez besoin de :
Va a necesitar:
Advertisement

Subscribe to Our Youtube Channel
Related Manuals for ClosetMaid Style+ 1734


Summary of Contents for ClosetMaid Style+ 1734
- Page 1 “PRECAUCIONES DE SEGURIDAD”). • Respecter toutes les consignes de sécurité (voir « CONSIGNES DE SÉCURITÉ »). What you will need: Vous aurez besoin de : Va a necesitar: © ClosetMaid Corporation 2017 | Ocala, FL 34471 | 1-800-874-0008 | www.closetmaid.com 01-80799 02/17...
- Page 2 SAFETY PRECAUTIONS | CONSIGNES DE SÉCURITÉ | PRECAUCIONES DE SEGURIDAD MISE EN GARDE WARNING ADVERTENCIA • This unit contains small parts which • Ce module contient de petites pièces avec • Este producto contiene piezas pequeñas que could be a choking hazard for small lesquelles de petits enfants peuvent pueden causar peligro de asfixia a niños children.
- Page 3 PARTS | PIÈCES | PIEZAS side panel (2) panneau latéral (2) panel lateral (2) top shelf (1) étagèere supérieure (1) repisa superior (1) bottom shelf (1) étagèere inférieure (1) repisa inferior (1) adjustable shelf (1) étagère réglable (1) repisa ajustable (1) 51656 50636 50510...
- Page 4 HELPFUL HINTS | CONSEILS UTILES | CONSEJOS PRÁCTICOS PART IDENTIFICATION IDENTIFICATION DES PIÈCES IDENTIFICACIÓN DE LAS Use “PART IDENTIFICATION” and PIEZAS FRONT VIEW VISTA DELANTERA exploded view (on previous page) to VUE AVANT identify parts! • Count and locate holes in each part. Utiliser l’...
- Page 5 STEP 1 Push 4 cam locks into bottom shelf. ÉTAPE 1 Pousser 4 boulons à verrou dans l’étagère inférieure. Empuje 4 cierres de leva en la repisa inferior. PASO 1 NOTE: • See “HELPFUL HINTS” on page 4 for proper cam lock assembly.
- Page 6 STEP 2 Install 4 cam posts into top shelf. ÉTAPE 2 Installer 4 boulons à tige dans chaque étagère supérieure. Instale 4 postes de leva en la repisa superior. PASO 2 TOP SHELF ÉTAGÈRE SUPÉRIEURE REPISA SUPERIOR NOTE: • Top shelf has 6 small holes and is larger than other shelves.
- Page 7 STEP 3 Push 2 cam locks into each side panel. ÉTAPE 3 Pousser 2 boulons à verrou dans chaque panneau latéral. Empuje 2 cierres de leva en cada panel lateral. PASO 3 SIDE PANEL PANNEAU LATÉRAL PANEL LATERAL UNFINISHED EDGES BORDURES BRUTES BORDES SIN TERMINAR LARGE HOLE AT TOP...
- Page 8 Install 2 cam posts into each side panel. Insert 2 bottom nuts STEP 4 and 2 feet into bottom of each side panel. Installer 2 boulons à tige dans chaque panneau latéral. Insérer ÉTAPE 4 2 écrous inférieurs et 2 pattes sous chaque panneau latéral. PASO 4 Instale 2 postes de leva en cada panel lateral.
- Page 9 Attach bottom shelf to side panels. Attach top panel. STEP 5 Fixer l’étagère inférieure aux panneaux latéraux. Fixer le ÉTAPE 5 panneau supérieur. Una la repisa inferior a los paneles laterales. Una el panel PASO 5 superior. TOP VIEW FINISHED EDGES VUE SUPÉRIEUR FINISHED EDGES UP! BORDURES OUVRÉES...
- Page 10 STEP 6 Attach gussets to back of unit. ÉTAPE 6 Fixer les goussets à l’arrière du module. Una las escuadras a la parte posterior de la unidad. PASO 6 STOP! INCORRECT Turn unit over so unfinished edges CORRECT are up! CORRECT INCORRECT INCORRECTO...
- Page 11 STEP 7 Attach unit to wall. ÉTAPE 7 Fixer le module au mur. Una la unidad a la pared. PASO 7 NOTE: WARNING All units MUST be fastened to the wall. When stacking • Use a level and adjust leveling feet. units, the unit on the bottom must be attached to the wall •...
- Page 12 Install adjustable shelf, hole covers, and dowels or hole plugs. STEP 8 Installer l’étagère réglable, les capuchons, les goujons ou ÉTAPE 8 bouchons. Instale la repisa ajustable, las cubiertas de agujero y las PASO 8 espigas o tapones de agujero. NOTE: •...
Need help?
Do you have a question about the Style+ 1734 and is the answer not in the manual?
Questions and answers