
Related Manuals for CHNT Power SCH320K-T-EU


Summary of Contents for CHNT Power SCH320K-T-EU
- Page 1 SCH320/333/350K-T-EU Grid-tied PV Inver User Manual Shanghai Chint Power System Co., Ltd. Version 1.0 June 2024 Doc No.: 9.0020.0785A0...
-
Page 2: Table Of Contents
Table of Contents Table of Contents Preface ....................4 IMPORTANT SAFETY INSTRUCTIONS ..........5 Warnings and Symbols in this Document ........5 Markings on the Product ..............6 Safety Precautions of Operating the PV Inverter ......7 General Introduction ................8 Photovoltaic Grid-tied System ............8 Product Dimensions and Appearance ..........9 LED Display .................. - Page 3 Table of Contents APP Download ................41 APP Setting ................... 41 Main Interface Functional Operation ..........46 6.3.1 Inverter ................... 46 6.3.2 Fault Record ................... 51 6.3.3 Generation Statistics ..............53 6.3.4 Operation Record ................57 6.3.5 Parameter Setting................58 6.3.6 Upgrade Firmware ................
-
Page 4: Preface
Preface 0 Preface Thank you for choosing a Chint Grid-tied PV Inverter (hereinafter referred to as “PV Inverter” or “Inverter”) developed by Shanghai Chint Power System Co., Ltd. (hereinafter referred to as "CHINT"). This PV Inverter is a high performance and highly reliable product specially designed for the EU market except North America solar market. -
Page 5: Important Safety Instructions
IMPORTANT SAFETY INSTRUCTIONS 1 IMPORTANT SAFETY INSTRUCTIONS (SAVE THESE INSTRUCTIONS) PLEASE READ THIS USER MANUAL CAREFULLY BEFORE THE INSTALLATION AND OPERATION OF THIS PV INVERTER. CPS RESERVES THE RIGHT TO REFUSE WARRANTY CLAIMS FOR EQUIPMENT DAMAGE IF USERS FAIL TO INSTALL THE EQUIPMENT ACCORDING TO THE INSTRUCTIONS IN THIS MANUAL. -
Page 6: Markings On The Product
IMPORTANT SAFETY INSTRUCTIONS Markings on the Product Symbols Meanings HIGH VOLTAGE! This equipment works with high voltages. All works on the equipment must only be performed as described in this document. HIGH ENERGY! Risk of electric shock from energy stored in capacitor. Do not remove cover until 5 minutes after disconnecting all sources of supply. -
Page 7: Safety Precautions Of Operating The Pv Inverter
IMPORTANT SAFETY INSTRUCTIONS Safety Precautions of Operating the PV Inverter WARNING! All operations and connections shall be performed by professional engineering and technical personnel! To prevent the risk of electric shock during equipment maintenance or installation, please ensure that all DC and AC power has been separated from the equipment, and ensure that the equipment is reliably grounded. -
Page 8: General Introduction
General Introduction 2 General Introduction Photovoltaic Grid-tied System SCH320/333/350K-T-EU series inverters are designed for using with commercial rooftop, and large-scale PV grid-tied systems. The system is generally made up of PV modules, PV inverter and AC power distribution equipment, as shown in Figure 2-1. The solar energy is converted by PV modules to DC power, and then converted by the inverter to AC power with the same frequency and phase as the AC grid. -
Page 9: Product Dimensions And Appearance
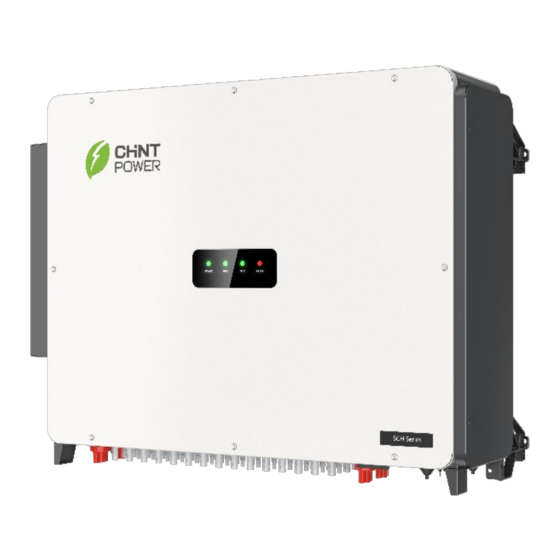
General Introduction Product Dimensions and Appearance Figure 2-2 Inverter Dimensions Figure 2-3 Product Appearances Name Function Logo Inverter brand LED Indicator Indicates operation status of the inverter 9 / 103... -
Page 10: Led Display
General Introduction Forced cooling of the heat exchanger Lowering the operating temperature of the Heat exchanger inverter PE point External grounding DC switch Safely cut off DC power supply DC terminal Quick plug terminal connector Communication interface RS485 /CAN communication line outlet port AC sealing plate AC and internal grounding cable outlet port Install LINKIT module. - Page 11 General Introduction No power supply Permanent failure Quick General failure (on for 0.5 seconds, off Flash for 0.5 seconds) FAULT Fault Status Indicators (Red) Slow Alarm failure (on for 0.5 seconds, off for Flash 2 seconds) No fault or no working power supply Upgrade status Flash LCD or DSP upgrading...
-
Page 12: Product Protection Functions
General Introduction Product Protection Functions Short circuit protection Input to ground insulation resistance monitoring Output voltage and frequency monitoring Ground leakage current monitoring DC component monitoring of output current Anti-island protection DC Input and AC output overvoltage protection ... -
Page 13: Mechanical Installation
Mechanical Installation 3 Mechanical Installation Storage before Unpacking If the inverter is not immediately installed upon arrival, the following requirements should be met when storing the inverter: Do not remove the outer packing of the inverter. Store it in a clean, dry place to prevent dust and moisture intrusion. ... - Page 14 Mechanical Installation Image Accessories Usage M10 Spring bracket washer M10 Flat washer Screw M10X50 2 for mounting Screw M6X16 bracket 3 for grounding Handle Carry the inverter Screw M6X18 with plastic flat Spare for front cover washer Unlock tool for Unlock connector DC connector M12 tapered...
-
Page 15: Installation Precautions
Mechanical Installation Installation Precautions Check that the product environmental specifications (protection degree, operating temperature range, humidity and altitude, etc.) meet the requirements of the specific project location. Make sure that the power grid voltage is within the normal range of the Grid ... -
Page 16: Installation Requirements
Mechanical Installation device, obtain the device software source code, steal intellectual property rights, or disclose any performance testing results of the device software. If the gap of the output terminal is not blocked according to the requirements, resulting in machine failure, our company does not carry out warranty, and bear any responsibility. -
Page 17: Space Requirements
Mechanical Installation Figure 3-4 Installation requirements for inverter racks Install inverter vertically on mounting bracket if installation conditions permit. The inverter can be installed at an angle of ≤15° leaning back while its back shall not be shielded to ensure good ventilation. The inverter can be installed under the panel, while its back and top shall not be blocked to ensure good ventilation. -
Page 18: Installation Procedures
Mechanical Installation NOTICE! The distance between two parallel inverters must be ≥720 mm, and good ventilation should be ensured. If the surroundings are relatively closed, please increase this distance appropriately. Installation Procedures Mark the positions of mounting holes on the installation structure (shelter, steel rack, etc.) according to the size of the mounting brackets. - Page 19 Mechanical Installation bracket ⑤ with the equipped screws M10X50 ④, M10 flat washer ③, M10 spring washer ②, and M10 nut ① (They are included in the package). Tools: Electric drill (with Ф12mm drill bit), No. 17 hexagon socket wrench, torque: 230 kgf.cm.
- Page 20 Mechanical Installation Figure 3-9 hoist mounting (b) Manual hanging: install four handles into the screw holes as indicated. Four people are needed to properly lift the inverter by the four handle positions and bottom surface marked in Figure 3-10, and mount the inverter onto the mounting bracket.
- Page 21 Mechanical Installation Figure 3-10 Manual hanging CAUTION! The total weight of the inverter is approx. 131kg (288.8 pounds). Ensure the mounting bracket is properly installed before hanging the inverter on the bracket. When handling the inverters, pay attention to maintain balance to prevent them from tipping or falling.
-
Page 22: Installation Check
Mechanical Installation Figure 3-11 Inverter fixed on backplane bracket Installation Check Ensure that the supporting points (On the rear side of the inverter) align with the mounting holes of the support. Ensure that the inverter is well fixed. Ensure that the inverter is locked on the support and an antitheft lock is installed. 22 / 103... -
Page 23: Electrical Connection
Electrical Connection 4 Electrical Connection DANGER! The cables shall be connected in accordance with the National Electrical Code and all other applicable local codes or jurisdictions. Before connecting all cables, ensure the equipment is free from any damage. Otherwise, it may cause electric shock or fire. High-temperature environments may result in insulation aging or damage ... -
Page 24: External Interfaces And Internal Connection Points
Electrical Connection External Interfaces and Internal Connection Points You will find the external connection interfaces, internal connection points, as well as their names, positions etc. as shown in Figure 4-1a, Figure 4-1b, Figure 4-2, and Table 4-3. Figure 4-1a External connection interfaces of 12MPPT inverter Figure 4-1b External connection interfaces of 15MPPT inverter 24 / 103... - Page 25 Electrical Connection Figure 4-2 External grounding point and AC Wiring terminal block Names Names DC Input (male & female) quick-plug LINKIT interface connector RS485 and CAN Communication AC sealing plate interface External ground point (PE point) AC Output terminal block Internal ground point Table 4-3 External Interfaces and Internal Connection Points 25 / 103...
-
Page 26: Electrical Cable Connection
Electrical Connection Electrical Cable Connection NOTICE! Please read carefully and refer to Chapter 9 Technical Data before wiring. Ensure inverter cover is securely closed and attached after wiring is completed to avoid water condensation inside unit. Before the first power-on operation or before running inverter after a long period of non-operation (6-12 months), check if the water- sensitive label in the bottom left corner of the AC wire box and on the capacitive plate have turned red. -
Page 27: Grounding(Protection Earthing)
Electrical Connection Figure 4-4 support the cover of wire box IMPORTANT! It is important to use hand tools (e.g. hex wrench) instead of power drivers or other types of screw drivers. Captive screws can not be removed in order to prevent the screws go missing. -
Page 28: Ac Wiring
Electrical Connection 4.4.2 AC Wiring Perform the AC wiring procedures as follows: Loosen the four screws to remove the AC sealing plate from the inverter. Figure 4-6 Remove AC sealing plate According to cable types, pull off ring tab with hand or piler, then route cable through the seal ring. - Page 29 Electrical Connection Remove an appropriate length of the jacket layer from the AC output cable. Insert the exposed core wires into the crimp area of the OT terminal, then wrap the wire crimp area with heat shrink tubing or insulation tape, and crimp them using hydraulic pliers. Figure 4-8 AC wire stripping Unplug the rubber plug of transparent protection cover above the AC terminal block to remove the transparent protection cover.
- Page 30 Electrical Connection NOTICE! Use copper compression lugs to match L1, L2, L3 copper wires. Use Cu-Al bimetallic compression lug or aluminum compression lugs to match L1, L2, L3 aluminum wires. M12 flat washer shall be used if inner hole diameter of compression lug ...
- Page 31 Electrical Connection The inverter’s AC nominal operating voltage is 800VAC. If another voltage/configuration is needed, a transformer may be necessary. Figure 4-12a Supported IT power grid Figure 4-12b Supported TT and TN power grid Transformer configurations: 3W Wye and 4W Wye are recommended. 3W Delta Configuration is acceptable, but the Delta can’t connect with ground as following Figure.
-
Page 32: Dc Wiring
Electrical Connection NOTICE! To ensure convenience and safety, it is recommended to use multi-core cables, crimp terminals and proper crimping tool to crimp the cables before wiring. 4.4.3 DC Wiring 4.4.3.1 DC Cable Connection To ensure the optimum performance of the inverter, please read the following guidelines before performing any DC connections: Confirm the DC configuration and ensure that the maximum open circuit ... - Page 33 Electrical Connection Figure 4-15 DC Wire stripping Insert the exposed areas of the positive and negative power cables into the metal terminals of the male and female connectors respectively and crimp them using a crimping tool (Amphenol H4TC0002 or Devalan D4ZCY001). Figure 4-16 Crimp power cables NOTICE! The connector used for the DC input must be supplied randomly, or the...
- Page 34 Electrical Connection Figure 4-18 Ensure the polarities of the DC cables Insert connectors into the corresponding terminals of the inverter until a "click" sound is heard. Figure 4-19 Insert connectors into corresponding terminals NOTICE! Make marks on all positive and negative power cables to identify ...
-
Page 35: Communication Connection
Electrical Connection Communication Connection The inverter supports industry standard PLC, Modbus RS485, as well as CAN communication modes. We will introduce most commonly used RS485 and CAN communication methods in detail. 4.5.1 RS485 and CAN Cable Connection Unscrew the locking nut ① of 8-pin connector and press down both buckles ② of connector, to take out the cable seal ring. - Page 36 Electrical Connection Adjust the cable length, insert terminals block ① into connector and lock the locking nut ②. Plug any spare sear hole with watertight plug ③. Figure 4-23 combine the connector Remove watertight cover from communication connector of inverter. Figure 4-24 Remove watertight cover Connect 8-pin connector into communication connector of inverter.
-
Page 37: Rs485/Can Network Connection
Electrical Connection 4.5.2 RS485/CAN Network Connection NOTICE! When connecting multiple inverters in a daisy chain, it is necessary to open the front cover of each inverter to perform wiring and establish networking. When the inverters are monitored via the RS485/CAN communication, a unique RS485/CAN address for each inverter can be set up through the APP interface. - Page 38 Electrical Connection Figure 4-28 DIP switch NOTICE! When the neutral point of the transformer is grounded, PID cannot be enabled. PV panel side (inverter DC input side) is energized when PidNight repair function is enabled. Therefore, before performing any maintenance or overhaul, disable the PidNight repair function and then wait at least 5 minutes to ensure the system is completely de- energized and to avoid electric shock.
-
Page 39: Install The Linkit Module
Electrical Connection Install the LINKIT Module Follow the following steps to install LINKIT module: Remove the two fixing screws on the connector cover, then rotate the cover to its opposite side. Figure 4-29 Remove the two fixing screws Fasten LINKIT module with the two screws just removed (Indicators face front cover). Fasten the module firmly to ensure that the seal watertight. -
Page 40: Inverter Commissioning
Inverter Commissioning 5 Inverter Commissioning WARNING! Please follow the guidelines below before performing any on-grid operation to eliminate possible dangers. Pre-commissioning Checks 5.1.1 Mechanical Installation Perform the following inspections by referring to chapter 3 Mechanical Installation. Make sure all the mounting brackets are secure. ... -
Page 41: App Setting And Interface Introduction
APP Setting and Interface Introduction 6 APP Setting and Interface Introduction APP Download The inverter conducts human-computer interaction through the "ChintPower 2.0” mobile APP. Users can download the iOS version in the Apple store or Android version in the Google store, or directly scan the QR code to download. - Page 42 APP Setting and Interface Introduction Click in main interface and go to setting interface. Click “language setting” to set language environment and “Sync Cloud Data” to synchronize data from cloud as necessary. Platform and App version information can be read from this interface. Figure 6-2 APP Environment Configuration 42 / 103...
- Page 43 APP Setting and Interface Introduction You can view user connection information listed in below interface. Click “Connect” and select connect type (Connect With BLE/Connect with WIFI), it will go to connection page. Figure 6-3 Device List Figure 6-4 Connect Type 43 / 103...
- Page 44 APP Setting and Interface Introduction If the connection is successful, it goes to main interface. Figure 6-5 Main Interface Note: Click “Connect With WIFI”, and input password “1111”, it also goes to main interface. 44 / 103...
- Page 45 APP Setting and Interface Introduction If the connection fails, click “Retry connect” icon in the connect device interface. Figure 6-6 Connecting device 45 / 103...
-
Page 46: Main Interface Functional Operation
APP Setting and Interface Introduction Main Interface Functional Operation 6.3.1 Inverter On main functional interface, click “Inverter” to enter inverter page. Figure 6-7 Main Interface 46 / 103... - Page 47 APP Setting and Interface Introduction On inverter page, click to get detail parameters of related properties. Information is listed after expansion. Read Generation statistics/Direct current/Alternation current/Version/Other information as below: Figure 6-8 Generation statistics 47 / 103...
- Page 48 APP Setting and Interface Introduction Figure 6-9 Direct current Figure 6-10 Alternating current 48 / 103...
- Page 49 APP Setting and Interface Introduction Figure 6-11 Version Figure 6-12 Other 49 / 103...
- Page 50 APP Setting and Interface Introduction Click to power on/power off the inverter. Figure 6-13 Power On/Power Off Inverter Connection 50 / 103...
-
Page 51: Fault Record
APP Setting and Interface Introduction 6.3.2 Fault Record Click “Fault record” to enter “Fault record” interface then select “Current fault record” and “Historical fault record” to view current fault record/historical fault record information. Figure 6-14 Click Fault Record 51 / 103... - Page 52 APP Setting and Interface Introduction Figure 6-15 Current Fault Record Figure 6-16 Historical Fault Record You can click “Fault generation” or “Fault elimination” to generate or delete fault record. 52 / 103...
-
Page 53: Generation Statistics
APP Setting and Interface Introduction 6.3.3 Generation Statistics Tap “Generation statistics” to enter “Generation statistics” interface and you can get electricity generation summary in dimensions of hour/day/month. Figure 6-17 Main Functional Interface 53 / 103... - Page 54 APP Setting and Interface Introduction Generation statistics by hour Figure 6-18 Generation Statistics by Hour 54 / 103...
- Page 55 APP Setting and Interface Introduction Generation statistics by day Figure 6-19 Generation Statistics by Day 55 / 103...
- Page 56 APP Setting and Interface Introduction Generation statistics by month Figure 6-20 Generation Statistics by Month 56 / 103...
-
Page 57: Operation Record
APP Setting and Interface Introduction 6.3.4 Operation Record Click “Operation record” to view running status information (CHECK/Fault). Figure 6-21 View Operation Record 57 / 103... -
Page 58: Parameter Setting
APP Setting and Interface Introduction 6.3.5 Parameter Setting Click “Parameter setting” and insert the password 1111 to view parameter settings. Figure 6-22 Click Parameter Setting 58 / 103... - Page 59 APP Setting and Interface Introduction Click to expand detail information of each parameter settings. In below interface you can click to configure each parameters. Figure 6-23 Configure Detailed Parameter Information 59 / 103...
- Page 60 APP Setting and Interface Introduction 6.3.5.1 Grid Protection Parameters Click to expand detail information of each power grid protection parameters. In below interface you can click to configure each parameters. 60 / 103...
- Page 61 APP Setting and Interface Introduction Figure 6-24 Configure Power Grid Protection Parameters 61 / 103...
- Page 62 APP Setting and Interface Introduction 6.3.5.2 Grid Frequency Protection Parameters In the grid frequency protection parameters interface, you can set the parameters such as over and under frequency protection thresholds, protection and recovery times, and various other criteria crucial for maintaining grid integrity. Note: These parameters are factory default settings and users are not allowed to modify them without authorization.
- Page 63 APP Setting and Interface Introduction Figure 6-26 Configure Power Dispatch Parameters 6.3.5.4 Active power derate parameters Click to expand detail information of each active power derate parameters. In below interface you can click to configure each parameters. 63 / 103...
- Page 64 APP Setting and Interface Introduction Figure 6-27 Configure Active Power Derate Parameters Refer to the over-voltage derating curve in Figure 6-28 and over-frequency derating curve in Figure 6-29. 64 / 103...
- Page 65 APP Setting and Interface Introduction Power Present VwCurveP2 VwCurveV1 VwCurveV2 Gird Voltage Figure 6-28 Curve of over voltage derating Po/Pn(%) 40%/Hz 60.00 60.03 60.53 Freq(Hz) Figure 6-29 Curve of over frequency derating 65 / 103...
- Page 66 APP Setting and Interface Introduction 6.3.5.5 Reactive Power Derate Curve Parameters Click to expand detail information of each no active power derate parameters. In below interface you can click to configure each parameters. 66 / 103...
- Page 67 APP Setting and Interface Introduction Figure 6-30 Configure Reactive Power Derate Curve Parameters Note: The PF and Q value can be adjusted by remote software if the “Remote” is selected. PF Set: Set the PF value. Note: Change the reactive power by adjusting the ...
- Page 68 APP Setting and Interface Introduction (PFCurveP1,PFCurvePF1) Inductive (P%) Capacitive (PFCurveP2,PFCurvePF2) Figure 6-31 PF(P) Curve Mode Q(u) Curve:Q(u) curve mode. Note: The reactive compensation changes according to the grid voltage change, as shown in Figure 6-31. Q(%) (QuCurveU2i,QuCurveQ2i) Inductive (QuCurveU1, QuCurveQ1) (QuCurveU1i, U(V)
- Page 69 APP Setting and Interface Introduction 6.3.5.6 High-Low Voltage Ride Throughout Parameters The High-Low Voltage Ride Throughout parameters include over-voltage, under-voltage protection settings, and so on. Figure 6-33 Configure High-Low Voltage Ride Throughout Parameters 69 / 103...
- Page 70 APP Setting and Interface Introduction Through Trip 0.25 0.73 Time/S Figure 6-34 LVRT Curve (Just for Reference) 1.25 Through * r a 1.15 5,6,7,8 Trip 1.05 Time/S 2 4 6 8 10 12 14 16 18 20 22 Figure 6-35 HVRT Curve (Just for Reference) 6.3.5.7 On-off Parameters The On-off parameters are used to set the parameters about power on or off the inverter.
- Page 71 APP Setting and Interface Introduction 71 / 103...
- Page 72 APP Setting and Interface Introduction Figure 6-36 Configure On-Off Params 6.3.5.8 Control Parameters Click to expand detail information of control commands. In below interface you can click configure each parameters click “Start” execute ForceRestart/FactoryDefaults/IVScanCure/FanDetect operation. Note: When a permanent failure occurs, you have the option to re-energize the inverter. After re-energizing, the fault will be restored.
- Page 73 APP Setting and Interface Introduction Figure 6-37 Start and Configure Control commands PowerOnOff: Users can use this function to remotely control the device’s power status from their mobile phone. ForceRestart: If a fault shutdown happens, a severe fault may have occurred ...
- Page 74 APP Setting and Interface Introduction crucial for maintaining the safety and efficiency of the power system. 74 / 103...
- Page 75 APP Setting and Interface Introduction 75 / 103...
- Page 76 APP Setting and Interface Introduction Figure 6-38 Other Protection Parameters 76 / 103...
- Page 77 APP Setting and Interface Introduction 6.3.5.10 Important Parameters The Important Parameters include setting for grid connection rule. Figure 6-39 Important Parameters 77 / 103...
- Page 78 APP Setting and Interface Introduction 6.3.5.11 Inverter Basic Info You can view basic information about the inverter on this interface. Figure 6-40 Inverter Basic Information 78 / 103...
- Page 79 APP Setting and Interface Introduction 6.3.5.12 Generation Capacity Params You can view and edit parameters related to power generation. Figure 6-41 Generation Capacity Parameters 79 / 103...
- Page 80 APP Setting and Interface Introduction 6.3.5.13 LcdLess Basic Parameters Click to expand detailed information about LcdLess parameters. In the interface below, you can click to configure each parameter, such as time synchronization. Figure 6-42 LcdLess Basic Parameters 80 / 103...
- Page 81 APP Setting and Interface Introduction 6.3.5.14 LcdLess Parameters 2nd Area In the LcdLess Parameters 2nd Area interface, you can view information such as the host name, MAC address enablement, DHCP enablement, IP address, subnet mask, default gateway, DNS, and port number. Figure 6-43 LcdLess Parameters 2 Area 81 / 103...
- Page 82 APP Setting and Interface Introduction 6.3.5.15 PID Parameters In the PID parameters interface, you can view information about PID related parameters. Figure 6-44 PID Parameters 82 / 103...
-
Page 83: Upgrade Firmware
APP Setting and Interface Introduction 6.3.6 Upgrade Firmware Click the “ Upgrade Firmware” to see upgrade interface. To upgrade firmware, please contact service personnel. Figure 6-45 Upgrade Firmware 83 / 103... -
Page 84: Trip Plate Monitor
APP Setting and Interface Introduction 6.3.7 Trip Plate Monitor When the DC switch trips, click the “Trip Plate Monitor” and input password “1111” for more information. If the state of DC switch shows “Trip”, it means DC switch has been disconnected. - Page 85 APP Setting and Interface Introduction Click “Setting” button to set up every tripping protection parameters, such as reverse overcurrent trip protection, back overcurrent trip protection, short circuit trip protection, over temperature trip protection, and over voltage trip protection. Figure 6-47 Reverse Overcurrent Trip Protection 85 / 103...
- Page 86 APP Setting and Interface Introduction Figure 6-48 Reverse Overcurrent Trip Protection and Short Circuit Trip Protection 86 / 103...
- Page 87 APP Setting and Interface Introduction Figure 6-49 Over Temperature Trip Protection and Overvoltage Trip Protection 87 / 103...
- Page 88 APP Setting and Interface Introduction You can also click “PV” button to read current and voltage value of each PV string, as below. Figure 6-50 Current and Volatage Value of Each PV string 88 / 103...
-
Page 89: Pid/Svg
APP Setting and Interface Introduction 6.3.8 PID/SVG Click “PID/SVG” item to go to “system choice” interface. You can choose IT system (default) or TN-C/TN-C-S/TT system. Figure 6-51 PID/SVG 89 / 103... - Page 90 APP Setting and Interface Introduction Figure 6-52 PID/SVG System Settings 90 / 103...
-
Page 91: Maintenance And Replace
Maintenance 7 Maintenance and Replace WARNING! Before starting any product maintenance, the inverter should be stopped running, the AC circuit breaker connected to the grid and the PV input on the DC side shall be all disconnected, and then wait at least 5 minutes before starting any operation. - Page 92 Maintenance Use a No.2 Phillips head screwdriver to remove the screws fixing the fan tray as shown in Figure 7-1. Figure 7-1 Remove the fan tray and fan Disconnect the watertight cable connector from cooling fan, as shown in Figure 7-2. Figure 7-2 Disconnect the watertight cable connector Use a No.2 Phillips head screwdriver to remove the screws fixing every fan.
-
Page 93: Replace The Inverter
Maintenance Place the new cooling fans on the fan tray, and fasten the cable on the fan tray with cable ties. Tools required: No.2 Phillips head screwdriver, torque value: 14~18kgf.cm. Reinstall the assembled fans onto the inverter. Tools required: No.2 Phillips head screwdriver, torque value: 16kgf.cm. -
Page 94: Troubleshooting
Troubleshooting 8 Troubleshooting LED Indicator Troubleshooting If the LED light indicates any faults, please perform troubleshooting according to the Table 8-1. LED status Solutions Neither the Power LED nor the Turn off the external AC breaker. LCD screen lights up. Switch the DC switch to OFF position. - Page 95 Troubleshooting Recommended solutions: Observe for 5 minutes and see whether the alarm will be eliminated automatically; Switch off 3-phase working power supply and then reboot the system; Contact after-sales service personnel. ExtFanErr Definition: Cooling fan failure by visual check Possible causes: Fan is blocked;...
- Page 96 Troubleshooting (Bus over voltage) discharge. If inverter cannot clear fault, replace inverter. Protect0070 Raise limit of IDCmax (for example, 400mA) to allow inverter more room to adjust in transient condition to cope with (Bus imbalance) imbalance of impedance and voltage between Grid phases If after adjustment, alarm still occurs, replace inverter Protect0030 Restart inverter by recycle both AC and DC switches.
- Page 97 Troubleshooting bit. GFCIErr Check wires of PV and ground: (leakage current Turn OFF AC switch to disconnect inverter from Grid. high) Open fuse drawers to de-couple PV strings from each other. Test strings with string test set. Add one PV string at a time, and startup inverter to see if alarm occurs.
- Page 98 Troubleshooting Protect0230 Restart inverter by recycle both AC and DC switches. (Inverter open-loop Wait for 1 minute between OFF and ON for all energy to self-test fault) discharge. If inverter cannot clear fault, replace inverter. Table 8-3 Troubleshooting list of Protection faults Fault Codes Solutions Fault0130...
-
Page 99: Technical Data
Technical Data 9 Technical Data Model Name SCH320K-T- EU SCH333K-T- EU SCH350K-T- EU DC Input Max DC input voltage 1500Vdc MPPT operating voltage range 500-1500Vdc Start Voltage/Power 550V Rated DC Voltage 1190V Number of MPPT Number of DC Connection Sets per MPPT Max DC Current per MPPT Max. -
Page 100: Quality Assurance
Quality Assurance 10 Quality Assurance Liability Exemption Exceed the quality assurance period of the product. Cannot provide product serial number or the SN is not clear/complete. Incorrect or inappropriate use of the product (including installation and use). Damage during transportation/storage/handling. Misuse, abuse, intentional damage, negligence or accidental damage. -
Page 101: Quality Clause (Warranty Clause)
Quality Assurance Quality Clause (warranty Clause) For products that fail during the warranty period, our company will repair or replace new products free of charge; Customer shall present the invoice of the product and date of purchase. At the same time, the trademark on the product should be clearly visible, otherwise we have rights to refuse quality assurance. -
Page 102: Recycling
Recycling 11 Recycling Distributors or installers should contact the inverter manufacturer after removing the inverter from the photovoltaic module and follow the instructions. The inverter cannot be disposed of as household waste. When the inverter's service life expires, please dispose of it in accordance with the electrical waste disposal laws applicable to the installation location. - Page 103 Contact Information Shanghai Chint Power Systems Co., Ltd. Headquarters: No. 5999, Guangfulin Road, Songjiang District, 201616 Shanghai, P. R. China Switchboard: +86-21-37791222-866000 Customer Service Hotline: +86-21-37791222-866300 Fax: +86-21-37791222-866001 Website: www.chintpower.com Email: service.cps@chint.com 103 / 103...
Need help?
Do you have a question about the SCH320K-T-EU and is the answer not in the manual?
Questions and answers