Table of Contents
Advertisement
Available languages
Available languages
Quick Links
FX-CARBON-NORDIC-
WALKING-STÖCKE
FX-CARBON NORDIC
WALKING POLES
BÂTONS DE MARCHE NORDIQUE
EN CARBONE FX
FX-CARBON-NORDIC-WALKING-STÖCKE
Gebrauchsanweisung
FX-CARBON NORDIC WALKING POLES
Instructions for use
BÂTONS DE MARCHE NORDIQUE EN
CARBONE FX
Notice d'utilisation
FX CARBON NORDIC WALKING-POLES
Gebruiksaanwijzing
KIJKI NORDIC WALKING FX-CARBON
Instrukcja użytkowania
TREKINGOVÉ HOLE NORDIC FX CARBON
Návod k použití
TREKINGOVÉ PALICE
Návod na použivanie
IAN 326845_1904
DE/AT/CH
1 1
Advertisement
Table of Contents

Related Manuals for Crivit 326845 1904


Summary of Contents for Crivit 326845 1904
- Page 1 FX-CARBON-NORDIC- WALKING-STÖCKE FX-CARBON NORDIC WALKING POLES BÂTONS DE MARCHE NORDIQUE EN CARBONE FX FX-CARBON-NORDIC-WALKING-STÖCKE Gebrauchsanweisung FX-CARBON NORDIC WALKING POLES Instructions for use BÂTONS DE MARCHE NORDIQUE EN CARBONE FX Notice d’utilisation FX CARBON NORDIC WALKING-POLES Gebruiksaanwijzing KIJKI NORDIC WALKING FX-CARBON Instrukcja użytkowania TREKINGOVÉ...
-
Page 2: Table Of Contents
Inhaltsverzeichnis/Contents Verwendung/Einsatzgebiet ........6 Technische Daten ............6 Teileliste ..............7 Sicherheitshinweise ..........7 - 8 Ausstattung ..............9 Stocklänge – die richtige Größe ermitteln ..9 - 10 Stocklänge einstellen ..........10 Anlegen der Handschlaufe ........11 Schnelles Entfernen der Handschlaufe vom Handgriff ............ - Page 3 Table Des Matieres/Inhoudsopgave Utilisation/domaine d’utilisation ......25 Caractéristiques techniques ........25 Nomenclature ............26 Consignes de sécurité ........26 - 27 Matériau ..............28 Longueur des bâtons – déterminer la bonne taille ......28 - 29 Régler la longueur des bâtons ......29 Mise en place de la dragonne ......
- Page 4 Spis treści/Obsah Zastosowanie/obszar zastosowania ....47 Dane techniczne ............ 47 Lista części .............. 48 Wskazówki bezpieczeństwa ......48 - 49 Wyposażenie ............50 Długość kijka – określanie prawidłowego rozmiaru ............50 - 51 Ustawianie długości kijka ........51 Zakładanie pętelek ..........52 Szybkie usuwanie pętelki na nadgarstek z uchwytu ......
- Page 5 Obsah Použitie/oblasť použitia ........66 Technické údaje ............. 66 Zoznam dielov ............67 Bezpečnostné pokyny ........67 - 68 Vybavenie ............68 - 69 Dĺžka palice – ako určiť správnu veľkosť ... 69 Nastavenie dĺžky palice ........70 Pripevnenie pútka ..........70 Rýchle odstránenie pútka na ruku z rukoväte ........
-
Page 6: Verwendung/Einsatzgebiet
Herzlichen Glückwunsch! Mit Ihrem Kauf haben Sie sich für einen hochwerti- gen Artikel entschieden. Machen Sie sich vor der ersten Verwendung mit dem Artikel vertraut. Lesen Sie hierzu aufmerksam die nachfolgende Gebrauchsanweisung. Benutzen Sie den Artikel nur wie beschrieben und für die angegebenen Einsatzbereiche. -
Page 7: Teileliste
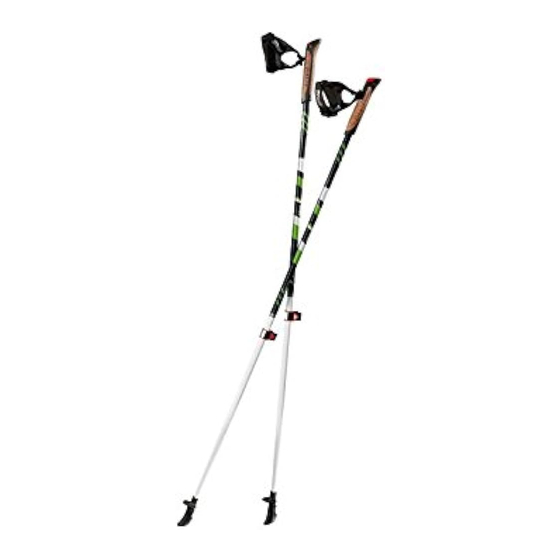
Teileliste (1) Schlaufen-Verstellsystem (2) Handschlaufe (3) Ergonomisch geformter Griff (4) Asphaltpad-Halterung (5) Höhen-Verstellsystem (6) Nordic-Walking-Stock (7) Teller (8) Hohlschliffspitze (9) Asphaltpad (10) Schutzkappe Sicherheitshinweise Lebensgefahr! • Lassen Sie Kinder nie unbeaufsichtigt mit dem Verpackungsmaterial. Es besteht Erstickungsge- fahr. • Es wird empfohlen, einen Herzfrequenzmesser zu verwenden. - Page 8 Verletzungsgefahr! • Kontrollieren Sie den Artikel vor dem Verwenden auf Beschädigungen. Besonders die Schlaufen und das Carbonrohr müssen unbeschädigt sein! • Sportschuhe mit gutem Profil und seitlichem Halt verwenden. • Ein defekter Artikel darf aufgrund von Verlet- zungsgefahr nicht verwendet werden! •...
-
Page 9: Ausstattung
Ausstattung Fiberglas Matrix Carbon In diesem Stock ist Carbon mit hochelastischer Glasfaser und Aluminium zu einem Schaftmaterial verbunden, das Vibrationen hervorragend dämpft. Ellenbogen-, Hand- und Schultergelenke werden entlastet (besonders wichtig bei Asphalt- oder Intensivtraining). Griff Die ergonomische Form bietet der Hand hervorra- genden Halt zur Kraftübertragung. -
Page 10: Stocklänge Einstellen
Das Ergebnis runden Sie dann zur nächsten verfüg- baren Stocklänge auf oder ab. Stocklänge Körpergröße 100 cm 144 cm - 150 cm 105 cm 151 cm - 158 cm 110 cm 159 cm - 165 cm 115 cm 166 cm - 172 cm 120 cm 173 cm - 180 cm 125 cm... -
Page 11: Anlegen Der Handschlaufe
Anlegen der Handschlaufe Führen Sie Ihre Hand von unten in die Handschlau- fe und legen Sie den Klettverschluss so um das innere Handgelenk, dass Sie den Buchstaben R bzw. L gut lesen können (Abb. C). Das Symbol muss sich auf dem Handgelenk-Inneren befinden (Abb. -
Page 12: Einstellen Der Daumenschlaufe Und Des Abstandes Vom Stockgriff Zur Handfläche
Einstellen der Daumenschlaufe und des Abstandes vom Stock- griff zur Handfläche Die Daumenschlaufe der Handschlaufe ist variabel einstellbar. Mit der Daumenschlaufe können Sie auch den Abstand zwischen Griff und Ihrer Hand- fläche optimal nach Ihren Bedürfnissen einstellen. Der Abstand sollte so gewählt werden, dass der Stockgriff sich auch bei geöffneter Hand an Ihrer Handfläche befindet. -
Page 13: Aufwärmen/Stretching
Hinweis: Um die Daumenschlaufe zu vergrößern und damit den Abstand zwischen Handschlaufe und Griff einzustellen, schieben Sie den Ver- schlusspin (1a) weiter zum offenen Bandende. 5. Führen Sie das offene Bandende durch den Clip (1b) (Abb. I). 6. Drücken Sie den Verschlusspin in die Banddurch- führung. -
Page 14: Nordic Walking Technik
Nordic-Walking-Technik Beim Nordic Walking wird das Walking mit dem skandinavischen Skilanglauf (daher Nordic) verbun- den. Durch das Abdrücken der Nordic-Walking- Stöcke vom Boden wird die Fortbewegung unter- stützt. Brust-, Schulter- und Armmuskulatur werden hierdurch intensiver trainiert. Nordic Walking ist einfach und schnell erlernbar (Abb. L). Lagerung, Reinigung Lagern Sie den Artikel bei Nichtbenutzung immer trocken und sauber bei Raumtemperatur. -
Page 15: Hinweise Zur Garantie Und Serviceabwicklung
Der Code besteht aus dem Recyclingsymbol – das den Verwertungskreislauf widerspiegeln soll – und einer Nummer, die das Material kennzeichnet. Hinweise zur Garantie und Serviceabwicklung Der Artikel wurde mit großer Sorgfalt und unter ständiger Kontrolle produziert. Sie erhalten auf diesen Artikel drei Jahre Garantie ab Kaufdatum. Bitte bewahren Sie den Kassenbon auf. -
Page 16: Use/Area Of Application
Congratulations! You have chosen to purchase a high-quality product. Familiarise yourself with the product before using it for the first time. Read the following instructions for use carefully. Use the product only as described and only for the given areas of application. Store these instructions for use carefully. -
Page 17: Parts List
Parts list (1) Strap adjustment system (2) Hand loop (3) Ergonomic grip (4) Asphalt pad holder (5) Height adjustment system (6) Nordic walking pole (7) Disc (8) Hollow-ground tip (9) Asphalt pad (10) Protective cap Safety information Life-threatening hazard! • Never leave children unattended with the packaging materials. -
Page 18: Equipment
• Use athletic shoes with a good profile and lateral support. • A defective product should not be used due to risk of injury! • If possible, avoid public roads. • Check the function of the locking system regularly. • Make sure that the clamping force of the quick release for adjusting the length of the product is sufficient to prevent the product accidentally collapsing when in use. -
Page 19: Pole Length - Determine The Correct Size
Grip The ergonomic shape provides the hand excellent grip for transfer of force. Hard metal tip Extremely durable, set in unbreakable, resilient plastic. For optimum transfer of force and grip on country lanes, in the woods or across terrain. Asphalt pad Made of non-slip TPR plastic to protect the metal tip. -
Page 20: Setting The Pole Length
Setting the pole length (Fig. B) Open the locking lever of the height adjustment system and pull out the bottom end of the pole the appropriate amount. When adjusting the pole length, the clamp must be completely open. Finally, close the locking lever again. 125 cm Note: always set the upper 120 cm... -
Page 21: Quickly Removing The Hand Loop From The Hand Grip
Quickly removing the hand loop from the hand grip Press the button downwards with your thumb and pull the hand loops out of the hand grip (Fig. E). To attach the hand loop, press the clip with some force back into the hand grip. Pay attention to the correct position of the clip! The clip must be at the height of thumb and index finger (Fig. - Page 22 3. Pull the open end of the band completely out of the clip (1b) (Fig. H). 4. Move the locking pin (1a) anywhere along the thumb loop to your desired position by moving the locking forwards or backwards (Fig. H). Note: to expand the thumb loop and thereby set the distance between the hand loop and the grip, push the locking pin (1a) further towards the open...
-
Page 23: Warming Up/Stretching
Warming up/stretching Before doing Nordic walking you should take sufficient time for warming up and stretching exercises (Fig. K). Nordic walking technique In Nordic walking, walking is connected with Nordic cross-country skiing (hence Nordic). Movement is supported by pushing the Nordic walking poles against the ground. -
Page 24: Notes On The Guarantee And Service Handling
Dispose of the products and the packaging in an environmentally friendly manner. The recycling code is used to identify various materials for recycling. The code consists of the recycling symbol – which is meant to reflect the recycling cycle – and a number which identifies the material. -
Page 25: Utilisation/Domaine D'utilisation
Félicitations ! Vous avez acquis un produit de haute qualité. Apprenez à connaître le produit avant sa première utilisation. Lisez pour cela attentivement la notice d’utilisation suivante. N’utilisez le produit que comme décrit et pour les zo- nes d’application indiquées. Veuillez conserver cette notice d’utilisation. -
Page 26: Nomenclature
Nomenclature (1) Système de réglage de la boucle (2) Dragonne (3) Poignée de forme ergonomique (4) Support pour embout d’asphalte (5) Système de réglage de la hauteur (6) Bâton de marche nordique (7) Assiette (8) Pointe concave (9) Embout d’asphalte (10) Embout de protection Consignes de sécurité... - Page 27 Risque de blessure ! • Contrôler l’article avant l’utilisation afin de détecter d’éventuelles détériorations. Les dragonnes et le tube carbone en particulier doivent toujours être dans un état impeccable. • Porter des chaussures de sport avec un bon profil et une bonne tenue latérale. •...
-
Page 28: Matériau
Matériau Fibre de verre matrice carbone Dans ce bâton, du carbone est combiné à de la fibre de verre hautement élastique et à de l’aluminium pour obtenir un matériau de manche qui amortisse à la perfection les vibrations. Les articulations du coude, de la main et des épaules sont soulagées (particulièrement important lors d’un entraînement sur asphalte ou intensif). -
Page 29: Régler La Longueur Des Bâtons
Arrondissez ensuite le résultat à la longueur de bâtons supérieure ou inférieure disponible. Longueur des bâtons Taille 100 cm 144 cm - 150 cm 105 cm 151 cm - 158 cm 110 cm 159 cm - 165 cm 115 cm 166 cm - 172 cm 120 cm 173 cm - 180 cm... -
Page 30: Mise En Place De La Dragonne
Mise en place de la dragonne Passez votre main du bas dans la dragonne et placez la fermeture velcro autour de l’articulation de votre main de manière à pouvoir lire les lettres R ou L (fig. C). Le symbole doit se trouver à l’intérieur du poignet (fig. -
Page 31: Réglage Du Passe-Pouce Et De La Distance Entre La Poignée Du Bâton Et La Paume De La Main
Réglage du passe-pouce et de la distance entre la poignée du bâton et la paume de la main Le passe-pouce de la dragonne est réglable en continu. Vous pouvez également utiliser le passe- pouce pour ajuster la distance entre la poignée et la paume de votre main selon vos besoins. -
Page 32: Échauffement/Étirement
5. Passez l’extrémité ouverte du ruban à travers le clip (1b) (fig. I). 6. Enfoncez la goupille de verrouillage dans la traversée de la bande. 7. Enfoncez le clip dans la poignée. Important : veillez à la bonne position du clip (fig. -
Page 33: Stockage, Nettoyage
La musculature de la poitrine, des épaules et des bras est ainsi entraînée de manière intensive. La marche nordique s’apprend facilement et rapidement (fig. L). Stockage, nettoyage Lorsque vous n’utilisez pas l’article, rangez-le toujours dans un endroit sec et propre à une température ambiante. -
Page 34: Indications Concernant La Garantie Et Le Service Après-Vente
Le code se compose du symbole de recyclage, qui doit correspondre au circuit de recyclage, et d‘un numéro identifiant le matériau. Indications concernant la garan- tie et le service après-vente Le produit a été fabriqué avec le plus grand soin et sous un contrôle permanent. - Page 35 Indépendamment de la garantie commerciale souscrite, le vendeur reste tenu des défauts de conformité du bien et des vices rédhibitoires dans les conditions prévues aux articles L217-4 à L217-13 du Code de la consommation et aux articles 1641 à 1648 et 2232 du Code Civil. Article L217-4 du Code de la consommation Le vendeur livre un bien conforme au contrat et répond des défauts de conformité...
- Page 36 Article 1641 du Code civil Le vendeur est tenu de la garantie à raison des défauts cachés de la chose vendue qui la rendent impropre à l‘usage auquel on la destine, ou qui diminuent tellement cet usage que l‘acheteur ne l‘aurait pas acquise, ou n‘en aurait donné...
-
Page 37: Gebruik/Gebruiksomgeving
Gefeliciteerd! Met uw aankoop hebt u voor een hoogwaardig artikel gekozen. Zorg ervoor dat u voor het eerste gebruik met het artikel vertrouwd raakt. Lees hiervoor de volgende gebruik- saanwijzing zorgvuldig door. Gebruik het artikel alleen zoals omschreven en voor het aangegeven doel. -
Page 38: Lijst Met Onderdelen
Lijst met onderdelen (1) Verstelsysteem voor polsbanden (2) Polsbanden (3) Ergonomisch gevormd handvat (4) Asfaltdop-houder (5) Hoogteverstelsysteem (6) Trekkingstok (7) Schotel (8) Hol geslepen punt (9) Asfaltdop (10) Beschermkap Veiligheidstips Levensgevaar! • Laat kinderen nooit zonder toezicht alleen met het verpakkingsmateriaal. Er bestaat verstikkingsgevaar. - Page 39 Kans op lichamelijk letsel! • Controleer het artikel voor gebruik op beschadigingen. Met name de polsbanden en de carbon buis mogen niet beschadigd zijn! • Draag sportschoenen met een goed profiel die goede zijdelingse steun geven. • Een defect artikel mag niet worden gebruikt vanwege de kans op lichamelijk letsel! •...
-
Page 40: Onderdelen
Onderdelen Glasvezel matrix carbon In deze stok is carbon met uiterst elastische glasvezel en aluminium gecombineerd tot een schachtmateriaal dat trillingen uitstekend dempt. Ellenboog-, hand- en schoudergewrichten worden ontlast (vooral belangrijk bij training op asfalt of bij intensieve training). Handvat De ergonomische vorm biedt de hand uitstekende grip voor krachtoverbrenging. -
Page 41: Stoklengte Instellen
Stoklengte Lichaamslengte 100 cm 144 cm - 150 cm 105 cm 151 cm - 158 cm 110 cm 159 cm - 165 cm 115 cm 166 cm - 172 cm 120 cm 173 cm - 180 cm 125 cm 181 cm - 187 cm Aanwijzing: de vernoemde waardes dienen als richtlijn. -
Page 42: De Polsband Snel Verwijderen Van Het Handvat
Aanwijzing: let op de markering R voor de rechter polsband en de markering L voor de linker polsband. De polsband snel verwijderen van het handvat Druk met de duim op de knop en trek de polsband uit de houder (afb. E). Voor het bevestigen van de polsband drukt u de clip met gepaste kracht terug in de opening van de sluiting. - Page 43 2. Trek de sluitpin (1a) uit de clip (1b) van de polsband (afb. G). 3. Trek het open bandeinde volledig uit de clip (1b) (afb. H). 4. Verschuif de sluitpin (1a) naar behoefte op de duimband op de door u gewenste positie door de sluitpin heen en weer te bewegen (afb.
-
Page 44: Opwarmen/Stretchen
Opwarmen/stretchen Neem voor het nordic walken voldoende tijd voor opwarm- en strekoefeningen (afb. K). Nordic walking-techniek Nordic walken is een combinatie van wandelen en het van oorsprong Scandinavische langlaufen (vandaar de term Nordic). Doordat de loper zich met de nordic-walkingstokken op de grond afzet, wordt de voortbeweging ondersteund. -
Page 45: Afvalverwerking
Reinig de nordic-walkingstokken nooit met agressieve reinigingsmiddelen of reinigingsmiddelen die oplosmiddelen bevatten. Deze kunnen de verstevigingsmiddelen en markeringen aantasten en op den duur beschadigen. Afvalverwerking Voer het artikel en verpakkingsmaterialen in over- eenstemming met actuele lokale voorschriften af. Verpakkingsmaterialen, zoals bv. foliezakjes, horen niet thuis in kinderhanden. - Page 46 Onze servicemedewerkers zullen de verdere handelswijze zo snel mogelijk met u afspreken. Wij zullen u in ieder geval persoonlijk te woord staan. De garantieperiode wordt na eventuele reparaties en op basis van de garantie, wettelijke garantie of coulance niet verlengd. Dit geldt ook voor vervan- gen en gerepareerde delen.
-
Page 47: Zastosowanie/Obszar Zastosowania
Gratulujemy! Decydując się na ten produkt, otrzymują Państwo towar wysokiej jakości. Należy zapoznać się z pro- duktem przed jego pierwszym użyciem. Należy uważnie przeczytać następu- jącą instrukcję użytkowania. Produkt ten należy użytkować wyłącznie w opisany sposób oraz zgodnie ze wskazanym przeznacze- niem. -
Page 48: Lista Części
Lista części (1) System regulacji pętelek (2) Pętelka (3) Ergonomiczny uchwyt (4) Uchwyt do nakładki do asfaltu (5) System regulacji wysokości (6) Kijek do nordic walking (7) Talerzyk (8) Wydrążona końcówka (9) Nakładka do asfaltu (10) Osłona ochronna Wskazówki bezpieczeństwa Zagrożenie życia! •... - Page 49 Niebezpieczeństwo odniesienia obrażeń! • Przed użyciem sprawdzić, czy produkt nie jest uszkodzony. Zwłaszcza pętelki i rurka węglowa muszą być nienaruszone! • Należy używać obuwia sportowego o dobrym profilu i bocznym podparciu. • Nie wolno używać uszkodzonego produktu ze względu na ryzyko zranienia! •...
-
Page 50: Wyposażenie
Wyposażenie Włókno szklane Matrix Carbon Włókno węglowe z wysokogatunkowego włókna szklanego i aluminium zostały połączone w materiale drążka, dzięki czemu kijek doskonale tłumi drgania. Łokcie, dłonie i barki zostają odciążone (szczególnie ważne przy intensywnym treningu lub treningu na asfalcie). Uchwyt Ergonomiczny kształt zapewnia doskonałą... -
Page 51: Ustawianie Długości Kijka
Zaokrąglić wynik w górę lub w dół do następnej dostępnej długości drążka. Długość kijka Wzrost 100 cm 144 cm–150 cm 105 cm 151 cm–158 cm 110 cm 159 cm–165 cm 115 cm 166 cm–172 cm 120 cm 173 cm–180 cm 125 cm 181 cm–187 cm Wskazówka: powyższe wartości są... -
Page 52: Zakładanie Pętelek
Zakładanie pętelek Włożyć dłoń do pętelki od spodu i umieścić rzep wokół wewnętrznego nadgarstka, tak aby można było dobrze odczytać litery R lub L (rys. C). Symbol musi znajdować się na wewnętrznej stronie nadgarstka (rys. C–D). Wskazówka: zwrócić uwagę na znak R na prawej pętelce i znak L na lewej pętelce. - Page 53 Odległość powinna być tak dobrana, aby uchwyt kijka znajdował się przy dłoni również wtedy, gdy jest dłoń jest otwarta. 1. Usunąć pętelkę na nadgarstek z uchwytu, jak opisano w części „Szybkie usuwanie pętelki na nadgarstek z uchwytu“ i wyjąć rękę z pętelki. 2.
-
Page 54: Rozgrzewka/Rozciąganie
6. Wcisnąć blokadę w otwór, przez który przechodzi pasek. 7. Nacisnąć klips w uchwycie. Ważne: należy upewnić się, że klips znajduje się we właściwej pozycji (rys. J)! Rozgrzewka/rozciąganie Przed treningiem nordic walking należy przeznaczyć wystarczająco dużo czasu na rozgrzewkę i ćwiczenia rozciągające (rys. K). Technika nordic walking W marszu nordic walking wędrówka połączona jest ze skandynawskimi biegami narciarskimi... -
Page 55: Przechowywanie, Czyszczenie
Przechowywanie, czyszczenie Podczas nieużywania należy zawsze przechowywać produkt w suchym i czystym miejscu, w temperaturze pokojowej. Do czyszczenia kijków do nordic walking można użyć ściereczki nasączonej letnią wodą lub wodą z mydłem. Nigdy nie czyścić kijków rozpuszczalnikami lub silnymi środkami czyszczącymi. Mogą one zniszczyć... - Page 56 Państwa prawa, w szczególności zasady odpowie- dzialności z tytułu rękojmi, nie zostaną ograniczone tą gwarancję. W razie ewentualnych reklamacji należy skontakto- wać się pod niżej podanym numerem infolinii lub po- przez pocztę elektroniczną. Nasi współpracownicy omówią z Państwem jak najszybciej dalszy przebieg sprawy.
-
Page 57: Použití
Srdečně blahopřejeme! Svým nákupem jste se rozhodli pro kvalitní výrobek. Před prvním použitím se prosím seznamte s tímto výrobkem. Pozorně si přečtete následující návod k použití. Používejte tento výrobek pouze tak, jak je popsáno, a pro uvedené účely. Uschovejte si tento návod k použití... -
Page 58: Seznam Dílů
Seznam dílů (1) Systém pro nastavení řemínku (2) Přidržovací poutko (3) Ergonomicky tvarovaná rukojeť (4) Držák botičky na asfalt (5) Systém pro nastavení výšky (6) Hůl na Nordic Walking (7) Talířek (8) Hrot s dutým výbrusem (9) Botička na asfalt (10) Ochranný... -
Page 59: Vybavení
• Používejte sportovní boty s dobrým profilem a postranní oporou. • Defektní výrobek nesmí být kvůli nebezpečí poranění používán! • Vyhněte se, pokud je to možné, pouličnímu provozu. • Kontrolujte pravidelně funkci uzavíracích částí. • Zajistěte, aby byla upínací síla rychlouzávěru vzhledem k nastavení... -
Page 60: Délka Hole - Určení Správné Velikosti
Úchop Ergonomický tvar nabízí ruce skvělé uchopení k přenesení síly. Hrot z tvrdého kovu Extrémně dlouhá životnost, uchycení v pružném plastu odolném proti zlomu. K optimálnímu přenesení síly a udržení stability na polních cestách, v lese nebo v krajině. Botička na asfalt Z drsného plastu TPR k ochraně... -
Page 61: Nastavení Délky Hole
Upozornění: Výše uvedené hodnoty jsou orientační. Nastavení mezi označené délky holí je rovněž možné. Nastavení délky hole (obr. B) Otevřete upínací páčku systému pro nastavení výšky a vysuňte spodní konec hole na potřebný rozměr. Při nastavování výšky hole musí být svorka úplně otevřená. Potom upínací... -
Page 62: Rychlé Odstranění Přidržovacího Poutka Z Rukojeti
Rychlé odstranění přidržovacího poutka z rukojeti Zmáčkněte palcem tlačítko dolů a vytáhněte přidržovací poutko z rukojeti (obr. E). K upevnění přidržovacího poutka vmáčkněte klip s trochou síly zpět do rukojeti. Dbejte přitom na správné umístění klipu! Klip musí být ve výšce palce a ukazováku (obr. -
Page 63: Zahřátí/Protažení
4. Posuňte uzavírací kolík (1a) na poutku na palec do libovolné polohy tak, že budete uzavíracím kolíkem pohybovat tam a zpět (obr. H). Upozornění: Pro zvětšení poutka na palec, a tím i nastavení vzdálenosti mezi přidržovacím poutkem a rukojetí, posuňte uzavírací kolík (1a) dál k volnému konci pásku. -
Page 64: Nordic-Walking - Technika
Nordic-Walking – technika Při Nordic Walking je chůze spojená se skandinávským během na lyžích (proto Nordic). Odpíchnutím holí Nordic Walking od země se podporuje pohyb vpřed. Svaly hrudníku, ramen a paží jsou tak intenzivněji trénovány. Nordic Walking se lze snadno a rychle naučit (obr. L). Uskladnění, čištění... -
Page 65: Pokyny K Záruce A Průběhu Služby
Recyklační kód identifikuje různé materiály pro recyklaci. Kód se skládá z recyklačního symbolu - který indikuje recyklační cyklus - a čísla identifikujícího materiál. Pokyny k záruce a průběhu služby Produkt byl vyrobený s velkou pečlivostí a byl průběžně kontrolovaný ve výrobní procesu. Na tento produkt obdržíte tříroční... -
Page 66: Použitie/Oblasť Použitia
Blahoželáme! Svojím nákupom ste sa rozhodli pre kvalitný výrobok. Pred prvým použitím sa s výrobkom dôkladne oboznámte. Pozorne si prečítajte tento návod na použivanie. Výrobok používajte len uvedeným spôsobom a na uvedený účel. Tento návod na použivanie si dobre uschovajte. Pri odovzdávaní výrobku tretej osobe odovzdajte s výrobkom aj všetky podklady. -
Page 67: Zoznam Dielov
Zoznam dielov (1) Systém na nastavenie pútka (2) Pútko na ruku (3) Ergonomicky tvarovaná rukoväť (4) Držiak cestnej podložky (5) Systém na nastavenie výšky (6) Palica na severskú chôdzu (7) Tanierik (8) Brúsený hrot (9) Tlmič na asfaltové povrchy (10) Ochranný kryt Bezpečnostné... -
Page 68: Vybavenie
• Používajte športovú obuv s drsnou podrážkou a bočnou oporou. • Chybný výrobok nepoužívajte, hrozí nebezpečenstvo poranenia! • Ak je to možné, vyhýbajte sa cestným komunikáciám. • Pravidelne kontrolujte funkčnosť nastavovacích prvkov. • Uistite sa, že je upínacia sila systému na nastavovanie dĺžky dostatočná... -
Page 69: Dĺžka Palice - Ako Určiť Správnu Veľkosť
Rukoväť Ergonomický tvar umožňuje ruke vynikajúci úchyt prispôsobený na prenos sily. Špička z tvrdeného kovu Extrémne odolná, uchytená v pružnom, nerozbitnom plaste. Slúži na optimálny prenos sily a priľnavosť na prašných cestách, v lese alebo v teréne. Tlmič na asfaltové povrchy Z priľnavého TPR plastu slúži na ochranu kovovej špičky. -
Page 70: Nastavenie Dĺžky Palice
Nastavenie dĺžky palice (obr. B) Uvoľnite páčku systému na nastavenie výšky a spodný koniec potiahnite palice na požadovanú dĺžku. Pri nastavovaní dĺžky palice musí byť páčka kompletne otvorená. Napokon zatvorte upínaciu páčku. 125 cm Upozornenie: Horný 120 cm segment palice vždy zafixujte v strede na značke 115 cm dĺžky palice. -
Page 71: Rýchle Odstránenie Pútka Na Ruku Z Rukoväte
Rýchle odstránenie pútka na ruku z rukoväte Palcom stlačte tlačidlo smerom nadol a vytiahnite pútko z rukoväte (obr. E). Na pripevnenie pútka mierne zatlačte svorku naspäť do rukoväte. Dajte pritom pozor na správnu polohu svorky! Svorka musí byť vo výške palcov a ukazovákov (obr. -
Page 72: Rozcvička/Strečing
4. Zatváraciu špičku (1a) posuňte na ľubovoľné miesto pútka na palec tak, že uzatváraciu špičku posuniete dopredu alebo dozadu (obr. H). Upozornenie: Ak chcete pútko na palec zväčšiť a nastaviť tak aj vzdialenosť medzi pútkom na ruku a rukoväťou, posuňte zatváraciu špičku (1a) ďalej k otvorenému koncu pásu. -
Page 73: Technika Nordic Walking
Technika nordic walking Pri Nordic Walkingu sa spája chôdza so škandinávskym bežkovaním (preto Nordic). Odtláčanie palíc na Nordic Walking od podkladu podporuje napredovanie. Vďaka tomu sa intenzívne zapája svalstvo hrude, paží a ramien. Nordic Walking je jednoduchý a dá sa rýchlo naučiť (obr. -
Page 74: Pokyny K Záruke A Priebehu Servisu
Výrobky a obaly likvidujte ekologickým spôsobom. Recyklačný kód slúži na označenia rôznych materiálov na navrátenie do obehu opätovného využitia. Kód sa skladá z recyklačného symbolu - ktorý má odzrkadľovať zhodnotenie recyklačnýého obehu - a číslo označujúce materiál. Pokyny k záruke a priebehu servisu Produkt bol vyrobený... - Page 76 DELTA-SPORT HANDELSKONTOR GMBH Wragekamp 6 • DE-22397 Hamburg GERMANY 11/2019 Delta-Sport-Nr.: NW-7164, NW-7165 IAN 326845_1904...
Need help?
Do you have a question about the 326845 1904 and is the answer not in the manual?
Questions and answers