
Subscribe to Our Youtube Channel
Related Manuals for Rinnai Geoflo Hybrid 22


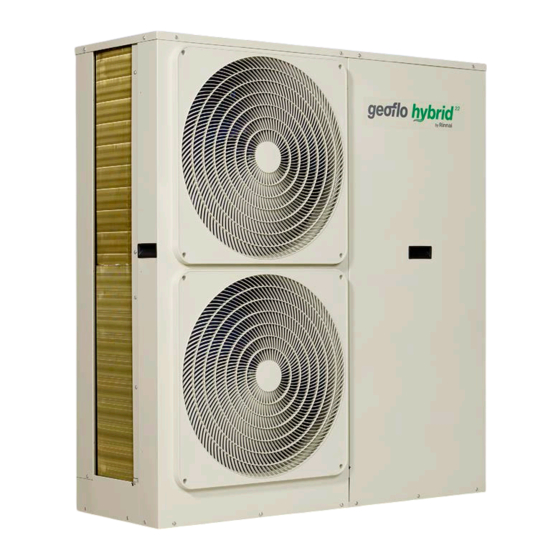
Summary of Contents for Rinnai Geoflo Hybrid 22
- Page 1 MODELS REFRIGERANT R410A Indoor Unit Outdoor Unit DINLR17Z72 DONSGHW18Z3 Geoflo Hybrid – Home Comfort & Hot Water System Installation Manual...
-
Page 2: Before Using This Appliance
Congratulations on the purchase of your Rinnai Geoflo Hybrid Geothermal air conditioning and hot water system. We trust you will have many years of comfort and enjoyment from your appliance. BEFORE USING THIS APPLIANCE Before proceeding with the operation or installation read this manual thoroughly and gain a full IMPORTANT understanding of the appliance, to ensure safe and correct use. This manual primarily details installation requirements of the Geoflo refrigeration indoor unit, outdoor unit and ground well. -
Page 3: Table Of Contents
Required Equipment ������������������������������������������������������������������������������������������������������������������������������������� 27 Before Commissioning ��������������������������������������������������������������������������������������������������������������������������������� 27 Pressure Testing for leaks prior to filling the system ������������������������������������������������������������������������������������ 29 Filling Ground Loop �������������������������������������������������������������������������������������������������������������������������������������� 30 Water Pipes, Fittings and Insulation ����������������������������������������������������������������������������������������������������������������� 31 Water Pipe Connection �������������������������������������������������������������������������������������������������������������������������������� 31 Insulation ������������������������������������������������������������������������������������������������������������������������������������������������������ 31 Pipe Sizing ��������������������������������������������������������������������������������������������������������������������������������������������������� 31 Water Supply ���������������������������������������������������������������������������������������������������������������������������������������������������� 31 Component Specifications ���������������������������������������������������������������������������������������������������������������������������� 31 Typical Hot Water Cylinder Connections ���������������������������������������������������������������������������������������������������������� 32 Typical Installation ���������������������������������������������������������������������������������������������������������������������������������������� 32 Rinnai Geoflo Hybrid IM – Issue 1... - Page 4 Installation for unit with drain pump �������������������������������������������������������������������������������������������������������������� 45 Drainage Test �������������������������������������������������������������������������������������������������������������������������������������������������� 46 Fan Performance Chart ������������������������������������������������������������������������������������������������������������������������������������ 47 Refrigeration Circuit Schematic Diagram ��������������������������������������������������������������������������������������������������������� 47 Commissioning Pre-Commissioning System Operational Checks ������������������������������������������������������������������������������������������� 49 Indoor Unit Airflow & Circulation Check List ������������������������������������������������������������������������������������������������� 49 Indoor Unit Cooling Mode Check List ����������������������������������������������������������������������������������������������������������� 49 Indoor Unit Heating Mode Check List ����������������������������������������������������������������������������������������������������������� 50 Hot Water Storage Check List. ��������������������������������������������������������������������������������������������������������������������� 50 Final Checklist �������������������������������������������������������������������������������������������������������������������������������������������������� 51 Troubleshooting Save a Service Call ������������������������������������������������������������������������������������������������������������������������������������������ 52 Contacts Rinnai Geoflo Hybrid IM – Issue 1...
-
Page 5: Warnings And Important Information
Electrical cable routing must be properly arranged so that the control board cover is able to be fixed properly. WARNING If the control board cover is not fixed properly, it may cause the electrical connections to overheat and fail, resulting in personal injury or property damage. Rinnai Geoflo Hybrid IM – Issue 1... -
Page 6: Electrical Warnings
Installation of damaged or incorrect appliances may contravene local government regulations. Rinnai disclaims any liability or responsibility whatsoever in relation to the installation or operation of damaged or incorrect appliances. WARNING ABOUT HOT WATER Hot water can cause scalding. -
Page 7: Drilling Hazard
System design and installation is to be in accordance with current AS/NZS 5141. Ductwork MUST be supported independently of the indoor unit. When installing the indoor unit, ensure adequate space and access for service and maintenance. Rinnai Geoflo Hybrid IM – Issue 1... -
Page 8: Ground/Earth The Air Conditioner
All pictures and diagrams in this manual are indicative for explanatory purposes only. There may be differences between these and the products supplied, depending on the model. Actual unit NOTE specifications should be reviewed. Definitions Must Indicates a mandatory requirement of this manual. Should Indicates a recommended requirement of this manual. Any deviations from these instructions may, at the discretion of the manufacturer, void the warranty. As a result, the customer and/or installer may be charged a fee for non-product warranty related call outs. Also note that failure to comply with these instructions may preclude company service personnel from being able to service the unit. Gycol (Propylene Glycol Food Grade) Where Gycol is stated in this manual, it is specifically Propylene Glycol Food Grade. Rinnai Geoflo Hybrid IM – Issue 1... -
Page 9: Accessories
Table 1. Description Name Item Quantity Tubing & Fittings Soundproof / insulation sheath Drain pipe Fittings Drain joint (some models) Seal ring (some models) EMC Fitting Magnetic ring (twist the electric wires S1 and S2 around the magnetic ring to five circles) Wired Controller Wired Controller (with outdoor unit). See page 49 for setting. Manuals Wired Controller Manual Geoflo Hybrid Installation Manual Rinnai Geoflo Hybrid IM – Issue 1... -
Page 10: Specifications
Model Name DINLR17Z72 Rated Input 600 W Rated Current 3.0 A Airflow @ 150 Pa 1100 L/s Maximum External Static Pressure (ESP) 200 Pa Noise Level , Sound Pressure @ 1.4m (High / Mid / Low) 49 / 46 /42 dBA Dimensions Net (W x D x H) 1400 mm x 858 mm x 440 mm Weight (Net) 75 kg Return Air Duct Connection (W x H) 1188 mm x 385 mm Supply Air Duct Connection (W x H) 1189 mm x 385 mm Refrigerant Pipe – Suction / Liquid 19 mm ( 3/4”) / 9.5 mm (3/8") Condensate Drain Diameter 25 mm Rated Moisture Removal 3.3 L/h Controller Connection Standard 5 Wire Programmable Operating Range Cooling 17°C ~ 32°C , Heating 0°C ~ 30°C Rinnai Geoflo Hybrid IM – Issue 1... - Page 11 A correctly specified and sized circuit breaker must be installed in accordance with all local and national wiring standards. WARNING The Geoflo system must be on a dedicated, independent electrical circuit. If applicable this also applies to a hot water system, it must be electrically independent of Geoflo. Rinnai Geoflo Hybrid IM – Issue 1...
-
Page 12: Outdoor Unit Dimensions
Plan view (1256) (450) (929) (870) (807) (732) (1393) (607) (482) (204) (162) (111) (87) (110) (1107) (242) (1252) (508) Front view Right Side view All measurements are in millimetres (mm) unless otherwise specified. Rinnai Geoflo Hybrid IM – Issue 1... -
Page 13: Indoor Unit Dimensions & Clearances
Position of downward-directed ventilation opening and size of mounted hook Electric Control Box Table 3. System Specifications (mm) Air Outlet Air Return Size of External Dimensions Opening Size Opening Size Mounted Lug Model (kW) DINLR17Z72 1400 1188 1188 1436 Rinnai Geoflo Hybrid IM – Issue 1... -
Page 14: Service Space
The unit can be opened from top or bottom. Airflow direction The air outlet flange is independent of the top and bottom panel, allowing for easy access when the unit is connected to ductwork. Rinnai Geoflo Hybrid IM – Issue 1... -
Page 15: Hot Water Storage Tank
SPECIFICATIONS HOT WATER STORAGE TANK When selecting the hot water storage capacity for the Geoflo system, please refer to the hot water product selector on the rinnai.com.au website. Either an electric heat pump storage system or standard electric element storage tank can be used. Water Heating control is provided by the Water heater. Hot Water Outlet PTR Valve Flow return to Geoflo Hybrid Unit Tee connection and sensor socket supplied... -
Page 16: Outdoor Unit Components Overview
INLET/OUTLET SERVICE VALVES GLYCOL PUMP ELECTRONIC EXPANSION VALVE INTERFACE CONTROLLER GEOi HOT WATER PCB TRANSFORMER 2.25AMP TERMINAL BLOCK CONDENSER COIL GLYCOL = (Propylene Glycol Food Grade) Rinnai Geoflo Hybrid IM – Issue 1... -
Page 17: Wiring
WIRING ELECTRICAL INTERCONNECTION Outdoor Unit Electric Panel Main PCB THERMOSTAT DIPSW C Y W (1)L (2)N Indoor Power Mains Power Communications TERMINAL BLOCK Indoor Unit PCB ON / OFF CN40 Rinnai Geoflo Hybrid IM – Issue 1... - Page 18 Hot Water Module is activated by default DIP SWITCH No4 : OFF Hot Water Module can be deactivated by setting DIP SWITCH No4 : ON Outdoor Unit Main PCB THERMOSTAT DIPSW C Y W tank temp. sensor Thermostat Rinnai Geoflo Hybrid IM – Issue 1...
- Page 19 Any 3rd party device, technical, installation, operation, performance or other enquiries need to be referred to the device’s supplier or installer. Any adverse effects of 3rd party devices on the operation, performance or reliability of this appliance is not covered by the manufacturer’s product warranty. Rinnai Geoflo Hybrid IM – Issue 1...
-
Page 20: Wiring Diagram
WIRING WIRING DIAGRAM Rinnai Geoflo Hybrid IM – Issue 1... -
Page 21: Installation General
Installation of damaged or incorrect appliances may contravene local government regulations. Rinnai disclaims any liability or responsibility whatsoever in relation to the installation or operation of damaged or incorrect appliances. Indoor, outdoor and hot water storage tank (when fitted) received undamaged? Ground loop received, installed, &... -
Page 22: System Overview
All images and diagrams in this manual are indicative for explanatory purposes only. There may be differences between these and the products supplied, depending on the model. Actual unit specifications should always be reviewed. NOTE Rinnai Geoflo Hybrid IM – Issue 1... -
Page 23: Location
Actual COP results for different loop length is a function of soil conditions, thermal load, usage patterns and indoor/ outdoor conditions. COP ≥ 4.4 Maximum Efficiency 4 ≤ COP < 4.4 High Efficiency 3.5 ≤ COP < 4 Average Efficiency COP < 3.5 Poor Efficiency CBOL Configuration is Beyond Operational Limits Ensure the system has been properly sized prior to installation following sizing guide. IMPORTANT Rinnai Geoflo Hybrid IM – Issue 1... -
Page 24: Installation Sequence
Overly corrosive environments i.e. coastal or industrial • Areas of insufficient or unstable power supply • Areas where strong electromagnetic fields exist • In transport applications, mobile homes, caravans, buses, boats or other vehicles • Close to flammable materials or gases • Other sites with specific adverse conditions. Do not install indoor unit in the following locations • Under a floor or beneath a deck, to be installed in a roof space only. Maximum distance between storage tank and Geoflo Hybrid system is 30m. NOTE Rinnai Geoflo Hybrid IM – Issue 1... -
Page 25: Outdoor Unit Location & Clearances
(Wall or obstacle) >100mm Air inlet from back wall >300mm on left MAINTENANCE ACCESS >600mm Air inlet from above >600mm on right >650mm Air outlet in front NOTE: The unit must not be enclosed Rinnai Geoflo Hybrid IM – Issue 1... -
Page 26: Installation
The vertical distance between the bottom of the ground heat exchanger loop and the top of the indoor fan coil unit MUST NOT be greater than 100 m. • All refrigeration lines MUST be insulated with at least 19 mm Armaflex, Neoprene, or Rubatex closed-cell insulation • Do not tightly tape the insulated lines together. Leave a few mm of air gap to avoid heat transfer between lines • The installing contractor should document the location/ distances diagram, and provide a copy to the property owner. Rinnai Geoflo Hybrid IM – Issue 1... -
Page 27: Commissioning Instructions - Glycol / Water Ground Loop Heat Exchanger
INSTALLATION COMMISSIONING INSTRUCTIONS - GLYCOL / WATER GROUND LOOP HEAT EXCHANGER Scope This section provides information for connection and commissioning of Rinnai's Geoflo Hybrid air conditioner / Hot water system to glycol/ water ground loop heat exchange loops; including the fittings and required commissioning tools. The following installation shows commissioning instructions for professional and qualified installers who understand the Geoflo principles for design and installation of ground loop heat exchange systems. Required Equipment Item Description Photo 1x Fluid Transfer Pump Maximum Head Height > 18m Recommended Model: Milwaukee 2771-20 3x Short Garden Hoses with fittings 6x Garden Tap adaptors 1x Large Bucket (> 15 L) 1x Bicycle Pump with Gauge (To verify or adjustment to meet 20 Psi in expansion tank) - Page 28 Check ground loop installation and make sure below components are connected as detailed in the following diagram. Refer to Diagram 4 on page 29. • Pressure Gauge to check and validate the system pressure with the maximum pressure range being 550 KPa [80 Psi] • Ball Valve to isolate return • Ball Valve to fill water / Glycol & Nitrogen testing • Ball Valve to isolate discharge For installation of the PTR valve refer to the installation instructions in the PTR kit supplied loose inside of the outdoor cabinet. Rinnai Geoflo Hybrid IM – Issue 1...
-
Page 29: Pressure Testing For Leaks Prior To Filling The System
The cap is closed when it is tightened (clockwise) and opened when the cap NOTE is backed off (counter-clock wise) a few turns. If 4 hours pass without any significant drop in pressure, you can rest assured that the ground loop piping is tight and ready for filling with glycol mix. Rinnai Geoflo Hybrid IM – Issue 1... -
Page 30: Filling Ground Loop
Observe the drain hose. Several minutes can pass with unsteady stream of fluid discharging from the drain line, often in spurts and sputters. By holding the end of the drain hose under the Glycol in the bucket, it’s useful for visual indication of air bubbles. Once it appears that all the air is out of the system, let a continuous stream of flow for an additional minute. Open valve and allow the pump to operate for another one minute. Close the drain valve and observe the pressure gauge . As soon as you close the drain valve, the pressure from the pump will begin pressurising the system. When the pressure gauge reads (220 KPa [30Psi]), close the ball valve and shut off the pump . This is your current system pressure. When the system is hot, the pressure will be slightly higher. Conversely, it will be lower. A positive pressure in the system will guarantee that any remaining air in the system, or any gassing off during normal operation will be purged by the air eliminator. Open the cap on the top of air eliminator . The cap should always be open during normal operation. Your ground loop heat exchanger is now commissioned. The purpose of the expansion tank is to allow for the thermal expansion/contraction of the glycol mix under normal operating conditions. It is pre-set to (140 KPa [20Psi]) and MUST NOT be adjusted under any circumstances. The ground loop pressure when commissioning has been completed, gauge pressure will read (220 KPa [30Psi]). The ground loop will have 10Psi of extra pressure acting on the expansion bladder for correct operation. If a leak occurs in the ground loop, the pressure gauge will decrease from set final commissioning pressure. This is a visual indicator to contractors without connecting to the system. Rinnai Geoflo Hybrid IM – Issue 1... -
Page 31: Water Pipes, Fittings And Insulation
MUST be at least 15 mm diameter. This unit is to be installed in a single house dead leg hot water system. Water Pipe Connection Clearly identify and mark each incoming line with its respective ground heat exchanger loop and DO NOT mix gas line and liquid lines together . Insulation All hot water pipework should be insulated with sealed polyethylene foamed or equivalent insulation to optimise performance and energy efficiency, and to protect against frost damage. Such insulation may also be mandatory under local regulations. Rinnai recommend insulation to achieve at least the R value shown in the following table. Location of Installation Pipe between tank and geothermal system All areas R = 0.6 (m².K)/W All supplied insulation materials must be fitted as shown to minimise heat losses. Pipe Sizing With the exception of geothermal flow and return pipes, water pipe sizing should be performed in accordance with AS/NZS 3500. -
Page 32: Typical Hot Water Cylinder Connections
TO DRAIN INLET SUPPLY WATER POWER TEE CONNECTION (From Mains) & SENSOR SOCKET (supplied RINNAI STORAGE with outdoor unit) TANK (Not Supplied) For illustrative purposes only. WARNING Valves with pressure ratings other than specified are unsuitable and MUST NOT be used. -
Page 33: Electrical Pre-Installation Check List
The Outdoor unit has correctly sized isolating switch (ref. data label). Actual Voltage across Main Input Terminals L1, L2 Volts Is the thermostat wiring in accordance with the manufacturer's instructions? Is the thermostat configured in accordance with the manufacturer's instructions? Rinnai Geoflo Hybrid IM – Issue 1... -
Page 34: Thermostat Connection
Outdoor Unit Main Controller Thermostat Connections COMMON Outdoor Unit Main PCB COOLING CALL HEATING CALL FAN CALL 24VAC POWER Thermostat C Y W G R • Thermostat wiring MUST be routed through a conduit or raceway from the outdoor unit. • Thermostat wiring MUST be separated from incoming power leads. • Low voltage wire gauges and wire lengths should also comply with local codes. • The thermostat MUST be mounted at least 1.5 m above the floor level and on an internal wall. • DO NOT install the thermostat on an outside wall or next to windows. • Refer to the thermostat manufacturer’s instruction sheet for detailed mounting and installation information. Rinnai Geoflo Hybrid IM – Issue 1... -
Page 35: Thermostat Connection Wi-Fi 9000
Select 'Next'. • Choose number of stages. Select 'Done'. • Select 'Help' anytime, or visit online installation help and support site for setup videos and FAQ sections, or visit: https://www.mytotalconnectcomfort.com • Setup menu can be revisited anytime to make a change by selecting 'Menu' > 'System Setup' from home screen. For more information refer to the manual(s) supplied with the thermostat. NOTE Rinnai Geoflo Hybrid IM – Issue 1... -
Page 36: Installation Indoor Unit
Terminate the Safety Drain Tray in a position where convenient and where the home owner can see if water is dripping. Instruct owner to contact installer or Rinnai if Safety Drain Tray outlet drips water. INSTALLING THE INDOOR UNIT Installing Ø10 hanging bolts. (4 bolts) •... -
Page 37: Timber Construction
Steel roof beam structure Hanging the indoor unit • Install and directly mount the supporting steel angle. Hang the indoor unit onto the hanging screw bolts (Refer to Diagram 9) as shown in Diagram 10. • Install the indoor unit flat and level by using a spirit level. Uneven installation may cause condensate leaks. Diagram 9. Diagram 10. Hanging screw bolt Screw nut Supporting Washer Hanging bolts steel angle Hanger Hanging screw bolt Rinnai Geoflo Hybrid IM – Issue 1... -
Page 38: Duct Design
Also, provide a minimum of 1m of straight duct from the unit before the first branch take off. • All ductwork and connected accessories MUST be installed and sealed in accordance with all applicable federal, regional and local regulations. Rinnai Geoflo Hybrid IM – Issue 1... -
Page 39: Installation Refrigerant Pipe
Incomplete or insufficient insulation will result in condensation and possible equipment and/or property damage. CAUTION HOW TO CONNECT THE REFRIGERANT PIPES Flaring • Cut the pipe with an approved pipe cutter. Refer to Diagram right. Angled Uneven Burred • Place a flare nut onto the pipe and flare the pipe. • Refer to Table 7 for the flare dimensions. Rinnai Geoflo Hybrid IM – Issue 1... -
Page 40: Connect The Indoor Unit First, Then Connect The Outdoor Unit
Excessive tightening torque will the damage the flare. Too little tightening torque may cause a refrigerant leak. Please determine the correct tightening torque in accordance with Table 7. CAUTION After the connection work is complete, be sure to check the system thoroughly for leaks. Rinnai Geoflo Hybrid IM – Issue 1... -
Page 41: How To Evacuate The Refrigeration System
Service Port Service Port Nut Seal Shaft Allen Key Hole Using the vacuum pump • Loosen and remove the service port nuts of valves A and B, and connect the charging hose of the manifold valve to the service port of the isolation valve A. Ensure that the isolation valves A and B are both closed (Fig. 9-6). • Connect the charging hose to the vacuum pump. • Open the Lo-side valve of the manifold completely. • Turn the vacuum pump on. At the start of pumping, loosen the service valve nut of isolation valve B a little to check for air entering (the sound of the vacuum pump will change, and the manifold gauge reads below zero). Then close the service valve. • When evacuation is complete, close the Lo-side valve of the manifold gauge completely and turn off the vacuum pump. Let the system hold for 15 minutes or more, and check that the pressure does not rise, suggesting a system leak. • Loosen and remove the cap of the isolation valves A and B to open stop valve A and B completely, then fasten the cap. • Disassemble the charge hose from the service port of the isolation valve A, and fasten the nut. Rinnai Geoflo Hybrid IM – Issue 1... -
Page 42: Additional Refrigerant Charge
REMOVE Refrigerant 30g/m for Ø9.52 liquid line More than 15 m ADD Refrigerant Leak testing Check all the joints with a leak detector or soapy water. Refer to Diagram 18. Diagram 18. Check-point of indoor unit Check-point of outdoor unit Low side isolation valve High side isolation valve Joints of the interconnecting pipe to the indoor unit Rinnai Geoflo Hybrid IM – Issue 1... -
Page 43: Air Purging & Leakage Test
Evacuation Vacuum Method / Leak Test System MUST be evacuated down to at least 250 micron vacuum (minimum). The vacuum sequence can be followed after brazing process completed: Isolate the indoor fan coil unit and transmission lines by shutting off top two gas and liquid service valves. Pull a vacuum down on the indoor fan coil unit through access ports on top gas valve. Pull a vacuum down on the outdoor unit through both suction and discharge lines access ports.. After 250 micron vacuum (minimum) achieved on indoor fan coil unit, tighten Schrader cap valves on the top gas valve Both the vapour and liquid valve caps MUST be on tight. IMPORTANT SYSTEM CHARGING SEQUENCE System charging is a very important part of installation. Too much refrigerant will flood the compressor in heating mode causing the compressor damage and high power draw in all modes. Too little refrigerant will lead to poor heating performance and freeze the indoor coil in cooling mode operation. Please Note that: System is pre-charged with R410A Refrigerant System MUST be evacuated before charging All electrical Work and Wiring MUST be completed before charging Rinnai Geoflo Hybrid IM – Issue 1... -
Page 44: Installing Drain Pipe
If condensate pump drain outlet is not used and one of the gravity drain outlets is used, fit the plug (from the gravity outlet) into the pump outlet and unplug the pump from the indoor PCB NOTE terminal CN13. Rinnai Geoflo Hybrid IM – Issue 1... -
Page 45: Installation For Unit With Drain Pump
If you discharge the water directly into a sewer, make sure NOTE that the drain has a U or S pipe to catch odours that might otherwise come back into the house. Rinnai Geoflo Hybrid IM – Issue 1... -
Page 46: Drainage Test
DRAINAGE TEST Check whether the drain pipe is unhindered. Newly built houses should have this test done before lining the ceiling. Remove the test cover, and pour about 2 litres of water into the water pan . Diagram 23. Test cap Stow tube Operate the air conditioner in "COOLING" mode. The sound of the drain pump must be heard. Check whether the water is discharged well (1 min lag is possible, according to the length of the drain pipe), and check whether the water leaks from the joints. Power off the air conditioner and recover the cap. Rinnai Geoflo Hybrid IM – Issue 1... -
Page 47: Fan Performance Chart
DIAGRAMS FAN PERFORMANCE CHART DINLR17Z72 REFRIGERATION CIRCUIT SCHEMATIC DIAGRAM 0.1 - 0.2m Liquid Liquid Rinnai Geoflo Hybrid IM – Issue 1... -
Page 48: Commissioning
Diagram 24. Wired Control supplied with Indoor Unit Diagram 25. CN40 port ON / OFF CN40 • The wired controller is connected during wiring installation stage. • • Indoor programming through CN40 is Retain this wired controller connected to fan coil PCB and done during commissioning stage (after place it near the indoor fan coil unit. Ensure it is set at Auto, installation is complete). 22°C and ON status. Rinnai Geoflo Hybrid IM – Issue 1... -
Page 49: Pre-Commissioning System Operational Checks
Green LED on EEV valve controller Solid On Main EEV valve opening after 5 min running Booster EEV valve opening after 5 min running Discharge Pressure Value after 20 min running Compressor current draw Rinnai Geoflo Hybrid IM – Issue 1... -
Page 50: Indoor Unit Heating Mode Check List
"OFF" and Water temp. is < Does heating element run when Geoflo Hybrid °C set point Heating Element Current Draw Does circulation pump run when Cooling is "ON" and Water temp. is < set point Rinnai Geoflo Hybrid IM – Issue 1... -
Page 51: Final Checklist
No cooling or heating Is the end user fully aware of the operating procedure? Incorrect operation If you have answered NO to any of the above, you must check and correct before appliance hand-over to customer. Rinnai Geoflo Hybrid IM – Issue 1... -
Page 52: Troubleshooting
The fan of the outdoor unit does not During operation, the fan speed is controlled to optimise operate. performance. Check power supply. If a power failure has occurred. Turn off the air conditioner when a power failure occurs. When the power is restored, wait 3 minutes, and then turn on the air conditioner. Check the air conditioner has not been turned off automatically The air conditioner stops running. by a programmed off timer. Press the power button on the remote control. Circuit Breaker tripped or fuse blown. Reset or replace, if problem persists contact Rinnai. Timer is activated. Turn timer off. Rinnai Geoflo Hybrid IM – Issue 1... - Page 53 NOTES Rinnai Geoflo Hybrid IM – Issue 1...
- Page 54 NOTES Rinnai Geoflo Hybrid IM – Issue 1...
- Page 55 NOTES Rinnai Geoflo Hybrid IM – Issue 1...
-
Page 56: Contacts
Monday to Friday, 8.00 am to 5.00 pm EST. *Cost of a local call may be higher from a mobile phone. (National calls from public phones in Australia are free.) For further information visit www.rinnai.com.au or email enquiry@rinnai.com.au innai has a Service and Spare Parts network with...
Need help?
Do you have a question about the Geoflo Hybrid 22 and is the answer not in the manual?
Questions and answers