Aiwa CDC-X30MP Operating Instructions Manual
Fm/am compact disc player
Hide thumbs
Also See for CDC-X30MP:
- Operating instructions manual (17 pages) ,
- Service manual (52 pages)
Table of Contents
Advertisement
Available languages
Available languages
FM/AM Compact Disc Player
AUTOESTEREO PARA DISCO COMPACTO
CDC-X30MP
© 2003 Sony Corporation
POR FAVOR LEA DETALLADAMENTE ESTE MANUAL DE
INSTRUCCIONES ANTES DE CONECTAR Y OPERAR ESTE
EQUIPO.
RECUERDE QUE UN MAL USO DE SU APARATO PODRÍA
ANULAR LA GARANTÍA.
Owner's Record
For your convenience, record the serial number (you will find
them on the bottom side of your set) in the space provided
below. Please refer to them when you contact your AIWA dealer
in case of difficulty.
Model No. CDC-X30MP
3-253-072-12(1)
Serial No.
Advertisement
Table of Contents

Related Manuals for Aiwa CDC-X30MP


Summary of Contents for Aiwa CDC-X30MP
- Page 1 For your convenience, record the serial number (you will find them on the bottom side of your set) in the space provided below. Please refer to them when you contact your AIWA dealer in case of difficulty. Model No. CDC-X30MP 3-253-072-12(1) Serial No.
- Page 2 PRECAUTIONS • Use only in a 12-volt DC negative-ground electrical system. • Disconnect the vehicle’s negative battery terminal while mounting and connecting the unit. • When replacing the fuse, be sure to use one with an identical amperage rating. Using a fuse with a higher amperage rating may cause serious damage to the unit.
-
Page 3: Table Of Contents
TABLE OF CONTENTS THEFT PROTECTION ... 2 BASIC OPERATION, AUDIO AND CLOCK ADJUSTMENT ... 3 RADIO OPERATION ... 4 CD PLAYER OPERATION ... 5 AUXILIARY EQUIPMENT ... 9 OTHER FUNCTIONS ... 9 CARD REMOTE CONTROL ... 10 TROUBLESHOOTING ... 11 MAINTENANCE ... -
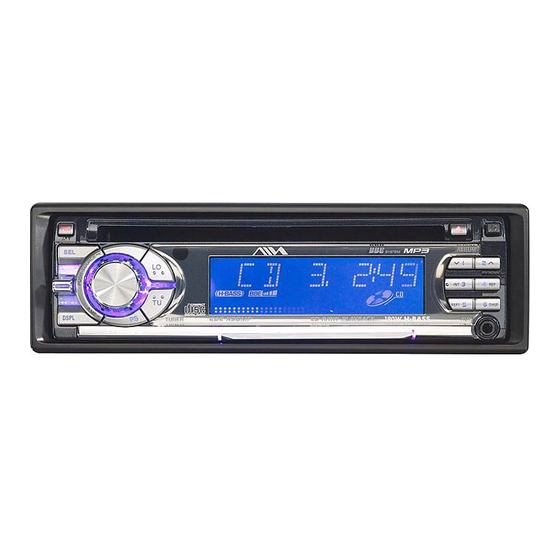
Page 4: Basic Operation, Audio And Clock Adjustment
BASIC OPERATION, AUDIO AND CLOCK ADJUSTMENT PWR/ATT Jog dial (PUSH-SOURCE) DSPL TU (TUNER) + / - Turning the unit on/off • You can turn the unit on by pressing any button on the front panel except z and %. The unit also turns on when you insert a CD. -
Page 5: Radio Operation
Setting the beep tone Turn off the unit. Press and hold SEL until “BEEP” appears on the display. Turn Jog dial to select ON or OFF. Press SEL. Setting the clock Press and hold DSPL until the clock indicator flashes on the display. Press + (to set hour) or - (to set minute), and then turn Jog dial. -
Page 6: Cd Player Operation
Presetting stations automatically (Auto Memory) Press TU (TUNER) repeatedly to select the desired band (F1, F2, F3, A1, or A2). Press and hold PS/A.ME until automatic presetting starts. The unit automatically stores up to 6 stations for each band. After completion of automatic presetting, the unit tunes in to all the stations stored on the preset station buttons in order (Preset Scan). - Page 7 Press Eject a CD Skip to the next track Go back to the beginning of the current track Each extra press skips backward one extra track Locate a specific point in Press and hold r/f a track or t/g until you find the point.
- Page 8 Notes on indications in the display • The following characters are displayed: - uppercase letters: A to Z - numerals: 0 to 9 - symbols: space, ", %, ', , +, comma, -, period, /, <, =, >, @ and _. •...
- Page 9 After scanning, the total number of albums and tracks appears on the display, then the unit automatically starts playing the disc from the first track of the first album. Album number Track number Each time the track is changed, this display appears and remains for about 5 seconds.
-
Page 10: Auxiliary Equipment
AUXILIARY EQUIPMENT Listening to a cassette/MD/MP3 portable player or other equipment You can listen to equipment connected to the unit. Refer to the operating instructions for the corresponding equipment for more detailed information. Be sure to remove inserted CDs to prevent possible damage to the unit before connecting the equipment. -
Page 11: Card Remote Control
CARD REMOTE CONTROL Names of parts 1 TUNER button 2 CD button 3 AMS (Auto music sensor) r button 4 AMS (Auto music sensor) t button 5 PS (preset) button 6 TUNING UP/DOWN buttons 7 VOLUME +/- buttons Preparations A lithium battery is installed in the remote control at the factory. -
Page 12: Troubleshooting
TROUBLESHOOTING Error code In the following cases the corresponding error code indication appears. Follow the suggestions below to solve such problems. ERROR03 Focus error. Check that the CD is loaded properly (right side up, etc.), and the CD contains valid data. Reset button If a CD does not operate properly, press the reset button with a pointed object such as a pencil, etc. - Page 13 PRECAUCIONES • Utilice sólo el sistema eléctrico de cc de 12 voltios con tierra negativa. • Desconecte el terminal negativo de la batería cuando monte y conecte la unidad. • Cuando cambie el fusible, asegúrese de utilizar uno con una capacidad de amperaje idéntica. El uso de un fusible con una capacidad de amperaje mayor puede provocar daños graves en la unidad.
-
Page 14: Protección Antirrobo
INDICE PROTECCIÓN ANTIRROBO ... 2 OPERACIÓN BÁSICA, AJUSTE DE AUDIO Y DEL RELOJ ... 3 MANEJO DE LA RADIO ... 4 MANEJO DEL REPRODUCTOR DE DISCOS COMPACTOS ... 5 EQUIPO ACCESORIO ... 9 OTRAS FUNCIONES ... 9 TARJETA DE CONTROL REMOTO ... 10 LOCALIZACIÓN DE AVERÍAS ... - Page 15 OPERACIÓN BÁSICA, AJUSTE DE AUDIO Y DEL RELOJ PWR/ATT Dial de lanzadera (PUSH-SOURCE) DSPL TU (TUNER) + / - Encendido y apagado de la unidad • Usted podrá encender la unidad pulsando cualquier botón del panel frontal excepto z y %. El aparato también pueden encenderse cuando coloque un disco compacto.
-
Page 16: Manejo De La Radio
Reestablecimiento de las configuraciones de fábrica Apague el aparato. Mantenga pulsado DSPL hasta que aparezca “LEVEL --” en la pantalla. Nota Se pueden restablecer las configuraciones de fábrica sólo para VOL, BASS, TRE, BAL, FAD, H-BASS, DSSA y BBE, y se alinean los niveles de volumen de las fuentes. - Page 17 Preconfiguración automática de estaciones (Memoria automática) Pulse repetidamente TU (TUNER) para seleccionar la banda deseada (F1, F2, F3, A1 o A2). Mantenga pulsado PS/A.ME hasta que se inicie la preconfiguración automática. El aparato memoriza automáticamente hasta 6 estaciones para cada banda. Después de completar la programación automática, el aparato sintoniza todas las estaciones memorizadas en los botones de estación...
- Page 18 Para Pulsar Expulsar un disco compacto Saltar a la sección siguiente Volver al principio de la sección en curso Cada pulsación añadida salta hacia atrás una sección Localizar un punto Mantenga pulsado r/ específico dentro de una f o t/g hasta sección encontrar el punto.
- Page 19 Notas acerca de las indicaciones en la pantalla indicadora • Se visualizarán los caracteres siguientes: - Mayúsculas: A a Z - Números: 0 a 9 - Símbolos: espacio,",%, ', (,), *, +, coma, -, punto, /, <, =, >, @, [, ], _, {, y }. •...
- Page 20 Luego de la examinación, el total de números de álbumes y secciones aparece en la pantalla indicadora, luego el aparato comienza automáticamente la reproducción del disco desde la primera sección del primer álbum. Número del álbum Número de sección Cada vez que la sección sea cambiada, esta visualización aparece por 5 segundos en la pantalla indicadora.
-
Page 21: Otras Funciones
Para cancelar la repetición de la reproducción de una sección, pulse REP1 nuevamente. Reproducción aleatoria Podrá reproducir todas las secciones en el álbum actual en orden aleatorio. Pulse SHUF durante la reproducción de la sección MP3. La expresión “SHUF” aparecerá en la pantalla indicadora. - Page 22 TARJETA DE CONTROL REMOTO Nombre de las piezas 1 Botón TUNER 2 Botón CD 3 Botón AMS (Auto music sensor) r 4 Botón AMS (Auto music sensor) t 5 Botón PS (preconfigurado) 6 Botones TUNING UP/DOWN 7 Botones VOLUME +/- Preparativos Se ha instalado en fábrica una pila de litio en el control remoto.
-
Page 23: Localización De Averías
LOCALIZACIÓN DE AVERÍAS Códigos de error En los siguientes casos aparece la correspondiente indicación del código de error. Siga las recomendaciones presentadas abajo para resolver los problemas mencionados. ERROR03 Error de centrado. Compruebe que el CD está bien metido (con la cara correspondiente hacia arriba, etc.), y que el CD contiene datos válidos. - Page 24 PRECAUTIONS • A utiliser uniquement dans un système électrique à masse négative 12 V CC. • Déconnectez la prise de la batterie négative du véhicule pour l’installation et le raccordement de l’appareil. • Au remplacement du fusible, utilisez un fusible de même ampérage.
-
Page 25: Protection Antivol
TABLE DES MATIERES PROTECTION ANTIVOL ... 2 FONCTIONNEMENT DE BASE, REGLAGE DU SON ET DE L’HORLOGE ... 3 FONCTIONNEMENT DE LA RADIO ... 4 FONCTIONNEMENT DU LECTEUR CD ... 5 MATERIEL AUXILIAIRE ... 9 AUTRES FONCTIONS ... 9 CARTE TÉLÉCOMMANDE ... 10 DÉPANNAGE ... - Page 26 FONCTIONNEMENT DE BASE, REGLAGE DU SON ET DE L’HORLOGE PWR/ATT Commande Jog (PUSH-SOURCE) DSPL TU (TUNER) + / - Mise sous/hors tension • L'appareil peut être mis sous tension en appuyant sur une touche quelconque du panneau avant, sauf z et %.
-
Page 27: Fonctionnement De La Radio
Remarque Vous pouvez rétablir les réglages d’usine seulement pour VOL, BASS, TRE, BAL, FAD, H-BASS, DSSA et BBE, et les niveaux des volumes de source alignés. Réglage de la tonalité bip Mettez l’appareil hors tension. Maintenez SEL pressé jusqu’à ce que “BEEP” s’affiche. -
Page 28: Fonctionnement Du Lecteur Cd
Préréglage automatique des stations (Mémorisation automatique) Appuyez plusieurs fois sur TU (TUNER) pour sélectionner la bande souhaitée (F1, F2, F3, A1 ou A2). Maintenez PS/A.ME pressé jusqu’à ce que le préréglage automatique commence. L’appareil mémorise automatiquement un maximum de 6 stations sur chaque bande. Après le préréglage automatique, l’appareil accorde toutes les stations mémorisées sur les touches de de stations préréglées dans l’ordre (Preset Scan). - Page 29 Pour Appuyez sur Ejecter un CD Sauter au titre suivant Revenir au début du titre courant Chaque pression additionnelle fera passer au titre qui précède Localiser un point Maintenez r/f ou spécifique dans un titre t/g pressé jusqu’à ce que le point soit atteint. Remarques •...
- Page 30 Remarque sur les indications de l’afficheur • Les caractères suivants sont affichés: - majuscules: A à Z - chiffres: 0 à 9 - symboles: espace, ", %, *, +, virgule, -, point, /, <, =, >, @, et _. • Les lettres minuscules (“a” à “z”) sont affichées sous forme de majuscules (“A”...
- Page 31 Après avoir scanné le CD-ROM, le nombre total d’albums et de titres apparaît sur l’afficheur, en suite l’appareil commence automatiquement à lire à partir du premier titre du premier album. Album number Track number A chaque fois que le titre est changé, cet affichage apparaît et reste pour 5 secondes.
-
Page 32: Autres Fonctions
Remarques • Pendant la lecture aléatoire, un appui sur r ne vous permet que de revenir au début du titre en cours, et non au début du titre qui précède. • Si vous sélectionnez un des modes cités auparavant (Lecture des introductions, Lecture répétée d’un album, Lecture répétée d’un titre, ou Lecture aléatoire), l’indication du mode correspondante au mode de lecture sélectionné... -
Page 33: Carte Télécommande
CARTE TÉLÉCOMMANDE Nomenclature 1 Touche TUNER 2 Touche CD 3 Touche AMS (Auto music sonsor) r 4 Touche AMS (Auto music sonsor) t 5 Touche PS (préréglage) 6 Touches TUNING UP/DOWN 7 Touches VOLUME +/- Préparatifs Une pile au lithium est installée dans la télécommande à... -
Page 34: Dépannage
DÉPANNAGE Codes d’erreur Un code d’erreur spécifique apparaît dans les cas suivants. Suivez les suggestions indiquées ci-dessous pour résoudre de tels problèmes. ERROR03 Erreur de concentration. Vérifiez que le CD est chargé correctement (le côté approprié dessus etc.), et qu’il contient des données valables. - Page 35 Sony Corporation Printed in Thailand...
Need help?
Do you have a question about the CDC-X30MP and is the answer not in the manual?
Questions and answers