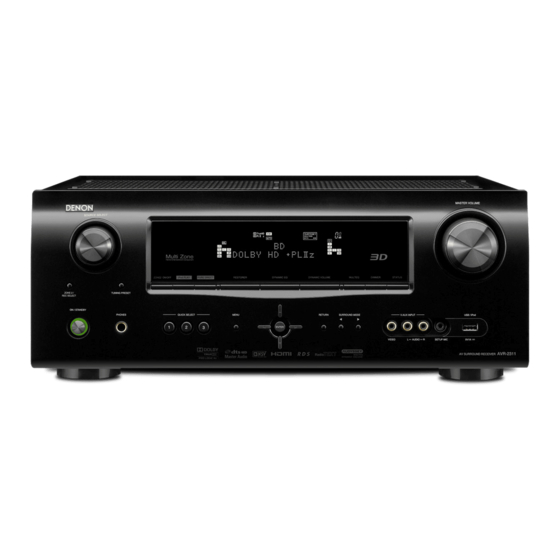
Denon AVR-2311CI Owner's Manual
Denon avr-2311ci: user guide
Hide thumbs
Also See for AVR-2311CI:
- Service manual (207 pages) ,
- Owner's manual (95 pages) ,
- Specifications (2 pages)
Table of Contents
Advertisement
Quick Links
AV SURROUND RECEIVER
AVR-2311CI
Owner's Manual
Manuel de l'Utilisateur
Manual del usuario
Version simplifiée
Simple
Versión sencilla
version
v
3
Version basique
Basic
Versión básica
version
v
12
Version avancée
Advanced
Versión avanzada
version
v
31
"Part names and functions"
Information
(vpage 70)
Informations
v
69
"Nomenclature et fonctions"
(vpage 70)
Información
"Nombres y funciones de las
piezas" (vpágina 70)
Advertisement
Table of Contents

Related Manuals for Denon AVR-2311CI


Summary of Contents for Denon AVR-2311CI
- Page 1 Version simplifiée Simple Versión sencilla version Version basique Basic Versión básica version AV SURROUND RECEIVER Version avancée AVR-2311CI Advanced Versión avanzada version Owner’s Manual Manuel de l’Utilisateur Manual del usuario “Part names and functions” Information (vpage 70) Informations “Nomenclature et fonctions“...
-
Page 2: Safety Precautions
Install in accordance with the manufacturer’s instructions. REFER SERVICING TO QUALIFIED SERVICE PERSONNEL. approved by DENON may void your authority, granted by the FCC, to use Do not install near any heat sources such as radiators, heat registers, the product. -
Page 3: Cautions On Installation
ENGLISH FRANCAIS ESPAÑOL n CAUTIONS ON INSTALLATION NOTES ON USE / OBSERVATIONS RELATIVES A L’UTILISATION / NOTAS SOBRE EL USO PRÉCAUTIONS D’INSTALLATION WARNINGS AVERTISSEMENTS ADVERTENCIAS EMPLAZAMIENTO DE LA INSTALACIÓN • Avoid high temperatures. • Eviter des températures élevées. • Evite altas temperaturas. Allow for sufficient heat dispersion when Tenir compte d’une dispersion de chaleur Permite la suficiente dispersión del calor cuando... -
Page 4: Table Of Contents
ENGLISH Getting started Thank you for purchasing this DENON product. To ensure proper operation, please read these owner’s manual carefully before using the product. After reading them, be sure to keep them for future reference. Contents Accessories Advanced version ·······························································31 Getting started ··············································································1... -
Page 5: Features
ENGLISH Features Cautions on handling • Before turning the power switch on Fully Discrete, identical quality and power for all Auto setup function Check once again that all connections are correct and that there are 7 channels (135 W x 7ch) The unit is provided with an “Auto setup function”... -
Page 6: Simple Version (Simple Setup Guide)
ENGLISH Simple version (Simple setup guide) Simple version Here, we explain the entire setup procedure, from unboxing the unit to using it in a home theater. The “Simple version” describes the installation, connection and setup methods for 5.1-channel speakers. See page 32 for the installation, connection and setup methods for speakers other than 5.1-channel speakers. n Before connecting the unit, turn off the power to all devices. -
Page 7: Install/Connect
ENGLISH Install Connect NOTE This unit can perform 2.0/2.1 to 7.1-channel surround playback. Speakers • Connect so that the speaker cable core wires Here, we explain setup using the example of 5.1-channel speaker do not protrude from the speaker terminal. The protection circuit may be activated if the playback. -
Page 8: Blu-Ray Disc Player And Tv
ENGLISH Connect Blu-ray Disc player and TV Use only an HDMI (High Definition Multimedia Interface) cable that bears the HDMI logo (a certified HDMI product). Using a cable without the HDMI logo (an uncertified HDMI product) may result in abnormal playback. When outputting Deep Color or 1080p, etc., we recommend you use a “High Speed HDMI cable”... -
Page 9: Set Up Speakers
ENGLISH Set up speakers Turn on power (Audyssey ® Auto Setup) Turn on the TV and subwoofer power. The acoustic characteristics of the connected speakers and listening room are measured and the optimum settings are made automatically. This is called “Audyssey Auto Setup”. -
Page 10: Setup Microphone
ENGLISH Set up speakers (Audyssey ® Auto Setup) About setup microphone placement Set up the microphone Set up the remote control unit Mount the setup microphone on a tripod or stand n Set up the zone mode • Measurements are performed by placing the setup microphone and place it in the main listening position. - Page 11 ENGLISH Set up speakers (Audyssey ® Auto Setup) STEP 1 STEP 2 STEP 3 Preparation Speaker Detection Measurement • In STEP 2, you will perform measurements at the • In STEP 3, you will perform measurements at NOTE Connect the setup microphone to the main listening position.
- Page 12 ENGLISH Set up speakers (Audyssey ® Auto Setup) STEP 4 STEP 5 STEP 6 Finish Calculation Check Store Unplug the setup microphone from ENTER to select the item you want Select “Store” and then press On the screen, use STEP 3 the unit’s SETUP MIC jack.
-
Page 13: Error Messages
ENGLISH Error messages Parameter Check An error message is displayed if Audyssey ® Auto Setup could not be completed due to speaker placement, the measurement environment, etc. This function enables you to check the measurement results and If this happens, check the relevant items, be sure to take the necessary measures, then perform Audyssey Auto Setup over again. equalizer characteristics after Audyssey Auto Setup. - Page 14 ENGLISH Play back disc When power is switched to standby Press to switch an input source POWER OFF Press for a player used for playback. GPower indicator status in standby modeH Play the component connected to • Normal standby : Off this unit.
-
Page 15: Basic Version
ENGLISH Basic version Basic version Here, we explain the connections and basic operation methods for this unit. F Connections vpage 13 F Playback (Basic operation) vpage 21 F Selecting a listening mode (Surround mode) vpage 28 n Refer to the pages indicated below for information on connecting and playing back the various media and external devices. -
Page 16: Connections
ENGLISH Connections Important information • Make connections as follows before using this unit. Select an appropriate connection type NOTE according to the components to be connected. • Do not plug in the power cord until all connections have been completed. •... -
Page 17: Connecting An Hdmi-Compatible Device
ENGLISH About ARC (Audio return channel) function Connecting an HDMI-compatible device The Audio Return Channel in HDMI 1.4 enables a TV, via a single HDMI cable, to send audio data You can connect up to five HDMI-compatible devices to the unit. “upstream”... -
Page 18: Connecting A
ENGLISH Connecting an HDMI-compatible device Connecting a TV • Select the connector to use and connect the device. • For video connections, see “Converting input video signals for output (Video conversion function)” • When this unit is connected to other devices with HDMI cables, connect this unit and TV also with an (vpage 13). -
Page 19: Connecting A Dvd Player
ENGLISH Connecting a DVD player Connecting a set-top box (Satellite tuner/cable TV) • You can enjoy video and audio from a DVD. • You can watch satellite or cable TV. • Select the connector to use and connect the device. •... -
Page 20: Connecting A Digital Video Recorder
ENGLISH Connecting a digital video recorder NOTE To record video signals through this unit, use the same type of video cable for connection between this • You can record video onto a Blu-ray Disc or DVD. unit and the player as used for connection between this unit and the recorder. •... -
Page 21: Connecting A Control Dock For Ipod
DENON control dock for iPod. • When you want to playback a video file stored on an iPod, use a DENON control dock for iPod (ASD-1R, ASD-11R, ASD-3N, ASD-3W, ASD-51N and ASD-51W, sold separately) (vpage 18 “Connecting a control in Set as Necessary dock for iPod”). -
Page 22: Connecting A Cd Player
ENGLISH Connecting a CD player Connecting an antenna • You can enjoy CD sound. n AM loop antenna assembly Connecting an HD Radio receiver • Select the connector to use and connect the device. Put the stand section Stand Cables used for connections •... -
Page 23: Connecting An External Control Device
ENGLISH Connecting an external control device REMOTE CONTROL jacks TRIGGER OUT jacks If this unit is installed in a location that is out of range of the signal When a device with TRIGGER IN jack is connected, the connected device’s power on/standby can be controlled through linked operation from the remote control unit, you can still operate the unit and the devices connected to it by using a commercially available IR receiver. -
Page 24: Playback (Basic Operation)
ENGLISH Playback (Basic operation) n Using the “Source Select” menu Adjusting the master volume SOURCE SELECT n Selecting the input source (vpage 21) Press VOL df to adjust the volume. Display the “Source Select” menu. n Adjusting the master volume (vpage 21) The currently selected input n When the “Volume Display”... -
Page 25: Playing A Blu-Ray Disc Player/Dvd Player
Browse mode Remote mode (vpage 18 “Connecting a control dock for iPod”). Make the necessary settings on the player (language setting, Set the iPod ® in the DENON control dock for iPod. Music file subtitles setting, etc.) beforehand. Playable POWER ON... - Page 26 • Depending on the type of iPod and the software version, some MEMORY Store memory functions may not operate. iPod equipped with a slide show or video function. • Note that DENON will accept no responsibility whatsoever for any TV POWER TV power on/standby (Default : SONY) Press and hold SEARCH...
- Page 27 • There are two modes for displaying the contents recorded on the You can use the USB cable provided with the iPod ® to connect the • Note that DENON will accept no responsibility whatsoever for any iPod. problems arising with the data on an iPod when using this unit in iPod with the unit’s USB port and enjoy music stored on the iPod.
-
Page 28: Tuning In Radio Stations
ENGLISH Playing an iPod ® Tuning in radio stations iPod play function Important information iPod PLAY is pressed when power of this unit is on standby and a • If the desired station cannot be tuned in with auto tuning, tune it in n Using the HD Radio™... - Page 29 ENGLISH Tuning in radio stations n Presetting radio stations (Manual preset) Specify a name for the preset broadcast station n Check the HD Radio reception information Your favorite broadcast stations can be preset so that you can tune (Preset Name) (vpage 48) Press STATUS while an HD Radio...
-
Page 30: Playing A Usb Memory Device
32/44.1/48 kHz 48 – 192 kbps .wma NOTE Media Audio) • Note that DENON will accept no responsibility whatsoever for any MP3 (MPEG-1 32/44.1/48 kHz 32 – 320 kbps .mp3 problems arising with the data on a USB memory device when using Audio Layer-3) this unit in conjunction with the USB memory device. -
Page 31: Selecting A Listening Mode (Surround Mode)
The surround effects suitable for the source type or according to your Assign” (vpage 57) or “Speaker Config.” (vpage 57). Surround surround playback liking can be selected from the DENON original sound mode and is used (vpage 30) for playback. Multi channel This mode is for 7.1-channel surround playback DOLBY PLgz using the front height speakers. - Page 32 ENGLISH Standard playback Displaying the currently playing surround mode GViews on the displayH Select the mode corresponding to the playback contents with the menu “Surround Parameter” – Input signal Surround mode Display DOLBY DIGITAL “Mode” (vpage 52) to enjoy your favorite sound DOLBY DIGITAL DOLBY DIGITAL EX mode.
-
Page 33: Denon Original Surround Playback
In this case, try other modes to achieve a sound field suited to your tastes. NOTE When the input signal is Dolby TrueHD, Dolby Digital Plus, DTS-HD or DTS Express, you cannot select DENON original surround mode. -
Page 34: Advanced Version
ENGLISH Advanced version Advanced version Here, we explain functions and operations that let you make better use of this unit. F Speaker installation/connection (Other than 5.1-channel) vpage 32 F Playback (Advanced operation) vpage 38 F Playback in ZONE2 (Separate room) vpage 41 F How to make detailed settings vpage 43 F Operating the connected devices by remote control unit vpage 65... -
Page 35: Speaker Installation/Connection (Other Than 5.1-Channel)
ENGLISH Speaker installation/connection (Other than 5.1-channel) Here we describe the installation, connection and setup methods for speakers other than 5.1-channel speakers. For the installation, connection and setup methods for 5.1-channel speakers, see “Simple version (Simple setup guide)” (vpage 3). When 7.1ch (Front height speaker) installed When 6.1ch (Surround back speaker) installed Procedure for speaker settings Install... -
Page 36: Connect
ENGLISH Connect • For the method of connecting 5.1-channel speakers, see page 4. 7.1-channel/6.1-channel (Surround back speaker) connection • For the method of connecting the TV, see page 5. For 7.1-channel (Surround back speaker) playback, set “Amp Assign” in “Set up speakers” (vpage 36) to 7.1-channel (Front height speaker) connection “Normal”. - Page 37 ENGLISH Connect Front A/B connection 2.1-channel/2-channel connection The second set of front speakers can be connected to the SURR. BACK/AMP ASSIGN terminals. In this case, set “Amp Assign” of “Set up speakers” (vpage 36) to “Front B”. FL(B) FL(A) FR(A) FR(B) 2-channel connection For 2-channel playback, disconnect the subwoofers.
- Page 38 ENGLISH Connect Bi-amp connection 5.1-channel + 2.1-channel connection A bi-amp connection is to connect separate amplifiers to the tweeter terminals and woofer terminals of If front speakers for 2-channel playback are connected to the SURR. BACK / AMP ASSIGN terminals, speakers compatible with the bi-amp function.
-
Page 39: Set Up Speakers
ENGLISH Set up speakers around items indicate the settings. Here we describe how to set up speakers other than 5.1-channel speakers. For the method of setting up 5.1-channel speakers, see “Simple version”, “Set up speakers (Audyssey ® Auto Setup)” (vpage 6). First install and connect the speakers to this unit. - Page 40 ENGLISH Set up speakers GWhen “Subwoofer” is selected in Set up “Channel Select” step 6H to select the item. to select “Channel Select”, ENTER and then press Measure Set for measuring a subwoofer. Skip AUTO SETUP Set for no measuring of a subwoofer. AUDYSSEY AUTO SETUP MultEQ STEP1 Preparation...
-
Page 41: Playback (Advanced Operation)
ENGLISH Playback (Advanced operation) Convenient functions Set the HDMI output connector corresponding with Playback (Basic operation) (vpage 21) the HDMI control function. Set “HDMI Control” (vpage 60) to “ON“. HDMI control function Selecting a listening mode (Surround mode) Turn the power on for all the equipment connected (vpage 28) When you make an HDMI connection with a TV or player compatible by HDMI cable. -
Page 42: Sleep Timer Function
ENGLISH Convenient functions Sleep timer function Adjusting the volume of the speakers n Adjusting the volume of group of speakers (Fader function) The power automatically goes into standby once the set time has You can adjust the channel level either according to the playback This function lets you adjust (fade) the sound all at once from the elapsed. - Page 43 ENGLISH Convenient functions Quick select function ZONE2/REC SELECT SOURCE SELECT • To cancel, press , then turn • The Quick Select function can be set separately for the different All of the settings in step 1 can be memorized together. By memorizing until “ZONE2 Source”...
-
Page 44: Playback In Zone2 (Separate Room)
ENGLISH Convenient functions Playback in ZONE2 (Separate room) Various memory functions • You can operate this unit so as to enjoy audio in a room (ZONE2) w ZONE2 playback by audio output n Personal memory plus function other than the MAIN ZONE (room where the unit is located). •... -
Page 45: Playback
ENGLISH Adjusting the volume Playback Quick select function VOL df to adjust the volume. ZONE SELECT It is also possible to save three settings for ZONE2. Switch to “ZONE2”. GAdjustable rangeH – – – –80dB – –40dB – 18dB n Saving the settings The remote control unit switches to the (When the “Volume Display”... -
Page 46: How To Make Detailed Settings
ENGLISH How to make detailed settings Menu map Setting items Detailed items Description Page Adjusts various audio parameters. 1. Audio/Video Adjust Audio Adjust For menu operation, connect a TV to this unit and Adjusts the picture quality. Picture Adjust display the menu on the TV screen. For menu AUDIO/VIDEO ADJUST operations, see the following page. -
Page 47: Examples Of Menu And Front Display
ENGLISH Examples of menu and front display Below we describe typical examples of displays on the TV screen and on the set’s display window. Menu Display Front Display Description Top menu display q The menu items are displayed here. MENU w The selected line is displayed here. -
Page 48: Inputting Characters
Inputting characters “Preset Name” (vpage 4 8), “Rename” (vpage 5 0), “Zone Rename” Using the number buttons Example: For changing the input source from “DVD” to “DENON” (vpage 63), and “Quick Select Name” (vpage 63)can be changed as q Place the cursor at “V”. -
Page 49: Input Setup
ENGLISH Inputting characters Input Setup Keyboard screen Display the screen for inputting characters. Perform settings related to input source playback. (vpage 43 “Menu map”) • You do not have to change the settings to use the unit. Make n Display of a keyboard input screen settings when needed. -
Page 50: Auto Preset
ENGLISH Input Setup Items that can be set with the Input Setup procedure Important information Auto Preset (vpage 47) Preset Skip (vpage 47) Preset Name (vpage 48) n About the display of input sources INPUT SETUP INPUT SETUP INPUT SETUP AUTO PRESET PRESET SKIP PRESET NAME [1/7] [1/7]... -
Page 51: Preset Name
ENGLISH Input Setup Preset Name Setting items Setting details HDMI HDMI 1 / HDMI 2 / HDMI 3 / HDMI 4 / HDMI 5 / HDMI 6 Assign name to a preset memory. Set this to change the HDMI None : Do not assign an HDMI input connector to the selected input Setting items Setting details input connectors assigned... - Page 52 ENGLISH Input Setup Setting items Setting details Setting items Setting details Component 1-RCA / 2-RCA (Component video) Video Mode Auto : Process video automatically based on the HDMI content Set this to change the None : Do not assign a component video input connector to the selected Make settings for video information.
-
Page 53: Input Mode
ENGLISH Input Setup Input Mode Setting items Setting details Default settings are underlined. Resolution Auto : The number of pixels the TV connected to the HDMI output The input modes available for selection may vary depending on the input source. Set the output resolution. -
Page 54: Audio/Video Adjust
Items that can be set with the Audio/Video Adjust procedure DOCK USB/iPod OFF : Shuffle playback mode is canceled. n For iPod playback (When DENON control dock for iPod ASD-3N, ASD- 3W, ASD-51N or ASD-51W is connected) Audio Adjust (vpage 52) ON : Shuffle playback mode is enabled. -
Page 55: Audio Adjust
ENGLISH Audio/Video Adjust Audio Adjust Setting items Setting details Panorama ON : Set. n Surround Parameter Assign front L/R signal also OFF : Do not set. Default settings are underlined. to surround channels for Adjust surround sound parameters. It may not be possible to set this item depending on the input signal wider sound. - Page 56 ENGLISH Audio/Video Adjust Setting items Setting details Setting items Setting details n For 2-channel sources S.Back Height Gain Low : Reduce the front height channel volume. Sets the method of Control the front height Mid : Front height channel sound is output with standard sound volume. ON : The surround back channel is used.
- Page 57 ENGLISH Audio/Video Adjust n Audyssey Settings Default settings are underlined. Setting items Setting details Dynamic EQ ® Set MultEQ ® , Dynamic EQ ® and Dynamic Volume ® . These can be selected after Audyssey ® Auto ON : Use Dynamic EQ. Solve the problem of OFF : Do not use Dynamic EQ.
- Page 58 ENGLISH Audio/Video Adjust n Manual EQ Setting items Setting details Default settings are underlined. Dynamic Volume ® Midnight : Most adjustment to softest and loudest sounds. Use the graphic equalizer to adjust the tone of each speaker. “Manual EQ” can be set when “MultEQ ® ” setting (vpage 54) is “Manual”. Solve the problem of large Evening : Medium adjustment to loudest and softest sound.
- Page 59 ENGLISH Audio/Video Adjust n RESTORER Picture Adjust Default settings are underlined. Compressed audio formats such as MP3, WMA (Windows Media Audio) and MPEG-4 AAC reduce SAT/CBL GAME V.AUX • This item can be set when the input source is the amount of data by eliminating signal components that are hard for the human ear to hear. The DOCK .
-
Page 60: Manual Setup
ENGLISH Speaker Setup Manual Setup Default settings are underlined. Set when changing Audyssey ® Auto Setup settings, or when changing the audio, video, display Perform when setting the speakers manually or when changing settings made in Audyssey Auto Setup. or other settings. •... - Page 61 ENGLISH Manual Setup Setting items Setting details Setting items Setting details Speaker Config. Surround : Set the presence and size of the surround speakers. Bass Setting SW Mode : Select low range signals to be reproduced by subwoofer. (Continued) • Large : Use a large speaker that can adequately play back low Set subwoofer and LFE •...
- Page 62 ENGLISH Manual Setup Setting items Setting details Setting items Setting details Distance Default : The “Distance” settings are returned to the default settings. Crossover Frequency Crossover : Set the crossover frequency. (Continued) • Yes : Reset to the defaults. Set the maximum frequency •...
-
Page 63: Hdmi Setup
ENGLISH Manual Setup HDMI Setup Setting items Setting details Default settings are underlined. Power Off Control All : If power to a connected TV is turned off independently of the input Make settings for HDMI video/audio output. Links the power standby source, power to this unit is automatically set to standby. -
Page 64: Zone2 Setup
ENGLISH Manual Setup Setting items Setting details Setting items Setting details 2ch Direct/Stereo Crossover : Set the maximum frequency of the bass signal output from EQ Customize Audyssey Byp. L/R : Set when not using “Audyssey Byp. L/R” equalizer. (Continued) each channel to the subwoofer. -
Page 65: Option Setup
–20dB : The sound is attenuated by 20 dB down. • Picture : Set the background to a picture (DENON logo). is on. • Black : Set the background to black. Format : Set the video signal format to be output for the TV you are using. - Page 66 DENON or “USB/iPod”. service engineer or custom Only use this function if so instructed by a DENON serviceperson or installer. • Always : Show display continuously. installer. • 30sec : Show display for 30 seconds after operation.
-
Page 67: Information
ENGLISH Information Items Setting details Quick Select Quick Select 1 / Quick Select 2 / Quick Select 3 / ZONE2 Quick Select 1 / Show information about receiver settings, input signals, etc. Show information about ZONE2 Quick Select 2 / ZONE2 Quick Select 3 •... -
Page 68: Operating The Connected Devices By Remote Control Unit
ENGLISH Operating the connected devices by remote control unit Registering the supplied preset codes in the remote control unit Registering preset codes Input Devices controllable with the remote enables you to operate devices made by other manufacturers. Input source source control unit When preset codes are registered in the included remote control unit, of this unit... - Page 69 Press to set the remote control unit to amplifier Category Brand Preset code Blu-ray button operation mode. CD Recorder Blu-ray Disc player DENON 32258 CABLE CABLE/PVR Press MENU DVD player DENON 32134 DVD Recorder The menu is displayed on the TV screen.
- Page 70 REMOTE PRESET CODES MANUAL SETUP OPTION SETUP Category : DVD REMOTE PRESET CODES Category : DVD Brand : Denon Brand : Denon Code [ 1/ 3] : 30490 Code [ 1/ 3] : 30490 Setup Remote Setup Remote 1. Press [INPUT SOURCE] button.
-
Page 71: Operating Components
ENGLISH n CD player / CD recorder operation n TV operation Operating components Operation buttons Function Operation buttons Function The supplied remote control unit can control a component other than ZONE/DEVICE ON Power onz ZONE/DEVICE ON Power onz this unit. ZONE/DEVICE OFF Power standbyz ZONE/DEVICE OFF... -
Page 72: Specifying The Zone Used With The Remote Control Unit
ENGLISH Specifying the zone used with the Information remote control unit Information ZONE SELECT When the button is pressed, only the set zone can be operated with the remote control unit. Press and hold POWER ON Here, we list various information related to this unit. ZONE/DEVICE ON for at least 3 Please refer to this information as needed. -
Page 73: Part Names And Functions
ENGLISH Part names and functions Front panel Display For buttons not explained here, see the page indicated in parentheses ( ). Q3 Q2 r t y W0 W1 W2 W6 W7 W8 Input signal indicators AUDYSSEY indicators Lighting is as follows, depending on the setting Input signal channel indicators of “Dynamic EQ”... -
Page 74: Rear Panel
ENGLISH Display Rear panel Tuner reception mode indicators See the page indicated in parentheses ( ). These light according to the reception conditions when the input source is set to “HD Radio”. STEREO : In the FM mode, this light when receiving analog stereo broadcasts. -
Page 75: Remote Control Unit
ENGLISH Remote control unit For buttons not explained here, see the page indicated in parentheses ( ). ZONE/DEVICE power buttons ············ (42, 65) ENTER button ····································· (44 – 46) Zone mode indicators ·························· (42, 65) RESTORER button ······································ (56) Input source select buttons ················· (21, 42) Pure direct button (PURE) ·························... - Page 76 ENGLISH Remote control unit Inserting the batteries Operating range of the remote control unit Point the remote control unit at the remote sensor when operating it. q Slide the rear lid in the w Load the two batteries direction of the arrow and properly as indicated by remove it.
-
Page 77: Other Information
ENGLISH Other information Trademark information “Made for iPod” means that an electronic n Trademark information (vpage 74) accessory has been designed to connect This product uses the following technologies: specifically iPod been n Surround (vpage 75) certified by the developer to meet Apple n Relationship between video signals and monitor Manufactured under license from Dolby performance standards. -
Page 78: Surround
ENGLISH Surround This unit is equipped with a digital signal processing circuit that lets you play program sources in the surround mode to achieve the same sense of presence as in a movie theater. Surround modes and surround parameters This table shows the speakers that can be used in each surround mode and the surround parameters adjustable in each surround mode. Symbols in the table S This indicates the audio output channels or surround parameters that can be set. - Page 79 ENGLISH Surround Surround Parameter (vpage 52) Audyssey Settings z20 (vpage 54) NEO:6 Music PRO LOGIC g/gx Music mode only mode only Tone RESTORER AFDM F.Height Surround mode (vpage 28) S.Back Height Gain Subwoofer Dynamic Dynamic EQ ® (vpage 53) MultEQ ® Volume ® (vpage 56) (vpage 53) (vpage 53) (vpage 53)
- Page 80 ENGLISH Surround n Types of input signals, and corresponding surround modes This table shows the input signal that can be played in each surround mode. Check the audio signal of the input source then select the surround mode. Symbols in the table F This indicates the default surround mode.
- Page 81 ENGLISH Surround Input signal types and formats DTS-HD DOLBY DOLBY DIGITAL DTS-HD DOLBY Surround mode (vpage 28) NOTE DTS-HD DTS ES DTS ES DOLBY DOLBY DOLBY DOLBY ANALOG LINEAR PCM LINEAR PCM High DOLBY DOLBY DIGITAL EX Master DSCRT MTRX DTS 96/24 DIGITAL EX DIGITAL DIGITAL...
-
Page 82: Relationship Between Video Signals And Monitor Output
ENGLISH Relationship between video signals and monitor output MAIN ZONE MONITOR OUT Input Signals Output Signals Menu displayed Video Convert HDMI COMPONENT S-VIDEO VIDEO HDMI COMPONENT VIDEO HDMI COMPONENT VIDEO A z2 Wall paper Only the menu is displayed A z2 VIDEO VIDEO VIDEO... -
Page 83: Explanation Of Terms
ENGLISH Explanation of terms Dolby Digital DTS Digital Surround Dolby Pro Logic gx Dolby Digital is a multi-channel digital signal format DTS Digital Surround is the standard digital surround Dolby Pro Logic gx is a further improved version of Adobe RGB color / Adobe YCC601 color developed by Dolby Laboratories. - Page 84 ENGLISH Explanation of terms DTS NEO:6™ Surround DTS NEO:6™ is a matrix decoding technology Progressive (sequential scanning) x.v.Color achieving 6.1-channel surround playback This is a scanning system of video signal that This function lets HDTVs display colors more with 2-channel sources. It includes “DTS NEO:6 displays 1 frame of video as one image.
-
Page 85: Troubleshooting
• If “Front” and “Center” for “Speaker Config.” are set to “Large”, 57, 58 power, the power contact the DENON service adviser. and “SW Mode” is set to “LFE”, no sound may be output from indicator is blinking the subwoofers, depending on the input signal or selected red in intervals of surround mode. - Page 86 ENGLISH GHDMIH GUSB memory deviceH Symptom Cause/Solution Page Symptom Cause/Solution Page No audio is • Check the connection of the HDMI connectors. When a USB • The set cannot recognize a USB memory device. Check the output with HDMI • When outputting HDMI audio from the speakers, set “HDMI memory device is connection.
-
Page 87: Resetting The Microprocessor
ENGLISH Resetting the microprocessor Specifications Perform this procedure if the display is abnormal or if operations cannot be performed. n Audio section When the microprocessor is reset, all the settings are reset to their default values. • Power amplifier ON/STANDBY SURROUND MODE 1 Rated output: Front:... - Page 88 Banana plug ·························································· 4 Delay Time ························································· 52 Setup Lock ······················································· 63 HDMI 1.4 ···························································· 14 Base Curve Copy ················································ 55 DENON original surround mode ························· 30 Source Delete ·················································· 62 HDMI Audio Out ················································ 60 Bass ····························································· 53, 61 Dimension ·························································· 52 Trigger Out ·······················································...
- Page 89 ENGLISH iPod (Control dock for iPod) ······························ 22 Sleep timer ························································· 39 iPod (USB) ························································ 24 Source Delete ···················································· 62 MP3 ································································· 27 Source Level ······················································ 51 MPEG-4 AAC ··················································· 27 Speaker Pure direct ······················································· 30 Connect ······················································· 4, 33 Standard ··························································...
- Page 90 D&M Holdings Inc. Printed in China 5411 10423 001D...
Need help?
Do you have a question about the AVR-2311CI and is the answer not in the manual?
Questions and answers