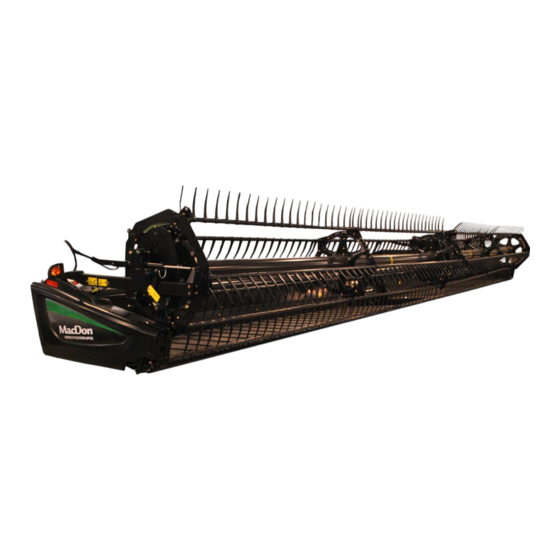
MacDon FlexDraper FD75 Unloading And Assembly Instructions
Hide thumbs
Also See for FlexDraper FD75:
- Operator's manual (578 pages) ,
- Manual (29 pages) ,
- Installation instructions manual (28 pages)

Subscribe to Our Youtube Channel
Related Manuals for MacDon FlexDraper FD75


Summary of Contents for MacDon FlexDraper FD75
- Page 1 Model FD75 FlexDraper ® with CA25 Combine Adapter UNLOADING and ASSEMBLY INSTRUCTIONS NORTH AMERICAN SHIPMENTS Published: April, 2012 Form 169606 Revision A...
- Page 2 INTRODUCTION This instructional manual describes the unloading, set-up and pre-delivery requirements for the MacDon FD75 FlexDraper with a CA25 Combine Adapter for North America. Use the Table of Contents to guide you to specific areas. Retain this instruction for future reference.
-
Page 3: Table Of Contents
TABLE OF CONTENTS GENERAL SAFETY ..........................3 RECOMMENDED TORQUES ......................5 General ............................5 SAE Bolts ............................ 5 Metric Bolts ..........................5 Hydraulic Fittings ......................... 6 CONVERSION CHART ........................8 STEP 1. UNLOAD HEADER ......................9 STEP 2. LOWER HEADER ......................10 STEP 3. - Page 4 TABLE OF CONTENTS Hydraulic Reservoir........................45 Sickle Belt Tension ........................45 Reel Centering ........................... 45 Draper Tension .......................... 46 Header Main Float ........................47 Wing Balance ..........................49 Skid Shoe Settings........................52 Reel Tine to Cutterbar Clearance ....................53 Draper Seal ..........................54 Lubricate Header ........................
-
Page 5: General Safety
SAFETY GENERAL SAFETY CAUTION The following are general farm safety • precautions that should be part of your operating procedure types machinery. Provide a first-aid kit for use in case of • Protect yourself. • emergencies. When assembling, operating and servicing •... - Page 6 SAFETY Use only service and repair parts made or • approved by the equipment manufacturer. Substituted parts may not meet strength, design, or safety requirements. Do not modify the machine. Unauthorized • modifications may impair the function and/or safety and affect machine life. Stop engine, and remove key from •...
-
Page 7: Recommended Torques
RECOMMENDED TORQUES RECOMMENDED TORQUES C. METRIC BOLTS STD COARSE BOLT TORQUE* A. GENERAL BOLT DIA. 10.9 "A" The tables shown below give correct torque ft·lbf N·m ft·lbf N·m values for various bolts and capscrews. Tighten all bolts to the torques specified in •... -
Page 8: Hydraulic Fittings
RECOMMENDED TORQUES O-RING TYPE D. HYDRAULIC FITTINGS FLARE TYPE FITTING LOCKNUT WASHER FLARE O-RING GROOVE SEAT BODY FLARESEAT d. Check flare and flare seat for defects that might cause leakage. a. Inspect O-ring and seat for dirt or obvious e. Align tube with fitting before tightening. defects. - Page 9 RECOMMENDED TORQUES O-RING FACE SEAL (ORFS) TYPE a. Check components to ensure that the sealing HYDRAULIC FITTINGS surfaces and fitting threads are free of burrs, nicks, and scratches, or any foreign material. b. Apply lubricant (typically Petroleum Jelly) to O-ring and threads. If O-ring is not already installed, install O-ring.
-
Page 10: Conversion Chart
CONVERSION CHART CONVERSION CHART INCH-POUND UNITS SI UNITS (METRIC) QUANTITY FACTOR UNIT NAME ABBR. UNIT NAME ABBR. Area acres acres x 0.4047 = hectares Flow US gallons per minute x 3.7854 = liters per minute L/min Force pounds force x 4.4482 = Newtons inch x 25.4 =... -
Page 11: Unloading And Assembly
UNLOADING AND ASSEMBLY STEP 1. UNLOAD HEADER CAUTION To avoid injury to bystanders from being struck by machinery, do not allow persons to stand in unloading area. CAUTION Equipment used for unloading must meet or exceed the requirements specified below. Using inadequate equipment may result in chain breakage, vehicle tipping or machine damage. -
Page 12: Step 2. Lower Header
UNLOADING AND ASSEMBLY STEP 2. LOWER HEADER CAUTION Re-position header in preparation for assembly and set-up as follows: Stand clear when lowering, as machine may swing. a. Remove fork guide from adapter lower frame. b. Choose an area with level ground. c. -
Page 13: Step 3. Remove Shipping Stands
UNLOADING AND ASSEMBLY STEP 3. REMOVE SHIPPING STANDS The removable stands are painted yellow. NOTE Unless otherwise specified, discard stands, and all shipping material and hardware. c. Remove four bolts in each shipping stand on outboard header legs, and remove stands. a. -
Page 14: Step 4. Install Reel Lift Cylinders
UNLOADING AND ASSEMBLY STEP 4. INSTALL REEL LIFT CYLINDERS CAUTION Braces On Reel Arms Keep Reel From Sliding Forward. Do Not Remove. c. Position sling around the reel tube close to outboard end of reel, and attach sling to a forklift (or equivalent). - Page 15 UNLOADING AND ASSEMBLY g. Remove sling, and re-position around reel tube near reel center support arm. k. Remove sling, and re-position around reel tube h. Remove shipping wire/banding from center reel near opposite outboard reel arm. lift cylinder, and remove socket head bolt and nut Remove shipping wire/banding from cylinder, and from cylinder rod.
- Page 16 UNLOADING AND ASSEMBLY Remove bolt locking reel fore-aft position at center reel arm, and remove center reel arm o. Disengage center reel arm shipping support from shipping channel. cutterbar, and remove. p. Remove two bolts from reel arm supports at endsheet, and remove support.
-
Page 17: Step 5. Re-Position Gearbox
UNLOADING AND ASSEMBLY STEP 5. RE-POSITION GEARBOX c. Rotate gearbox, and move bolt into working position slot (C). Tighten nut. d. Remove bolt and nut from bracket on gearbox. a. Remove shipping wire and wrapping on brace, and swing brace (A) clear of gearbox. e. -
Page 18: Step 6. Install Reel Speed Sensor
UNLOADING AND ASSEMBLY STEP 6. INSTALL REEL SPEED SENSOR NOTE This step is not applicable to CASE-IH or New Holland combines. Proceed to STEP 7. INSTALL OPTIONS. CAUTION To avoid personal injury, before servicing header or opening drive covers: Fully lower the header. If necessary to •... -
Page 19: John Deere Sensor Installation
UNLOADING AND ASSEMBLY B. JOHN DEERE SENSOR INSTALLATION a. Perform A. REMOVE COVER. b. Retrieve speed sensor kit from combine completion package. 0.12 inch (3 mm) e. Remove top nut on sensor (F) and locate sensor in bracket (D). Re-install nut. Adjust gap between sensor (F) and disc (A) to 0.12 in. - Page 20 UNLOADING AND ASSEMBLY IMPORTANT Ensure harness is clear of chain and sprockets, and that motor can be moved up and down fully in slots without damaging harness. Locate cover (K) over harness, align holes, and attach to chain case with two rivets (L). k.
-
Page 21: Cat Lexion 500 And 700 Series Sensor Installation
UNLOADING AND ASSEMBLY d. Slide motor (B) and motor mount (C) down C. CAT LEXION 500 AND 700 SERIES towards reel shaft until drive chain is loose. SENSOR INSTALLATION a. Retrieve speed sensor kit from combine completion package. The contents are bagged and wired to the header. - Page 22 UNLOADING AND ASSEMBLY g. Locate support (H) on chain case, and re-install bolts (K) removed in STEP A. If required, bend support so that sensor just clears the disc (D). IMPORTANT h. Install nuts on bolts (K), but do not tighten. Ensure harness is clear of chain and Adjust gap between sensor (G) and disc (D) to sprockets, and that motor can be moved...
-
Page 23: Agco Sensor Installation
UNLOADING AND ASSEMBLY D. AGCO SENSOR INSTALLATION a. Perform A. REMOVE COVER. b. Retrieve speed sensor kit from combine completion package. The contents are bagged and wired to the header. d. Assemble sensor (D) to support (E) with self- tapping screws (F). e. -
Page 24: Install Cover
UNLOADING AND ASSEMBLY E. INSTALL COVER g. Locate cover (J) over harness, align holes and attach to chain case with two rivets (K). h. Secure harness to cover (J) and support with cable ties (L) exactly as shown. a. Attach sensor connector to existing harness (A) IMPORTANT behind chain case. -
Page 25: Step 8. Set-Up Adapter
UNLOADING AND ASSEMBLY STEP 8. SET-UP ADAPTER A. FILLER CAP d. Place gasket (B) that was removed from the top of the filler strainer onto filler cap neck (C), and align holes. e. Install #10-32 screws on filler cap neck (C), a. -
Page 26: Flighting Extensions
UNLOADING AND ASSEMBLY B. FLIGHTING EXTENSIONS C. STRIPPER BARS Flighting extension kits may have been supplied Stripper bar kits may have been supplied with with your header to improve feeding in certain your header to improve feeding in certain crops crops such as rice. -
Page 27: Cr Feeder Deflectors
UNLOADING AND ASSEMBLY D. CR FEEDER DEFLECTORS For New Holland CR 960, 9070, and 9080 combines, feeder kits have been installed on adapter at the factory to improve feeding into the feeder house. They may also have been installed as an option on older machines. If necessary, they can be removed. -
Page 28: Step 9. Attach To Combine
Slowly drive combine up to adapter until feeder as John Deere 50 Series Combines. See house saddle (A) is directly under the adapter top your MacDon Dealer. cross member (B). b. Raise feeder house slightly to lift adapter, IMPORTANT... - Page 29 UNLOADING AND ASSEMBLY Connect combine hydraulic quick coupler to 4. Position onto adapter receptacle (G), and receptacle (G) on adapter as follows: push handle (K) to engage coupler pins into receptacle. 5. Push handle to closed position until lock button (J) snaps out. g.
- Page 30 UNLOADING AND ASSEMBLY Pull back collar (P) on end of driveline, and push onto combine output shaft (Q) until collar locks. LOCK UNLOCK m. Disengage both adapter float locks by moving latch (R) away from adapter, and moving lever (S) at each lock to lowest position. n.
-
Page 31: John Deere 60, 70 Series
UNLOADING AND ASSEMBLY B. JOHN DEERE 60, 70 SERIES Contour Master, Level Land Check that bolts (E) on adapter brackets are tight. g. If pins (B) do not fully engage adapter brackets, loosen bolts (E), and adjust bracket as required. a. - Page 32 UNLOADING AND ASSEMBLY k. Attach coupler (G) to combine as follows: m. Rotate disc (M) on adapter driveline storage hook, and remove driveline from hook. 1. Handle (A) should be in the nearly up position. Clean receptacle. 2. Locate coupler (G) onto receptacle, and pull handle (A) so that lugs on coupler are n.
-
Page 33: Cat Lexion 500, 700 Series
UNLOADING AND ASSEMBLY C. CAT LEXION 500, 700 SERIES CAT Lexion 500(R), 700 combines e. Remove locking pin (E) from adapter pin (B). a. Handle (A) on the adapter should be in raised position, and pins (B) at bottom corners of adapter retracted. - Page 34 UNLOADING AND ASSEMBLY Remove cover (J) from adapter receptacle. o. Remove shipping wire from driveline and float lock lever. k. Clean mating surface of coupler (G), and locate onto adapter receptacle (K). Turn knob (F) to secure coupler to receptacle. p.
-
Page 35: New Holland Cr, Cx Series
UNLOADING AND ASSEMBLY D. NEW HOLLAND CR, CX SERIES CR, CX Series a. Ensure handle (A) is positioned so that hooks (B) can engage adapter. d. Lift lever (E) on adapter at left side of feeder house, and push handle (A) on combine so that hooks (B) engage pins (F) on both sides of the feeder house. - Page 36 UNLOADING AND ASSEMBLY g. Connect to receptacle on adapter as follows: h. Attach combine electrical connector (N) to adapter as follows: 1. Remove cover adapter electrical receptacle (O). 2. Remove connector (N) from combine. 1. Open cover (J). 3. Align lugs on connector (N) with slots in 2.
- Page 37 UNLOADING AND ASSEMBLY k. Pull back collar on end of driveline, and push onto combine output shaft (Q) until collar locks. Proceed to STEP 10. ATTACH CAM ARMS (page 39). Form 169606 Revision A...
-
Page 38: Agco
UNLOADING AND ASSEMBLY ALL EXCEPT GLEANER ‘R’ & ‘S’ SERIES E. AGCO and ‘LL’ MODEL Gleaner R Series and S Series Challenger 660, 670, and 680B Massey 9690, 9790, and 9895 ALL EXCEPT GLEANER ‘R’ & ‘S’ SERIES GLEANER ‘R’ & ‘S’ SERIES GLEANER ‘R’... - Page 39 UNLOADING AND ASSEMBLY g. Start engine, and lower header. Shut down the combine. NOTE The CA25 Combine Adapter is equipped with a multi-coupler that connects to the combine. If your combine is equipped with individual connectors, a multi-coupler kit (single-point connector) must be installed.
- Page 40 UNLOADING AND ASSEMBLY 3. Clean mating surfaces of coupler and receptacle if necessary. Rotate disc (L) on adapter driveline storage hook, and remove driveline from hook. 4. Position coupler (H) onto combine receptacle (K), and pull handle (J) to fully engage coupler into receptacle.
-
Page 41: Step 10. Attach Cam Arms
UNLOADING AND ASSEMBLY STEP 10. ATTACH CAM ARMS e. Install bolt (C) in link, and position shim (D) on bolt so that shim is between link and tine bar crank. NOTE ® Bolts are pre-coated with Loctite , so no further locking method is required. -
Page 42: Step 11. Remove Shipping Supports
UNLOADING AND ASSEMBLY STEP 12. POSITION TRANSPORT STEP 11. REMOVE SHIPPING LIGHTS SUPPORTS The removable supports are painted yellow. Refer to illustrations, and remove the remaining supports as follows: NOTE Unless otherwise specified, discard supports, and all shipping material and hardware. -
Page 43: Step 13. Install Crop Dividers
UNLOADING AND ASSEMBLY STEP 13. INSTALL CROP DIVIDERS d. Lift forward end of divider up to endsheet, and install washer and bolt at (C). a. Dividers are stored on inboard side of endsheets. To remove, support the divider and remove shipping wire at front end (A). -
Page 44: Step 14. Trim Draper Deflectors
UNLOADING AND ASSEMBLY STEP 14. TRIM DRAPER DEFLECTORS Trim existing deflectors as follows: 4 in. (100 mm) a. Mark a straight line (A) on the deflector 4 in. (100 mm) from and parallel to the back edge of the deflector. b. -
Page 45: Step 15. Pre-Delivery Checks
PRE-DELIVERY CHECKS STEP 15. PRE-DELIVERY A. TIRE PRESSURE: TRANSPORT AND STABILIZER WHEEL OPTIONS CHECKS Check tire inflation pressure. If necessary, inflate as per following table: WARNING SIZE LOAD RANGE PRESSURE Stop combine engine, and remove key before 65 psi making adjustments to machine. A child or (448 kPa) even a pet could engage the drive. -
Page 46: Wobble Box
PRE-DELIVERY CHECKS BETWEEN LOWER HOLE C. WOBBLE BOX AND END OF DIPSTICK For access to wobble box(es), endshield(s) must be fully opened. a. To open endshield(s): WOBBLE BOX (CHECK OIL LEVEL WITH TOP OF WOBBLE BOX HORIZONTAL) b. Position of plug (F) and breather (G) at wobble box must be as shown above. -
Page 47: Hydraulic Reservoir
PRE-DELIVERY CHECKS E. HYDRAULIC RESERVOIR G. REEL CENTERING a. Raise header, shut down combine, and engage Check oil level at sights (A) and (B) with cutterbar header lift cylinder stops. just touching ground. Check when oil is cold, and with center-link retracted. TAKE MEASUREMENTS 2 PLACES REEL... -
Page 48: Draper Tension
PRE-DELIVERY CHECKS H. DRAPER TENSION Raise header, and shut down engine. Engage header lift props. WARNING Stop combine engine, and remove key before making adjustments to machine. A child or even a pet could engage the drive. CAUTION LOOSEN Engage header lift cylinder stops before working under header. -
Page 49: Header Main Float
PRE-DELIVERY CHECKS I. HEADER MAIN FLOAT Checking and Adjusting Float CAUTION Stop engine, and remove key from ignition before leaving Operator's seat for any reason. A child or even a pet could engage an idling machine. LOCK c. Set center-link to mid-range (near “C” on cylinder indicator). -
Page 50: Left Side
PRE-DELIVERY CHECKS h. Continue pushing down on the wrench until indicator (G) has reached a maximum reading, and started to drop off. Note the maximum reading. Repeat for opposite side. Use the table below as a guide for float settings: TORQUE SETTINGS HEADER CUTTING ON... -
Page 51: Wing Balance
B and C. adjustments, an optional heavy duty spring is available. See your MacDon b. Raise header until the cutterbar is 6 - 10 in. (152 - 254 mm) off the ground. Dealer or Parts Catalog for ordering information. - Page 52 PRE-DELIVERY CHECKS Move spring handle (A) to lower position (C) to UNLOCK the wing float. g. Place torque wrench (H) (from adapter frame) on bolt (J). NOTE WING UP Use wrench to move wing upward so that pointer lower alignment tab (N) lines up with upper edge See decal inside each linkage cover.
- Page 53 PRE-DELIVERY CHECKS m. If readings are outside the one increment range, the wing is either too light or too heavy. Move spring handle (T) to upper position to LOCK TOO LIGHT the wing float. 1. If the indicator range is as shown above, the s.
-
Page 54: Skid Shoe Settings
PRE-DELIVERY CHECKS J. SKID SHOE SETTINGS If optional skid shoes are installed, check and adjust if necessary as follows: WARNING Stop combine engine, and remove key before making adjustments to machine. A child or even a pet could engage the drive. CAUTION Engage header lift cylinder stops before working under header. -
Page 55: Reel Tine To Cutterbar Clearance
PRE-DELIVERY CHECKS K. REEL TINE TO CUTTERBAR CLEARANCE e. Measure clearance ‘X’ at ends of each reel. NOTE UNLOCK The reel has been adjusted at the factory to provide more clearance at the center of the reel than at the ends (frown) to compensate for reel flexing. -
Page 56: Draper Seal
PRE-DELIVERY CHECKS If necessary, adjust center arm as follows: b. Loosen tension on drapers. Refer to sub-step H. DRAPER TENSION. CLOCKWISE LOOKING UP AT ARM UNDERSIDE c. Lift draper up at front edge past cutterbar. 1. Loosen nut (C). d. Loosen two lock-nuts (G) one-half-turn only on 2. -
Page 57: Lubricate Header
PRE-DELIVERY CHECKS M. LUBRICATE HEADER Refer to master grease decals (shown opposite) provided on the header and adapter back frames, and use the illustrations on the following pages to identify the various locations requiring lubrication. a. Wipe grease fitting with a clean cloth before greasing, to avoid injecting dirt and grit. - Page 58 PRE-DELIVERY CHECKS Lubrication Points (cont’d) DRIVE ROLLER BEARING High Temperature Extreme Pressure (EP2) Performance With 1% Max Molybdenum Disulphide (NLGI Grade 2) Lithium Base IDLER ROLLER BOTH SIDES 10% MOLY GREASE IS RECOMMENDED FOR DRIVELINE SHAFT SLIP JOINT ONLY DRIVE UNIVERSAL - 2 PLCS DRIVELINE SLIP JOINT Form 169606 Revision A...
- Page 59 PRE-DELIVERY CHECKS Lubrication Points (cont’d) FLEX LINKAGE (2 PLCS) - BOTH SIDES FLOAT PIVOT - 2 PLCS DRIVELINE GUARD - 2 PLCS AUGER PIVOT AUGER PIVOT (continued next page) Form 169606 Revision A...
- Page 60 PRE-DELIVERY CHECKS Lubrication Points (cont’d) REEL SHAFT RH BEARING (1 PLC) REEL CENTER BEARING (1 PLC) High Temperature Extreme Pressure (EP2) PerformanceWith 1% Max Molybdenum Disulphide (NLGI Grade 2) Lithium Base REEL UNIVERSAL (1 PLC) U-JOINT HAS AN EXTENDED LUBRICATION CROSS AND BEARING REEL SHAFT LH BEARING (1 PLC) KIT.
-
Page 61: Endshields
PRE-DELIVERY CHECKS b. If necessary, open endshield, and adjust the gap as follows: N. ENDSHIELDS 1. Open endshield. NOTE Plastic endshields subject expansion or contraction depending on large temperature variations. Position of top pin and lower catch can be adjusted to compensate for dimensional changes. -
Page 62: Operator's Manual And Parts Catalogs
PRE-DELIVERY CHECKS 6. Adjust gap: O. OPERATOR’S MANUAL AND PARTS CATALOGS i. From inside endsheet, loosen nut (F) on pin (G). Check case contents. The manual case is ii. Close endshield and adjust position to located inside the LH endshield. achieve the gap ‘X’... -
Page 63: Step 16. Run-Up The Header
HEADER RUN-UP STEP 16. RUN-UP THE HEADER a. Start combine, raise header fully, and engage header lift cylinder locks. Shut down combine, and remove key. WARNING Stop combine engine, and remove key before making adjustments to machine. A child or even a pet could engage the drive. - Page 64 HEADER RUN-UP Ensure feeder house variable speed is set to CAUTION minimum. Start combine, and run the machine slowly for Never start or move the machine until you are 5 minutes, watching and listening FROM THE sure all bystanders have cleared the area. OPERATOR’S SEAT for binding or interfering parts.
-
Page 65: Step 17. Post Run-Up Adjustments
HEADER RUN-UP b. Adjust guard alignment as follows: The guard STEP 17. POST RUN-UP straightening tool (MacDon #140135) is available ADJUSTMENTS from your MacDon Dealer. The following adjustments may be necessary after the run-up: WARNING Stop combine engine, and remove key before making adjustments to machine. -
Page 66: Knife Speed
550 - 650 45 FT g. If adjustment to wobble box pulley rpm is necessary, contact your MacDon Dealer or refer to the Header Technical Manual. 1. Remove lynch pin (A), and tool (B) from pin (C) at top rear of endshield. - Page 67 NOTES Form 169606 Revision A...
- Page 68 MacDon Inc. 10708 N. Pomona Avenue Kansas City, Missouri United States 64153-1924 t. (816) 891-7313 f. (816) 891-7323 MacDon Australia Pty. Ltd. A.C.N. 079 393 721 P.O. Box 243 Suite 3, 143 Main Street Greensborough, Victoria Australia 3088 t. 03 9432 9982 f.
Need help?
Do you have a question about the FlexDraper FD75 and is the answer not in the manual?
Questions and answers