
Related Manuals for Mitsubishi MELFA RC-1300G Series


Summary of Contents for Mitsubishi MELFA RC-1300G Series
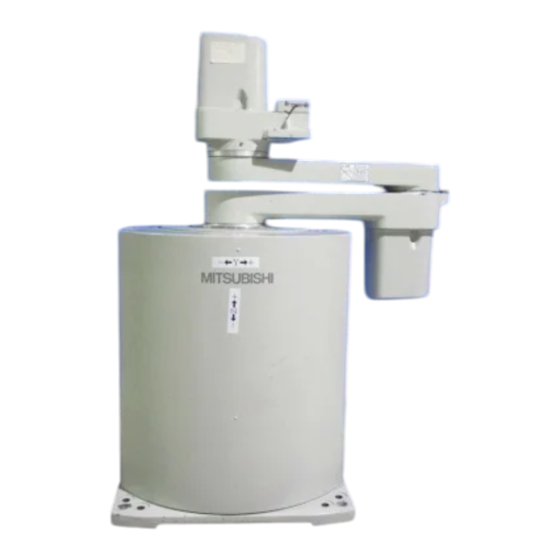
- Page 1 MITSUBISHI Mitsubishi Industrial Robot RC-1300G Series INSTRUCTION MANUAL ROBOT ARM SETUP & MAINTENANCE BFP-A8289...
- Page 2 Caution Users of the robot given as a "Object Model" in "Table 1: List of origin position joint angles" must observe the details below. Warning Do not release the brakes from an external source and forcibly move the robot arm at a high speed. ...
-
Page 3: Safety Precautions
Safety Precautions Always read the following precautions and the separate "Safety Manual" before starting use of the robot to learn the required measures to be taken. CAUTION All teaching work must be carried out by an operator who has received special training. (This also applies to maintenance work with the power source turned ON.) →... - Page 4 The points of the precautions given in the separate "Safety Manual" are given below. Refer to the actual "Safety Manual" for details. CAUTION Use the robot within the environment given in the specifications. Failure to do so could lead to a drop or reliability or faults. (Temperature, humidity, atmosphere, noise environ - ment, etc.) CAUTION Transport the robot with the designated transportation posture.
-
Page 5: Revision History
Revision history Date of print BFP No. Details of revisions 2003-10-27 BFP-A8289 First print. - Page 6 ■ Introduction Thank you for purchasing the Mitsubishi industrial robot. This instruction manual explains procedures to be taken for unpacking, installing, servicing and inspecting the robot arm. Always read through this manual before starting use to ensure correct usage of the robot.
-
Page 7: Table Of Contents
Contents Page 1 Before starting use ..................................1-1 1.1 Using the instruction manuals ............................1-1 1.1.1 The details of each instruction manuals ........................ 1-1 1.1.2 Symbols used in instruction manual ........................1-2 1.2 Safety Precautions ................................. 1-3 1.2.1 Precautions given in the separate Safety Manual ..................... 1-4 2 Unpacking to Installation ................................ - Page 8 Page 5.3.4 Replacing the backup battery ........................... 5-43 (1) Replacing the robot arm battery ......................... 5-43 5.4 Maintenance parts ................................. 5-45 5.5 Resetting the origin ................................5-48 5.5.1 ABS method ..................................5-48 5.5.2 Mechanical stopper method ............................5-50 (1) Select the T/B ................................5-50 (2) J3 and J6 axes origin setting ..........................
-
Page 9: Before Starting Use
1Before starting use 1 Before starting use This chapter explains the details and usage methods of the instruction manuals, the basic terminology and the safety precautions. 1.1 Using the instruction manuals 1.1.1 The details of each instruction manuals The contents and purposes of the documents enclosed with this product are shown below. Use these documents according to the application. -
Page 10: Symbols Used In Instruction Manual
1Before starting use 1.1.2 Symbols used in instruction manual The symbols and expressions shown in Table 1-1 are used throughout this instruction manual. Learn the meaning of these symbols before reading this instruction manual. Table 1-1 : Symbols in instruction manual Symbol Meaning Precaution indicating cases where there is a risk of operator fatality or seri -... -
Page 11: Safety Precautions
1Before starting use 1.2 Safety Precautions Always read the following precautions and the separate "Safety Manual" before starting use of the robot to learn the required measures to be taken. CAUTION All teaching work must be carried out by an operator who has received special training. (This also applies to maintenance work with the power source turned ON.) →... -
Page 12: Precautions Given In The Separate Safety Manual
1Before starting use 1.2.1 Precautions given in the separate Safety Manual The points of the precautions given in the separate "Safety Manual" are given below. Refer to the actual "Safety Manual" for details. CAUTION Use the robot within the environment given in the specifications. Failure to do so could lead to a drop or reliability or faults. -
Page 13: Unpacking To Installation
2Unpacking to Installation 2 Unpacking to Installation 2.1 Confirming the product 2-1. Con - The standard configuration of the robot arm section, part of the purchased product, is shown in Table firm the parts. Users who have purchased optional products should refer to the separate "Standard Specifications". Table 2-1 :... -
Page 14: Installation
2Unpacking to Installation 2.2 Installation 2.2.1 Unpacking As the robot is packed in double layers of vinyl wraps when shipped from the factory, remove the vinyl wraps. When removing the second vinyl wrap, do so in an extremely clean area, such as in the front room of the clean room. -
Page 15: Transportation Method Of Robot
2Unpacking to Installation (2) Transportation method of robot Lift it by hanging the four wires to transport jig 1, as shown in Fig. 2-2. At this time, make sure that the wires and robot do not interfere. Furthermore, to transport the robot using a forklift, insert the fork of the forklift into trans - port jig 3 and then transport the robot. -
Page 16: Installation Procedures
2Unpacking to Installation 2.2.3 Installation procedures (1) Installation reference Maintaining the optimum functions of the robot is the most important point of installing the robot arm. In respect to the robot arm fixing and foundation, to maintain the path accuracy while withstanding the weight applied on the arm and the reaction during movement, the robot arm must be fixed with sufficient force so that it does not move. - Page 17 2Unpacking to Installation Front Exhaust outlet in the case of concrete (prepared by customer) 1000 Top view 8-M20 screw feed hole (for fixing the robot) (Mark A) 8-M20 screw feed hole (Mark B) Rotating axis (J4 axis) center (Steel plate) 8-φ28 hole (In the case of M20 bolt) (Mark C)
-
Page 18: Robot Installation
2Unpacking to Installation (2) Robot Installation This shows the positional relationship between the rotating axis center and the rotating axis edge of the robot base section, and the mounting dimensions. 1) After transporting the robot, remove trans - port jig 2 (see "Fig. - Page 19 2Unpacking to Installation Fig. 2-6 shows the installation location of the Z axis stopper. Z axis stopper (four positions) Transport jig 3 (two positions) 2x4-M12x80 Hexagon socket bolt 2x4-Conical spring washer(1H12) Z axis stopper 2x4-Taper washer(for M12) Jig installation block Fig.2-6 :...
-
Page 20: Adjusting The Levelness
2Unpacking to Installation (3) Adjusting the levelness The robot arm levelness is adjusted with the following procedure. Fix the steel rule with a scale stand or similar object onto the hand flange, as shown in Fig. 2-7. Next, rotate the J4 axis for its full stroke while observing the steel rule with a transit or similar instrument. At this time, mount it so as to obtain 0.5 mm/full stroke. -
Page 21: Grounding Procedures
2Unpacking to Installation 2.2.4 Grounding procedures (1) Grounding methods 1) There are three grounding methods as shown in Fig. 2-8 3, but the dedicated grounding (Fig. 2-8 (a)) should be used for the robot arm and control - Controller Controller Controller ler when possible. -
Page 22: Connecting With The Controller
2Unpacking to Installation 2.2.5 Connecting with the controller Controller RIOS Earth Robot arm Motor signal cable Ferrite core (7m) Motor power cable RIO cable (7m) Fig.2-10 : Connecting the machine cables Carry out the following procedure after installing the controller referring to the separate "Controller setup, basic operation, and maintenance"... -
Page 23: Setting The Origin
2Unpacking to Installation 2.3 Setting the origin The origin is set so that the robot can be used with a high accuracy. After purchasing the robot, always carry out this step before starting work. This step must also be carried out if the combination of robot and controller being used is changed. -
Page 24: Setting The Origin With The Origin Data Input Method
2Unpacking to Installation 2.3.2 Setting the origin with the origin data input method (1) Confirming the origin data ● Origin data history table (Origin Data History) Serial No.ES804008 The origin data to be input is noted in the Date Default . -
Page 25: Preparing The T/B
2Unpacking to Installation (3) Preparing the T/B Next, prepare to use the T/B. EMG.STOP STATUS NUMBER CHANG DISP 1) Set the [MODE] switch on the front of the controller to "TEACH". MODE SVO ON START RESET TEACH AUTO AUTO (Op.) (Ext.) REMOVE T/B SVO OFF... -
Page 26: Selecting The Origin Setting Method
2Unpacking to Installation (4) Selecting the origin setting method <T/B screen> [Keys used] <MENU> 1) Press the [5] key on the menu screen, and display the maintenance screen. 1.TEACH 2.RUN 3.FILE 4.MONI (J6) 5.MAINT 6.SET <MAINT> 1.PARAM 2.INIT 2) Press the [4] key on the maintenance screen, and display the origin setting 3.BRAKE 4.ORIGIN method selection screen. -
Page 27: Inputting The Origin Data
2Unpacking to Installation (5) Inputting the origin data Input the value confirmed in section "(1)Confirming the origin data" on Origin data table page T/B screen (D,J1,J2,J3,J4,J5,J6) The correspondence of the origin data label value and axis to be input is <DATA>... -
Page 28: Moving The Cursor
2Unpacking to Installation ◇◆◇ Moving the cursor ◇◆◇ Press the [ ↑ ], [ ↓ ], [ ← ] and [ → ] keys. ◇◆◇ Inputting characters ◇◆◇ Hold down the [CHAR] key and press the key with the character to be input on the lower right. Three characters will scroll each time the character key is pressed. -
Page 29: Confirming The Operation
2Unpacking to Installation 2.4 Confirming the operation In this section, the robot will be moved manually using the T/B to confirm that the operation is correct. Moving the robot manually is called "jog operation". This operation includes the JOINT jog that moves each axis, the XYZ jog that moves along the base coordinate system, the TOOL jog that moves along the tool coordinate system, and the CYLNDER jog that moves along the circular arc. - Page 30 2Unpacking to Installation J4 axis Z axis Fork2 (upside) Z axis Y axis Fork1 (downside) X axis Fork base *The orthogonal jog operation and the tool jog operation are identical. Fig.2-15 : XYZ jog operation Confirming the operation 2-22...
-
Page 31: Joint Jog Operation
2Unpacking to Installation (1) JOINT jog operation Select the JOINT jog mode Press the [MOVE] + [JOINT] keys to select the JOINT JOINT jog mode. "JOINT" will appear at the upper +34.50 left of the screen. JOINT STEP + +20.00 MOVE ( )? +80.00... - Page 32 2Unpacking to Installation When the [MOVE] + [+X (J1)] keys are pressed, the fork1 will move in the plus direction. When the [MOVE] + [-X (J1)] keys are pressed, the fork1 will move in the minus direction. When the [MOVE] + [+Y (J2)] keys are pressed, the fork2 will move in the plus direction. When the [MOVE] + [-Y (J2)] keys are pressed, the fork2 will move in the minus direction.
-
Page 33: Xyz Jog Operation
2Unpacking to Installation (2) XYZ jog operation Select the XYZ jog mode Press the [MOVE] + [XYZ] keys to select the XYZ jog mode. "XYZ" will appear at the upper left of the X +134.50 screen. STEP Y +220.00 + MOVE Z +280.00 $":... - Page 34 2Unpacking to Installation * Moving the fork1 When the [MOVE] + [+X (J1)] keys are pressed, the fork1 will move along the X axis plus direction. When the [MOVE] + [-X (J1)] keys are pressed, the fork1 will move along the minus direction. **If the moving position of fork 1 becomes limit, the fork base will interlock and move.
-
Page 35: Tool Jog Operation
2Unpacking to Installation (3) TOOL jog operation Select the TOOL jog mode Press the [MOVE] + [TOOL] keys to select the TOOL TOOL jog mode. "TOOL" will appear at the upper left of the X +134.50 screen. TOOL STEP Y +220.00 +... -
Page 36: Installing The Option Devices
3Installing the option devices 3 Installing the option devices Refer to the standard specifications, and install the above options are needed. 3-28... -
Page 37: Basic Operations
4Basic operations 4 Basic operations The basic operations from creating the program to automatic operation are explained in section "4. Basic operations" in the "From Controller Setup to Maintenance" manual. Refer that manual as necessary. 4-29... -
Page 38: Maintenance And Inspection
5Maintenance and Inspection 5 Maintenance and Inspection The maintenance and inspection procedures to be carried out to use the robot for a long time without trouble are described in this chapter. The types and replacement methods of consumable parts are also explained. 5.1 Maintenance and inspection interval Maintenance and inspection are divided into the inspections carried out daily, and the periodic inspections carry out at set intervals. -
Page 39: Inspection Items
5Maintenance and Inspection 5.2 Inspection items The inspection items for the robot arm are shown below. Also refer to section "5 Maintenance and Inspection" in the "Controller setup, basic operation, and maintenance" manual, and inspect the controller. 5.2.1 Daily inspection items Carry out the daily inspections with the procedures given in Table 5-1. -
Page 40: Periodic Inspection
Check and eliminate the cause. damage and adherence of foreign matter. If the cables are severely damaged, contact the Mitsubishi Service Department. 9-month inspection items (approx. 1,500hr) Lubricate the grease at the harmonic reduction gears forJ1, J2, J3, J5 Lublicate it referring to "5.3.2Lubrication"... -
Page 41: Maintenance And Inspection Procedures
The procedures for carrying out the periodic maintenance and inspection are described in this section. Thoroughly read the contents, and follow the instructions. This work can be commissioned to the Mitsubishi Service Department for a fee. (Never disassemble, etc., the parts not described in this manual.) The maintenance parts, etc., required for the user to carry out maintenance and inspection are described in... -
Page 42: J1, J2 And J5 Axes (Expansion/Contraction Axes) Drive Mechanism
5Maintenance and Inspection (2) J1, J2 and J5 axes (expansion/contraction axes) drive mechanism The J1 and J2 axes have the function to move the fork mounting section forward and backward, and the J5 axis has the function to move the J1 and J2 axes forward and backward. J1 and J2 axes .. -
Page 43: J4 Axis Drive Mechanism
5Maintenance and Inspection (3) J4 axis drive mechanism The J4 axis has a function to swing the vertical axis (J3 and J6 axes). The rotation of the AC servo motor rotates the cross roller bearing fixed to the rotating axis and the vertical axes (J3 and J6 axes) fixed to the cross roller bearing via the reduction gears. -
Page 44: Lubrication
5Maintenance and Inspection 5.3.2 Lubrication (1) Lubrication positions and lubrication amount The lubrication positions are shown in Fig. 5-5, and the lubrication positions and lubrication amounts are shown in Table 5-3. The method for lubricating each axis is explained in the following section. 3. - Page 45 5Maintenance and Inspection Table 5-3 : Lubrication positions and lubrication amounts Replenishment position Grease Lubrication interval (time) Axis Target part Type Amount J1 axis Linear guide 5g X 4 positions J2 axis AFE Grease 3,000 J3 axis Linear guide 15g X 4 positions Ball screw J4 axis Reduction gears...
-
Page 46: J3 And J6 Axes Grease Replenishment Method
5Maintenance and Inspection (2) J3 and J6 axes grease replenishment method 1) Set the position of the vertical axes (J3 and J6 axes) at 295 mm, and remove the rear cover. 2) Fill the specified amounts of oil as listed in Table 5-3 from the oil filler hole of the ball screw section and from the grease nipples of each block in the linear guide section. -
Page 47: J1, J2 And J5 Axes Grease Replenishment Method
5Maintenance and Inspection (3) J1, J2 and J5 axes grease replenishment method 1) Set the J5 axis position at 0 mm, and remove the top cover of the expansion/contraction axes. 2) In the ball screw section, remove the grommet from the top cover section of the ball screw, and fill the specified amount of oil as listed in Table 5-3 from the grease nipple (J5 axis). -
Page 48: J4 Axis Grease Replenishment Method
5Maintenance and Inspection (4) J4 axis grease replenishment method 1) Remove the top cover of the vertical axis base. 2) Fill the specified amount of oil as listed in Table 5-3 from the oil plug mounted on the rotating axis. 3) Mount the top cover of the vertical axis base.Set the J5 axis position at 0 mm, and remove the top cover of the expansion/contraction axes. -
Page 49: Adjusting And Replacing The Timing Belt
5Maintenance and Inspection 5.3.3 Adjusting and replacing the timing belt This robot uses a timing belt for the drive conveyance system of the retractable axis. Compared to gears and chains, the timing belt does not require lubrication and has a low noise. However, if the belt usage method and tension adjustment are inadequate, the life could drop and noise could be generated.Sufficient aging to remove the initial elongation of the belt, and adjustment of the belt tension have been carried out before shipment from the factory. - Page 50 5Maintenance and Inspection Front View A Linear guide Installation bolt Lock nut Timing belt Installation bolt Belt holder Pulley Pulley (Driven side) (Driving side) C部 Front Bracket Marking-off line Machine bolt Installation bolt View B Detailed of section C Installation bolt Belt holder1 Slider Belt holder...
-
Page 51: Replacing The Backup Battery
5Maintenance and Inspection 5.3.4 Replacing the backup battery An absolute encoder is used for the position detector, so the position must be saved with the backup battery when the power is turned OFF. The controller also uses a backup battery to save the program, etc. These batteries are installed when the robot is shipped from the factory, but as these are consumable parts, they must be replaced periodically by the customer. - Page 52 5Maintenance and Inspection 4) Remove the fixing screw (2) in Fig. 5-10, and remove the battery installation plate (1) from the robot arm. At this time, take care to prevent pulling excessively the relay cable. 5) The battery holder is present on the battery installation plate. Pull the old battery out of the holder, and disconnect the connection connector.
-
Page 53: Maintenance Parts
Table 5-5. Purchase these parts from the dealer when required. Some Mitsubishi-designated parts differ from the maker's standard parts. Thus, confirm the part name, robot arm and controller serial No. and purchase the parts from the dealer. Table 5-4 : Consumable part list... - Page 54 BU169A036G51 J4 axis (signal cable) BU160C821G51 J5 axis Motor BU169C026G51 J1 axis BU169C026G52 J2 axis HC-SF301BK J3 axis Mitsubishi Electric System & Service;Co.,Ltd. BU169C042G51 J4 axis BU169C026G53 J5 axis HC-SF301BK J6 axis Fan assembly BU160C713G54 J4 axis base section left/right...
- Page 55 Q'ty Usage place Supplier Motor BU169C026G51 J1 axis BU169C026G52 J2 axis HC-SF301BK J3 axis BU169C042G51 J4 axis Mitsubishi Electric System & Service;Co.,Ltd. BU169C026G53 J5 axis HC-SF301BK J6 axis Fan assembly BU160C713G54 J4 axis base section left/right Grease Marutenpu SRL 200g For coating when replacing the J4 axis cable Type :...
-
Page 56: Resetting The Origin
5Maintenance and Inspection 5.5 Resetting the origin The origin is set so that the robot can be used with a high accuracy. After purchasing the robot, always carry out this step before starting work. The origin must be reset if the combination of robot and controller being used is changed or if the motor is changed causing an encoder area. - Page 57 5Maintenance and Inspection Carry out the following operations while lightly holding down the deadman switch on the teaching pendant. <MENU> <MAINT> 1) Press the [5] key on the Menu screen to select 1.TEACH 2.RUN 1.PARAM 2.INIT the Maintenance screen. 3.FILE 4.MONI 3.BRAKE 4.ORIGIN 5.MAINT 6.SET...
-
Page 58: Mechanical Stopper Method
5Maintenance and Inspection 5.5.2 Mechanical stopper method The method for setting the origin with the transportation jig is explained below. This operation is carried out with the T/B. Set the [MODE] switch on the front of the controller to "TEACH", and set the T/B [ENABLE/DISABLE] switch to "ENABLE"... -
Page 59: J3 And J6 Axes Origin Setting
5Maintenance and Inspection (2) J3 and J6 axes origin setting <MECHA> 12345678 1) Move the vertical axis (Z axis) to the 0 mm BRAKE (00100100) position with jog operation (see the figure at SET AXIS (00101000) left). ORIGIN :NOT DEF (J5) 2) Press the [0] key and then press the [1] key. -
Page 60: Releasing The Brakes
5Maintenance and Inspection ◇◆◇ Releasing the brakes ◇◆◇ To release the brakes, move the cursor to the "BRAKE" axis No. with the [ ← ] or [ → ] key. The brakes can be released only for the axis for which a "1" is displayed on the screen. If the brakes are not to be released, press the [0] key and display a "0". -
Page 61: J1, J2 And J5 Axes Origin Setting
5Maintenance and Inspection (3) J1, J2 and J5 axes origin setting <MECHA> 12345678 1) Press the [1] key twice, the [0] key twice, and BRAKE (11001000) then the [1] key once. In "Brake" 1, 2 and 5, "1" SET AXIS (11001000) is displayed, indicating the brake release ORIGIN :NOT DEF specification. - Page 62 5Maintenance and Inspection ◇◆◇ Releasing the brakes ◇◆◇ To release the brakes, move the cursor to the "BRAKE" axis No. with the [ ← ] or [ → ] key. The brakes can be released only for the axis for which a "1" is displayed on the screen. If the brakes are not to be released, press the [0] key and display a "0".
-
Page 63: J4 Axes Origin Setting
5Maintenance and Inspection (4) J4 axes origin setting <MECHA> 12345678 1) Press the [0] key three times and then press the BRAKE (00010000) [1] key. "1" will display at the 4 position to set SET AXIS (00010000) the brake release. ORIGIN :NOT DEF (J5) 2) Confirm the axis for which the brakes are to be... -
Page 64: User Origin Method
5Maintenance and Inspection 5.5.3 User origin method CAUTION Before using this method, the origin must be set with the origin data input method or ABS method or mechanical stopper method. The procedure for setting the origin with the user origin method is explained below. This operation is carried out with the teaching pendant. - Page 65 5Maintenance and Inspection <MENU> <MAINT> 4) Next, set the origin. 1.TEACH 2.RUN 1.PARAM 2.INIT Press the [MENU] key to display the Menu 3.FILE 4.MONI 3.BRAKE 4.ORIGIN screen. 5.MAINT 6.SET 5.POWER 5) Press the [5] key to display the Maintenance screen. (J6) Display the maintenance screen ...
-
Page 66: Recording The Origin Data
5Maintenance and Inspection 5.5.4 Recording the origin data When the origin has been set with the mechanical stopper method, record that origin data on the origin data label. With this, the origin can be set with the origin data input method the next time. Confirm the origin data on the teaching pendant screen (origin data input screen). - Page 67 HEAD OFFICE : MITSUBISHI DENKI BLDG MARUNOUCHI TOKYO 100-8310 TELEX : J24532 CAB LE MELCO TOKYO NAGOYA WORKS : 1-14, YADA-MINAMI 5, HIGASHI-KU, NAGOYA, JAPAN NOV..2003 MEE Printed in Japan on recycled paper. Specifications are subject to change without notice.
Need help?
Do you have a question about the MELFA RC-1300G Series and is the answer not in the manual?
Questions and answers