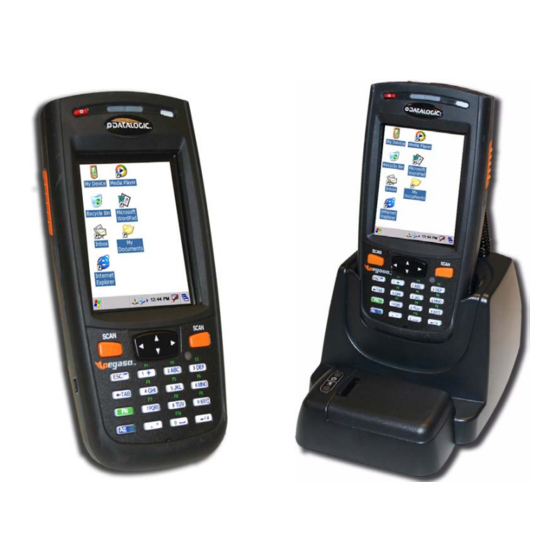
Datalogic Pegaso Product Reference Manual
Industrial pda
Hide thumbs
Also See for Pegaso:
- Quick reference manual (68 pages) ,
- Installation manual (36 pages) ,
- Quick reference manual (60 pages)
Table of Contents
Advertisement
Quick Links
Advertisement
Table of Contents

Related Manuals for Datalogic Pegaso


Summary of Contents for Datalogic Pegaso
- Page 1 Industrial PDA with Windows ® Product Reference Guide...
- Page 2 Datalogic Mobile website (www.mobile.datalogic.com) or provided on appropriate media. If you visit our website and would like to make comments or suggestions about this or other Datalogic publications, please let us know via the “Contact Datalogic”...
-
Page 3: Table Of Contents
Suspend Mode ........................... 1-1 Suspending ..........................1-1 Resuming ..........................1-2 Battery Warnings and Cautions ......................1-2 Battery Disposal ..........................1-3 Chapter 2. Configuring the Pegaso ..................2-1 Overview ............................2-1 Backlight ............................2-2 Brightness ..........................2-2 Auto-Off ............................ 2-2 Activation ..........................2-3 Bluetooth Manager .......................... - Page 4 Removing Programs ........................... 3-7 Firmware Update Utility ........................3-8 Retrieving a Firmware Image Update ..................... 3-8 Installing FUU on the Host PC ....................... 3-8 Updating the Pegaso Firmware .....................3-10 Restoring Pegaso Firmware ......................3-11 AutoStart ............................3-12 Installing CAB files ........................3-13 Autostart.ini ..........................3-14 Chapter 4.
- Page 5 Contents Installing the Handstrap ....................... A-8 Handle .............................. A-8 Installing a Handle on the Pegaso ....................A-9 Belt Clip ............................A-10 Attaching to a Belt ........................A-11 Screen Protector ..........................A-12 Appendix B. Falcon® Desktop Utility for Windows® CE ............B-1 Overview ............................B-1 Falcon Desktop Utility .........................
- Page 6 RSS Limited ............................ G-19 RSS Expanded ..........................G-21 Standard 2 of 5 ..........................G-22 Trioptic ............................G-23 UPC-A ............................G-25 UPC-E ............................. G-26 UPC/EAN Extensions ......................... G-27 Other Controls ..........................G-27 Appendix H. Glossary......................H-1 ® Pegaso™ Industrial PDA with Windows...
-
Page 7: Preface: About This Guide
How to Use this Manual This Product Reference Guide contains comprehensive basic user instructions for the Pegaso Industrial PDA software, batteries, dock, serial cable, data transfer, as well as advanced user information such as bar code configuration and parameters. This section provides an overview of the manual’s contents and organization. -
Page 8: Document Conventions
Portable Keys Keys on the Pegaso are bracketed by “greater than” and “less than” symbols to distinguish them from keys on the PC. < >) <F1> — <F19> Keys. - Page 9 <ENTER> Stylus Actions Stylus actions apply to the Pegaso only; most PCs use a mouse as an input device. Tap or Select. Tap the display screen once with the stylus to activate a specific button or select an item from a pull-down list.
- Page 10 Preface: About this Guide NOTES ® viii Pegaso™ Industrial PDA with Windows...
-
Page 11: Chapter 1. Batteries And Power
"Battery Disposal" starting on page 1-3. Suspend Mode The Pegaso will go into a suspend or sleep mode when it is idle for a period of time. This duration can be customized using the control panel (refer to "The Battery... -
Page 12: Resuming
Do not discharge the battery using any device except for the Pegaso. When the battery is used in devices other than the Pegaso, it may damage the battery or reduce its life expect- ancy. If the device causes an abnormal current to flow, it may cause the battery to become hot, explode or ignite and cause serious injury. -
Page 13: Battery Disposal
Use only the authorized power supplies, battery pack, chargers, and docks supplied by your Datalogic reseller. The use of any other power supplies can damage the Pegaso and void your warranty. Refer to Appendix for the correct "Power Supplies"... - Page 14 Batteries and Power NOTES ® Pegaso™ Industrial PDA with Windows...
-
Page 15: Chapter 2. Configuring The Pegaso
Chapter 2 Configuring the Pegaso Overview This section contains the following topics on configuring Control Panel your Pegaso. Most control panels are accessed by selecting/ tapping Start > Settings > Control Panel • "Backlight" on page • "Bluetooth Manager" on page (optional) •... -
Page 16: Backlight
Figure 2-1. Backlight Control Panel & Brightness Auto-Off On the tab, enable the desired option checkbox and select the desired options Auto-Off from the pull-down lists (refer to Figure 2-1). ® Pegaso™ Industrial PDA with Windows... -
Page 17: Activation
2. Search for the type of Device(s) you want to connect to by tapping Printer, Serial, or . The Pegaso will search for Bluetooth Devices within range. 3. If you attempt to set up a connection when the Bluetooth Radio is disabled, you will receive a message reminding you that the radio is turned off, and asking you if you want to turn it on. -
Page 18: Connect To A Bluetooth Device
Figure 2-3. Bluetooth Device Icons Icon Service Dialup Networking Printer File Transfer Protocol (FTP) Object Exchange (OBEX) Object Push (OPP) Object Exchange (OBEX) ActiveSync Human Interface Device (HID) - Keyboard Serial ® Pegaso™ Industrial PDA with Windows... -
Page 19: Viewing Or Deleting Paired Devices
Tap Sync to initiate a Sync (available only if the service is an ActiveSync connection). Figure 2-4. Bluetooth Pairing Info The icons displayed in the taskbar at the bottom of your Pegaso’s screen will show you the state of the Bluetooth connection, as shown in Table 2-1. Product Reference Guide... -
Page 20: Settings
Bluetooth radio and specify settings Settings for Incoming Connections. Tapping will make the Pegaso available to other Bluetooth devices for 60 sec- Find Me onds, allowing them to set up a connection. to apply the settings you have selected. -
Page 21: Decoding
Date/Time Properties • Select/tap the close button to exit without saving your changes. Decoding You can configure the Pegaso’s decoding options by tapping on Start > Settings > Control . Decoder configuration can also be accomplished for large numbers of Panel >... - Page 22 : Sets volume, tone, duration, and number of various types of beeps. Audio Figure 2-6. Decoding Properties: General Options • : Select from Label Programming Enable, Symbology IDs, Label General Options Prefix, Label Suffix, and Data Separator options. ® Pegaso™ Industrial PDA with Windows...
- Page 23 Decoding Figure 2-7. Decoding Properties: Decoding Options To view other configuration options, select Configure > General from the menu. • Set the character associated with a symbology, the Decoding Options: User ID Redun- and select when available. dancy Aggressive Decoding Figure 2-8.
- Page 24 : Select from Enable, Send Check Digit, and Send System Digit. UPC-A Other decoding parameters are described in Programming Parameters, starting on page F-1; bar code settings are provided in Programming Bar Codes, starting on page G-1. ® 2-10 Pegaso™ Industrial PDA with Windows...
-
Page 25: Device Info
This file must be exactly 480 pixels wide by 640 pixels high. 3. The current file is located in the Windows directory with the Datalogic logo file named DeskLogo.bmp 4. Select the new file name by using Browse Product Reference Guide... -
Page 26: Appearance
3. Change the by selecting the desired Resolution setting. 4. Tap on the control bar, or press <Enter> the keypad. Error Reporting 1. Select Start > Settings > Control Panel > Error Reporting ® 2-12 Pegaso™ Industrial PDA with Windows... -
Page 27: Falcon Config
A copy of FMU is shipped with all Pegaso Windows CE units. For complete information on FMU, refer to the FMU User’s Guide on the Product CD included with your Pegaso. -
Page 28: Internet Options
(refer to Figure 2-12B) modify the network access settings Connection as desired. Figure 2-12. Internet Settings 4. On the tab (refer to Figure 2-13A) add sites or modify the security settings Security for Internet, Local intranet, Trusted Sites, and Restricted Sites. ® 2-14 Pegaso™ Industrial PDA with Windows... - Page 29 Internet Options Figure 2-13. Internet Settings 5. The tab (refer to Figure 2-14) allows you to modify the settings by tapping Privacy the radio buttons. You can Accept, Block or receive a Prompt for First-party and Third-party Cookies. Enable/Disable session cookies by selecting/deselecting the check box.
-
Page 30: Keyboard Configuration
Trigger by selecting it from the Triggers drop-down box, then clicking the desired option. Available items will vary depending on the model. 5. Tap to exit the control panel. Keyboard Options ® 2-16 Pegaso™ Industrial PDA with Windows... -
Page 31: Network And Dialup
Network and Dialup Network and Dialup To change the Network and Dialup connection settings, complete these steps: 1. Select Start > Settings > Network and Dialup Connections Figure 2-16. Changing the Network & Dialup Connection Settings. 2. Double-tap the connection to view or change the settings. The item SDCCF10G1 shown as an example can vary, depending on the radio installed and the number of... -
Page 32: Owner
3. Select to enable password protection at power- on and/or enabling password protection for the screen-saver. 4. To exit the control panel, tap Password the control bar, or press on the keypad. <Enter> ® 2-18 Pegaso™ Industrial PDA with Windows... -
Page 33: Pc Connection
PC Connection PC Connection control panel determines how ActiveSync works with the PDA. To PC Connection modify the default settings: 1. Select Start > Settings > Control Panel > PC Con- nection 2. Select the first checkbox to enable direct con- nections to the desktop computer. -
Page 34: Power Configuration
Suspend settings in 5-minute increments). To save your settings, tap on the com- mand bar, or press on the keypad. <Enter> Device Status Tab tab displays the power usage of active devices. Device Status Figure 2-17. Battery and Power Tabs ® 2-20 Pegaso™ Industrial PDA with Windows... -
Page 35: Regional Settings
, and Number Currency, Time Date. Figure 2-18. Region and Custom Settings 3. The options on the Language tab are disabled because the Pegaso will display only in English. 4. The will open to facilitate data input. Input Panel Figure 2-19. Language and Input Tabs 5. -
Page 36: Remove Programs
Start > Settings > Control Panel > Stylus Stylus Properties shown in Figure 2-20 on page 2-23. 2. Adjust sensitivity if needed or desired. Double-Tap 3. Select the tab to open the application. Calibration Calibration ® 2-22 Pegaso™ Industrial PDA with Windows... - Page 37 Stylus Calibration Figure 2-20. Stylus Properties Control Panel 4. Tap to open Recalibrate screen Calibration shown to the right 5. Carefully press and briefly hold stylus on the center of the target as the target moves around the screen or press to cancel <ESC>...
-
Page 38: System Properties
Allocation 1. Select Start > Settings > Control Panel > System Properties 2. Select the tab. Memory 3. Move the slider to adjust memory allocation. 4. Tap , or on the Pegaso. <Enter> ® 2-24 Pegaso™ Industrial PDA with Windows... -
Page 39: Device Name
Volume and Sounds Device Name Your device uses this information to identify itself to other computers. Copyrights Refer to this tab for specific copyright data. As a user, you are responsible to read this statement. Volume and Sounds To change the settings, complete the following steps: Volume and Sound 1. -
Page 40: Wi-Fi
SCU provides a graphical user interface (GUI) for access to all of its functions. Access to these functions also is available through an application programming interface (API), which an application programmer can use to enable another utility to manage the radio. ® 2-26 Pegaso™ Industrial PDA with Windows... -
Page 41: Scu Windows
Wi-FI To initialize SCU: 1. Go to Start> Settings > Control Panel. 2. Tap on the icon. Wi-fi SCU Windows SCU has five tabs: Main, Profile, Status, Diags (Troubleshooting), and Global Settings. Tabs enable easy navigation. Each tab is described in more detail in this section. Main Tab Reference Figure 2-22 on page 2-27... - Page 42 EAP type: The protocol used to authenticate the device and its user if the WLAN uses the Enterprise version of Wi-Fi Protected Access (WPA) and WPA2. SCU supports four EAP types: PEAP with EAP-MSCHAP (PEAP-MSCHAP), PEAP with EAP-GTC (PEAP-GTC), LEAP, and EAP-FAST ® 2-28 Pegaso™ Industrial PDA with Windows...
-
Page 43: Status Tab
Wi-FI • Encryption: Specifies the type of key used to encrypt and decrypt transmitted data and how that key is specified or derived. Encryption options include: - WPA2 or WPA with dynamic keys (derived from the EAP authentication pro- cess) - WPA2 or WPA with pre-shared keys - Static WEP keys Consult the Summit User’s Guide for details on all profile settings, including security... -
Page 44: Global Settings Tab
Radio and security settings that apply to all profiles • Settings that apply to SCU itself An administrator can define and change most global settings on the Global Settings tab in SCU. Figure 2-26 shows a sample Global Settings tab. ® 2-30 Pegaso™ Industrial PDA with Windows... - Page 45 Wi-FI Figure 2-26. Global Settings The default setting for each global setting ensures reliable operation in most environ- ments. Consult the user’s guide for details on all global settings. Product Reference Guide 2-31...
- Page 46 Configuring the Pegaso NOTES ® 2-32 Pegaso™ Industrial PDA with Windows...
-
Page 47: Chapter 3. Software Applications
"Firmware Update Utility" on page 3-8. • "Retrieving a Firmware Image Update" on page 3-8. • "Installing FUU on the Host PC" on page 3-8. • "Updating the Pegaso Firmware" on page 3-10. • "Restoring Pegaso Firmware" on page 3-11. •... -
Page 48: Inbox
3. Select from the com- View > Internet Options mand bar. 4. Enter the desired URL in the field. Start Page Internet Explorer window with the 5. Tap Status bar and View menu. ® Pegaso™ Industrial PDA with Windows... -
Page 49: Media Player
View From the top menubar, go to View > Hide Toolbars Once it is hidden, you must reset the Pegaso to access these features again. Refer to the Pegaso Quick Start Guide (QSG) for reset instructions. For more control over the way Internet Explorer is displayed, refer to "Falcon®... -
Page 50: Persistent Memory
Persistent Memory In addition to the RAM-based storage standard on Windows CE terminals, the Pegaso is also equipped with a persistent storage application and file storage area. The persistent storage memory persists across all reset (warm/cold reboot) conditions and software/firmware updates. -
Page 51: Disk Size
96 MB FlashDisk size Installing Programs Programs pre-installed on the Pegaso are stored in ROM (read-only memory). You can- not remove or modify this software. You may add programs and data files to RAM (random access memory) or into persis- tent storage memory via the persistent storage disk. -
Page 52: Using An Installation Wizard
• For more information on copying files using , refer to the ActiveSync ActiveSync online Help. 3. Connect your Pegaso and desktop computer. Refer to "Networks, Communica- tions, and Connections", starting on page to connect your Pegaso with your *.exe *.cab 4. -
Page 53: Using Windows Explorer To Add To The Start Menu
Explorer ActiveSync your Pegaso and locate the program. For more information on using ActiveSync refer to "Installing & Setting Up Microsoft ActiveSync" on page 4-1, or see the online help on your unit. -
Page 54: Firmware Update Utility
FUU can also be used to restore the firmware onto a Pegaso that has become corrupted, such as would happen if the unit were powered down during an ActiveSync firmware update. See "Restoring Pegaso Firmware" on page 3-11. - Page 55 ® To install Datalogic Mobile’s Falcon Firmware Update Utility, complete the following steps on the PC: 1. Insert the CD shipped with your Pegaso and click on the link to Firmware Update Utility www.mobile.datalogic.com Go to the Datalogic Mobile website at and download the most current version of the Firmware Update Utility.
-
Page 56: Updating The Pegaso Firmware
.img 4. Select the current * file and click Open 5. Verify that the Pegaso is turned on. Insert the device into a powered dock con- nected to the host computer. 6. Click on the host PC. Update Terminal ®... -
Page 57: Restoring Pegaso Firmware
If the firmware image on the Pegaso becomes corrupted, the unit will beep twice and show a blank screen when powered on. This can happen if a firmware update is aborted, such as during a power loss or if the Pegaso is removed from the Dock before comple- tion of the procedure. -
Page 58: Autostart
Update Terminal will restore the firmware on the Pegaso as shown on page 3-10. Please be patient and do not remove the Pegaso from the Dock during this procedure. The firmware image of the Pegaso can take as long as: •... -
Page 59: Installing Cab Files
AutoStart Table 3-3. PreAuto.ini and Autostart.ini location Product Operating System Location Windows CE \FlashFX Disk F4400 Windows Mobile \FlashDisk Installing CAB files Copy any CAB files you want to install into the AutoStart CAB folder. These CAB files will then be automatically installed in alphabetical order the next time you start the device. -
Page 60: Autostart.ini
The second line is an invalid line because there is no way to distinguish the executable from the argument. AutoStart Options Autostart.ini Table shows options you can use when writing a line in the PreAuto.ini file. ® 3-14 Pegaso™ Industrial PDA with Windows... - Page 61 AutoStart Table 3-6. Options for Autostart.ini and PreAuto.ini Description Character Comments This may only be used as the first character of the line. If the ‘#’ OR ‘ ‘ Comment: This line will not be comment option is specified in (space) executed.
- Page 62 This will confirm the execution of \Windows\Pword.exe. If the exe- ?- \Windows\Pword.exe cution is confirmed, AutoStart will immediately process the next line. This will execute the program \Program Files\App.exe with the !”\Program Files\App.exe” /run argument /run ONLY after a Cold Reset. ® 3-16 Pegaso™ Industrial PDA with Windows...
-
Page 63: Chapter 4. Networks, Communications, And Connections
Important! You must disconnect any other PDAs, PDTs, or Pegasos using USB Active- Sync from the Host PC prior to connecting the Pegaso or the Host PC and Microsoft ActiveSync may not recognize the new device. - Page 64 3. Download the current version of ActiveSync from the Microsoft website. ® 4. Install the most current version of Microsoft ActiveSync on the host PC (refer to Figure 4-1). Figure 4-1. Microsoft ActiveSync Installer Figure 4-2. Microsoft ActiveSync Installer ® Pegaso™ Industrial PDA with Windows...
-
Page 65: Setting Up Activesync
Setting up ActiveSync 1. Open ActiveSync from the Host PC. 2. Connect the Pegaso to the Host PC via a dock or USB/Serial cable. 3. Verify that the Pegaso is turned on. 4. Within a minute, the ActiveSync window should appear, attempting to connect to a new device. -
Page 66: Installing The Usb Driver
Host PC’s System Tray if it is not ActiveSync already open. • Remove the Pegaso from the dock and then reinsert it into the dock or discon- nect the cable from the Host PC and reconnect it. • Select for ActiveSync to look for a mobile device. -
Page 67: Using Activesync
Using ActiveSync 1. Copy the USB driver file from your Pegaso CD or the Datalogic website to the following location on your computer: C:\Program Files\Microsoft ActiveSync\Drivers 2. Connect the USB or Serial cable to Pegaso or place the unit in the dock. -
Page 68: File Synchronizing Using Activesync
ActiveSync file synchronization requires an ActiveSync partnership between the Pegaso and the Host PC. Refer to "Setting up a Partnership" on page 4-5. 1. Select the controls in the synchronization configuration for the Pegaso partner- ship. Refer to Figure 4-8 on page 4-7. - Page 69 (defaults to the desktop). Refer to Figure 4-7 on page 4-6. Synchronization During the ActiveSync connection, all files in the folder will be \My Documents synchronized with (copied to) the directory on the Pegaso. Figure 4-9. Select Synchronization Settings Product Reference Guide...
-
Page 70: Networking
Setting up the Network ID To set up your Network ID (configure the Windows user settings, such as the user name, password, and domain), complete the following steps on the Pegaso: 1. Go to Start > Settings > Control Panel > Owner 2. -
Page 71: Network Setup: Remote Activesync
You must have established an ActiveSync partnership with a host before you can use Remote ActiveSync to connect to it. To establish an ActiveSync connection with the Pegaso, refer to "Installing & Setting Up Microsoft ActiveSync" on page 4-1. SNMP SNMP (Simple Network Management Protocol) is the standard protocol for managing devices on a network. - Page 72 Networks, Communications, and Connections NOTES ® 4-10 Pegaso™ Industrial PDA with Windows...
-
Page 73: Appendix A. Accessories
"Handstrap" on page "Handle" on page "Belt Clip" on page A-10 "Screen Protector" on page A-12 Contact your Datalogic reseller for accessories and supplies for the Pegaso; go to the Datalogic website for the most current information. Product Reference Guide... -
Page 74: Appendix A. Accessories
Power Supplies Powered USB Cable & Power Supply Use only the correct battery chargers and docks with this Windows CE Pegaso. The tech- nology used for these models is incompatible with other Datalogic chargers and docks. Figure A-1. Power Supply and Powered USB Cable Battery Pack The Battery Pack and the Battery Door are integrated and are not sold separately. -
Page 75: Single Slot Dock
Power Supplies Figure A-2. Battery Pack Battery Pack Battery Latch Seat this (push in to release) end first Single Slot Dock Figure A-3. Single Slot Dock Pull Upward to Remove USB/Serial Connector LEDs Battery Pack in Charger Product Reference Guide... -
Page 76: Four-Slot Charge Dock
Four-Slot Ethernet Dock Like the Four-Slot Charging Dock, the Four-Slot Ethernet Dock provides the ability to charge four Pegaso and four spare batteries simultaneously. In addition, the built-in Ethernet hub gives all the docks a unique Ethernet address accessible through one phys- ical 802.3 CAT5 connection. -
Page 77: Four-Slot Battery Charger
LEDs Car Charging Adapter A Car Charging Adapter is available for the Pegaso. To attach, just plug the adapter into the connector on the bottom of the unit, and tighten the thumb screws to secure it. Figure A-7. Car Charging Adapter... -
Page 78: Modem Module
Accessories Modem Module An optional Modem Module allows you to use the Pegaso to dial a server in a remote office. Features: • V.92/56K data rate backward compatible with lower speeds • V.44 and V.42 bits data compression • V.42 error correction •... -
Page 79: Ethernet Module
A PPP connection has now been created. TCP/IP network communications can com- mence. Ethernet Module The optional Ethernet Module allows the Pegaso to connect to an Ethernet network. There are two LEDs; one for 10/100 Mbps link and the other for Tx/Rx. The commu- nications rate is 10/100Mbps – Auto-negotiate. -
Page 80: Installing The Handstrap
Back Enclosure Handstrap Holder Installing the Handstrap To install a Handstrap on the Pegaso, follow the steps described below. 1. Feed the strap end of the handstrap down through the Back Enclosure Handstrap Holder slot as shown in Figure and loop it up to engage the closure area at the desired position. -
Page 81: Installing A Handle On The Pegaso
1. Align the “ears” on the handle with the corresponding holes on the underside of the Pegaso and slide them into place. Ears 2. Seat the top of the Handle against the Pegaso and turn the quarter-turn fastener to secure the Handle to the unit. Unlocked... -
Page 82: Belt Clip
3. Align the “ears” on the inside of the Belt Clip with the corresponding holes on the underside of the Pegaso and slide them into place. Ears 4. Push the top of the Belt Clip against the Pegaso and turn the quarter-turn fastener to secure it. ®... -
Page 83: Attaching To A Belt
Position Attaching to a Belt To attach the Pegaso to a belt, snap the Belt Attachment onto your Belt. Slide the Pegaso onto the Belt Attachment sideways, then rotate to an upright position to secure it into place, as shown in Figure A-10. -
Page 84: Screen Protector
Accessories Screen Protector A Screen Protector is available for the Pegaso. Use the following instructions to attach a Screen Protector. You may find it helpful to have the unit firmly seated in its dock while performing these procedures. Another useful tip is to have a credit card handy to assist in smoothing the Screen Protector in place. - Page 85 ® configure Pegaso Windows CE devices to control individual user access. This includes: • Prevent users from changing Pegaso OS settings. • Define keys to access specific functionality/programs. • Use Application Selector to replace desktop with a selection of authorized applica- tions.
-
Page 86: Appendix B. Falcon® Desktop Utility For Windows® Ce
FDU tabs. saves every modification. to cancel the settings and modifications you have made in the FDU tabs. cancels all modifications you have made in FDU. ® Pegaso™ Industrial PDA with Windows... -
Page 87: Administrative Options
Falcon Desktop Utility Administrative Options When you open the control panel, the tab will open. Select the tab to Admin Admin set up FDU. Figure B-2. Setting a Password/Admin Tab Fields Table B-2. Setting a Password/ Admin Tab Fields Command Description Select/tap this checkbox to activate the functions such as... -
Page 88: Setting A Password
Password Request Dialog Box Once the password is set, the next time you open the , the Falcon Desktop Utility FDU Pass- dialog box opens. word This dialog box will only open if a password was defined. ® Pegaso™ Industrial PDA with Windows... -
Page 89: Setting Hot Keys
Falcon Desktop Utility Figure B-3. Setting a Password Table B-3. Setting a Password Dialog Command Description Enter your password using the keypad, or using the stylus on the Enter Password soft input panel (SIP) in the text box. Select/tap to accept the password. Select/tap to cancel the request to start the FDU. - Page 90 If you wish to assign this key to a different function, you must first select an unassigned Hot Key and assign it to the Action - Admin. You can then go back and reassign the to something else. FKey ® Pegaso™ Industrial PDA with Windows...
- Page 91 Falcon Desktop Utility Table B-5. Pegaso Hot Keys Available Pegaso 19-key models Numeric F1-F10 Alpha keys Side/top triggers The administrator is responsible for verifying that these keys don’t override existing func- tions. To prevent FDU Hot Keys from overriding existing application keys, select “No Action”...
-
Page 92: Internet Explorer Configuration
Exist, (500) Internal Server Error, (501) Server Can't Do That, Generic Error, Server Is Busy, Couldn't Find Server, URL Syn- tax Error, Request Cancelled, Not Available Offline Edit this textbox to associate a website or html file with the Error Page specified error. ® Pegaso™ Industrial PDA with Windows... -
Page 93: Modifying Windows Controls
Falcon Desktop Utility Command Description Select/tap to set a specified error page as the default. A confir- Assign as Default mation dialog opens to ask if the default error page applies to all errors. Browse Select/tap to browse for files. Show Address Select/tap this check box to show the address bar. - Page 94 This option is only available when both Show Taskbar Task Bar Enabled are checked. Windows CE Desk- Select/tap Windows CE Desktop Enabled to specify that top Enabled the desktop icons are accessible or not. ® B-10 Pegaso™ Industrial PDA with Windows...
-
Page 95: Application Selector
Application Selector Application Selector Use the (AppSelect Tab) function to edit, add, or delete applications Application Selector for the application selector. Figure B-8. AppSelect Tab Table B-9. AppSelect Tab Fields Command Description Select/tap Enable Application Selector to enable/disabled Enable Applica- the application selector. - Page 96 Enter a delay duration in seconds in the combo box. Delay This option delays auto start of application(s) to allow drivers to load prior to starting applications Select/tap to add/save changes. Select/tap to cancel the creation of this entry. ® B-12 Pegaso™ Industrial PDA with Windows...
-
Page 97: Application Selector
Application Selector Application Selector The administrator can choose for the user to have access to the desktop or not. The Application Selector can replace the desktop and limit the user to the specified list of applications. Figure B-10. Application Selector The user can select/tap the desired application. - Page 98 Falcon® Desktop Utility for Windows® CE NOTES ® B-14 Pegaso™ Industrial PDA with Windows...
-
Page 99: Appendix C. Configuring The Web Server
By default the Web Server is disabled. The following demonstrates how to enable the Web Server: 1. On the Pegaso, either through a CE-based registry editor or using the Remote Tools RemoteRegEdit included with eVC++ 4.0, modify the following registry... -
Page 100: Setting Up A User
Testgroup To configure for the Web Server: User Group Permissions 1. On the Pegaso, launch Internet Explorer and type the following address in the address bar: http://localhost/NetAdmin The Web-based network configuration utility appears. 2. Fill in the boxes, then click... -
Page 101: Testing The Web Server
Web Server and therefore can access any virtual directory on the Web Server. To launch the Web Server configuration page from your host PC: 1. On the Pegaso, verify that the icon appears on the taskbar. This Connected Network icon indicates you are connected to the network. -
Page 102: Launching The Network Administration Page
SP2. The help file contains a wealth of information on this topic. Adding these values will create virtual root directories for the Basic and NTLM-based authentication methods. [HKEY_LOCAL_MACHINE\COMM\HTTPD\VROOTS\/WebAdmin] @="\\windows\\httpdadm.dll" "a"=dword:0 [HKEY_LOCAL_MACHINE\COMM\HTTPD\VROOTS\/BasicOnly] @="\\" "a"=dword:1 "Basic"=dword:1 "NTLM"=dword:0 [HKEY_LOCAL_MACHINE\COMM\HTTPD\VROOTS\/NTLMOnly] @="\\" "a"=dword:1 "Basic"=dword:0 "NTLM"=dword:1 [HKEY_LOCAL_MACHINE\COMM\HTTPD\VROOTS\/BothAuth] @="\\" "a"=dword:1 "Basic"=dword:1 "NTLM"=dword:1 ® Pegaso™ Industrial PDA with Windows... -
Page 103: Creating And Using An Isapi Service
Developers can create an ISAPI service written in eVC++ to access the APIs available on the Terminal. The two sample .dlls below demonstrate setting and getting a few of the configurable items available in the Pegaso SDK. Setting Configuration Items... - Page 104 Configuring the Web Server NOTES ® Pegaso™ Industrial PDA with Windows...
-
Page 105: Appendix Dsnmp Interface
Datalogic MIBs Beyond the standard values, SNMP allows manufacturers to define their own private MIBs. For example, Datalogic has been assigned an MIB by the Internet Assigned Numbers Authority that allows Datalogic to define SNMP values relating specifically to devices that we manufacture. Within the Datalogic MIB, several categories of values have been defined including scanner Configurations, Terminal power Configurations and Terminal network parameters. -
Page 106: Additional Resources
For example, if the Datalogic MIB is loaded into OpenView, the administrator can then view all of the values defined by Datalogic using the names assigned by Datalogic, as well as a brief explanation of what each value represents. This will also allow the admin- istrator to update most values, and provides range checking information for the tool to take advantage of. -
Page 107: Appendix E. Cable & Connector Configurations
Appendix E Cable & Connector Configurations Introduction The following pages contain information about standard interface cables for use in interconnecting the Dock to power and/or peripheral devices. General Specifications Wire Requirements • Cable length should not exceed 15 feet. • Wire gauge: 5V and GND —... -
Page 108: Usb Cable
RS232 DSR (Input to Mobile Computer) No Connect POWER IN Power Into Mobile Computer USB Cable Figure illustrates the connector configuration of the USB cable for the Pegaso. Figure E-1. USB Connector Configurations Power jack PC END PEGASO 62” +/- 2”... -
Page 109: Appendix F. Programming Parameters
• is the factory setting installed on the Pegaso. This default set will Factory (FF3B) work for most applications. To reset the Pegaso to the original defaults, scan the bar code on page G-2. Factory Product Reference Guide... -
Page 110: Programming Codes Without Parameters
Stops a label programming sequence and writes all parameter settings into the registry. This can be used to Exit and FF3F Commit save a customized set of parameter settings for restoring later via parameter FF3C. ® Pegaso™ Industrial PDA with Windows... -
Page 111: Bar Code Parameters
Bar Code Parameters Bar Code Parameters The following table lists the standard customer programmable settings for the Pegaso. Table F-2. Programmable Standard Bar Code Settings Defaults Acceptable Code Parameter/ Description I.D. # Input Factory Codabar Enter 1 for On and 0 for Off. -
Page 112: Programming Parameters
0401 On / Off Aggressive Decoding labels. Set the minimum label length to be less than Minimum 0420 01 - 50 or equal to maximum label length. Label Length ® Pegaso™ Industrial PDA with Windows... -
Page 113: Code 128
Bar Code Parameters Defaults Acceptable Code Parameter/ Description I.D. # Input Factory This feature specifies the maximum allowable length of a Code 93 label. The length includes Maximum check and data characters. Maximum Label 0421 01 - 50 Label Length Length should be greater than or equal to Min- imum Label Length. - Page 114 0 for Off. Enables/disables the EAN-8 symbology. 0518 On / Off Enable Enables more aggressive decoding algorithms Enable to be used in order to scan hard to read 0519 On / Off Aggressive Decoding labels. ® Pegaso™ Industrial PDA with Windows...
- Page 115 Bar Code Parameters Defaults Acceptable Code Parameter/ Description I.D. # Input Factory Instructs the terminal to include the check digit Send Check 051A On / Off Digit in the label transmission. Instructs the decoder to expand EAN-8 labels Convert EAN- to their EAN-13 equivalents.
-
Page 116: Matrix 2 Of 5
Enable to be used in order to scan hard to read 0609 On / Off Aggressive Decoding labels. Require An MSCI label must contain 2 check digits. 060A On / Off 2 Check Dig- ® Pegaso™ Industrial PDA with Windows... - Page 117 Bar Code Parameters Defaults Acceptable Code Parameter/ Description I.D. # Input Factory This instructs the decoder to include any Send Check enabled check digit(s) in the label which is 060B On / Off Digits transmitted. Instructs the decoder to interpret any second 2nd Check MSI check digit as modulo 11 instead of mod- 060C...
-
Page 118: Rss Limited
0025) is set to 3. "ASCII" code zero (null) is 0827 ‘R’ ‘R’ ‘R’ Expanded acter (00 = User Code ID used to indicate that an identifier is not to be Off) sent for the symbology. ® F-10 Pegaso™ Industrial PDA with Windows... -
Page 119: Standard 2 Of
Bar Code Parameters Defaults Acceptable Code Parameter/ Description I.D. # Input Factory Standard 2 of 5 Enter 1 for On and 0 for Off. Enables/disables the Standard 2 of 5 symbol- 0200 On / Off Enable ogy. Enables more aggressive decoding algorithms Enable to be used in order to scan hard to read 0201... - Page 120 On / Off Digit transmitted. This instructs the decoder to include the sys- Send Sys- tem digit in the label transmission. For UPC-E, 050B On / Off tem Digit the system digit is zero. ® F-12 Pegaso™ Industrial PDA with Windows...
- Page 121 Bar Code Parameters Defaults Acceptable Code Parameter/ Description I.D. # Input Factory Instructs the decoder to expand UPC-E labels Convert UPC- to their UPC-A equivalents. Any UPC-A 050C On / Off E to UPC-A parameters will then apply to the result. Sets the number of times a label must be read Read Verifi- 0522...
-
Page 122: Other Controls
Send Symbol- 0025 ogy Identifiers 0025) is set to 3. "ASCII" code zero 02 = AIM IDs (null) used to indicate an identifier not 03 = User IDs to be sent for the symbology. ® F-14 Pegaso™ Industrial PDA with Windows... - Page 123 Any single ASCII charac- Indicates a label suffix. 0027 Label Suffix (00 = Off) Table F-4. Datalogic Label IDs DLM Label IDs UPC-A = A Code 128 = K Trioptic = X UPC-E = E I 2 of 5 = B...
- Page 124 Programming Parameters ASCII ASCII ASCII ASCII < > ® F-16 Pegaso™ Industrial PDA with Windows...
-
Page 125: Appendix G Programming Bar Codes
Pegaso. Factory default settings are OUTLINED To make settings that are not provided in the chapter, you can design custom bar codes or use the Falcon Management Utility (FMU) to program the Pegaso. Refer to "Config- uring the Pegaso", on page 2-1. 1D Symbologies Symbologies and bar code setup parameters included in this appendix are: •... -
Page 126: Predefined Defaults
0 3 0 3 0 F F 3 E * 0 3 0 3 1 F F 3 E * SEND START/STOP 0 3 0 5 1 F F 3 E * 0 3 0 5 0 F F 3 E * ® Pegaso™ Industrial PDA with Windows... - Page 127 Codabar CONVERT TO CLSI 0 3 0 6 1 F F 3 E * 0 3 0 6 0 F F 3 E * ALLOW WIDE INTERCHARACTER GAPS 0 3 0 7 1 F F 3 E * 0 3 0 7 0 F F 3 E * MINIMUM LENGTH 0 3 2 0 0 1 F F 3 E * 0 3 2 0 3 0 F F 3 E *...
- Page 128 0 3 2 2 0 1 F F 3 E * 0 3 2 2 0 3 F F 3 E * 0 3 2 2 0 2 F F 3 E * 0 3 2 2 0 4 F F 3 E * ® Pegaso™ Industrial PDA with Windows...
- Page 129 Code 39 Code 39 ENABLE 0 1 0 0 1 F F 3 E * 0 1 0 0 0 F F 3 E * ENABLE AGGRESSIVE DECODING 0 1 0 1 1 F F 3 E * 0 1 0 1 0 F F 3 E * ENABLE CHECKSUM 0 1 0 2 1 F F 3 E * 0 1 0 2 0 F F 3 E *...
- Page 130 0 1 2 2 0 1 F F 3 E * 0 1 2 2 0 3 F F 3 E * 0 1 2 2 0 2 F F 3 E * 0 1 2 2 0 4 F F 3 E * ® Pegaso™ Industrial PDA with Windows...
- Page 131 Code 93 Code 93 ENABLE 0 4 0 0 0 F F 3 E * 0 4 0 0 1 F F 3 E * ENABLE AGGRESSIVE DECODING 0 4 0 1 1 F F 3 E * 0 4 0 1 0 F F 3 E * MINIMUM LENGTH 0 4 2 0 0 2 F F 3 E * 0 4 2 0 3 0 F F 3 E *...
- Page 132 Programming Bar Codes 0 4 2 2 0 2 F F 3 E * 0 4 2 2 0 4 F F 3 E * ® Pegaso™ Industrial PDA with Windows...
-
Page 133: Code 128
Code 128 Code 128 ENABLE 0 4 0 8 1 F F 3 E * 0 4 0 8 0 F F 3 E * ENABLE AGGRESSIVE DECODING 0 4 0 9 1 F F 3 E * 0 4 0 9 0 F F 3 E * ENABLE UCC/EAN-128 0 4 0 C 1 F F 3 E * 0 4 0 C 0 F F 3 E *... -
Page 134: Ean-13
0 5 1 1 0 F F 3 E * SEND CHECK DIGIT 0 5 1 2 1 F F 3 E * 0 5 1 2 0 F F 3 E * ® G-10 Pegaso™ Industrial PDA with Windows... - Page 135 EAN-13 SEND SYSTEM DIGIT 0 5 1 3 0 F F 3 E * 0 5 1 3 1 F F 3 E * CONVERT EAN-13 TO ISBN 0 5 1 4 1 F F 3 E * 0 5 1 4 0 F F 3 E * CONVERT EAN-13 TO ISSN 0 5 1 5 1 F F 3 E * 0 5 1 5 0 F F 3 E *...
-
Page 136: Ean-8
0 5 2 6 0 3 F F 3 E * 0 5 2 6 0 2 F F 3 E * 0 5 2 6 0 4 F F 3 E * ® G-12 Pegaso™ Industrial PDA with Windows... -
Page 137: Interleaved 2 Of 5
Interleaved 2 of 5 Interleaved 2 of 5 ENABLE 0 2 1 0 1 F F 3 E * 0 2 1 0 0 F F 3 E * ENABLE AGGRESSIVE DECODING 0 2 1 1 1 F F 3 E * 0 2 1 1 0 F F 3 E * ENABLE CHECKSUM 0 2 1 2 1 F F 3 E *... - Page 138 0 2 2 A 0 3 F F 3 E * 0 2 2 A 0 2 F F 3 E * 0 2 2 A 0 4 F F 3 E * ® G-14 Pegaso™ Industrial PDA with Windows...
- Page 139 Matrix 2 of 5 Matrix 2 of 5 ENABLE 0 2 0 8 1 F F 3 E * 0 2 0 8 0 F F 3 E * ENABLE AGGRESSIVE DECODING 0 2 0 9 0 F F 3 E * 0 2 0 9 1 F F 3 E * ENABLE CHECKSUM 0 2 0 A 1 F F 3 E *...
- Page 140 0 2 2 6 0 3 F F 3 E * 0 2 2 6 0 2 F F 3 E * 0 2 2 6 0 4 F F 3 E * ® G-16 Pegaso™ Industrial PDA with Windows...
-
Page 141: Msi
ENABLE 0 6 0 8 1 F F 3 E * 0 6 0 8 0 F F 3 E * ENABLE AGGRESSIVE DECODING 0 6 0 9 1 F F 3 E * 0 6 0 9 0 F F 3 E * REQUIRE 2 CHECK DIGITS 0 6 0 A 1 F F 3 E * 0 6 0 A 0 F F 3 E *... - Page 142 0 6 2 6 0 3 F F 3 E * 0 6 2 6 0 2 F F 3 E * 0 6 2 6 0 4 F F 3 E * ® G-18 Pegaso™ Industrial PDA with Windows...
-
Page 143: Pharmacode 39 (Code 32
Pharmacode 39 (Code 32) Pharmacode 39 (Code 32) ENABLE 0 1 1 0 1 F F 3 E * 0 1 1 0 0 F F 3 E * SEND CHECKSUM 0 1 1 2 1 F F 3 E * 0 1 1 2 0 F F 3 E * SEND START/STOP 0 1 1 3 1 F F 3 E *... - Page 144 Programming Bar Codes ENABLE RSS Limited to UCC-128 0 8 0 C 1 F F 3 E * 0 8 0 C 0 F F 3 E * ® G-20 Pegaso™ Industrial PDA with Windows...
-
Page 145: Rss Expanded
RSS Expanded RSS Expanded ENABLE 0 8 1 0 0 F F 3 E * 0 8 1 0 1 F F 3 E * ENABLE RSS Expanded to UCC-128 0 8 1 4 1 F F 3 E * 0 8 1 4 0 F F 3 E * MINIMUM LENGTH 0 8 2 4 0 1 F F 3 E *... -
Page 146: Standard 2 Of
0 2 2 0 1 0 F F 3 E * 0 2 2 0 5 0 F F 3 E * 0 2 2 0 2 0 F F 3 E * ® G-22 Pegaso™ Industrial PDA with Windows... -
Page 147: Trioptic
Trioptic MAXIMUM LENGTH 0 2 2 1 0 1 F F 3 E * 0 2 2 1 3 0 F F 3 E * 0 2 2 1 1 0 F F 3 E * 0 2 2 1 4 0 F F 3 E * 0 2 2 1 2 0 F F 3 E * 0 2 2 1 5 0 F F 3 E * READ VERIFICATION... - Page 148 0 1 2 4 0 3 F F 3 E * 0 1 2 4 0 2 F F 3 E * 0 1 2 4 0 4 F F 3 E * ® G-24 Pegaso™ Industrial PDA with Windows...
-
Page 149: Upc-A
UPC-A UPC-A ENABLE 0 5 0 0 0 F F 3 E * 0 5 0 0 1 F F 3 E * ENABLE AGGRESSIVE DECODING 0 5 0 1 1 F F 3 E * 0 5 0 1 0 F F 3 E * SEND CHECK DIGIT 0 5 0 2 1 F F 3 E * 0 5 0 2 0 F F 3 E *... -
Page 150: Upc-E
0 5 2 2 0 3 F F 3 E * 0 5 2 2 0 2 F F 3 E * 0 5 2 2 0 4 F F 3 E * ® G-26 Pegaso™ Industrial PDA with Windows... -
Page 151: Upc/Ean Extensions
UPC/EAN Extensions UPC/EAN Extensions ENABLE 2-DIGIT EXTENSIONS 0 5 1 C 1 F F 3 E * 0 5 1 C 0 F F 3 E * ENABLE 5-DIGIT EXTENSIONS 0 5 1 D 1 F F 3 E * 0 5 1 D 0 F F 3 E * REQUIRE EXTENSIONS 0 5 1 F 1 F F 3 E *... - Page 152 0 0 2 1 0 0 F F 3 E * Medium 0 0 2 1 0 3 F F 3 E * Highest 0 0 2 1 0 7 F F 3 E * ® G-28 Pegaso™ Industrial PDA with Windows...
- Page 153 Other Controls GOOD-READ BEEP DURATION (IN SECONDS) 0.07 0 0 2 2 0 0 F F 3 E * 0.13 0 2 2 0 0 1 F F 3 E * 0.18 0 0 2 2 0 2 F F 3 E * 0.36 0 0 2 2 0 3 F F 3 E * Long Range Trigger Mode...
- Page 154 0 0 2 4 0 3 F F 3 E * 0 0 2 4 0 5 F F 3 E * 0 0 2 4 1 0 F F 3 E * ® G-30 Pegaso™ Industrial PDA with Windows...
- Page 155 Other Controls SEND SYMBOLOGY IDENTIFIERS 0 0 2 5 0 0 F F 3 E * DLM IDs 0 0 2 5 0 1 F F 3 E * AIM IDs 0 0 2 5 0 2 F F 3 E * User IDs 0 0 2 5 0 3 F F 3 E * LABEL PREFIX...
- Page 156 Programming Bar Codes NOTES ® G-32 Pegaso™ Industrial PDA with Windows...
-
Page 157: Appendix H Glossary
The AutoCE program allows the user to create a list of applications to run when the Pegaso is rebooted. Each application may be designated to run only on a AutoCE cold reset, or on both warm and cold resets. The applications run sequentially, allowing interdependencies to be handled. - Page 158 Control Panels are several different applets that allow you to configure the Pegaso to meet your specific requires. There are control panels for scanning, control panel keyboard, display, etc. Access the control panels at Start >...
- Page 159 Falcon Manage- ration settings and updating the operating system and applications automati- ment Utility (FMU) cally from a server using the wireless network system on the Pegaso. A Datalogic Windows-based field upgradeable firmware mechanism. Use the Firmware Update Firmware Update Utility (FUU), described starting on page...
- Page 160 Nonsystem applications are taken from storage memory, uncom- program memory pressed, and loaded into program memory for execution. A small card-shaped device installed in a Pegaso that allows wireless connec- RF card tion and communication with a network. Quick Start Guide.
- Page 161 The Pegaso will go into a suspend or sleep mode when it is idle for a period of time. Suspend mode works and looks just like you have turned the unit off.
- Page 162 Also called a Uniform Resource Identifier. Universal Serial Bus is a protocol for connecting PCs with peripheral devices, including PDTs, PDAs, Pegaso mobile computers, cameras, printers, mice, scanners, etc. The web server can perform several different actions, including generating a...
- Page 163 NDEX YMBOLS version version required ... (browse) B-9, B-12 new hotkey .exe files program B-11 address bar, enable Admin tab UMERICS alignment, touchscreen 2-22 400 Invalid Syntax application 403 Request Forbidden adding B-11 404 Object Not Found authorized B-11 406 No Response Format enable selector B-11 410 Page Doesn’t Exist...
- Page 164 2-21 cable system 2-24 serial volume & sounds 2-25 calibration controls, other F-14 control panel 2-23 copyrights 2-25 touchscreen 2-22 corrupted firmware Car Charging Adapter Couldn't Find Server checksum clicking i-vii, 4-3 ® Pegaso™ Industrial PDA with Windows...
- Page 165 2-24 configuration 2-11 explore mobile device control panel 2-11 Explorer 2-17 Internet 3-2, 3-3 dock Windows which Datalogic dock to use document conventions i-vi overview domain double-click i-vii F2 key double-tap i-vii factory driver failure, battery Falcon Desktop Utility...
- Page 166 2 of 5 G-15 maximum default settings memory allocation 2-24 I.D. # configuration 2-24 icons file read-only B-12 input state status TrueFFS Disk system tray usage 2-24 IE Tab Memory, persistent Inbox menu bar, enable ® Pegaso™ Industrial PDA with Windows...
- Page 167 ActiveSync setup re-enter connections 2-17, 4-8 request B-3, B-4 overview settings 2-18 setup ID PC card, expansion 2-24 networking Pegaso B-11 dock button B-11 power hotkey persistent non-persistent state state Not Available Offline Persistent Memory note Persistent Registry 2-19...
- Page 168 F-3, G-9 with the stylus i-vii code 128 F-5, G-9 selector code 39 F-4, G-5 application B-11, B-13 code 93 F-4, G-7 enable application B-11 EAN-13 F-6, G-10 send EAN-8 F-6, G-12 ® Pegaso™ Industrial PDA with Windows...
- Page 169 Index UPC/EAN extensions F-13, G-27 interleaved 2 of 5 UPC-A F-7, F-8, G-13 2-10, F-12, G-25 matrix 2 of 5 UPC-E G-15 F-12, G-26 F-8, G-17 2-14 Pharmacode 39 (Code 32) Syntax Error F-9, G-19 G-19, G-21 send identifiers driver F-14, G-31 standard 2 of 5 USB Cable...
- Page 170 Index NOTES ® Pegaso™ Industrial PDA with Windows...
- Page 172 40012 Lippo di Calderara di Reno Bologna - Italy Telephone: +39 051 3147011 Fax: +39 051 726562 www.mobile.datalogic.com Datalogic Mobile, Inc. 1505 Westec Dr. Eugene, OR 97402 Telephone: (541) 743-4800 Fax: (541) 743-4900 ©2007 Datalogic Mobile, Inc. R44-2577 (Rev A) 09/07...
Need help?
Do you have a question about the Pegaso and is the answer not in the manual?
Questions and answers