Datalogic Skorpio X5 User Manual
Rugged mobile computer with 1d/2d imager
Hide thumbs
Also See for Skorpio X5:
- Quick start manual (9 pages) ,
- Quick start manual (2 pages) ,
- Quick start manual (2 pages)
Table of Contents
Advertisement
Quick Links
Advertisement
Table of Contents

Related Manuals for Datalogic Skorpio X5


Summary of Contents for Datalogic Skorpio X5
- Page 1 Skorpio™ X5 USER’S MANUAL Rugged Mobile Computer with 1D/2D Imager...
- Page 2 Electronic versions of this document may be downloaded from the Datalogic website (www.datalogic.com). If you visit our website and would like to make comments or suggestions about this or other Datalogic pub- lications, please let us know via the "Contact" page.
-
Page 3: Table Of Contents
Long Press Power Menu ....................21 Power Off ...........................21 Restart ............................21 Screenshot ..........................21 Applications ........................22 Datalogic Applications ........................22 Android Applications .........................23 Touch Gestures ......................25 Keyboards ........................25 Alphanumeric Keyboard (47 Keys) ....................25 Function Numeric Keyboard (38 Keys) ....................26 Numeric Keyboard (28 Keys) ......................27... - Page 4 Camera Settings ..........................36 General ............................37 Still Camera ..........................37 Video Camera ..........................38 System ............................38 SETTINGS ........................ 39 Overview ........................39 Datalogic Settings ......................40 Scanner Settings ..........................40 Notification ..........................41 Good Read ..........................42 Formatting ..........................42 Scanner Options ........................45 Wedge ............................47 Symbology Settings ........................49...
- Page 5 USB ADB Driver ......................91 SDK Add-on ........................91 Install ADB Driver ..........................91 Create a New Application based on Datalogic SDK Add-on with Android Studio ......92 Datalogic SDK ........................ 92 Datalogic OEMConfig ...................... 92 Wi-Fi QR Code Generator ....................92 DATA CAPTURE......................
- Page 6 CONTENTS USB Dock Connection ........................95 Ethernet Connection .......................96 Ethernet Dock Connection ........................ 96 Wi-Fi Connection ......................97 Bluetooth® Serial Connection ..................98 Near Field Communication (NFC) ..................98 Read NFC Tags ..........................98 Wireless and Radio Frequencies Warnings ...............99 TECHNICAL FEATURES ..................100 Technical Data ......................
-
Page 7: Introduction
Google as an ‘Android Enterprise Recommended’ (AER) rugged device. Fully rugged in the most demanding environments, the Skorpio X5 features a 1.8 m / 6.0 ft drop resistance and an IP65 sealing grade. With the dedicated rubber boot, the resis- tance is even more increased. -
Page 8: Available Models
INTRODUCTION AVAILABLE MODELS The Skorpio X5 is available in different models depending on the features it is equipped with. All options are listed below: 1D Imager - HANDHELD • 943500001 Skorpio X5 Hand held, 802.11 a/b/g/n/ac, 4.3" display, BT V5, 3GB RAM/32GB Flash, 28-Key Numeric, 1D Imager w Green Spot, Android 10. - Page 9 RAM/64GB Flash, 47-Key Alpha-Numeric, Contactless 2D Imager MR w Green Spot, Android 10, with Extended Battery. For further details about the Skorpio X5 models refer to the web site: http://www.datalogic.com. For further information regarding Android refer to the website: www.android.com.
-
Page 10: Out Of The Box
INTRODUCTION OUT OF THE BOX The Skorpio X5 package contains: • Skorpio X5 Device • Rechargeable one-piece battery pack • USB Type-A to Type-C Cable • Handstrap (Handheld Models Only) • Handstrap Lower Bridge (Handheld Models Only) • Lanyard (Pistol Grip Models Only) •... -
Page 11: General View
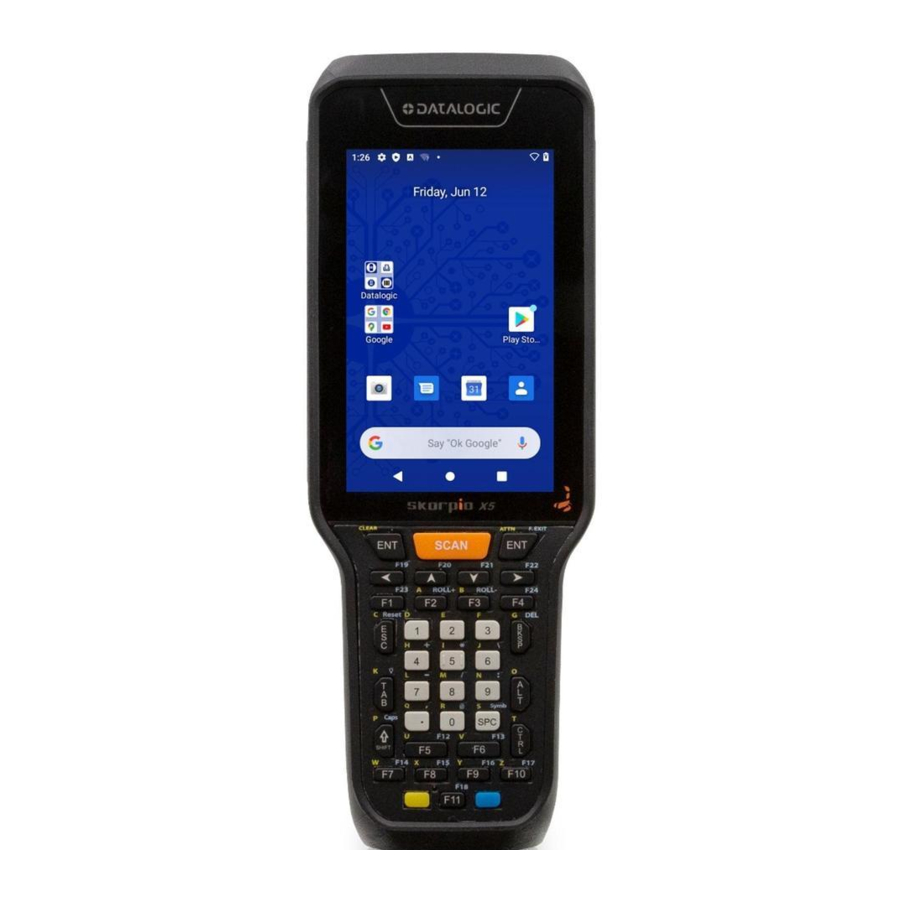
INTRODUCTION GENERAL VIEW Top View Proximity/Distance Sensor Data Capture Window Front View Charging Status/Android Good Read Indicator Notifications LED Ambient Light Sensor Touch Panel Display Scan Key Keyboard Main Microphone USER’S MANUAL... -
Page 12: Side View
INTRODUCTION Side View USB Rubber Door Power Button and USB Type-C Port Left Trigger Right Trigger SKORPIO™ X5... -
Page 13: Back View
INTRODUCTION Back View Secondary Microphone Rear Camera LED Flash Speaker Handstrap Eyelet Trigger Button (for use with the optional pistol trigger) MicroSD Card Slot (under battery) Battery Bottom View With Contacts Wireless Charging Charging Dock Connector USER’S MANUAL... -
Page 14: Accessories
Skorpio X5 Lanyard (pack of 5) Power Supplies - Cords 91ACC0048 Skorpio X5 Docks & Multi Battery Charger Power Supply 91ACC0049 Skorpio X5 3 Slot Docks & MBC Power Jumper (5 Pcs) 95ACC1113 Power Cord, 120V AC, IEC/US 95ACC1213 Power Cord, 240V AC, UK... -
Page 15: Battery
BATTERY INSTALL THE BATTERY 1. Attach the handstrap to the eyelet as shown. 2. Insert the handstrap lower bridge into the hand strap. 3. Attach the handstrap lower bridge to the battery pack. 4. Insert the battery pack into the slot, top first, and press it into place until it clicks. USER’S MANUAL... -
Page 16: Charge The Battery
Use the Skorpio X5 USB-type C wall adapter (available as an accessory, p/n 91ACC0048) to charge the device from a power outlet. You can also use the supplied Type-A/Type-C cable to charge the Skorpio X5 from any self-powered USB hub or USB port on a computer. -
Page 17: Charge With The Optional Dock
Do not put any foreign object such as, but not limited to, coins, paper clips, stickers inside the slot of any of the wireless docks. Do not apply any sticker to the Skorpio X5 (see the examples below). Foreign objects could overheat. -
Page 18: Battery Charging Time
(the following notification is displayed on screen: REAL-TIME CLOCK BACKUP The Skorpio X5 provides a Real-time Clock (RTC) backup feature. The RTC retention time, when the main battery is completely discharged or removed, is about 6 days. SKORPIO™ X5... -
Page 19: Battery Information
Never charge the device battery in a closed space where excessive heat can build up. As a safety precaution, the battery may stop charging to avoid overheating. The Skorpio X5 may get warm during charging; this is normal and does not mean a mal- function. -
Page 20: Battery Safety Guidelines
Using the battery pack in this manner may also result in a loss of perfor- mance and a shortened life expectancy. To power the cradle, use only a Datalogic approved power supply. The use of an alternative power supply will void the product warranty, may cause product damage and may cause heat, an explosion, or fire. - Page 21 BATTERY WARNING: If your device stops working for any reason, do not use its bat- tery on other electronic devices without a prior check and approval by an Authorized Repair Center. Do not replace the battery pack when the device is turned on. Do not remove or damage the battery pack’s label.
-
Page 22: Sd Card
SD CARD INSTALL THE SD CARD The Skorpio X5 supports microSD card up to UHS-1 (104 MB/s bus speed). Contact the sales support team to select the memory card for your device. To install the memory card: 1. Remove the battery pack. - Page 23 SD CARD 4. Insert the microSD card into the cardholder; push the cardholder down and then slide it to the left. 5. Replace the microSD card slot cover. 6. Replace the battery pack (see " Install the Battery" on page 9 USER’S MANUAL...
-
Page 24: Getting Started
GETTING STARTED TURN ON THE DEVICE To turn on the Skorpio X5, press and hold the power button for at least 4 seconds. HOME SCREEN Notification/ Status Bar Datalogic Apps Favorites Tray Google Apps Recent Back Home Home Screen Items Displays the time, status icons (right side), and notification icons (left side). -
Page 25: Status Bar Icons
GETTING STARTED Status Bar Icons Wi-Fi is on. Battery is low. Wi-Fi not connected. External power source is connected. Wi-Fi connected no internet. Battery is full. Connected to a Wi-Fi network. Battery is partially drained. Bluetooth is on. Airplane mode. USER’S MANUAL... -
Page 26: Setup Wizard
For Datalogic devices, the enrollment process has been enhanced to include additional properties in the QR code and the option to encrypt the QR code. These Datalogic spe- cific options can be configured using the Android Enterprise QR Code Generator. -
Page 27: Suspend Mode
GETTING STARTED SUSPEND MODE Suspend mode automatically turns the screen off and locks the device to save battery power when the terminal is inactive for a programmed period of time. Press and release the power button to toggle the terminal in or out of suspend mode: To unlock the home screen, tap anywhere on the screen and drag your finger upward. -
Page 28: Applications
GETTING STARTED APPLICATIONS All Apps screen displays icons for all installed applications. The tables below list the default applications installed on the Skorpio X5. Datalogic Applications Icon Description Battery Manager - Provides information on the battery type, charge, status and temperature, allows to set the charging profile and to log battery data (see "Bat-... -
Page 29: Android Applications
GETTING STARTED Android Applications Icon Description Calculator - Provides the basic and scientific arithmetic functions. Calendar - Lets you manage events and appointments. Camera - Use it to take photos or record videos. Chrome - Google’s own web browser. Use it to access the Internet or intranet. Clock - Lets you schedule alarms for appointments or as a wake-up. - Page 30 Play Store - Google's own digital distribution service. It serves as the official app store for the Android operating system and as a digital media store. Screenshot Easy - Use it to take editable screenshots. Settings - Use it to configure the Skorpio X5 (see "Settings" on page 39).
-
Page 31: Touch Gestures
On the pop-up menu that appears, tap the action you want to perform. KEYBOARDS The Skorpio X5 comes with three different keyboards: a 47-key alphanumeric, a 38-key function numeric keyboard and a 28-key numeric keyboard. Alphanumeric Keyboard (47 Keys) Function The SCAN key starts data capture. -
Page 32: Function Numeric Keyboard (38 Keys)
GETTING STARTED Function Numeric Keyboard (38 Keys) Function The SCAN key starts data capture. If enabled, it also wakes up the mobile computer from low-power (see "Triggers" on page 56). For pistol grip models only, the trigger performs the same function as the SCAN key. -
Page 33: Numeric Keyboard (28 Keys)
GETTING STARTED Numeric Keyboard (28 Keys) Function The SCAN key starts data capture. If enabled, it also wakes up the mobile computer from low-power (see "Triggers" on page 56). For pistol grip models only, the trigger performs the same function as the SCAN key. -
Page 34: Terminal Emulation Overlays
GETTING STARTED Terminal Emulation Overlays Terminal Emulation Overlay for Alphanumeric Keyboard (47 Keys) ROLL+ ROLL- CAPS Home Fld- Fld+ F. Exit PrnScrn Attn Reset CTRL Symb Terminal Emulation Overlay for Function Numeric Keyboard (38 Keys) CLEAR ATTN F. EXIT ROLL+ ROLL- Reset Fld-... - Page 35 GETTING STARTED To enable the terminal emulator, go to the Datalogic Settings screen (see " Datalogic ) and tap Key Settings > Advanced Keyboard Settings > Install New Settings" on page 40 Keyboard/Overlay and select the TE overlay. USER’S MANUAL...
-
Page 36: Reset The Device
GETTING STARTED RESET THE DEVICE Configuration Reset Configuration reset sets the configuration of the device (all its settings) to a known sta- tus: the factory status or an enterprise-user-defined status. Reset Wi-Fi, Bluetooth Resets all network settings. 1. Tap Settings >... -
Page 37: Enterprise Reset
GETTING STARTED Enterprise Reset Enterprise Reset brings the device to an enterprise-user-defined configuration, clearing all data and settings except the ones persisted by the enterprise system applications in enterprise flash partition and in the splash flash partition. The Enterprise folder is a file system storage that is used for deployment and device- unique data. -
Page 38: Led Indicators
The battery pack LEDs indicators notify the battery charge level, the battery health and the power failures. To activate the LED indicators and display the battery status informa- tion, remove the battery pack from the Skorpio X5 or from the 4 Slot Battery Charger and press the locking lever: The label on the battery pack indicates the meaning of the LEDs color: SKORPIO™... - Page 39 GETTING STARTED The following table lists battery status indicators. Information displaying flow: 1. Wait a triggering event. 2. Show “state of charge” information for 2 seconds. 3. Show “health status” information for 2 seconds. 4. If any, show “failure status” information for 2 seconds. Status Description Off State...
- Page 40 GETTING STARTED Status Description Below 80% of cells state of health: right LED, blinking blue. Between 80% and 84% of cells state of health: right LED, solid blue. Health Status (displayed for 2 seconds) Between 85% and 89% of cells state of health: right and center LEDs, solid blue.
-
Page 41: Camera
GETTING STARTED CAMERA Tap the Camera application icon to take photos or video. Filters Filters Flash Modes Menu Gallery Video Shutter Button To zoom in or out, press two fingers on the display and pinch or expand fingers. The zoom controls appear on the screen. Tap the Shutter button to take a picture. -
Page 42: Camera Settings
GETTING STARTED Camera Settings Tap the menu icon to select the scene mode and to display the settings icon. Scene Mode Options Settings Icon Tap the Setting icon to display the camera settings options: SKORPIO™ X5... -
Page 43: General
GETTING STARTED General These settings apply to both the still camera and the video camera. Face Detection Enables/disables face detection. Storage Sets the phone storage to: Phone (default) or SD Card. Still Camera These settings apply only to the still camera. Countdown timer Sets the countdown timer to: Off (default), 2 seconds, 5 seconds or 10 seconds. -
Page 44: Video Camera
GETTING STARTED Grid If enabled, it divides the frame of your photos using four lines which run horizontally and vertically along the screen. Video Camera These settings apply only to the video camera. Video quality Sets the video quality to HD 1080p (default), HD 720p, SD 480p, VGA, CIF, or QVGA. Video duration Set the video duration to: 30 seconds (MMS), 10 minutes (default), 30 minutes, or no limit. -
Page 45: Settings
SETTINGS OVERVIEW Settings app allows you to check or set system parameters to customize your device. To open the Settings screen, tap the Settings icons on the All Apps screen or pull down the notification panel and then tap the Settings icon on the bottom right cor- ner:... -
Page 46: Datalogic Settings
SETTINGS DATALOGIC SETTINGS Scanner Settings Before you start reading barcodes, use the Settings app to view and configure all set- tings for the scanner. From the applications menu, tap Settings > Datalogic Settings > Scanner Settings. Select the desired configuration from the following options:... -
Page 47: Notification
Enable Display Notification Enables display notifications (toasts). If cleared, the scanner is disabled until you launch a scanner listener application developed using the Datalogic SDK or enable a keyboard/ intent wedge. Good Read Audio Mode Sets the audio tone to: •... -
Page 48: Good Read
SETTINGS Good Read Audio Volume Sets the volume of beep tone or audio file (if enabled). Good Read Use it to enable good read notifications (LED, Green Spot): Enable good read to enable/disable notifications (main enabler), then select the notification you want to use. Formatting Standard Formatting Allows to format the barcode text by enabling and configuring the use of prefix, suffix,... - Page 49 AIM ID is inserted at the beginning of the decoded barcode. DLM identifier is a Datalogic specific character identifier. User defined identifier is a user specific character identifier you can set in the related symbology settings menu.
- Page 50 Select Transmit to set the data interface in "Extended Channel Mode". Select Remove to set the data interface in “Basic Channel Mode”. Visual Formatting Enable to set up barcode visual formatting. For more details, refer to https://datalogic.github.io/scan2deploy/studio/#visual-formatter SKORPIO™ X5...
-
Page 51: Scanner Options
SETTINGS Scanner Options Scanner Options to customize the Skorpio X5 scanning behavior. Enable Picklist If enabled, it allows you to pick and decode a barcode from multiple barcodes printed close together, when the scan illumination intersects more than one barcode. Only the targeted barcode will be returned. - Page 52 SETTINGS Spot Timeout Scanning takes place after a programmable time upon pressing the scan button. Tap Target timeout to set the duration of the spot: Release Scan Scanning takes place after the scan button is released. Tap Release scan timeout to set the scanning timeout after releasing the scan button: Decode Timeout...
-
Page 53: Wedge
SETTINGS Wedge Use it to enable or disable the keyboard wedge and the intent wedge: Enable Keyboard Wedge Enables/disables the keyboard wedge mode. Keyboard Wedge Only on Focus If selected, the scanner is enabled whenever a text area is in focus and can receive text. It provides a safer way to input keystrokes into the foreground application, allowing to send captured data in the form of key events only to the current text area with active keyboard input. - Page 54 SETTINGS Keyboard Wedge Input Mode Allows to select the scanned data input mode. Text Injection The scanned barcode is injected into the text area. Key Pressure The scanned barcode is translated into keyboard strokes. Commit Text The printable characters are injected into the text area, emulating the pressure of key- board keys for non-printable keys.
-
Page 55: Symbology Settings
SETTINGS Symbology Settings Each barcode symbology can be customized with additional settings that may affect that specific barcode decoding. Tap Symbology settings to configure symbology decoding options: Refer to the sample symbology control panels for examples of the types of fields and options you can modify. - Page 56 SETTINGS Advanced Barcode Options Linear Quiet Zones Linear quiet zones to reduce the blank margin on either side of a linear barcode. Inverted Decoding Defines the decoding mode for regular/reverse barcodes for both 1D and 2D barcodes: SKORPIO™ X5...
-
Page 57: Scan Engine Details
SETTINGS Scan Engine Details Provides information on the scan engine. Global Settings Use this section to change symbologies settings globally and to persist them. Enable All Symbologies Enables all barcode symbologies. Disable All Symbologies Disables all barcode symbologies. Reset Configuration Resets back to default scanner configuration settings. -
Page 58: Power Management
You have two options to set the suspend timeout (see " Suspend Mode" on page 21 more information on Suspend Mode): 1. Tap Settings > Datalogic Settings > Power Management: • Suspend on external power sets the number of seconds without user input activ- ity before the system is suspended while running on external power. -
Page 59: Wake-Up Configuration
Suspend on external power. Wake-Up Configuration The default wake-up sources are the left side trigger, the right side trigger and the pistol trigger. Tap Settings > Datalogic Settings > Power Management > Configure wake-up sources to enable/disable wake-up sources. USER’S MANUAL... -
Page 60: Key Settings
SETTINGS Key Settings Lock Keyboard Input If enabled, it locks user input from the keyboard. Key Remapping Key remapping to remap an input key, then press the key you want to remap. The following window displays on screen: • Scancode represents the physical location of a keyboard key. •... - Page 61 SETTINGS ADD A NEW MAPPING. A window displays showing the new keymap. Unicode Select Unicode to remap a key to display Unicode characters (such as symbol "$"): Press the Back Button on the navigation bar and then tap ADD A NEW MAPPING.
-
Page 62: View All Remapped Keys
SETTINGS Start Activity Select Start activity to remap a key to launch an application loaded on your device. Tap SELECT APPLICATION: Select the desired application and then tap ADD A NEW MAPPING. A window displays showing the new keymap: View All Remapped Keys Tap View all remapped keys to display all remapped keys. -
Page 63: Advanced Keyboard Settings
SETTINGS Auto Scan Trigger The Skorpio X5 has a proximity sensor able to detect the presence of nearby objects without any physical contact. If enabled, Auto Scan Trigger Enable allows to automati- cally read barcodes without pressing the trigger button. -
Page 64: Dock Management
SETTINGS Dock Management Dock Manager Allows you to manage the dock’s firmware update through the appli- cation (see " Dock Manager" on page 82 Wi-Fi Settings Wi-Fi Scan Settings Use the Wi-Fi Scan Settings to set the interval between scans when the device is con- nected and when it is disconnetted. -
Page 65: Wi-Fi Roaming Settings
SETTINGS Wi-Fi Roaming Settings The roaming RSSI threshold is a CPS configurable parameter, that controls the signal strength a radio needs to see before searching for another site. The roaming RSSI difference controls the signal difference between the current access point the device is connected to and the target access point the device wants to roam to. -
Page 66: System Update
To transfer the OTA package from your PC to the Skorpio X5, follow the steps below: 1. Connect the device and the PC via USB cable (see “USB Connection” on page 94);... - Page 67 Tap the notification to display a report showing the installed update components. NOTE: During the update, ensure that: • battery level is more than 20% if the Skorpio X5 is not connected to a power source; • battery level is more than 15% if the Skorpio X5 is connected to a power source (USB or dock).
-
Page 68: Device Info
SETTINGS Device Info The Device info screen displays information about the device including: serial number, scan engine, espresso extensions, sdk, system versions. SKORPIO™ X5... -
Page 69: Network & Internet
If the device finds a network that you connected to previously, it will connect to it auto- matically. 2. Tap Wi-Fi. The Skorpio X5 scans for available Wi-Fi networks within range and lists them. Secured networks are indicated with a lock icon. -
Page 70: Add A Wi-Fi Network
SETTINGS 3. Select the network name you want to connect to from the available network list. 4. If the network is open, tap the profile and then tap Connect, or press and hold and then select Connect. If the network is secured, a dialog box appears requesting information relevant to the network security protocol (e.g., password, key, or certificate). -
Page 71: Ethernet
SETTINGS Ethernet Use the 3 Slot Dock Wired to connect your device to an Ethernet network (see " Ethernet Connection" on page 96 To enable ethernet communication, tap Settings > Network & Internet > Ethernet switch right to the position. Ethernet to display the MAC address and the IP address: Ethernet configuration... -
Page 72: Connected Devices
SETTINGS CONNECTED DEVICES Bluetooth Settings To create a Bluetooth® pairing between your device and another device that has Blue- tooth® capabilities, ensure that the two devices are turned on, discoverable, and within operable range. Enable Bluetooth® 1. To turn on the Bluetooth®, tap Settings >... -
Page 73: Configure, Rename Or Unpair Bluetooth® Devices
SETTINGS 3. Make sure both devices show the same passkey and tap Pair. 4. The selected Bluetooth® device is added to the Previously connected devices list and a paired connection is established. Configure, Rename or Unpair Bluetooth® Devices Settings > Connected devices >... -
Page 74: Nfc
SETTINGS To enable enable short-range wireless data exchange, tap Settings > Connected Devices > Connection preferences and switch right to the On position. TOUCH MODE Adjusts touch-screen sensitivity for input with a bare, a gloved finger or a stylus. SKORPIO™ X5... -
Page 75: Display
SETTINGS DISPLAY Use the Display settings to set the screen brightness and theme, enable night light, change the background image and the screensaver, enable screen rotation, set display and font size. Brightness Level Use the slider to adjust the screen brightness level. USER’S MANUAL... -
Page 76: Night Light
SETTINGS Night Light Tap to enable Night Light and adjust its intensity. Adaptive Brightness If enabled, your screen brightness will automatically adjust to your environment. Wallpaper Tap to select a wallpaper. Dark Theme Tap to enable black background. SKORPIO™ X5... -
Page 77: Screen Timeout
SETTINGS Screen Timeout Tap to set the suspend timeout (see " Suspend Timeout" on page 52 Auto-Rotate Screen Enables/disables screen auto-rotation. Font Size Tap to set the size of the font. Display Size Tap to set the size of the items on your screen. USER’S MANUAL... -
Page 78: Screen Saver
SETTINGS Screen Saver Tap to select the screen saver, set the style (Analog or Digital) and time (When to start), or enable the Night mode. Lock Screen Display Tap to customize your lock screen. SKORPIO™ X5... -
Page 79: Recovery Mode
To enter boot menu: 1. Turn off the Skorpio X5 (see “Long Press Power Menu” on page 21). 2. Press the power key and the right trigger simultaneously. 3. The device turns on and the Recovery Mode screen appears. -
Page 80: Datalogic Applications
DATALOGIC APPLICATIONS BATTERY MANAGER This application provides information about the battery features and status, allows to configure the battery charging profile and to log battery data. All Apps > Battery Manager icon, then tap the menu icon on the top left corner of the screen, or swipe right to display the menu. -
Page 81: Battery Info
DATALOGIC APPLICATIONS Battery Info Battery Info section provides information about the battery’s health, capacity, man- ufacturer, level and charging status. Battery Info - Realtime This window provides real-time information about the battery. Charging Mode Discharging Mode The top section shows the battery level and the time left to full discharge (when in dis- charge mode) and to full charge (when in charge mode). -
Page 82: Battery Info - Lifetime
DATALOGIC APPLICATIONS Battery Info - Lifetime This window displays information and statistics about battery life, health and usage over its whole life cycle. Health Shows the current battery health and warns potential errors. State of Health Shows the current battery's health level. -
Page 83: Battery Info - Manufacturer
DATALOGIC APPLICATIONS Battery Info - Manufacturer This window displays the model name, the type, the nominal capacity, the serial num- ber, the product number and the manufacture date of the battery. USER’S MANUAL... -
Page 84: Charging Profile
DATALOGIC APPLICATIONS Charging Profile Charging Profile - Setup This window allows to customize the charging process according to the user's needs and priorities. To configure a charging profile, select 1 or 2 of the following preferences: • Battery Lifetime. •... -
Page 85: Data Logging
DATALOGIC APPLICATIONS Data Logging The data logging feature allows to collect, store, display and analyze minute-by-minute battery data. Setup Use the Setup window to select the data you want to log. The data logging is disabled by default. To enable it, tap Enable Data Logging. -
Page 86: Manage
DATALOGIC APPLICATIONS Manage Manage window allows to remove or export logs. Select one or more logs and tap Remove to remove them. Tap to confirm: Select one or more logs and tap Export to export data and store them for extended peri- ods. -
Page 87: Application
Settings section allows to set the value ranges that will be used to create the graphs. If you charge the Skorpio X5 with a wireless charging pad, you’re not allowed to custom- ize the charging profile. If the Show Wireless Pad Notification check box is selected, the system displays a warn- ing message saying that the charging profile won’t be applied. -
Page 88: Dock Manager
Below are some screenshots showing different cradle options: If the Skorpio X5 is inserted into the 3 Slot Dock WLC Locking, you can unlock and lock the device without using the unlock key, by tapping the... -
Page 89: Settings
DATALOGIC APPLICATIONS Settings Unlock Timeout You can set the time available to the user to remove the cradle after tapping the UNLOCK button. Tap Unlock timeout [s] to set your desired unlock timeout (5 by 5 sec- onds): Set Slot ID Allows to change the ID of the slot where your device is inserted. -
Page 90: Behavior On Unlock
DATALOGIC APPLICATIONS Behavior on Unlock Led On is selected, the dock bottom LED illuminates solid green anytime you unlock the device. It is enabled by default. Favorite Cradle Source Power Allows to select the charging mode (standard or fast). Enable Cradle Failures In case of a failure notification, it displays the reason of the failure (see the dock’s Quick... -
Page 91: Scan2Deploy
DATALOGIC APPLICATIONS SCAN2DEPLOY Scan2Deploy is a configuration tool that uses special barcode labels. For more details, visit the website: https://datalogic.github.io/scan2deploy. USER’S MANUAL... -
Page 92: Softspot
DATALOGIC APPLICATIONS SOFTSPOT™ Datalogic’s SoftSpot technology is a user-definable "floating soft trigger" meant to pro- vide easy access to the barcode scanner application and other frequently used function- alities on mobile scanning devices. Tap the SoftSpot icon on the favorites tray or on the All Apps screen to launch SoftSpot: Tap the SoftSpot to scan barcodes. -
Page 93: Vibrator
DATALOGIC APPLICATIONS Vibrator Enables the vibrator. Auto-transparency If enabled, the SoftSpot turns transparent automatically when it is not used. Transparency Range Sets the SoftSpot transparency level when it is used or when the auto-transparency fea- ture is not enabled. Speed of transparency Sets the lapse of time it takes for the SoftSpot to turn transparent. -
Page 94: Images
DATALOGIC APPLICATIONS To remove an application from the actions list, tap and swipe right. Images Normal Image and/or Decoded Image to change the SoftSpot images. You have six options: three default images and three custom images. Display Decoded Image For Sets the duration of the decoded image. -
Page 95: Enable Continuous Scan On Double Tap
DATALOGIC APPLICATIONS Enable Continuous Scan on Double Tap To enable the Continuous Scan mode and scan barcodes consecutively, switch right and then double-tap the SoftSpot. Tap one more time to stop laser emission. Continuous Delay Allows to set the continuous delay time. -
Page 96: Surefox
SURELOCK With SureLock you can secure and lock the Skorpio X5 to ensure its responsible usage, improve productivity and reduce maintenance cost. It allows access to only required applications and prevents the users from making any intended or unintended changes in the device. Only administrators can access the pass- word protected settings to either modify lockdown configurations or exit the lockdown. -
Page 97: Tools
TOOLS Refer to the Datalogic Mobile Computers Software Tools main page to find more detailed and up-to-date information: https://datalogic.github.io/. USB ADB DRIVER USB connection allows to read and write files on both the internal storage memory and the external storage memory, but doesn’t allow to install applications. -
Page 98: Create A New Application Based On Datalogic Sdk Add-On With Android Studio
TOOLS Create a New Application based on Datalogic SDK Add-on with Android Studio For information and instructions to configure Datalogic SDK Add-on in Android Studio, refer to the website: https://datalogic.github.io/android/overview. DATALOGIC SDK For information on the Datalogic SDK APIs, visit the web site: https://data- logic.github.io/android/overview. -
Page 99: Data Capture
DATA CAPTURE The Skorpio X5 has an integrated imager that collects data by scanning bar codes. See " for instructions on configuring the scanner settings. Scanner Settings" on page 40 IMAGER DATA CAPTURE The imager uses digital camera technology to take a digital picture of a bar code, the image is stored in memory and software decoding algorithms are executed to extract the data from the image. -
Page 100: Connections
CONNECTIONS USB CONNECTION USB Direct Connection You can use the provided USB Type A to Type-C cable to directly connect the Skorpio X5 to a host computer and transfer data through the USB interface. Host Computer USB Type A to Type-C Cable Skorpio X5 1. -
Page 101: Usb Dock Connection
3. Connect the single slot dock full to the host computer by means of a standard USB Type A to Type-C cable. 4. Turn on the Skorpio X5. 5. Insert the Skorpio X5 into the dock. Host Computer Single Slot Dock... -
Page 102: Ethernet Connection
3. Plug the ethernet cable into the ethernet hub or a port on the host device. 4. Turn on the Skorpio X5. 5. Enable ethernet communication (see " Ethernet" on page 65 6. Insert the Skorpio X5 into the dock. Skorpio X5 Ethernet Hub 3-Slot Dock... -
Page 103: Wi-Fi Connection
CONNECTIONS WI-FI CONNECTION The Skorpio X5 has a IEEE 802.11 a/b/g/n/ac and 802.11 d/e/h/i/k/r/v/w/mc WLAN (Wireless Local Area Network) radio and can communicate with other IEEE 802.11 a/b/ g/n/ac and 802.11 d/e/h/i/k/r/v/w/mc Wi-Fi compliant products including access points, workstations via PC card adapters and other wireless portable devices. -
Page 104: Bluetooth® Serial Connection
CONNECTIONS BLUETOOTH® SERIAL CONNECTION The Skorpio X5 can communicate with a Bluetooth® device, such as a printer, within a range of 10 m, using the on-board Bluetooth® module. NOTE: Area coverage and Bluetooth® radio performance may vary, due to environmental conditions or interference caused by other devices (micro- wave ovens, radio transmitters, etc.). -
Page 105: Wireless And Radio Frequencies Warnings
However, certain electronic equipment may not be shielded against the RF signals generated by Skorpio X5. Datalogic recommends persons with pacemakers or other medical devices to follow the same recommendations provided by Health Industry Manufac- turers Associations for mobile phones. -
Page 106: Technical Features
TECHNICAL FEATURES TECHNICAL DATA Physical Characteristics Front size: 218 x 78,5 mm / 6.69 x 3.14 in Dimensions Thickness Max 31.3 Head; Max 35.6 WLC coil area and hand strap area Handheld: with Std. battery 488 g, with high capacity battery 514 Weight g;... - Page 107 TECHNICAL FEATURES Environmental Withstands multiple drops from 1.8 m / 6.0 ft onto con- Drop Resistance crete according to IEC62-2-32 Tumbles Withstands 1000 from 1 m / 3.3 ft, 2000 hits Particulate and Water Sealing IP65 Chemical Resistance Chemical cleanser and industrial oil resistant Operating: -20 to 50 ºC / -4 to 122 ºF Temperature Storage/Transport: -30 to 70 ºC / -22 to 158 ºF...
- Page 108 160 cm / up to 63 in (55 mil/DM) Software Pre-licensed device and browser lockdown powered by 42Gears; Applications Datalogic WiFi Guard; compatible with enterprise class PTT by Zello; Datalogic’s SoftSpot soft triggers Provisioning Scan2Deploy Studio, Android Zero-Touch, QR Code enrollment...
-
Page 109: Test Codes
TEST CODES High Density Codes - 0.25 mm (10 mils) Code 39 17162 Interleaved 2/5 0123456784 Code 128 test EAN 13 EAN 8 USER’S MANUAL... - Page 110 TEST CODES Medium Density Codes - 0.38 mm (15 mils) Code 39 17162 Interleaved 2/5 0123456784 Code 128 test 100% EAN 13 100% EAN 8 SKORPIO™ X5...
- Page 111 TEST CODES Low Density Codes - 0.50 mm (20 mils) Code 39 17162 Interleaved 2/5 0123456784 Code 128 test 120% EAN 13 120% EAN 8 USER’S MANUAL...
- Page 112 TEST CODES 2D Codes Datamatrix ECC200 Example Inverse Datamatrix ECC200 Example SKORPIO™ X5...
-
Page 113: Maintenance
CAUTION: Do not apply any sticker to the Skorpio X5. CLEANING Periodically clean the Skorpio X5 device using a soft cloth slightly dampened with only water or Isopropyl Alcohol (70%). Do not use any other cleaning agents (e.g. different alcohol, abrasive or corrosive prod- ucts, solvents) or abrasive pads to clean the device. -
Page 114: Safety And Regulatory Information
Use only the components and accessories supplied by the manufacturer for the specific Skorpio X5 being used. • Do not attempt to disassemble the Skorpio X5 device, as it does not contain parts that can be repaired by the user. Any tampering will invalidate the warranty. •... -
Page 115: Technical Support
Products once sold. The Warranty Period shall be one year from the date of shipment by Datalogic, unless otherwise agreed in an applicable writing by Datalogic. Datalogic will not be liable under the warranty if the Product has been exposed or subjected to any: (1) maintenance, repair, installation, handling, packaging, transportation, storage, operation or use that is improper or otherwise not in compliance with Datalogic’s instruction;... - Page 116 IN ANY PRODUCT DELIVERED BY DATALOGIC SHALL IN NO EVENT EXCEED THE PURCHASE PRICE OF THE PRODUCT ON WHICH THE CLAIM IS BASED. DATALOGIC SHALL NOT BE LIABLE FOR DAMAGES RELATING TO ANY INSTRUMENT, EQUIPMENT, OR APPARATUS WITH WHICH THE PRODUCT SOLD UNDER THIS AGREEMENT IS USED.
-
Page 117: Glossary
GLOSSARY Access Point A device that provides transparent access between Ethernet wired networks and IEEE 802.11 interoperable radio-equipped mobile units. Hand-held mobile computers, PDAs or other devices equipped with radio cards, communicate with wired networks using Access Points (AP). The mobile unit (mobile computer) may roam among the APs in the same subnet while maintaining a continuous, seamless connection to the wired net- work. - Page 118 GLOSSARY right, 0 through 7, with bit 0 the low-order bit. One byte in memory can be used to store one ASCII character. CDRH Center for Devices and Radiological Health. A federal agency responsible for regulating laser product safety. This agency specifies various laser operation classes based on power output during operation.
- Page 119 GLOSSARY means an Android manufacturer needs to obtain a license from Google in order to legally pre-install GMS on an Android device. This license is provided by Google without any license fees. Host A computer that serves other mobile computers in a network, providing services such as network control, database access, special programs, supervisory programs, or program- ming languages.
- Page 120 GLOSSARY their bias. They use little electricity and react relatively quickly. They require external light to reflect their information to the user. 1 mil = 1 thousandth of an inch. Near-Field Communication (NFC) A form of contactless communication two electronic devices over a distance of 4 cm (1 1⁄2 in) or less.
- Page 121 GLOSSARY Symbology The structural rules and conventions for representing data within a particular bar code type (e.g. UPC/EAN, Code 39, PDF417, etc.). Universal Serial Bus. Type of serial bus that allows peripheral devices (disks, modems, printers, digitizers, data gloves, etc.) to be easily connected to a computer. A "plug-and- play"...
- Page 122 NOTES...
- Page 123 NOTES...
- Page 124 © 2021 Datalogic S.p.A. and /or its affiliates • All rights reserved • Without limiting the rights under copyright, no part of this documentation may be reproduced, stored in or introduced into a retrieval system, or transmitted in any form or by any means, or for any purpose, without the express written permission of Datalogic S.p.A.
Need help?
Do you have a question about the Skorpio X5 and is the answer not in the manual?
Questions and answers
We have an issue where multiple of our X5 Scanners are black screening, the lights are still coming on when buttons are pressed but the screen is completely black. Our Current fix is by taking the battery out and waiting for the device to shutoff. Then we boot it back up as usual. Any idea on what is causing this issue? Not sure if its a user error, only one person has been reporting the issue.
The black screen issue on multiple Datalogic Skorpio X5 scanners, despite the lights turning on when buttons are pressed, could be caused by a disconnected or drained main battery pack. The manual states that the main battery pack is disconnected at the factory to prevent excessive draining. If the battery is not properly connected or fully charged, the device may power on partially but fail to display anything on the screen. Charging the battery as indicated in the Quick Start Guide or ensuring proper battery connection may resolve the issue.
This answer is automatically generated