
Subscribe to Our Youtube Channel
Related Manuals for ZEROXCLUB BX902


Summary of Contents for ZEROXCLUB BX902
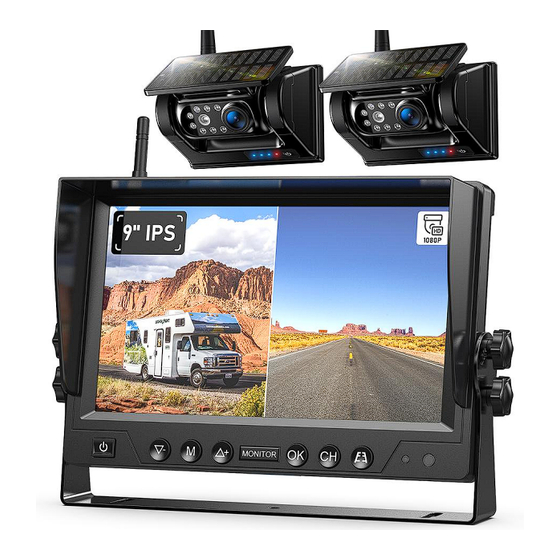
- Page 1 ZEROXCLUB INSTRUCTIONS MANUAL ZEROXCLUB 9" Magnetic Solar Wireless Backup Camera System Model: BX902 Installation and Operation Instructions...
- Page 2 ZEROXCLUB INSTRUCTIONS MANUAL PLEASE NOTE: Thank you for your trust in ZEROXCLUB and it's our pleasure to have you to purchased our product! ZEROXCLUB is committed to providing the high quality products and the pleasant shopping experience. Before operating this backup camera system, please read this instructions completely.
-
Page 3: Table Of Contents
ZEROXCLUB INSTRUCTIONS MANUAL Table of Contents 1 WHATS IN THE PACKAGE ........................1 2 Introduction and Specifications .......................2 3 SYSTEM DESCRIPTION ........................3 3.1 Monitor ..........................3 3.2 Camera ..........................5 3.3 REMOTE CONTROL ........................8 4 INSTALL GUIDE ..........................8 4.1 System Power Testing ......................8 4.1.1 Suggested Sequence for Installation ................. -
Page 4: Whats In The Package
ZEROXCLUB INSTRUCTIONS MANUAL 1 WHATS IN THE PACKAGE The ZEROXCLUB backup camera system will work for you with the years of reliable service. Our monitors, cameras and cables are of the highest quality. Please check and ensure there is no damage on the shipping box when you received it. -
Page 5: Introduction And Specifications
ZEROXCLUB INSTRUCTIONS MANUAL U-Shaped Bracket Installation Tools 2 Introduction and Specifications The camera system is designed to monitor the road condition and ensures safety for your reversing and driving. The monitor is required to be connected to a 12-24 Volt Direct Current... -
Page 6: System Description
ZEROXCLUB INSTRUCTIONS MANUAL 3 SYSTEM DESCRIPTION 3.1 Monitor Power button: Turn on / off the monitor - Button: Function DOWN button & Brightness Adjustment button & Flip the screen Menu button: Settings for PAIRING / PICTURE / MIR-FLIP / MODE / CAM-SETUP / SYSTEM / PLAY /... - Page 7 ZEROXCLUB INSTRUCTIONS MANUAL Short press this button and the monitor will be come on. Press it again, the monitor will be turned off. Function DOWN Button ① On the menu page, press it to select menu options. ② Turn down the screen brightness ③...
-
Page 8: Camera
ZEROXCLUB INSTRUCTIONS MANUAL 3.1.3 Main Screen Interface Signal: It means the strength of the signal between the camera and the monitor. CAM #1/2/3/4: The channel number is shown on the top left of the screen. Battery : This sign represents the remaining battery power of the camera. - Page 9 ZEROXCLUB INSTRUCTIONS MANUAL 3.2.1 Two Charging Methods The camera supports USB-C charging (5V DC charging) and Solar charging. Due to the limitation of the solar panel area, solar charging is only an auxiliary means to extend the working time of the camera, and it is better to use Type-C charging as the main charging method.
- Page 10 ZEROXCLUB INSTRUCTIONS MANUAL times. But you need to charge the backup camera with Type-C Charging regularly according to the frequency of use, especially in the winter. c. Many vehicles provide constant power to the 12V outlet. If your outlet provides constant power, please remember to unplug the monitor when not in use to avoid draining the vehicle battery.
-
Page 11: Remote Control
ZEROXCLUB INSTRUCTIONS MANUAL 3.3 REMOTE CONTROL 4 INSTALL GUIDE The system is assembled with simple tools without difficulty. 4.1 System Power Testing Please power and test the system before installation. 4.1.1 Suggested Sequence for Installation Please follow below installation sequence to install the system: Assemble Installation Tools ... - Page 12 ZEROXCLUB INSTRUCTIONS MANUAL ①Align the bracket ②Screw knob ③After adjusting the with the holes on bolts, and adjust the screen angle, tighten either side of the angle of the stand to the screws to secure it. screen. the screen. Suction Cup Mount Installation:...
-
Page 13: Camera Installation
ZEROXCLUB INSTRUCTIONS MANUAL seen inside the car, and does not obstruct your vision when driving. 2. Remove the plastic sheet of the suction cup, press it against the mounting surface and push the suction cup lock lever down to lock the suction cup. - Page 14 ZEROXCLUB INSTRUCTIONS MANUAL - Use the (+) / (-) button to select the menu options. - Confirm the selection by pressing the (OK) button. - Press (M) button can return to the previous page. Software Management System Main Menu and Sub-Menu...
-
Page 15: Pairing Operation
ZEROXCLUB INSTRUCTIONS MANUAL If the screen is in split-screen mode, the (P-LINE), (-)/(+) and (M) buttons will not work. * Before using these buttons, press the (CH) button to switch the screen to full screen mode. 5.2 PAIRING Operation Before shipped out from the factory, the camera has been paired with the monitor. -
Page 16: Picture Operation
ZEROXCLUB INSTRUCTIONS MANUAL monitor cannot be paired with several cameras at the same time, please pair them separately. 3. If the camera fails to pair with the monitor, please check and make sure the monitor and camera are powered on (please check the blue power indicator of the camera, if the indicator is come on, it means the camera is powered). -
Page 17: Mode Operation
ZEROXCLUB INSTRUCTIONS MANUAL the menu page, then press (OK) button to enter the setup page. ② Flip the image by pressing (+) or (-). 5.5 MODE Operation Please follow below steps to change the split screen mode on monitor: ①... -
Page 18: System Operation
ZEROXCLUB INSTRUCTIONS MANUAL through camera channels if you turn on the the AUTO SCAN function, and you could setup the SCANTIME. Note: If the status of AUTOSCAN are turned on, and the SCANTIME has been set, the camera view will be automatically cycle to the next one at the set time. -
Page 19: Play Operation
ZEROXCLUB INSTRUCTIONS MANUAL screen, please select and enter the P-LINE status to turn on/off it. Please note that the parking guide line of different cameras need to be turned on or off separately in the corresponding full-screen mode. Default: Getting the system back to default settings. -
Page 20: Menu Faq
ZEROXCLUB INSTRUCTIONS MANUAL 6 Menu FAQ Why is it soundless? A: Due to sound holes will reduce the waterproof coefficient of the camera, so we didn't enable this feature. 6.2 Q: Why does the screen cycle through channels automatically? A: Please follow below steps to turn off it: ①... - Page 21 ZEROXCLUB INSTRUCTIONS MANUAL A: If you turn it on, all recorded videos in the memory card will be deleted. How to start to record video? A: Press the (OK) button to start recording, then a “ ” sign will appear on the top center of the screen and the monitor will start to record.
-
Page 22: Troubleshooting
ZEROXCLUB INSTRUCTIONS MANUAL A: It will be automatically turned on in the dark environment. 6.14 Can I add more cameras? A: Yes, this system supports four cameras with dual/quad split modes. If you would like to add more cameras, please contact us via sales1@uszeroxclub.com... - Page 23 ZEROXCLUB INSTRUCTIONS MANUAL cleaner on antenna connection on camera. 4) If the vehicle body is aluminum or fiberglass which is blocking the signal and we recommend that you raise the camera to get a direct line of sight signal. 5) Check if the antenna screw connector on the camera/monitor is loose.
- Page 24 ZEROXCLUB INSTRUCTIONS MANUAL to charge it for several hours. 7) To ensure that you have the most current possible running through your charging cable, please use a wall outlet. Using the USB port on a laptop or desktop computer can charge your camera, but it often does so much slower.
-
Page 25: Warranty
ZEROXCLUB INSTRUCTIONS MANUAL 8 Warranty ZEROXCLUB provide 18 months warranty and 3 months replacement service. We also provide lifetime technical support to ensure the backup camera could be used for many years. If you are not satisfied or need any help with this product, please feel... - Page 26 ZEROXCLUB INSTRUCTIONS MANUAL Contact Person: Cindy Contact Email: sales1@uszeroxclub.com...
Need help?
Do you have a question about the BX902 and is the answer not in the manual?
Questions and answers