Table of Contents
Advertisement
Quick Links
Advertisement
Table of Contents

Subscribe to Our Youtube Channel
Related Manuals for Manitou DORADO PRO


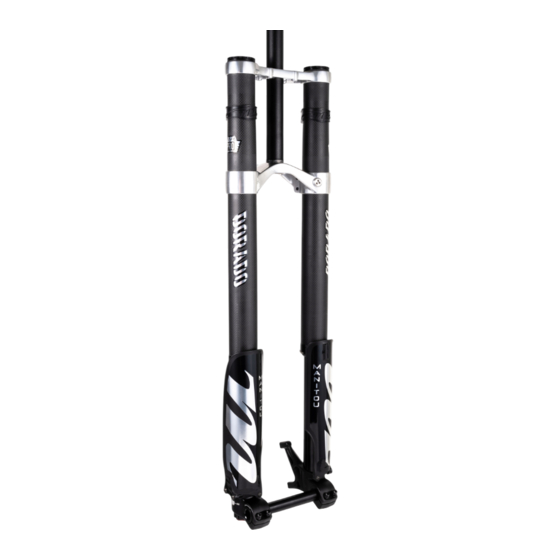
Summary of Contents for Manitou DORADO PRO
- Page 1 DORADO PRO 37MM SERVICE GUIDE...
- Page 2 MANITOU 5800 W Donges Bay Rd Mequon, WI 53092 manitoumtb.com 888.686.3472 Support: manitoumtb.com/support WARRANTY For full warranty information please visit hayesbicycle.com/warranty...
- Page 3 INTRODUCTION This manual is intended to guide the user through basic service of Manitou Dorado Pro 37mm front forks. We highly suggest the service on these forks be performed by an experienced suspension mechanic. Service is supported by the identification of common parts and assemblies that have been assembled into Service Kits.
-
Page 4: Table Of Contents
Damping Leg Service Disassembly Pro Damper Service Damping Leg Service Assembly Spring Leg Service Disassembly Spring Leg Service Assembly Dust & Oil Seal Replacement Travel Change Exploded View, Parts List, & Torque Table O-Ring Placement Diagram & Table DORADO PRO 37MM SERVICE GUIDE... -
Page 5: Tools And Materials
Below is a list of tools that will be used in the complete service of a Dorado fork: • Dorado Complete Rebuild Kit – Manitou Part number 141-38361-K001 (Needed for 200 hour complete service) • Dorado 37mm Seal Kit - Manitou Part Number 141-38380-K019 (Needed for 50 hour basic service) •... -
Page 6: Damping Leg Service Disassembly
Remove O-ring and be sure you capture the 2 detent balls and springs under the knob. Next you will remove the High Speed adjuster knob. Remove the c-clip that holds the knob on using a snap ring pliers or similar tool. DORADO PRO 37MM SERVICE GUIDE... - Page 7 Put them in a safe place so you do not misplace them. TIP: The ends of the Dorado sag guide can be used to spread the clamps apart and aid in leg removal. DORADO PRO 37MM SERVICE GUIDE...
- Page 8 Remove the fork leg from the bike stand and pour the oil out of the leg. Slide the inner leg out of the outer leg and leave the outer leg to drain in a drainage pan. DORADO PRO 37MM SERVICE GUIDE...
- Page 9 A. O-ring #100-012 - The O-ring above the threads on the end of the damper assembly. O-ring #100-122 - The larger O-ring on the bottom out end cap. O-ring # 100-026 - The O-ring that is around the outside of the compression assembly top cap. DORADO PRO 37MM SERVICE GUIDE...
-
Page 10: Pro Damper Service
LSC adjuster from top-cap. Place damper top-cap over catch pan. Cycle damper shaft several times to cycle out old oil from damper. Attach the empty syringe with Dorado Cartridge bleed fitting to top-cap bleed port. DORADO PRO 37MM SERVICE GUIDE... - Page 11 (85-0023). Remove bleed-screw from damper end-cap and attach the filled syringe M5x.8 adapter to end-cap bleed port. Holding the damper end-cap up-right using Manitou Clamp Blocks in vise (or lightly clamped in soft-jaw vise) position the notch on the HSC compression adjuster slightly up.
- Page 12 Closing the bleed hose clamp on both syringes cycle the damper SLOWLY to draw air to the top of the damper. Open bleed hose clamps and repeat step 3 and 4 until no air bubbles are present in oil drawn into upper syringe. DORADO PRO 37MM SERVICE GUIDE...
- Page 13 Remove cartridge from vise. Lay cartridge flat on bench. Remove lower syringe and replace bleed screw. Some oil may discharge from bleed port when removing syring. DORADO PRO 37MM SERVICE GUIDE...
-
Page 14: Damping Leg Service Assembly
Put a small amount of Slickoleum Grease on the O-ring on the rebound end of the damper cartridge assembly. Install the assembly in the inner leg by sliding it into the bottom of the leg. DORADO PRO 37MM SERVICE GUIDE... - Page 15 Install the high speed adjuster onto the end cap. Be sure that O-ring # 100-025 below the adjuster is in place and greased. Secure the adjuster with the c-clip (Retaining ring pliers can be used to aid in the installation). DORADO PRO 37MM SERVICE GUIDE...
- Page 16 Place O-ring # 100-024 around the TPC+ knob and apply a small amount of grease to it. Install the TPC+ adjuster knob onto the end cap and secure with the 2mm screw. DORADO PRO 37MM SERVICE GUIDE...
- Page 17 Install the rebound knob into the top cap by snapping it into place. Fully close the rebound by turning the knob clockwise. Fully extend the rebound shaft, pulling the inner leg up into the outer leg. DORADO PRO 37MM SERVICE GUIDE...
- Page 18 DAMPING LEG ASSEMBLY Pour 35cc of Bath Oil (Manitou 5W40 Semi Bath Oil) into the upper leg. Fully extend the inner leg and tighten down the top cap using a 16 notch Bottom Bracket Tool to the proper torque of 6.8-9.0 N m (60-80 in lb). Reinstall the damping leg into the fork crowns on the bike.
-
Page 19: Spring Leg Service Disassembly
Be sure not to misplace the frame bumper that will need to come off the fork leg. TIP: The ends of the Dorado sag guide can be used to spread the clamps apart and aid in leg removal. DORADO PRO 37MM SERVICE GUIDE... - Page 20 Remove the outer leg from the stand and let it sit above a drainage pan. Wrap the inner in a rag and clamp it lightly in the bike stand with the compression rod pointing towards the ceiling. DORADO PRO 37MM SERVICE GUIDE...
- Page 21 Remove Compression Rod Assembly from the inner leg. Carefully remove the A) glide ring (129-27922-L013), B) back up ring (129-31523-L338) and C) air piston quad seal (110-215). We recomend using a plastic pick to ensure the piston is not damage. DORADO PRO 37MM SERVICE GUIDE...
- Page 22 Wrap the inner leg in a towel and gently clamp in a bike stand with the drop out pointing up. While holding the drop out remove the IRT assembly using a casstte tool. DORADO PRO 37MM SERVICE GUIDE...
-
Page 23: Spring Leg Service Assembly
6.8 - 9.0 Nm [60-80 in lb]. Lube the threads on the inside of the inner leg, lube the outer diameter of the air piston, and fill the piston cup with 3cc of Slickoleum grease and 1cc Manitou 5w/40 Bath Oil. DORADO PRO 37MM SERVICE GUIDE... - Page 24 Slide the inner leg into the outer leg, and clamp the top of the outer leg in the bike stand. Inject 35cc of Manitou Semi Bath oil (5/40wt. Synthetic oil, P/N: 85-0023) into the outer leg on top of the inner leg.
- Page 25 3.4-4.5 N m (30-40 in lb) Fully extend the inner leg and tighten down the top cap to the proper torque of 6.8-9.0 N m (60-80 in lb). Fill the fork to the desired air pressure. DORADO PRO 37MM SERVICE GUIDE...
-
Page 26: Dust & Oil Seal Replacement
Remove the foam ring. Clean seal bore and bushing thouroughly. Soak new foam in Manitou bath oil. Place foam ring in the bottom of the seal bore. DORADO PRO 37MM SERVICE GUIDE... - Page 27 DUST & OIL SEAL REPLACEMENT Place the new dust seal into the leg and use the 37mm end of the seal press to press it completely into the leg. Install the wear ring back onto the outer leg. DORADO PRO 37MM SERVICE GUIDE...
-
Page 28: Travel Change
180mm is the position closest to the end cap. Rethread the top-out screw and bolt over the retaining ring, torque to 3,4 N-M [30 IN-LB]. NOTE: Consult pages 16-22 for air leg assembly and reassembly. DORADO PRO 37MM SERVICE GUIDE... -
Page 29: Exploded View, Parts List, & Torque Table
DORADO PRO EXPLODED VIEW DORADO PRO 37MM SERVICE GUIDE... - Page 30 SERVICE KIT LIST (REFERNCE EXPLODED VIEW) DORADO PRO 37MM SERVICE GUIDE...
- Page 31 TORQUE TABLE (REFERENCE EXPLODED VIEW) DORADO PRO 37MM SERVICE GUIDE...
-
Page 32: O-Ring Placement Diagram & Table
O-RING DIAMGRAM DORADO PRO 37MM SERVICE GUIDE... - Page 33 O-RING CHART (USE DIAGRAM FOR REFERENCE) DORADO PRO 37MM SERVICE GUIDE...
- Page 34 GLOBAL HEADQUARTERS & HAYES BICYCLE GROUP USA 5800 W. Donges Bay Rd. Mequon, WI 53092 HAYES BICYCLE GROUP EU Dirnismaning 20 a 85748 Garching (b. Munich) Germany HAYES BICYCLE GROUP ASIA 16F, No. 37, Sec. 3 16F, No. 37, Sec. 3 Mincyuan E.
Need help?
Do you have a question about the DORADO PRO and is the answer not in the manual?
Questions and answers
what is dorado pro mean
The "Dorado Pro" is a high-performance mountain bike fork from Manitou that replicates the Dorado MRD model but uses aluminium legs instead of carbon fiber. It maintains the same advanced features, such as a dual-chamber air spring, TPC+ damper, and hydraulic top-out and bottom-out circuits. For Manitou, the Dorado Pro represents a continuation of their goal to produce technically advanced, competition-level suspension products.
This answer is automatically generated