Table of Contents
Advertisement
Advertisement
Table of Contents

Subscribe to Our Youtube Channel
Related Manuals for Manitou MARA PIGGYBACK


Summary of Contents for Manitou MARA PIGGYBACK
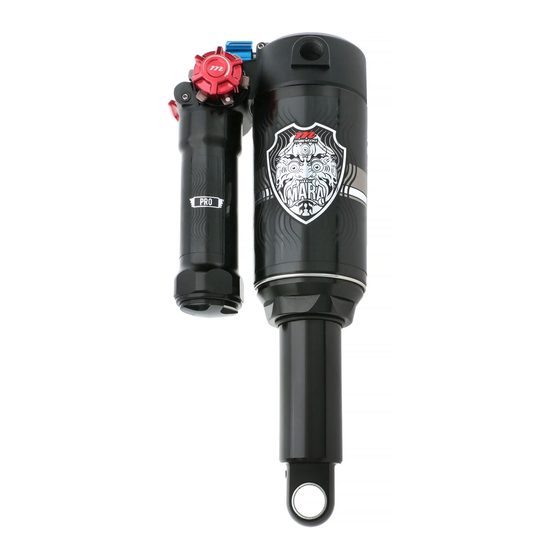
- Page 1 MARA PIGGYBACK | SERVICE GUIDE...
- Page 2 MANITOU 5800 W Donges Bay Rd Mequon, WI 53092 manitoumtb.com 888.686.3472 Support: manitoumtb.com/support WARRANTY For full warranty information please visit hayesbicycle.com/warranty MARA PIGGYBACK SERVICE MANUAL...
- Page 3 INTRODUCTION This manual is intended to provide the information necessary for the 250 hour full service of the Manitou Mara PiggyBack shock. We highly recommend installation and service be performed by a qualified mechanic. These instructions can be downloaded from the Hayes Performance Systems website at www.manitoumtb.com...
-
Page 4: Table Of Contents
Shaft Service 18-19 Shaft and Air Piston Assembly 20-25 Air Can Service 26-28 Bleed and Fill 29–35 Set-Up Guide Torque Specs IFP Depth Table O-Ring Location Exploded View Torque Specs IFP Depths O-ring Guide Exploded View MARA PIGGYBACK SERVICE MANUAL... -
Page 5: Tools And Materials
• Air piston OD seal bullet tool PN 172-32189-K001 • Manitou Clamp Block PN 172-31464 • Manitou shaft seal bullet tool ID of the air piston PN 142-37512-K040 • Air Can / Reservoir Wrench PN 142-37512-K033 • Compression Assembly Pin Spanner HBG PN 142-37512-K031 •... -
Page 6: Shock Teardown
DO NOT completely remove the air can at this point, only loosen one full turn. Removing the air can completely at this point will damage the threads due to pressure in the negative chamber. MARA PIGGYBACK SERVICE MANUAL... - Page 7 Remove air can, bumper, and spacers (if present). These may remain in the air can, locate and save for later re- assembly. Remove split ring from the main air piston. MARA PIGGYBACK SERVICE MANUAL...
- Page 8 A small side-cutter can be used to first partially cut the large piston ring, then break it to remove. Be careful not to damage the groove. Remove the Piggyback Reservoir cap by unthreading it counter-clockwise. MARA PIGGYBACK SERVICE MANUAL...
- Page 9 (example: Park Tool FR-1) to remove the Reservoir End Cap. Place a catch basin under the shock to catch oil. Use the air can / reservoir wrench (PN 142-37512-K033) to unthread the shock reservoir. (Alternative: use a 30mm wrench) MARA PIGGYBACK SERVICE MANUAL...
- Page 10 LSC knob. Be careful when removing this knob, underneath are two detent balls and springs. Pull these out and set aside, remove the O-ring used to retain the LSC knob. MARA PIGGYBACK SERVICE MANUAL...
- Page 11 Using a 21mm wrench, remove the air piston from the damper body. Place the main shock shaft into the 12mm Manitou clamp block. Using an eyelet tool such as a pin wrench or an adjustable wrench accross the...
-
Page 12: Top Cap Service
Remove the rebound adjuster by turning clock-wise (left-handed thread). Remove O-ring and clean the adjuster with isopropyl alcohol. Install a new O ring (101-450) and set aside. *Requires main shaft to be separated from top cap* MARA PIGGYBACK SERVICE MANUAL... - Page 13 O-ring and reservoir O-ring from the top cap. Remove valve stem with a 3mm hexwrench. Thoroughly clean topcap, spraying isopropyl alcohol into all ports and passageways. Allow to air dry or blow out with clean compressed air. MARA PIGGYBACK SERVICE MANUAL...
- Page 14 Grease O-rings, reinstall Work/Party assembly into the top cap. Install retention pin, check for full movement of the Work/Party lever by adjusting the depth of the retention pin. Such that the lever flips just past the word “WORK”. MARA PIGGYBACK SERVICE MANUAL...
- Page 15 (100-018) on the compression cartridge body (above threads at the flange). Grease both O-Rings. Install the compression assembly into the top cap. Use the compression assembly Pin spanner tool (142-37512- K031) and torque to 5.7Nm (50 in-lb). MARA PIGGYBACK SERVICE MANUAL...
- Page 16 LSC knob. Install detent spring using a tool and a dab of grease to help hold the spring in place. Repeat procedure with detent balls. Reinstall LSC knob by pushing straight down to not disrupt the detent balls. MARA PIGGYBACK SERVICE MANUAL...
- Page 17 Remove O-ring (100-021) from the reservoir end cap. Clean end cap with Isopropyl alcohol. Install new O-ring and apply grease. Set aside on a clean, lint free rag until needed after the oil fill process. MARA PIGGYBACK SERVICE MANUAL...
-
Page 18: Shaft Service
16mm socket wrench. Carefully slide the shims and piston onto a small tool like an O-ring pick or screw driver to preserve the sequence of components. Carefully set aside. MARA PIGGYBACK SERVICE MANUAL... - Page 19 Remove inner shaft O-ring. If the service warrants replacement of bushings within the air piston, use a ½-13 UNC bottoming tap and the Manitou clamp block to remove the bushings. (See Manitou Air Piston Bushing and Seal Tool instructions for information)
-
Page 20: Shaft And Air Piston Assembly
Please skip to step 5 if using the alternative method Grease new air piston quad seal (08-30017) and use the seal pusher to install onto the air piston. Install the Split Ring (08- 30718) onto the air piston. MARA PIGGYBACK SERVICE MANUAL... - Page 21 The peg on the end acts as a stop for installing the seals in the piston. Grease the mainshaft. Using the shaft seal bullet tool (142- 37512-K040), slide the air piston on at the damping-end of the shaft MARA PIGGYBACK SERVICE MANUAL...
- Page 22 Remove the piston and stack above the piston for further disassembly. Using an O-ring pick, remove the white piston ring, and the O-ring underneath. Install a new O-ring (PN 101-1810). Install a new piston glide ring (PN 129-30020). MARA PIGGYBACK SERVICE MANUAL...
- Page 23 Loctite, replace the main shock nut on the bottom of the main shaft. Torque to 5nm (45in-lb). *Excess Loctite can contaminate the assembly) From the bottom of the main piston install a new inner shaft O-Ring. (PN 101-500-100) MARA PIGGYBACK SERVICE MANUAL...
- Page 24 Orient flat side of the spring towards the upper end of the rebound needle against the two shims. Reinstall the rebound shaft into the main shaft. Replace the bottom out bumper O-Ring (101-1150- 0300) above the air piston. MARA PIGGYBACK SERVICE MANUAL...
- Page 25 *Some shocks may have a 2.5mm plastic spacer or a 5mm aluminum spacer.* Hold the main shaft in the vise using Manitou clamp block tool (172-31464). Thread the top cap onto the main shaft and torque to 11.3Nm (100in-lb)
-
Page 26: Air Can Service
32193-K001) to ease seal installation. If not available refer to “50 hour Air Can and Piston Service Guide.” The flat surface of the tool will help direct the seals into the internal seal glands. Install the quad-ring first. MARA PIGGYBACK SERVICE MANUAL... - Page 27 King Can, only the two outer seals will be used.) (100-030). Apply a few dabs of grease to the middle seal gland, and install back-up ring (08-36360). Apply Slickoleum grease to the ID of the cleaned King Can sleeve. MARA PIGGYBACK SERVICE MANUAL...
- Page 28 The MCU and negative spacers will be installed on the damper body at a later time. Grease the air can ID and negative seals with Slickoleum. Set aside on a clean shop rag for later use. MARA PIGGYBACK SERVICE MANUAL...
-
Page 29: Bleed And Fill
Remove the bleed screw on the air piston so that air can escape while the air piston is threaded on to the damper tube. Torque the air piston to 26Nm (230in-lb). Replace the bleed screw. MARA PIGGYBACK SERVICE MANUAL... - Page 30 Be sure the face seals stay in place. While pushing down firmly to engage the O-ring thread the reservoir onto the top cap and torque to 9Nm (80 in-lb). Fill the reservoir 2/3 full of oil. MARA PIGGYBACK SERVICE MANUAL...
- Page 31 With bleed screw closed and shock in Work mode, the damper should be difficult to compress, with no gap or soft feel at the very beginning of stroke. It may require 5 to 8 cycles to complete this step. MARA PIGGYBACK SERVICE MANUAL...
-
Page 32: Torque Specs
Stop when the leading edge of the IFP is engaged on the primary inner diameter of the reservoir below the threads. MARA PIGGYBACK SERVICE MANUAL... -
Page 33: Ifp Depths
Use a finger to press the IFP down to the specified depth per shock and reservoir size published in Table 2 “IFP Depth.” Reinstall the bleed screw while applying a light pressure to the IFP, preventing air entering into the bleed port. MARA PIGGYBACK SERVICE MANUAL... -
Page 34: O-Ring Guide
10.7Nm (95in-lb). Note: If compressing by hand it may be necessary to release the gas charge to ease the process. MARA PIGGYBACK SERVICE MANUAL... -
Page 35: Exploded View
Recharge IFP to 300 psi if previously released. Replace the dust caps on the Reservoir and mair chamber. Install bottom out O-ring on the damper body. Refer to Mara Set-up guide for air can pressure.(See Below) MARA PIGGYBACK SERVICE MANUAL... -
Page 36: Setup Guide
• Adjustments to lo-speed and high-speed compression • Adjustments to lo-speed and high-speed and rebound are active compression are deactivated • Rebound remains fully active • Separate internal circuit with pre-defined platform HBG PART NO. 46-38278 REV B [2020.4.20] MARA PIGGYBACK SERVICE MANUAL... -
Page 37: Torque Specs
DAMPER BODY TO AIR PISTON 230 in-lb ±10 BLEED SCREW INTO DAMPER BODY 12 in-lb ±2 TOP CAP KNOB SCREWS 5 in-lb ±1 AIR CAN TO TOPCAP 95 in-lb ±5 SChRADER VALVE CORE 3 in-lb ±1 Table 1: Torque Spec MARA PIGGYBACK SERVICE MANUAL... -
Page 38: Ifp Depth Table
250 X 75 160 X 40 165 X 45 185 X 50 185 X 55 205 X 60 205 X 65 225 X 70 225 X 75 230 X 60 260 X 65 Table 2: IFP Depth Chart MARA PIGGYBACK SERVICE MANUAL... -
Page 39: O-Ring Location
Air Piston 110-112 Air Piston 110-122 Shock Damper Tube 08-30014 Shock Damper Tube 08-30019 Shock Damper Tube 100-013 Top Cap 101-500 Top Cap 101-4100 Top Cap 101-600 Rebound Shaft 101-500 Rebound Shaft Table 3: O-Ring Location MARA PIGGYBACK SERVICE MANUAL... -
Page 40: Exploded View
Mara piggyback exploded view MARA PIGGYBACK SERVICE MANUAL... - Page 41 MANITOU 5800 W Donges Bay Rd Mequon, WI 53092 manitoumtb.com 888.686.3472 Support: manitoumtb.com/support 46-38526 REV.A...
Need help?
Do you have a question about the MARA PIGGYBACK and is the answer not in the manual?
Questions and answers