Advertisement
Advertisement
Table of Contents

Related Manuals for Manitou DORADO COMP


Summary of Contents for Manitou DORADO COMP
- Page 1 DORADO COMP 37MM SERVICE GUIDE...
- Page 2 MANITOU 5800 W Donges Bay Rd Mequon, WI 53092 manitoumtb.com 888.686.3472 Support: manitoumtb.com/support WARRANTY For full warranty information please visit hayesbicycle.com/warranty...
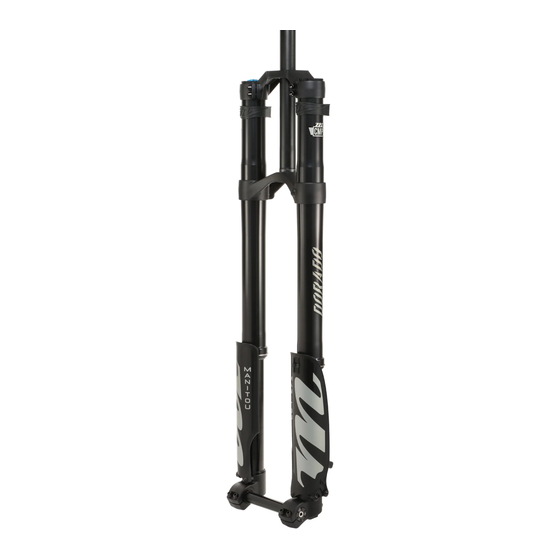
- Page 3 INTRODUCTION This manual is intended to guide the user through basic service of Manitou Dorado Comp 37mm front forks. We highly suggest the service on these forks be performed by an experienced suspension mechanic. Service is supported by the identification of common parts and assemblies that have been assembled into Service Kits.
-
Page 4: Table Of Contents
Tools And Materials Damping Leg Service Disassembly Damping Leg Service Assembly Spring Leg Service Disassembly Spring Leg Service Assembly Dust & Oil Seal Replacement Exploded View, Parts List, & Torque Table O-Ring Placement Diagram & Table DORADO COMP 37MM SERVICE GUIDE... -
Page 5: Tools And Materials
Below is a list of tools that will be used in the complete service of a Dorado fork: • Dorado Complete Rebuild Kit – Manitou Part number 141-38361-K001 (Needed for 200 hour complete service) • Dorado 37mm Seal Kit - Manitou Part Number 141-38380-K019 (Needed for 50 hour basic service) •... -
Page 6: Damping Leg Service Disassembly
(be sure the upper crown is loosened, you only want the lower tightened when breaking loose the top cap). Only loosen the top cap at this point. Do not remove it. DORADO COMP 37MM SERVICE GUIDE... - Page 7 Remove the fork leg from the bike stand and pour the oil out of the leg. Slide the inner leg out of the outer leg and leave the outer leg to drain in a drainage pan. DORADO COMP 37MM SERVICE GUIDE...
- Page 8 Wrap the inner leg in a rag and lightly clamp it into a bike stand with the rebound shaft pointing down towards the floor. Remove the damping cartridge from the inner leg using a 24mm socket. Pull the damping cartridge completely out of the inner leg. DORADO COMP 37MM SERVICE GUIDE...
- Page 9 A. O-ring #100-012 - This is the O-ring above the threads on the end of the damper assembly. O-ring # 100-026 - This is the O-ring that is around the outside of the compression assembly top cap. DORADO COMP 37MM SERVICE GUIDE...
-
Page 10: Damping Leg Service Assembly
To hold the detent balls in place on the spring use a small dab of grease. Install the ABS+ adjuster knob onto the end cap and secure with the 2mm screw. DORADO COMP 37MM SERVICE GUIDE... - Page 11 Install the top cap onto the end of the rebound shaft. Use a 16 notch Bottom Bracket Tool and a 12mm wrench to tighten to the proper torque of 6.8-9.0 N m (60-80 in lb). DORADO COMP 37MM SERVICE GUIDE...
- Page 12 After damper is fully bled, fully extend the inner leg and tighten down the top cap using a 16 notch Bottom Bracket Tool to the proper torque of 6.8-9.0 N m (60-80 in lb). Thoroughly clean leg assembly of all residual oil, then reinstall the damping leg into the fork crowns on the bike. DORADO COMP 37MM SERVICE GUIDE...
-
Page 13: Spring Leg Service Disassembly
Then gently remove the cap and spring by pulling them out of the leg. NOTICE For information of spring rate, see setup guide. Loosen the pinch bolt on the top crown, and crack the top cap loose with a 16 notch Bottom Bracket Tool. DORADO COMP 37MM SERVICE GUIDE... - Page 14 16 notch Bottom Bracket Tool. Pour the fluid out of the leg, and slide the inner leg out of the outer leg. Remove the outer leg from the stand and let it sit above a drainage pan. DORADO COMP 37MM SERVICE GUIDE...
- Page 15 Wrap the inner leg in a rag and clamp it lightly in the bike stand with the compression rod pointing towards the ceiling. Loosen the Compression Rod Assembly from the inner leg with a 32mm wrench. Remove Compression Rod Assembly from the inner leg. DORADO COMP 37MM SERVICE GUIDE...
-
Page 16: Spring Leg Service Assembly
Use a 32mm crows foot to tighten the bottom spring end cap to the proper torque of 1.8-2.8 N m (15-25 in lb). Coat coil spring in grease. Gently insert it into the lower leg. Use a 20mm socket to Install spring preload cap and torque to 6.8-9Nm {60-80In-lb} DORADO COMP 37MM SERVICE GUIDE... - Page 17 Coat the inside of the seal with Slickoleum grease Slide the inner leg into the outer leg, and clamp the top of the outer leg in the bike stand. Replace O-ring #100-027 on the top cap. DORADO COMP 37MM SERVICE GUIDE...
- Page 18 6.8-9Nm {60-80 In-Lb}. Using the sag guide tool to spread the crowns, slide the leg into the crown, align to proper wheel size and tighten crown bolts to 10.7-12.4 Nm {95-110 In-Lb}. DORADO COMP 37MM SERVICE GUIDE...
-
Page 19: Dust & Oil Seal Replacement
Remove the foam ring. Clean seal bore and bushing thouroughly. Soak new foam in Manitou bath oil. Place foam ring in the bottom of the seal bore. DORADO COMP 37MM SERVICE GUIDE... - Page 20 DUST & OIL SEAL REPLACEMENT Place the new dust seal into the leg and use the 37mm end of the seal press to press it completely into the leg. Install the wear ring back onto the outer leg. DORADO COMP 37MM SERVICE GUIDE...
- Page 21 DORADO COMP EXPLODED VIEW DORADO COMP 37MM SERVICE GUIDE...
- Page 22 SERVICE KIT LIST (REFERNCE EXPLODED VIEW) DORADO COMP 37MM SERVICE GUIDE...
- Page 23 TORQUE TABLE (REFERENCE EXPLODED VIEW) DORADO COMP 37MM SERVICE GUIDE...
- Page 24 O-RING DIAMGRAM DORADO COMP 37MM SERVICE GUIDE...
- Page 25 O-RING CHART (USE DIAGRAM FOR REFERENCE) DORADO COMP 37MM SERVICE GUIDE...
- Page 26 GLOBAL HEADQUARTERS & HAYES BICYCLE GROUP USA 5800 W. Donges Bay Rd. Mequon, WI 53092 HAYES BICYCLE GROUP EU Dirnismaning 20 a 85748 Garching (b. Munich) Germany HAYES BICYCLE GROUP ASIA 16F, No. 37, Sec. 3 16F, No. 37, Sec. 3 Mincyuan E.
Need help?
Do you have a question about the DORADO COMP and is the answer not in the manual?
Questions and answers