Table of Contents
Advertisement
Quick Links
Instruction Manual
Model:
GTX6-M-EU
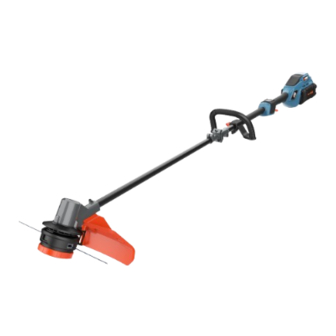
CORDLESS LINE TRIMMER
• SAFETY
• ASSEMBLY
• OPERATION
CAUTION: Before using this tool, please read this manual completely,
• MAINTENANCE
and follow all operating safety measures.
Senix Australia Pty Ltd. 32/3 Westside Avenue, #Port Melbourne, Victoria, 3207
For customer support, please call 1300 461 825 or email us at info@senixtool.com
SENIX.COM.AU
v. 1.1
English
Advertisement
Table of Contents

Related Manuals for Senix GTX6-M-EU


Summary of Contents for Senix GTX6-M-EU
- Page 1 CAUTION: Before using this tool, please read this manual completely, • MAINTENANCE and follow all operating safety measures. Senix Australia Pty Ltd. 32/3 Westside Avenue, #Port Melbourne, Victoria, 3207 For customer support, please call 1300 461 825 or email us at info@senixtool.com SENIX.COM.AU v.
-
Page 2: Table Of Contents
Do not use in rain or wet conditions. RCM Mark Wear sturdy, non-slip footwear. Wear protective gloves. WARNING - Beware of thrown objects. WARNING - The distance between 15m (50ft) the machine and bystanders shall be at least 15m. EN - 2 SENIX.COM.AU... -
Page 3: Safety Instructions
When operating a power tool outdoors, second. use an extension cord suitable for outdoor use. Use of a cord suitable for 4) Power tool use and care 3 - EN SENIX.COM.AU... -
Page 4: Grass Trimmer Safety Warnings
Keep handles and grasping surfaces WARNING! dry, clean and free from oil and grease. Slippery handles and grasping surfaces do Use only with SENIX X6 battery: B30X6/ not allow for safe handling and control of the B40X6/B60X6/B80X6 tool in unexpected situations. - Page 5 This reduces the risk of loss of control, slipping and falling which may result in personal injury. When working on slopes, always be sure of your footing, always work across the face of slopes, never up or down and exercise 5 - EN SENIX.COM.AU...
- Page 6 Do not simultaneously working position after working for a long wear multiple belt harnesses or multiple period. Keep a firm footing and balance shoulder harnesses. EN - 6 SENIX.COM.AU...
-
Page 7: Residual Risks
If any of the ‘whitefinger’ symptoms appear, seek medical advice immediately. ‘Whitefinger’ symptoms include: numbness, loss of feeling, tingling, pricking, pain, loss of strength, changes in skin colour or condition. These 7 - EN SENIX.COM.AU... -
Page 8: Know Your Unit
KNOW YOUR UNIT APPLICATIONS Model: GTX6-M-EU As a Line Trimmer: Cutting grass, light weeds, and other similar vegetation at or around ground level. Battery-Release Button Rear handle Latch Trigger Electric Contacts Safety Switch Inner Plum Wrench Front-Assist Handle Control Panel... -
Page 9: Specifications
The scope of delivery varies depending on Input Voltage 56 V (60 V Max*) the country and purchased variant. Model GTX6-M-EU Rated Output 600 W • Cordeless Line Trimmer x1 Power • Guard x1 5 000 RPM (ECO) •... -
Page 10: Installing Guard
Anti-Loss Screw Fig. 5 WARNING! To prevent accidental starting that could INSTALLING HANDLE cause serious personal injury, always remove the battery pack from the tool when installing the guard. WARNING! EN - 10 SENIX.COM.AU... - Page 11 Insert the inner plum wrench into the hole on the shield. Then slowly turn the trimmer head until the wrench is inserted into the blade. Fig. 8 11 - EN SENIX.COM.AU...
- Page 12 Step 1. Then turn the trimmer head clockwise until it is completely secured. Spool Spring Cutting Head Cover Fig. 16 Put spool back in place. Align the snap holes with the release-buttons to install the trimmer head assembly. EN - 12 SENIX.COM.AU...
-
Page 13: Line Replacement
Insert the line into the eyelet and push the line until the end of the line comes out of the opposite eyelet. Pull the line from the other side until equal lengths of the line appear on both sides of the trimmer head. 13 - EN SENIX.COM.AU... -
Page 14: Operation
ECO button to switch to economy battery pack for more details about how the mode. charger to charge the battery pack and other To stop, release the trigger. information regarding to the charger and battery pack. EN - 14 SENIX.COM.AU... -
Page 15: The Control Panel
The line-cutting blade on the edge of the guard can dull over time. It is recommended that you periodically sharpen it with a file or replace it with a new blade. 15 - EN SENIX.COM.AU... -
Page 16: Maintenance
Cutting with more than the Inspect the product before each use for tip will reduce cutting efficiency and may worn and damaged parts. Do not operate it overload the motor. if you find broken and worn parts. EN - 16 SENIX.COM.AU... -
Page 17: Maintenance Of Battery Pack
If the trimmer head is blocked by foreign recycling. objects during the operating, stop the product, wait for the trimmer head stops entirely, remove the foreign objects and clean the cutting blade. 17 - EN SENIX.COM.AU... -
Page 18: Troubleshooting
REPLACEMENT" into the trimmer eyelet. head properly Inspect the spool, rewind if Line inside the spool entangle Cutting line can no necessary longer be fed Spool empty EN - 18 SENIX.COM.AU...
Need help?
Do you have a question about the GTX6-M-EU and is the answer not in the manual?
Questions and answers