
Subscribe to Our Youtube Channel
Related Manuals for Häfele DIM12D6a


Summary of Contents for Häfele DIM12D6a
- Page 1 OPERATING INSTRUCTIONS DIM12D6a ONLY USE THE APPLIANCE WHEN YOU IO-DWS-4089 HAVE READ AND UNDERSTAND (03.2024/1) THE OPERATING INSTRUCTIONS...
-
Page 2: Disposal Of Old Appliance
DISPOSAL OF OLD APPLIANCE In accordance with European Directive 2012/19/EU and local legislation re- garding used electrical and electronic goods, this appliance is marked with the symbol of the crossed-out waste container. This marking indicates that the appliance must not be disposed of together with other household waste after it has been used. -
Page 3: Table Of Contents
CONTENTS WE ARE ENVIRONMENTALLY FRIENDLY BASIC INFORMATION SAFETY INSTRUCTIONS INSTALL THE APPLIANCE DESCRIPTION OF THE APPLIANCE CLEANING AND MAINTENANCE INSTALL THE APPLIANCE IN A CABINET WE ARE ENVIRONMENTALLY FRIENDLY For many years, HӒFELE has consistently pursued pro-ecological policy. Concern for the environment is as important for us as the use of modern technology. The development of technology has enabled our factories to become more environmentally friend- ly –... - Page 4 Dear customer! Thank you for choosing an HӒFELE product. For years we have de- livered high-quality appliances, so that household chores become a real pleasure. Before being packaged and leaving the manufacturer, this appliance was thoroughly checked with regard to safety and func- tionality.
-
Page 5: Basic Information
BASIC INFORMATION Carefully read the operating instructions before plugging dishwasher to a power outlet and using the appliance. Operating instruction include tips that will help you avoid the risk of injury and damage to the appliance. Keep dishwasher documentation in a safe place for possible future use. These operating instructions have been prepared for a range of appliances and some features described herein may not apply to your appliance. -
Page 6: Safety Instructions
SAFETY INSTRUCTIONS FOR USE Before you install the appliance Check the appliance for transport damage. Never install or use a damaged appliance. If in doubt, contact your seller. Before first use See installation notes (below). Refer the grounding system installation to a qualified electri- cian. - Page 7 SAFETY INSTRUCTIONS FOR USE Read the safety notes from detergent manufacturer. Never leave children unsupervised when the appliance is open. It can contain residue detergent. Dishwasher water is not suitable for drinking. Danger of injury from the caustic chemicals. When you open the door during a programme, be careful as water temperature is high.
- Page 8 SAFETY INSTRUCTIONS FOR USE To save energy and water, rinse food residue of the dishes before loading the dishes into the dishwasher. Run the dish- washer with full load. Do not put dishes with food leftovers in the appliance. Use pre-wash programme only when needed. Load bowls, cups and mugs bottom facing up.
- Page 9 SAFETY INSTRUCTIONS FOR USE UNPACKING During transportation, protective packaging was used to protect the appliance against any damage. Af- ter unpacking, please dispose of all elements of packaging in a way that will not cause damage to the environ- ment. All materials used for packaging the appliance are environmentally friendly;...
-
Page 10: Install The Appliance
INSTALL THE APPLIANCE PLACE YOUR APPLIANCE When choosing the place of installation, make sure you will be able to easily load and remove dishes and utensils from the dishwasher. Do not place the appliance in a room where the temperature can fall below 0°C. Before installing unpack the appliance following the instructions on the packaging. -
Page 11: Electrical Connection
NOTE: Aquastop water supply is used in some dishwasher models. Dangerous voltage could occur with Aquastop. Do not cut the Aquastop water supply. Do not allow it to bend or twist Note: For safety reasons, close the water tap after every wash THE DRAIN HOSE The drain hose can be connected directly to a water drain or kitchen sink stub pipe. - Page 12 Always use the plug provided with the appliance. When you operate the appliance at lower voltage the dishwashing efficiency will deteriorate and may damage the appliance. The power cord may only be replaced by authorized service or a qualified electrician. Failure to comply with these rules may lead to an accident.
-
Page 13: Features And Components
FEATURES AND COMPONENTS DESCRIPTION OF THE APPLIANCE The features and components of the appliance (fig. 1): Spray arm Salt container Filter assembly Dispenser Cup rack Basket Cutlery rack NOTE: Figures are for illustrative purposes only Individual models may vary. * on selected models: When you open the dishwasher door, the interior light will turn on automatically. -
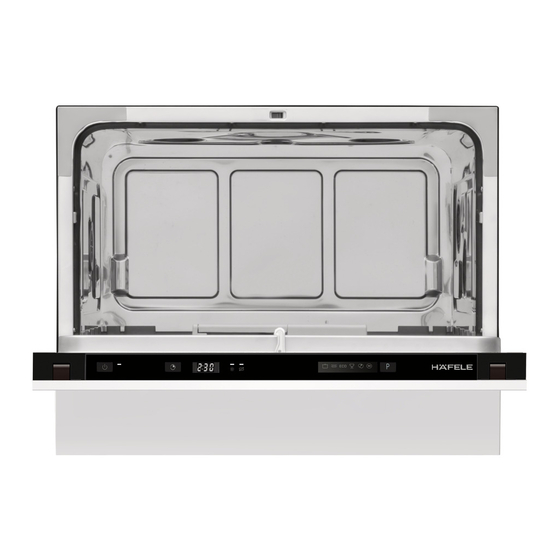
Page 14: Display And Control Panel
DISPLAY AND CONTROL PANEL 1. Power Press this button to turn on your dishwasher, the screen lights up. 2. Delay Press the Delay button to increase the delay start time. Delay a cycle for up to 24 hours in one-hour increments. After setting the delay time, press the Start/pause button to start. -
Page 15: Prepare The Appliance For Operation
PREPARE THE APPLIANCE FOR OPERATION Before first use Before using the appliance, verify that the data given on the rating plate matches that of local power outlets. Remove all packing materials from inside of the appliance. Prepare special salt (water softener). Pour water into the special salt dispenser and then add about 1.5 kg of special salt (dishwasher salt). - Page 16 Fill the detergent dispenser Open the detergent dispenser flap by pressing the detergent dispenser tab to release the lock as shown in the figure. The detergent dispenser features volume marking. Using these markings (lines) you can measure the correct amount of detergent. The dispenser can ac- commodate a maximum of 30g of detergent.
- Page 17 Multi-component (multitab) detergents (eg. 2-in-1, 3-in-1, etc.) There are three types of detergents: 1. Containing phosphates and chlorine, 2. Containing phosphates and no chlorine, 3. Containing no phosphates and no chlorine. The latest tablets are generally phosphate-free. Since phosphates have water softening properties, we recommend adding salt to the container even if the water hardness is only 6°dH.
- Page 18 Stop using multi-component detergents Add special salt and rinse aid to dispensers. Set the water hardness to the highest level (6) and run an empty dishwasher. Adjust the water hardness. Adjust rinse aid setting. Add rinse aid to the dispenser and adjust setting Use rinse aid to prevent the formation of white water drops, lime scale spots, white streaks that may occur on the dishes, as well as to improve the drying process.
- Page 19 Warning: Use only rinse aid designed for domestic dishwashers. Wipe up spilled rinse aid with a cloth as it will cause the formation of large amounts of foam, and thus will reduce the dishwashing effectiveness. Water hardness table German French British Special salt Water...
-
Page 20: Load Dishes Into Dishwasher
LOAD DISHES INTO DISHWASHER Basket Loading the dishwasher to its full capacity will contribute to energy and water savings. with the cup rack without the cup rack EN60436... - Page 21 Bottom rack Place the plates, bowls, pots, etc in the bottom rack. Make sure that the dishes in the bottom rack do not block spray head and it can freely rotate. Place large pans and heavily soiled items such as pots, pans, lids, dishes, etc.
- Page 22 Cutlery basket Place knives and forks separately from each other, and make sure they do not touch as this may cause poor washing results. For best washing results place knives and forks in the cutlery rack, and make sure: they do not touch and place objects in the middle.
-
Page 23: Turn On The Appliance And Select Programme
TURN ON THE APPLIANCE AND SELECT PROGRAMME Turn on the appliance 1. Draw out the lower and upper basket, load the dishes and push them back. It is commended to load the lower basket first, then the upper one. 2. Pour in the detergent. 3. - Page 24 The dishwashing programme completes Press on/off button to turn off the appliance. Close water supply tap and open the dishwasher door. Wait a few minutes before unloading the dishwasher. Allow dishes to cool. Hot dishes are more susceptible to breakage. Also the dishes will dry. Turn off the dishwasher The programme is completed only when the programme indicator is on, but not flashing.
-
Page 25: Cleaning And Maintenance
CLEANING AND MAINTENANCE Clean external surfaces Door and door seal To remove food residue, clean the door gasket regularly with a soft, moist cloth. When loading dishes into the dishwasher, food and drink residue may deposit on the sides of the dishwasher door. These surfaces are outside the dishwasher compartment and the water from the spray arms does not reach them. -
Page 26: Troubleshooting
TROUBLESHOOTING 3. Larger food remnants can be cleaned by rinsing the filter under running water. For a more thorough clean, use a soft cleaning brush. 4. Reassemble the filters in the reverse order of the disassembly, replace the filter insert, and rotate clockwise to the close arrow. - Page 27 Clean the dishwasher Frost protection In winter, the dishwasher must be protected against freezing temperature. After each wash: 1. Disconnect the dishwasher from power. 2. Turn off the water supply and disconnect the water inlet hose from the water valve. 3.
- Page 28 Problem Possible cause Solution The dishwasher will not The dishwasher will not The dishwasher door is open — close the door. start start The appliance is not Close the door carefully, make sure it is closed fully connected to the mains power The Delay start function is selected Child Lock is enabled...
- Page 29 Problem Possible cause Solution The dishwasher will not The dishwasher will not Close the door carefully, make sure it is closed start fully start The appliance is not Check the connection to the power supply connected to the mains power The Delay start function is selected To change the setting, refer to the Start Delay section in the operating instructions...
- Page 30 Problem Possible cause Solution The dishwasher does The drain is clogged Check the air trap. drain the water properly The drain hose is bent Make sure that the drain hose is correctly con- nected to the drain Foam in the dishwasher The wrong detergent Make sure that the detergent used is suitable for was used...
-
Page 31: Install The Appliance In A Cabinet
INSTALL THE APPLIANCE IN A CABINET Step 1a: If only the body into cabinets, please make this map the size of the cabinet hole. Electrical, drain band water supply line entrances, both sides Fig. 1a Space of cabinet... - Page 32 Step 1b: If the entire decorative panel into the cabinet also, the size of A should be equal to D +9.5; size B should be equal to C+6; Meanwhile, the cabinet around the inward booster: both sides of the (C-555) / 2 +3; C, D and E as the second step within the relevant size decorative panels.
- Page 33 Step 3: Assemble the decorative panel NOTE: If the machine with a decorative plate, no this step. Fig. 3 Step 4: Assemble the decorative door on the dishwasher, as figure. First install screw between the cabinet base board and decorative panel, in all 16; then pull glide from out door groove, case 8-screw between decorative panels and glide.
- Page 34 Screw,in all 16 Decorative panel Screw, in all Cabinet base board Step 5: Install the adjust screw into the base Fig. 5 Step 6: Install the dishwasher in aperture, but not full, as figure, adjust screw, let its bottom align aperture’s base, then push dishwasher full.
- Page 35 Height [mm] [H] 452 mm Width [mm] [W] 550 mm Depth [mm] [D1] 518 mm (with the door closed) Depth [mm] [D2] 812 mm (with the door open 90°)
- Page 36 HÄFELE SE & CO KG ADOLF-HÄFELE-STRASSE 1 D-72202 NAGOLD www.hafele.com...
Need help?
Do you have a question about the DIM12D6a and is the answer not in the manual?
Questions and answers