
Subscribe to Our Youtube Channel
Related Manuals for Daewoo DT- 4280NH


Summary of Contents for Daewoo DT- 4280NH
-
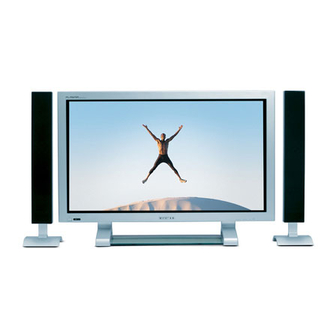
Page 1: Plasma Display
PLASMA DISPLAY USER’S MANUAL D T - 4 2 8 0 N H Helpline Number : 0870 100 2525 Proper use guarantees product life. Before using the product, be advised that you read this owner’s manual well and try to operate it. - Page 2 CCF Technology makes the picture clearer by controlling of the brightness among three different colour filters. • MGDI (Meta Genuine Digital Image) Engine MGDI is the image enhancement technology of Daewoo Electronics, which provides more clear, splendid, and delicated images. This Owner’s Manual presents safety precautions and how to use the product.
-
Page 3: Safety Precautions
Safety Precautions Always obey all During a lightning storm, or when it is left unattended and unused for a long period safety messages. of time, unplug it from the wall outlet. It can result in fire. • All the safety and operating instructions should be read before the... -
Page 4: During Use
The apparatus shall not be exposed to dripping or splashing and that no objects filled with liquids, such as vases, shall be placed on the apparatus. Spilled liquids may cause electric shock or fire. Do not disassemble batteries, and do not leave around in case children swallow them. - Page 5 Safety Precautions Always obey all When moving your TV, remove the power plug, antenna, and cables, and be sure to safety messages. move it by using two people.. Failure to follow this instruction can result in • All the safety and electric shock or personal injury.
- Page 6 The plasma display panel consists of fine cells. Although the panels are produced with more than 99.9 percent active cells, there may be some cells that do not produce light or remain lit. Do not allow a still picture to be displayed for an extended period, as this can cause a permanent ghost image to remain on the Plasma...
-
Page 7: Checking Accessories
Checking Accessories Supplied Accessories Remote Control Component Cable A/V Cable Note Check to be sure that the following items are packed with your Plasma panel. 1 UNIT Ferrite Core 1UNIT Scart(1 unit) Coaxial Cable 2 UNITS AC Cable 1 UNIT 3UNITS Place the small ferrite cores in the speaker... -
Page 8: Optional Accessories
Wall Mounting Unit Note The following items are optional accessories. Refer purchasing optional accessories from Daewoo Electronics Local retailer or the retailer from where you purchased the unit. DT-P20J - Speaker Main Unit Dimension : 100(W) x 628(H) x 83(D) mm 39.37(W) x 24.72(H) x 3.27(D) inch... -
Page 10: Table Of Contents
CONTENTS PREPARATION 4 • Safety Precautions 8 • Checking Accessories 12 • Panel Controls 13 • Remote control 14 • Remote control setup CONNECTION 15 • Antenna Connection 18 • To Watch TV 20 • Install Program 26 • Watching Digital Broadcasts 28 •... -
Page 11: Panel Controls
Front Panel, Back Panel, Remote Control Items having same names on Plasma display and the remote control would function in exactly the same way. Front ON/OFF STAND BY/OPERATE Power control sensor Power Standby: Red - Standby Green - ON Power button Rear DVI-D INPUT DVI-D... -
Page 12: Remote Control
Remote Control The number in ( ) indicates the page in which the function of each button is explained in detail. TV/VCR/DVD/SAT/CATV Channel number (0~9) Use to select channel directly 0~9 RECALL Indicates the current state and resolution. Use this function to make video input selection. It changes in the following sequence TV ->... -
Page 13: Remote Control Setup
• As the device is turned off, press the flickering device selection button of the remote control once. Then the lamp of the button will be turned off. • Now, the setting-up of the device can be controlled by Daewoo PDP remote control. VCR (STANDARD : 002) -
Page 14: Antenna Connection
Indoor Antenna Connection WHEN THE IMAGE IS NOT CLEAR Unclear screen image and bad reception may be caused by wrong antenna connection. Be sure to check its direction or installing place. 1. Connect the back of the TV set. Antenna Connection Antenna Input... - Page 15 CTV Antenna Connection TV Antenna installation may be found in most. When a coaxial cable is used Plug the coaxial cable to the antenna socket, and fix it firmly. It is recommended to use the provided coaxial cable. ANT/CABLE 1 Provided coaxial cable When a feeder cable is used ANT/CABLE 1...
-
Page 16: Outdoor Antenna Connection
Outdoor Antenna Connection Outdoor Antenna connection-such as VHF or/and UHF-may be necessary for installation at private houses Single Antenna Connection. VHF Antenna UHF Antenna ANT/CABLE 1 Separate Antenna Connection. ANT/CABLE 1... -
Page 17: To Watch Tv
To Watch TV - The buttons on the keypad in the PDP unit, which have the same name as those on the remote controller, perform the same function as the remote controller. Press the “ON/OFF” button of the PDP unit. •The “... -
Page 18: Adjust Volume
Press the “ON/OFF” button. • Press the “ON/OFF” button of the PDP unit. ON/OFF • The LED of the PDP unit turns on red colour. • Press the “ PR ” , power button of the remote control, or any button on the keypad of the PDP unit. -
Page 19: Install Program
Auto Setup - This is the function for the TV to memorise the broadcasting channels. If the Auto Setup is done, you can simply find out programs with “ PR ” buttons and so need not to select programs by pressing each program number. - Up to 100 TV stations can be stored in this set by programme numbers (0 to 99). - Page 20 Select the “Auto Setup”. • Select the “Auto Setup” with the “ PR ” button. • Then press the “ VOL ” button. MENU Select the “Country”. Select the “Search”. • Press the “VOL ” key to start searching. • Then it automatically searches channels as in the right.
-
Page 21: Deleting The Program
Edit VCR/DVD SAT CATV RECALL STILL MULTIMEDIA MENU SLEEP PICT. SOUND MODE MODE I-II F.R/SLOW PLAY F.F/SLOW STOP OPEN/ PREV CLOSE NEXT PAUSE Deleting the program. • Place the selection bar in the program that you want to delete using the “... -
Page 22: Manual Setup
Press the Number buttons(0~9) or the “ VOL ” button to select a program number you want. MENU Find the desired channel. • Using “ VOL ” button or number • By pressing red teletext button, you can MENU Name the Program. •... - Page 23 Manual Setup VCR/DVD SAT CATV RECALL STILL MULTIMEDIA MENU SLEEP PICT. SOUND MODE MODE I-II F.R/SLOW PLAY F.F/SLOW STOP OPEN/ PREV CLOSE NEXT PAUSE Check the System and Fine Tune. • You can select the country with the "System" function. However, if you had Auto Setup previously, the country of the "System"...
-
Page 24: Fine Tune
- If you are unable to get a good picture or sound because of a poor signal reception, it is possible Move the selection bar to Fine Tune and press the “ VOL ” buttons to activate Fine Tune up or down. MENU Note that it operates while the “... -
Page 25: Watching Digital Broadcasts
Watching Digital Broadcasts Watching Digital Broadcasts • To watch digital broadcasts: - Purchase a separate digital Broadcasting Receiver(SET-TOP BOX) - Connect the PDP to a Digital Broadcasting Receiver as shown right. VCR/DVD SAT CATV RECALL STILL MULTIMEDIA MENU SLEEP PICT. SOUND MODE MODE... -
Page 26: Input Select
Input Select • Select [Component 1 or Component 2] by MULTIMEDIA pressing the “Multimedia” button of the Remote Control or using the “INPUT SELECT” button of the PDP unit. • Each time you press the “Multimedia” button, different input modes appear. The sequence is as follows: Select a Desired Channel and Function NOTES:... -
Page 27: Watching Cable Broadcasts
Watching Cable Broadcasts Watching Cable Broadcasts • To watch cable broadcasts, subscribe to your local Cable TV Broadcasting, and then connect a cable Broadcasting Receiver TV to the PDP as shown right. VCR/DVD SAT CATV RECALL STILL MULTIMEDIA MENU SLEEP PICT. - Page 28 Input Select • Select [AV 1(Scart), AV 2(Scart) or AV3(S-Video)] by pressing the ] button of the Remote Control or the "INPUT SELECT" Key in KeyPad of the PDP unit. • Each time you press the [ button, different input modes appear. The sequence is as follows: Select a Desired Program and Function NOTES:...
-
Page 29: Watching Satellite Broadcasts
Watching Satellite Broadcasts Watching Satellite Broadcasts • To watch satellite broadcasting, subscribe to Digital Satellite Broadcasting, then connect satellite Broadcasting Receiver to the PDP as shown right. VCR/DVD SAT CATV RECALL STILL MULTIMEDIA MENU SLEEP PICT. SOUND MODE MODE I-II F.R/SLOW PLAY F.F/SLOW... - Page 30 Input Select • Select [AV 1(Scart), AV 2(Scart) or AV3(S-Video)] by pressing the [ button of the Remote Control or the "INPUT SELECT" Key in KeyPad of the PDP unit. • Each time you press the [ different input modes appear. The sequence is as follows: Select a Desired Program and Function ] button,...
-
Page 31: Watching A Dvd Image
Watching a DVD Image Watching a DVD Image • Component Input is set to 480i and 480p mode. • Connect the cable from the DVD Video Output (Y, Pb/Cb, Pr/Cr) to the Component Input at the back of PDP, and connect the cable from DVD Audio output (Left, Right) - Page 32 Input Select • Select [Component 1 or Component 2, MULTIMEDIA AV1(Scart), AV2(Scart) or AV3(S-Video)] by pressing the “MULTIMEDIA” or “ of the Remote Control or the "INPUT SELECT" Key in KeyPad of the PDP unit. • Each time you press the “MULTIMEDIA” or “...
-
Page 33: Watching A Vcr Image
Watching a VCR Image Watching a VCR Image • Video can use either the video terminal or the S-video terminal. VCR/DVD SAT CATV RECALL STILL MULTIMEDIA MENU SLEEP PICT. SOUND MODE MODE I-II F.R/SLOW PLAY F.F/SLOW STOP OPEN/ PREV CLOSE NEXT PAUSE Connect a VCR to the PDP. - Page 34 Input Select • Select [AV 1(Scart), AV 2(Scart) or AV 3(S-Video)] by pressing the [ button of the Remote Control or the "INPUT SELECT" Key in KeyPad of the PDP unit. • Each time you press the [ different input modes appear. The sequence is as follows: Select a Desired Title and Function NOTES:...
-
Page 35: Watching A Camcorder/Game Console Image
Watching a Camcorder/Game Console Image Watching a Camcorder/Game Console Image • Enjoy images recorded by camcorder or the game console after connecting to the PDP. VCR/DVD SAT CATV RECALL STILL MULTIMEDIA MENU SLEEP PICT. SOUND MODE MODE I-II F.R/SLOW PLAY F.F/SLOW STOP OPEN/... -
Page 36: Select Function
Input Select • Select [AV 1(Scart), AV 2(Scart) or AV 3] by pressing the [ Remote Control or the "INPUT SELECT" Key in KeyPad of the PDP unit. • Each time you press the [ different input modes appear. The sequence is as follows: Select Function NOTES:... -
Page 37: Connecting Pc(15Pin D-Sub
Connecting PC(15pin D-sub) Connecting PC • This product supports resolution of VGA, SVGA, XGA, SXGA. • Before connecting a PC to the PDP, be sure to adjust the resolution of PC. VCR/DVD SAT CATV RECALL STILL MULTIMEDIA MENU SLEEP PICT. SOUND MODE MODE... - Page 38 Press the Power Buttons. • Turn on the PDP and the PC. Input Select MULTIMEDIA Enjoy Dynamic Ultra Screen Monitor by Using PC’s Keyboard or Mouse. NOTES: 1) The resolution of the PC monitor is the best at 640 x 480 (VGA). 2) If there is a [Vertical Frequency]setting menu in the [Display] Menu of the PC, adjust the frequency to 60Hz.
-
Page 39: Connecting Pc(Dvi
Connecting PC(DVI) Connecting PC • This product supports resolution of VGA, SVGA, XGA, SXGA. • Before connecting a PC to the PDP, be sure to adjust the resolution of PC. • This product is supported by Plug and Play only at DVI. VCR/DVD SAT CATV RECALL... - Page 40 Press the Power Buttons. • Turn on the PDP and the PC. Input Select MULTIMEDIA Enjoy Dynamic Ultra Screen Monitor by Using PC’s Keyboard or Mouse. NOTES: 1) The resolution of the PC monitor is the best at 640 x 480 (VGA). 2) If there is a [Vertical Frequency]setting menu in the [Display] Menu of the PC, adjust the frequency to 60Hz.
-
Page 41: Pc And Dvi Input Resolution Available In Pdp
PC and DVI Input Resolution Available in PDP • Depending on graphic card, problems like no signal detected or line noises can happen. If these problems happen, contact the graphic card company for help. Resolution H Freq. (KHz) 640x400 640x480 720x400 800x600 1024x768... -
Page 42: Selecting Picture Mode
Selecting Picture Mode • Press the [PICTURE MODE] on the PICT Remote Control. MODE • While pressing the [PICTURE MODE] for the first time, the current PICTURE MODE will be displayed. Each Press of the Button Will Select One of Four Picture Modes. PICT MODE Normal... -
Page 43: Customising Picture
Customising Picture Customising Picture • You can adjust the colour tone and brightness to your preference. VCR/DVD SAT CATV RECALL STILL MULTIMEDIA MENU SLEEP PICT. SOUND MODE MODE I-II F.R/SLOW PLAY F.F/SLOW STOP OPEN/ PREV CLOSE NEXT PAUSE Press the MENU Button. •... - Page 44 Select User Mode Adjustments • While you are in [Picture Mode – User], press the “ MENU Picture Condition Adjustments NOTES: 1) While you are in the PC or DVI INPUT mode, you can only adjust brightness, contrast, sharpness and colour temperature. 2) When you adjust Brightness, Contrast, and Colour in DTV mode or adjust Brightness and Contrast in PC and DVI mode, the picture is adjusted finely.
-
Page 45: Adjusting Screen Size (Component, Av, Tv)
Adjusting Screen Size (Component, AV, TV) Adjusting with Screen Size button • You can adjust screen size or aspect ratio as desired. VCR/DVD SAT CATV RECALL STILL MULTIMEDIA MENU SLEEP PICT. SOUND MODE MODE I-II F.R/SLOW PLAY F.F/SLOW STOP OPEN/ PREV CLOSE NEXT... - Page 46 Press the MENU Button. • Press the [MENU] button on the Remote Control. MENU Select “Screen”. • Press the MENU Select the Screen Size. • Press the Volume “ VOL ” buttons to select “Screen Size”. MENU Mode Normal Brightness Picture Contrast Sound...
-
Page 47: Adjusting Screen Position And Size
Adjusting Screen Size (PC, DVI) Adjusting Screen Position and Size • You can adjust the screen position and size as desired. VCR/DVD SAT CATV RECALL STILL MULTIMEDIA MENU SLEEP PICT. SOUND MODE MODE I-II F.R/SLOW PLAY F.F/SLOW STOP OPEN/ PREV CLOSE NEXT PAUSE... - Page 48 Press the Volume “ VOL ” Buttons. • Press the Volume “ VOL ” buttons to enter the sub menu “Screen”. • While you are in ‘Screen’ mode, press the “ ” or “ MENU item, and then, adjust the value by pressing the “...
-
Page 49: Enlarging Screen Size
Enlarging Screen Size Enlarging Screen Size • You can view enlarged size of the screen with this function VCR/DVD SAT CATV RECALL STILL MULTIMEDIA MENU SLEEP PICT. SOUND MODE MODE I-II F.R/SLOW PLAY F.F/SLOW STOP OPEN/ PREV CLOSE NEXT PAUSE Press the “ZOOM+”... - Page 50 Move the Screen Position. • While you are in the ‘Zoom’ mode, press the “ VOL ” buttons to move screen stepwise up/down and left/right, respectively. MENU NOTES: 1) When the screen is enlarged, the pixel of the screen can become thick and dim.
-
Page 51: Watching A Still Image
Watching a STILL Image Watching a Still Image • You can view still images with this function. However, displaying the same images such as still images for a long time may cause image burn. VCR/DVD SAT CATV RECALL STILL MULTIMEDIA MENU SLEEP PICT. -
Page 52: Adjusting Auto Sound Mode
Select “SOUND MODE”. • Press the “SOUND MODE” on the SOUND Remote Control. MODE • While pressing the “SOUND MODE” for the first time, the current Sound Mode will be displayed. Every Press of the Button Changes Modes. SOUND MODE Normal Movie * Normal : Suitable for watching any motion picture... -
Page 53: Customising Sound Mode
Customising Sound Mode Customising Sound Mode • This feature allows the user to adjust for his preference. VCR/DVD SAT CATV RECALL STILL MULTIMEDIA MENU SLEEP PICT. SOUND MODE MODE I-II F.R/SLOW PLAY F.F/SLOW STOP OPEN/ PREV CLOSE NEXT PAUSE Press the MENU Button. •... -
Page 54: Language Selection
Select the Effect Mode. • Select [Effect] by pressing the select ON/OFF by pressing the “VOL ” button. • [Effect]: Used to emphasize stereo effect. MENU Select the Sound Mode. • Select the Sound Mode by pressing the then adjust it by pressing the “ VOL ” buttons. MENU Normal Movie... -
Page 55: Selecting Input Signal
Selecting INPUT SIGNAL INPUT SIGNAL • Used to select INPUT signal of external device connected to the PDP. Press the “MULTIMEDIA” or “ • Press the “MULTIMEDIA” or “ Remote Control or the PDP Display to select desired input signal. •... - Page 56 • “ ” button • “ MULTIMEDIA” button Component1 NOTES: 1) If an external device is not connected or INPUT signal is not applied, Warning Message (“No Signal”) would be displayed. 2) In this case, check if external device is connected and/or terminal connection is properly done.
-
Page 57: Checking The Current Input Signal
Checking the Current Input Signal Checking the Current Input Signal • Used to check the INPUT signal mode, resolution, frequency(video only), etc. of the current screen. VCR/DVD SAT CATV RECALL STILL MULTIMEDIA MENU SLEEP PICT. SOUND MODE MODE I-II F.R/SLOW PLAY F.F/SLOW STOP... - Page 58 Press the MENU Button. • The MENU screen will be displayed as below. MENU Press the “ PR ” Button. • Select [Features] by the MENU Select the menu Background. • Select the MENU [Background] by pressing the “VOL • Every press of the “VOL would switch between Translucent/Opaque.
-
Page 59: Menu Background, Language And Child Lock Setting
MENU Background, Language and Child Lock Setting VCR/DVD SAT CATV RECALL STILL MULTIMEDIA MENU SLEEP PICT. SOUND MODE MODE I-II F.R/SLOW PLAY F.F/SLOW STOP OPEN/ PREV CLOSE NEXT PAUSE Select LANGUAGE by using the • Select LANGUAGE by using the •... -
Page 60: Mgdi (Meta Genuine Digital Image)
MGDI (Meta Genuine Digital Image) MGDI is the image enhancement technology of Daewoo Electronics, which provides more clear, Press the MENU Button. • The MENU screen will be displayed as below. MENU Select Features • Select [Features] by the MENU MGDI Demo Setting •... -
Page 61: Auto Power Setting
Auto Power Setting POWER/STANDBY Indicator Front panel LED lights • When the AC power is on : Green. • When the AC power is in the standby mode : Red. VCR/DVD SAT CATV RECALL STILL MULTIMEDIA MENU SLEEP PICT. SOUND MODE MODE I-II... -
Page 62: Time Setting
Press the MENU Button. • The MENU screen will be displayed as below. MENU Select Features MENU Select Time Setting • Enter the sub menu by using the “VOL • Select the [Time setting] with the “ • Enter [Time Setting] by pressing the “VOL ” button. MENU Time Setting Mode... - Page 63 Time Setting Time Setting • The “Current time” must be set up ahead of setting up other time memories. VCR/DVD SAT CATV RECALL STILL MULTIMEDIA MENU SLEEP PICT. SOUND MODE MODE I-II F.R/SLOW PLAY F.F/SLOW STOP OPEN/ PREV CLOSE NEXT PAUSE Off-Time and Wake time setting •...
-
Page 64: Image Sticking Minimisation(Ism)
Press the MENU Button. • The MENU screen will be displayed as below. MENU “ PR ” Press the • Select [Features] by the MENU Select ISM. • Enter the sub menu by using the “VOL • Select the [ISM] by pressing the “ •... -
Page 65: Select Functions
Image Sticking Minimisation(ISM) VCR/DVD SAT CATV RECALL STILL MULTIMEDIA MENU SLEEP PICT. SOUND MODE MODE I-II F.R/SLOW PLAY F.F/SLOW STOP OPEN/ PREV CLOSE NEXT PAUSE Select Functions. • Every press of the “VOL ” button after select function by the ON/OFF. -
Page 66: Initialise Setting
Press the MENU Button. • The MENU screen will be displayed as below. MENU Select Features • Select [Features] by the MENU Initialise Setting Mode Normal Brightness Picture Contrast Sound Colour Sharpness Screen Colour Temp. Normal Features Install Move Select Exit MENU button. - Page 67 Initialise Setting INITIALISATION • Enter the sub Menu by using the “VOL • Select the [Initialise] by pressing the “ press the “VOL • A confirmation message will be displayed. MENU • To perform initialisation, press the “VOL selecting [YES] by the “ •...
-
Page 68: Setting Sleep Timer
Press the “SLEEP” Button. • Press the “SLEEP” button on the Remote Control. • Pressing the “SLEEP” button first time will display the current setting for SLEEP TIMER. • To cancel the SLEEP TIMER, press the “SLEEP” button SLEEP to select ‘OFF’. Sleep Timer off Sleep Timer 15 Sleep Timer 30... -
Page 69: Teletext
VCR/DVD SAT CATV RECALL STILL MULTIMEDIA MENU SLEEP PICT. SOUND MODE MODE I-II F.R/SLOW PLAY F.F/SLOW STOP OPEN/ PREV CLOSE NEXT PAUSE Teletext Switching Teletext ON/OFF • Press the Text button ( ) The index page or the page viewed last will appear. Press the Text button again to return to the TV mode. - Page 70 Calling Up Subpage Directly • Pressing the Subpage( ) button. The subpage number is displayed at the bottom of the screen. To change the subpage press the Red(-) / Green(+) buttons. Enter the subpage number that you want to call up with the Page selector button 0~9, for example, the 2nd page, sequence 0002.
-
Page 71: Before Requesting Service
Before Requesting Service Before requesting for service, check the following points once again. • Remote control does not function properly. • Check for any obstacle between the Remote Control and the Display. • Check for dead batteries and incorrect battery orientation. •... -
Page 72: Specifications
SPECIFICATIONS DISPLAY UNIT Diagonal Size 106cm (42 ) Screen Aspect Ratio 16 : 9 System PAL B/G, I/I, SECAM B/G, D/K, L/L’ Display Resolution 853(H) 480(V) dots Pixel Pitch 1.08(H) 1.08(V) mm Dimension 1044(W) 631(H) 89(D)mm 41.10(W) 24.84(H) 3.50(D)inch Weight 30kg (66.13Lbs) Power Requirement 100-240V~, 50/60Hz...
Need help?
Do you have a question about the DT- 4280NH and is the answer not in the manual?
Questions and answers