
Related Manuals for RHINO 4x4 RPD3D-JL


Summary of Contents for RHINO 4x4 RPD3D-JL
- Page 1 . r h i n o 4 x 4 . c o m . a r Jeep JL / Jeep Gladiator INSTRUCCIONES DE ARMADO RPD3D-JL INSTALLATION INSTRUCTION MANUAL RPD3D-JL IND ARG I N D U S T R I A A R G E N T I N A...
- Page 3 Before commencing with the installation it is important that you read and understand these installation instructions, if you need any technical advice please contact your closest Rhino 4x4 Dealer WELCOME TO THE RHINO 4X4 TEAM! ESPAÑOL Gracias por elegir equipar su vehiculo con nuestro producto.
- Page 4 BLOQUE I : PREPARAR SOPORTES DEL CHASIS BLOCK I: PREPARE CHASSIS'S BRACKETS STEP 1 PASO 1 Antes de sacar el paragolpes original del vehículo Before you remove the original bumper, you must asegurarse desconectar componentes disconnect electric components (foglights, parking eléctricos(faros antiniebla, sensores...
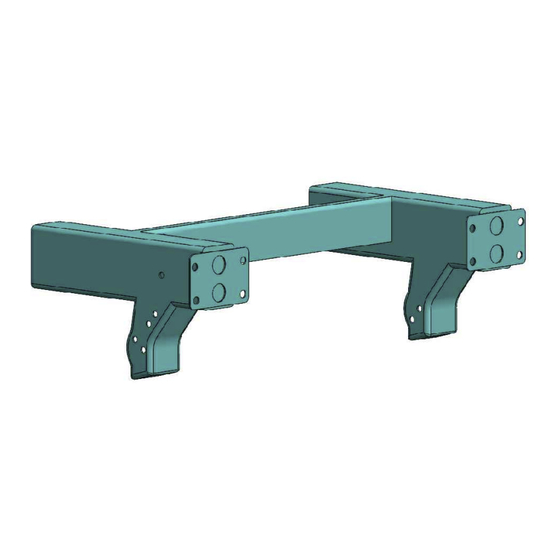
- Page 5 STEP 2: PASO 2: Fit the left and rigth Rhino bumper mounting brackets Montar las placas laterales izquierda y derecha del on the chassis's sides as shown below. Place the bumper Rhino en las puntas del chasis tal como lo threaded plate inside the chassis and tight the bolts.
- Page 6 STEP 3: PASO 3: Colocar soportes de faros izquierda y derecha en las Install the winch craddle on the front of the puntas del chasis, colocar placa roscada en el interior chassis. If your vehicle is Rubicon model mount the del chasis, ajustar tornillos con soportes laterales.
- Page 7 STEP 4: PASO 4: Place the led lights on the brackest inside the Colocar rodillo malacate en la bandeja, ajustar bumper`s center. tornillos. KIT FIJACION / FASTENING KIT AR 10-1.5 x 30 Arandela / Washer D10 Tuerca / Nut 10-1.5 PASO 4 / STEP 4...
- Page 8 STEP 5: PASO 5: Place the bumper's center on the brackets from step Alinear bandeja portamalacate con el chasis, ajustar con tornillos originales el frente y en los laterales en el interior del chasis. KIT FIJACION / FASTENING KIT TORNILLO ORIGINAL AR 10-1.5 x 30 PASO 5 / STEP 5...
- Page 9 STEP 6 PASO 6 Mount the front skidplate aligning the holes with Colocar punteras menores en cada extremo de la brackets installed in step 2 . Tight all the bolts. carcasa centrar. Ajustar tornillos KIT FIJACION / FASTENING KIT AR 10-1.5 x 20 Arandela / Washer D10 Tuerca / Nut 10-1.5 PASO 6 / STEP 6...
- Page 10 STEP 7 NUMBER PLATE BRACKET: PASO 7 PORTAPATENTE: An optional number plate bracket must be installed El portapatentes debe ser instalado en la carcasa to the centre insert as per with the fastening kit central, con el kit de fijación provisto. Por favor provided.
- Page 11 STEP 8: PASO 8: Mount the front skidplate aligning the holes with Colocar el centro y la barra portafocos sobre las brackets installed in step 2 . Tight all the bolts. placas del paso 3. KIT FIJACION / FASTENING KIT AR 10-1.5 x 30 Arandela / Washer D10 Tuerca / Nut 10-1.5...
- Page 12 STEP 9: PASO 9: Mount the front skidplate aligning the holes with Colocar el chapon alineando las perforaciones con los brackets installed in step 2 . Tight all the bolts. soportes instalados en el paso 2. Ajuste los tornillos KIT FIJACION / FASTENING KIT Allen frez 8-1.25x25 Llave portatuerca 8-1.25...
- Page 13 STEP 10: PASO 10: Mount the front skidplate aligning the holes with Colocar tapas en punteras, luego cada una en cada brackets installed in step 2 . Tight all the bolts. extremo del centro colocar tornillos por los huecos y ajustar.
- Page 14 Jeep JL / Jeep Gladiator ¡Buen Trabajo! TERMINADO/FINISH Well done!
- Page 15 AUTOPERFORANTE / LLAVE PORTATUERCA 30u. AR 10-1.5 X 30 SELFDRILLING T1 8x 1/2" 8-1.25 18u. ARANDELA / WASHER D 10 EX 6-100 x 20 AR 10-1.5 X 20 18u. ARANDELA / WASHER D6 TUERCA / NUT 10-1.50 TORNILLO ORIGINAL PLANCHUELA ROSCADA/ ALLEN FREZ 8-1.25x25 TUERCA / NUT 6-100 14u.
- Page 16 w w w . r h i n o 4 x 4 . c o m . a r MAIN OFFICE: AV. SABATTINI 2053 - CP X5014AUB - CORDOBA - ARGENTINA PHONE NUMBER: +54 0351 4563954 BRANCH OFFICE: AV. COLON 3655 - CP X5003DDH - CORDOBA - ARGENTINA PHONE NUMBER: +54 0351 4880522 "Designed and manufactured in Argentina"...
Need help?
Do you have a question about the RPD3D-JL and is the answer not in the manual?
Questions and answers