Table of Contents
Advertisement
Quick Links
Advertisement
Table of Contents

Subscribe to Our Youtube Channel
Related Manuals for BOS Suspension Stoy 3


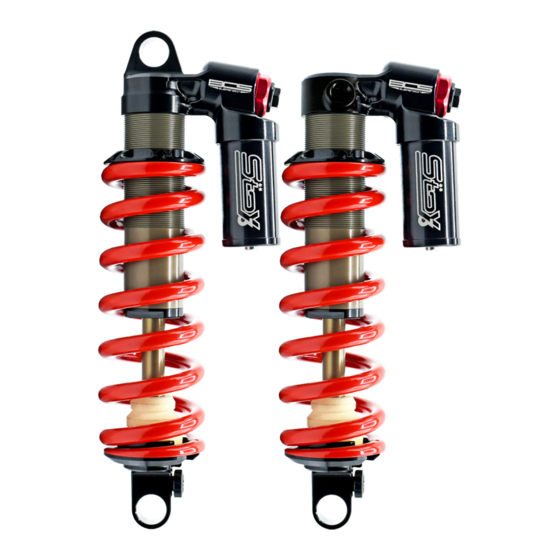
Summary of Contents for BOS Suspension Stoy 3
- Page 1 SERVICE MANUAL WWW.BOS-SUSPENSION.COM D R I V E N B Y P E R F O R M A N C E...
- Page 2 You have just purchased a product from BOS Suspension. Welcome to our big family! We have a common passion, MTB and it has led us to design neat and high-end products designed for your discipline: DH, Enduro & All Mountain.
-
Page 3: Table Of Contents
It is compulsory to produce the purchase invoice. here, the warranty is deemed to be amendable to comply Otherwise, the warranty will not apply. Sending the product with it. is subject to the prior agreement of the BOS SUSPENSION a�er-sales service department. -
Page 4: Safety Instructions
A�er installa�on, test your vehicle at low speed to make sure that it works properly. YOUR SAFETY FIRST When working on a BOS suspension, please wear appropriate safety equipment such as apron, safety gloves and goggles. When handling the suspension oil, please wear nitrile gloves and goggles. CAUTION The operations may impair your safety or cause damage to your suspension. -
Page 5: Tools
CLEANLINESS When servicing your BOS suspension, make sure that you are working in condi�ons that will not affect performance: Work in a dust-free environment Work at a clean and organised worksta�on Use so� aluminium jaws to protect the equipment when using a vice. -
Page 6: Exploded View
EXPLODED VIEW... -
Page 7: Cleaning
CLEANING Clean your shock with a washing machine if you have one Absolutely prohibited: any aggressive product available. such as degreaser on joints and spherical Otherwise, use the high pressure cleaner and finish cleaning bearing. If you use a high-pressure washer, never with hot water and soap. -
Page 8: Shock Depressurization
DISASSEMBLY SHOCK DEPRESSURIZATION Insert a needle in the valve cap to • Remove the air bleeding srew • drain the piggyback 3mm allen key • Push on the air cap to liberate the • Remove the air cap from the retaining ring piggyback with BOS tool •... -
Page 9: Rod Disassembly
DISASSEMBLY ROD DISASSEMBLY • Unscrew the rod guide • Slowly remove the rod assembly from the body 24mm Flat spanner • Drain the content of the body in an • Screw the floa�ng piston removing oil pan tool on the floa�ng piston •... - Page 10 DISASSEMBLY Remove the compression bloc from • • Unscrew the rod nut and remove all the body the parts from the rod assembly 152017-O-003 : Compression bloc socket 13mm socket Place all the parts on a workbench in the removing order to make sure of their posi�on during assembly Now all the parts are removed from your shock, clean them properly by hand or with an oil cooler.
-
Page 11: Seals Replacement
DISASSEMBLY SEALS REPLACEMENT • Remove the internal seal in the head 2 • Cut the piston guide (2) and remove and replace it them • Remove the external seal from the • Place the new ones compression bloc and replace it •... - Page 12 DISASSEMBLY • Apply white grease on the valve • Change the O-rings 1 and 2 • Put the valve in the tool note 3 • Change the oil seal 3 • Place the tube on the cap • Apply white grease on the 3 seals •...
-
Page 13: Reassembly
DISASSEMBLY REASSEMBLY • Insert the new bumb rubber (1) • Carefully insert the rod guide not to damage the oil seal (2) • Insert the rebound spacer (3), make sure the two holes are posi�oned upwards • Insert the compression top plate •... - Page 14 DISASSEMBLY • Insert the floa�ng piston and push it • Insert the Valve cap in the piggyback to the end • Place the retaining ring correctly • Remove the tool 150807-O-035 : Floating piston removing tool 150707-O-030 : Shock corkscrew Be careful not to lock up air between the oil and the floa�ng piston •...
- Page 15 ASSEMBLY • Slowly insert the rod assembly in the • Move the rod back and forth to expel body the air trapped in the oil. • Maintain the rod in extended • Fill the canister with 8bars of posi�on, with the rebound spacer nitrogen immersed flush with the oil •...
- Page 16 10 clicks 10 clicks 10 clicks Congratula�ons, you have just completed the overall service of your BOS STOY3. Ride slowly at first to make sure your bike and BOS shock are working properly. Thank you again for choosing BOS Suspension products.
-
Page 18: Settings Table
SETTINGS TABLE High speed Low speed Land type REBOUND COMPRESSION COMPRESSION (clicks) (clicks) (clicks) -
Page 19: Service Routine
SERVICE ROUTINE MAINTENANCE SERVICE TYPE DATE HOURS/KM REMARKS (DD/MM/YY) - Page 20 4 Impasse Léonce Couture F 31200 Toulouse, FRANCE +33 (0)5 34 25 33 66 sales@bos-suspension.com w w w.bos-suspension.com...
Need help?
Do you have a question about the Stoy 3 and is the answer not in the manual?
Questions and answers