
Related Manuals for Daikin VRV Aurora RELQ-TATJU Series


Summary of Contents for Daikin VRV Aurora RELQ-TATJU Series
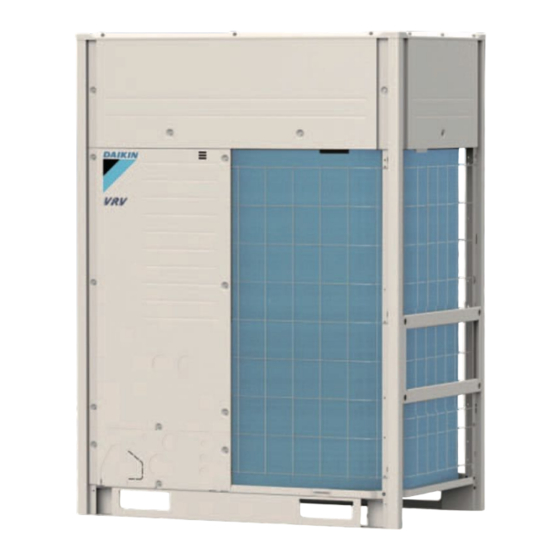
- Page 1 EDUS371705A-N Aurora Series Installation RELQ-TATJU, 208 / 230 V, 60 Hz RELQ-TATJU, 208 / 230 V, 60 Hz RELQ-TAYDU, 460 V, 60 Hz RELQ-TAYDU, 460 V, 60 Hz RELQ-TAYCU, 575 V, 60 Hz RELQ-TAYCU, 575 V, 60 Hz...
-
Page 3: Table Of Contents
EDUS371705A-N Installation of Outdoor Units 1. Features and Benefits ................2 2. Center of Gravity ..................3 3. Foundation Drawing ...................4 4. REFNET Pipe System................5 4.1 Layout Example.................... 5 4.2 REFNET Joints and Headers ............... 7 5. REFNET Joint and Header.................9 5.1 REFNET Joint (Branch Kit) ................9 5.2 REFNET Header (Branch Kit) .............. -
Page 4: Features And Benefits
• First Air Cooled VRV system to deliver heating down to −22°F (−30°C) as standard • Daikin’s patented inverted based vapor injection compressor delivers high heating capacity of up to 100% at 0°F (−18°C), up to 85% at −13°F (−25°C) and up to 60% at −22°F(−30°C) •... -
Page 5: Center Of Gravity
EDUS371705A-N Center of Gravity 2. Center of Gravity RELQ72TATJU / RELQ72TAYDU / RELQ72TAYCU 4D107384 RELQ96TATJU / RELQ96TAYDU / RELQ96TAYCU RELQ120TATJU / RELQ120TAYDU / RELQ120TAYCU 4D107385 Installation of Outdoor Units... -
Page 6: Foundation Drawing
Foundation Drawing EDUS371705A-N 3. Foundation Drawing RELQ72TATJU / RELQ96TATJU / RELQ120TATJU RELQ72TAYDU / RELQ96TAYDU / RELQ120TAYDU RELQ72TAYCU / RELQ96TAYCU / RELQ120TAYCU Installation of Outdoor Units... -
Page 7: Refnet Pipe System
2. Special purpose REFNET pipe components must be used for all the pipe work. For further details concerning choosing components, see REFNET and Piping Selection Rules. 3. The Daikin REFNET kits are supplied with insulation intended to fit over the main body of the REFNET joint after installation of the REFNET kit is complete. - Page 8 REFNET Pipe System EDUS371705A-N 4.1.2 Equivalent Piping Length of Joints and Headers (Reference) φ 1/4 in. φ 3/8 in. φ 1/2 in. φ 5/8 in. φ 3/4 in. φ 7/8 in. φ 1 in. φ 1-1/8 in. φ 1-1/4 in. φ...
-
Page 9: Refnet Joints And Headers
EDUS371705A-N REFNET Pipe System REFNET Joints and Headers 4.2.1 REFNET Joints For gas and liquid branch pipes Make sure that all branch pipes are fitted such that they branch either horizontally or vertically. When the size of the selected field piping is different from that of branch pipe then the connecting section should be cut with a pipe cutter as shown in the figure below. - Page 10 REFNET Pipe System EDUS371705A-N When the number of indoor units to be connected to the branch pipes is less than the number of branch pipes available for connection then cap pipes should be fitted to the surplus branches. When the size of the selected field piping is different from that of branch pipe then the connecting section should be cut with a pipe cutter as shown in the figure below.
-
Page 11: Refnet Joint And Header
EDUS371705A-N REFNET Joint and Header 5. REFNET Joint and Header REFNET Joint (Branch Kit) KHRP25A22T9 Installation of Outdoor Units... - Page 12 REFNET Joint and Header EDUS371705A-N KHRP25A33T9 Installation of Outdoor Units...
- Page 13 EDUS371705A-N REFNET Joint and Header KHRP25M72TU9 Installation of Outdoor Units...
- Page 14 REFNET Joint and Header EDUS371705A-N KHRP25M73TU9 Installation of Outdoor Units...
- Page 15 EDUS371705A-N REFNET Joint and Header KHRP26A22T9 Installation of Outdoor Units...
- Page 16 REFNET Joint and Header EDUS371705A-N KHRP26A33T9 Installation of Outdoor Units...
- Page 17 EDUS371705A-N REFNET Joint and Header KHRP26M72TU9 Installation of Outdoor Units...
- Page 18 REFNET Joint and Header EDUS371705A-N KHRP25A22T9 / KHRP25A33T9 C: 3P203737-1 Installation of Outdoor Units...
- Page 19 EDUS371705A-N REFNET Joint and Header C: 3P203737-1 Installation of Outdoor Units...
- Page 20 REFNET Joint and Header EDUS371705A-N C: 3P203737-1 Installation of Outdoor Units...
- Page 21 EDUS371705A-N REFNET Joint and Header C: 3P203737-1 Installation of Outdoor Units...
- Page 22 REFNET Joint and Header EDUS371705A-N KHRP26A22T9 / KHRP26A33T9 C: 2P182411-1 Installation of Outdoor Units...
- Page 23 EDUS371705A-N REFNET Joint and Header C: 2P182411-1 Installation of Outdoor Units...
- Page 24 REFNET Joint and Header EDUS371705A-N C: 2P182411-1 Installation of Outdoor Units...
- Page 25 EDUS371705A-N REFNET Joint and Header C: 2P182411-1 Installation of Outdoor Units...
- Page 26 REFNET Joint and Header EDUS371705A-N KHRP25M72TU9 / KHRP25M73TU9 / KHRP26M72TU9 3P161697-1D Installation of Outdoor Units...
- Page 27 EDUS371705A-N REFNET Joint and Header C: 3P161697-1D Installation of Outdoor Units...
- Page 28 REFNET Joint and Header EDUS371705A-N 3P161697-1D Installation of Outdoor Units...
- Page 29 EDUS371705A-N REFNET Joint and Header 3P161697-1D Installation of Outdoor Units...
-
Page 30: Refnet Header (Branch Kit)
REFNET Joint and Header EDUS371705A-N REFNET Header (Branch Kit) KHRP25M33H9 Installation of Outdoor Units... - Page 31 EDUS371705A-N REFNET Joint and Header KHRP25M72H9 Installation of Outdoor Units...
- Page 32 REFNET Joint and Header EDUS371705A-N KHRP25M73HU9 Installation of Outdoor Units...
- Page 33 EDUS371705A-N REFNET Joint and Header KHRP26M22H9 Installation of Outdoor Units...
- Page 34 REFNET Joint and Header EDUS371705A-N KHRP26M33H9 Installation of Outdoor Units...
- Page 35 EDUS371705A-N REFNET Joint and Header KHRP26M72H9 Installation of Outdoor Units...
- Page 36 REFNET Joint and Header EDUS371705A-N KHRP25M33H9 / KHRP25M72H9 C: 3P113623-1D Installation of Outdoor Units...
- Page 37 EDUS371705A-N REFNET Joint and Header C: 3P113623-1D Installation of Outdoor Units...
- Page 38 REFNET Joint and Header EDUS371705A-N C: 3P113623-1D Installation of Outdoor Units...
- Page 39 EDUS371705A-N REFNET Joint and Header C: 3P113623-1D Installation of Outdoor Units...
- Page 40 REFNET Joint and Header EDUS371705A-N C: 3P113623-1D Installation of Outdoor Units...
- Page 41 EDUS371705A-N REFNET Joint and Header KHRP26M22H9 / KHRP26M33H9 / KHRP26M72H9 C: 3P113151-1C Installation of Outdoor Units...
- Page 42 REFNET Joint and Header EDUS371705A-N C: 3P113151-1C Installation of Outdoor Units...
- Page 43 EDUS371705A-N REFNET Joint and Header C: 3P113151-1C Installation of Outdoor Units...
- Page 44 REFNET Joint and Header EDUS371705A-N C: 3P113151-1C Installation of Outdoor Units...
- Page 45 EDUS371705A-N REFNET Joint and Header C: 3P113151-1C Installation of Outdoor Units...
- Page 46 REFNET Joint and Header EDUS371705A-N KHRP25M73HU9 C: 3P185500-1 Installation of Outdoor Units...
- Page 47 EDUS371705A-N REFNET Joint and Header 3P185500-1 Installation of Outdoor Units...
- Page 48 REFNET Joint and Header EDUS371705A-N 3P185500-1 Installation of Outdoor Units...
- Page 49 EDUS371705A-N REFNET Joint and Header 3P185500-1 Installation of Outdoor Units...
-
Page 50: Outdoor Unit Multi Connection Piping Kit
REFNET Joint and Header EDUS371705A-N Outdoor Unit Multi Connection Piping Kit BHFP26P100U Installation of Outdoor Units... - Page 51 EDUS371705A-N REFNET Joint and Header Installation of Outdoor Units...
- Page 52 REFNET Joint and Header EDUS371705A-N Installation of Outdoor Units...
- Page 53 EDUS371705A-N REFNET Joint and Header C: 1P392285-1B Installation of Outdoor Units...
- Page 54 REFNET Joint and Header EDUS371705A-N C: 1P392285-1B Installation of Outdoor Units...
- Page 55 EDUS371705A-N REFNET Joint and Header C: 1P392285-1B Installation of Outdoor Units...
- Page 56 REFNET Joint and Header EDUS371705A-N C: 1P392285-1B Installation of Outdoor Units...
- Page 57 EDUS371705A-N REFNET Joint and Header C: 1P392286-1A Installation of Outdoor Units...
- Page 58 REFNET Joint and Header EDUS371705A-N C: 1P392286-1A Installation of Outdoor Units...
- Page 59 EDUS371705A-N REFNET Joint and Header 1P392286-1A Installation of Outdoor Units...
- Page 60 REFNET Joint and Header EDUS371705A-N 1P392286-1A Installation of Outdoor Units...
-
Page 61: Caution Label
EDUS371705A-N Caution Label 6. Caution Label RELQ72-120TATJU / RELQ72-120TAYDU / RELQ72-120TAYCU 3P487082-1 Installation of Outdoor Units... - Page 62 Caution Label EDUS371705A-N 1P385984-1A Installation of Outdoor Units...
- Page 63 EDUS371705A-N Caution Label 1P385984-1A Installation of Outdoor Units...
- Page 64 Caution Label EDUS371705A-N 1P385984-1A Installation of Outdoor Units...
- Page 65 EDUS371705A-N Caution Label 1P385984-1A Installation of Outdoor Units...
- Page 66 Caution Label EDUS371705A-N 1P385984-1A Installation of Outdoor Units...
- Page 67 EDUS371705A-N Caution Label 1P385984-1A Installation of Outdoor Units...
- Page 68 Caution Label EDUS371705A-N 3P385987-1A Installation of Outdoor Units...
- Page 69 EDUS371705A-N Caution Label 3P385987-1A Installation of Outdoor Units...
- Page 70 Caution Label EDUS371705A-N Installation of Outdoor Units...
-
Page 71: Appendix 1. Installation Manual Relq-Tatju / Relq-Taydu / Relq-Taycu
EDUS371705A-N Appendix 1. Installation Manual RELQ-TATJU / RELQ-TAYDU / RELQ-TAYCU 1. Installation Manual ..................i RELQ-TATJU / RELQ-TAYDU / RELQ-TAYCU... -
Page 72: Safety Considerations
Installation Manual EDUS371705A-N 1. Installation Manual Safety considerations WARNING Read these Safety considerations for Installation carefully be- work. Installation must be done in accordance with this fore installing an air conditioner or heat pump. After complet- installation manual. Improper installation could result in ing the installation, make sure that the unit operates properly during the startup operation. -
Page 73: Codes And Regulations
EDUS371705A-N Installation Manual CAUTION (c) Near machinery emitting electromagnetic waves. the control system and cause the unit to malfunction. Do not allow children to play on or around the unit or it may result in injury. are handled. Operating the unit in such conditions may result in injury if improperly used. - Page 74 Installation Manual EDUS371705A-N RELQ72TATJU RELQ72TAYDU RELQ72TAYCU RELQ96TATJU RELQ96TAYDU RELQ96TAYCU VRV Aurora Series System air conditioner RELQ120TATJU RELQ120TAYDU RELQ120TAYCU RELQ144TATJU RELQ144TAYDU RELQ144TAYCU Installation Manual RELQ192TATJU RELQ192TAYDU RELQ192TAYCU RELQ240TATJU RELQ240TAYDU RELQ240TAYCU CONTENTS Safety considerations ........i 9.4. Transmission wiring connection procedure ..........20 Codes and Regulations ........ii 9.5.
-
Page 75: Introduction
EDUS371705A-N Installation Manual 1. Introduction 1.1. General information This installation manual concerns the VRV Aurora series, full inverter driven, heat pump system. To install the outdoor unit, the following accessory parts are also required. 1 Refrigerant branch kit. Model name Description (for 3 pipes) (for 2 pipes) -
Page 76: Indoor Capacity Range
Installation Manual EDUS371705A-N 1.3. Indoor capacity range 1.4. Scope of the manual This manual describes the procedures for handling, installing and 1.3.1. Connection Ratio connecting the VRV Aurora series outdoor units. This manual has Connection Ratio = Total capacity index of the indoor units / Capac- been prepared to ensure adequate maintenance of the unit, and it will ity index of the outdoor units provide help in case problems occur. -
Page 77: Overview Of Unit
EDUS371705A-N Installation Manual 3. Overview of unit CAUTION 3.1. Opening the unit Appliance not accessible to the general public, install it in a secured area, protected from easy access. To gain access to the unit, front panels need to be opened as follows: This unit, both indoor and outdoor, is suitable for installation in a com- RELQ72-120T type mercial and light industrial environment. -
Page 78: Weather Related Precautions
When installing in areas where air contains high levels of salt such as near the ocean; Contact your Daikin sales representative for additional precautions. 4.3. Selecting a location in cold climates... -
Page 79: Dimensions And Service Space
EDUS371705A-N Installation Manual 5. Dimensions and service space 5.2. Service space The space around the unit is adequate for servicing and the minimum 5.1. Dimensions of outdoor unit RELQ72-120T type and choose one of the possibilities). 15 17 Unit: in. (mm) RELQ72-120T type Foundation bolt holes 9/16 (15) 7/8 (22.5) oblong holes 4... -
Page 80: Inspecting, Handling And Unpacking The Unit
Installation Manual EDUS371705A-N its original package to prevent damage during transport. <Front side> <Suction side> Service space or more or more 59 in. (1500 mm) 19-5/8 in. (500 mm) In case of an installation site where sides A+B+C+D have obsta- cles, the wall heights of sides A+C have no impact on service space of sides B+D on service space dimensions. -
Page 81: Installing The Unit
EDUS371705A-N Installation Manual 6.4. Installing the unit NOTE There are restrictions on the refrigerant pipe connecting order prevent vibration and noise. between outdoor units in the case of the multi system. NOTE When the installation height of the unit needs to be increased, do not and be sure to waterproof all work. -
Page 82: Refrigerant Pipe Size And Allowable Pipe Length
Installation Manual EDUS371705A-N 7. Refrigerant pipe size and allowable pipe length 7.3. Selection of piping size Determine the proper size referring to following tables and reference 7.1. General information NOTE The refrigerant R410A requires strict cautions for keeping the system clean, dry and tight. -
Page 83: Selection Of Refrigerant Branch Kits
EDUS371705A-N Installation Manual 7.3.2. Piping between refrigerant branch kits or refrigerant branch kits and Branch Selector units: C joint b - see 7.3. Selection of piping size), select the proper branch kit model based on the total capacity of all indoor units connected Choose from the following table in accordance with the indoor unit after the refrigerant branch. -
Page 84: System Piping (Length) Limitations
Installation Manual EDUS371705A-N 7.5. Outdoor unit : Branch Selector unit (multi) : Indoor units (cooling/heating First outdoor unit Outdoor unit selectable) : Branch Selector unit (single) multi connection : Indoor unit (cooling only) piping kit (*1) (*3) REFNET joint (A-E) (*1) “... - Page 85 EDUS371705A-N Installation Manual Actual piping length 7 : a+b+c+ From outdoor unit (*4) to indoor unit (500 m) allowable length multi connection pip- Actual piping length Outdoor unit ing kit to outdoor unit (in a multi system) From outdoor unit to Height difference indoor unit Actual piping length X Height difference between indoor units (H2)
- Page 86 Installation Manual EDUS371705A-N Necessary conditions Upsize the liquid pipes b, c, d, e, f and g in the refrigerant branch kit for the indoor unit beyond 130 ft. (40 m). lows: If upsizing is impossible, the condi- Branch Selector units (B1-B7) 3/8 in.
-
Page 87: Precautions On Refrigerant Piping
EDUS371705A-N Installation Manual 8. Precautions on refrigerant piping Do not allow anything other than the designated refrigerant to get refrigerant gas leaks while working on the unit, ventilate the room thoroughly right away. Use R410A only when adding refrigerant. 1 Refrigerant piping Installation tools: Make sure to use installation tools (gauge manifold, charge hose, 2 Part to be brazed... - Page 88 Installation Manual EDUS371705A-N Use the following procedure to remove the pinched piping: WARNING 1 Remove the valve cover and make sure that the stop valves are fully closed. the stop valves mounting plate with a protective plate to prevent from 1 Service port and service port cover 2 Stop valve...
- Page 89 EDUS371705A-N Installation Manual Only proceed with piping work after considering the limitations on Remove the knockout hole on the bottom frame and lead out the installing listed here and in the chapter 8.2. Connecting the refriger- piping from the bottom frame. delivered with the kit.
-
Page 90: Guidelines For Handling Stop Valve
Installation Manual EDUS371705A-N 2 Installation of the multi connection piping kit. create a rise of 8 in. (200 mm) or more in the suction gas and high/ low pressure gas line within a length of 6.5 ft. (2 m) from the kit. To indoor units Piping between outdoor units >... -
Page 91: Field Wiring
EDUS371705A-N Installation Manual 8.3.2. How to use the stop valve After handling the stop valve, make sure to tighten the stop valve cover securely. For the tightening torque, refer to 8.3.2. How to use Tightening torques the stop valve. Stop Check for refrigerant leaks after tightening the stop valve cover. -
Page 92: Power Circuit, Safety Device And Cable Requirements
Installation Manual EDUS371705A-N Make sure the electrical imbalance ratio is no greater than 2%. If it is 9.2. Wiring connection example for whole system larger than this, the unit’s lifespan will be reduced. code will be displayed on the indoor remote controller. parts (terminal for power wiring, terminal for transmission wiring and ground terminal). -
Page 93: Transmission Wiring Connection Procedure
EDUS371705A-N Installation Manual RELQ72-120T type NOTE Do not connect the power wiring to terminals for the transmission wiring. Doing so would destroy the entire system. Wiring to the indoor unit by way of Branch Selector unit should be wired to F1 and F2 on the outdoor unit’s terminal block (A1P_X1M). The above wiring should be wired using AWG18-16 stranded, non- shielded wiring. -
Page 94: Power Wiring Connection Procedure
Installation Manual EDUS371705A-N CAUTION Be sure to use crimp-style terminal with insulating sleeves for con- Suction gas pipe Power wire Crimp-style terminal High/low pressure gas pipe Liquid pipe Insulation material Insulating sleeve Finishing tape Transmission wiring board. For multi system: Use an appropriate screwdriver for tightening the terminal screws. -
Page 95: Air Tight Test And Vacuum Drying
EDUS371705A-N Installation Manual RELQ72-120T type 10. Air tight test and vacuum drying NOTE Always use nitrogen gas for the air tightness test. Absolutely do not open the stop valve until the main power circuit insulation measurement has been completed. (Measuring after the stop valve is opened will cause the insulation value to drop.) Compressor wiring Gauge manifold... -
Page 96: Pipe Insulation
Installation Manual EDUS371705A-N 11. Pipe insulation NOTE The air-tightness test and vacuum drying should be done using the NOTE service ports of suction gas pipe, high/low pressure gas pipe and Pipe insulation thickness provided below are guidelines only. Pipes must be insulated with the appropriate thickness of insulation per ap- panel of the outdoor unit for details on the location of the service plicable local/state or national codes. -
Page 97: Checking Of Device And Installation Conditions
EDUS371705A-N Installation Manual 12. Checking of device and installation conditions 1 Front panel 2 Inspection door Be sure to check the followings. For those doing electrical work 3 Main printed circuit board with 3 seven-segment display and 3 push buttons 1 Make sure there is no faulty transmission wiring or loosening of a nut. - Page 98 Installation Manual EDUS371705A-N Push BS3 one time; the value which is returned (depending on the nected to the system. Result: mode 1 setting 10 is addressed and selected, return value is monitored information. When no trouble occurs: lighted as indicated (8-10 minutes). To leave the monitoring function, push BS1 one time, you will return to the default situation when shipped from factory.
-
Page 99: Outdoor Unit
EDUS371705A-N Installation Manual 13.2.2. Operating the DIP switches 14.2. Calculating the additional refrigerant charge By operating the DIP switches it is possible to: NOTE What to do with DIP switch DS1 The refrigerant charge of the system must be less than 210 lbs. Cool/Heat selector (refer to the manual of the Cool/ (100 kg). - Page 100 Installation Manual EDUS371705A-N Parameter [D] Indoor unit FXMQ type capacity type Refrigerant 0.06 0.03 0.14 0.29 0.25 0.16 0.33 0.25 0.08 0.00 amount (0.03) (0.014) (0.06) (0.13) (0.11) (0.07) (0.15) (0.11) (0.04) (0.00) (lbs. (kg)/unit) Indoor unit FXFQ type capacity Others type Refrigerant...
-
Page 101: Method For Adding Refrigerant
EDUS371705A-N Installation Manual 14.3. Method for adding refrigerant 14.3.1. Flow chart Step 1 Calculate additional refrigerant charge amount: R (lbs. (kg)) Step 2+3 Close valves C and A Open valve B to the liquid line Disconnect the manifold from the suction gas line and the high/low pressure gas line Step 4a Refrigerant overcharge happened, recover... - Page 102 Installation Manual EDUS371705A-N Measuring instrument NOTE Refrigerant R410A tank (siphon system) If the power of some units is turned off, the charging procedure can- Vacuum pump Charge hose In case of a multiple outdoor system, turn on the power of all out- door units.
-
Page 103: Checks Before Initial Start Up
EDUS371705A-N Installation Manual INFORMATION The refrigerant charge operation will automatically stop within 30 INFORMATION minutes. If charging is not completed after 30 minutes, perform the It is important that all information in this chapter is read sequentially by additional refrigerant charging operation again. Perform the test procedure as described in 15.4.2. - Page 104 Installation Manual EDUS371705A-N 13 Air inlet/outlet Check that the air inlet and outlet of the unit is not obstructed by 1=unit is currently operating under power consumption paper sheets, cardboard, or any other material. limitation 0=unit is currently not operating under power consump- tion limitations Record them on the accessory REQUEST FOR THE INDICATION Power consumption limitation reduces the power consump-...
- Page 105 EDUS371705A-N Installation Manual 15.2.2. Mode 2 If the system needs to run under low noise operation or value is possible. under power consumption limitation conditions when an In general, normal operation can be resumed without special interven- changed. This setting will only be effective when the optional Default value=0.
- Page 106 Installation Manual EDUS371705A-N consumption limitation) Default value=2. If the system always needs to run under power consump- Value Start time automatic low noise [2-26] the level power consumption limitation that will be applied 8:00 p.m. continuously. The level is according to the table. 10:00 p.m.
- Page 107 EDUS371705A-N Installation Manual Default value=1. In case the outdoor unit is installed in the lowest position Default value=1. (indoor units are installed on a higher position than outdoor Value units) and the height difference between the highest indoor Heating comfort setting [2-82] Other changes/limitations to the circuit apply, for more Mild (default)
- Page 108 Installation Manual EDUS371705A-N 15.2.3. Auxiliary heat control 15.2.4. Heat pump lockout New control logic to provide more application options for cold temperature. climates. Outside temperature can now be measured directly from the out- Item Description Increments door unit coil sensor. Below this tempera- VRV IV HR, VRV-S and VRV Cold Climate can also be programed to ture, AUX heater can...
- Page 109 EDUS371705A-N Installation Manual Actions Type Description Heating Thermo-on Heating Thermo-off Field Shorted setting between Aux heater Indoor fan Aux heater Indoor fan Heat-pump heating is always 2-16 = ON locked out (H/L) 2-37 = Mode 1 Mode 1 (H/L) Lockout is controlled by ABC terminals Mode 2 2-37 =...
- Page 110 Installation Manual EDUS371705A-N 15.3. Energy saving and optimum operation The refrigerant temperature is set higher/lower (cooling/heating) compared to basic operation. The focus under high sensible mode Depending on the priority, emphasizes can be put on energy saving is comfort feeling for the customer. or comfort level.
- Page 111 EDUS371705A-N Installation Manual In case of cooling operation the evaporating temperature is allowed Example: Automatic mode during cooling to go down to 43°F (6°C) on temporary base depending on the situation. In case of heating operation the condense temperature is allowed 100% to go up to 115°F (46°C) on temporary base depending on the situ- ation.
-
Page 112: Test Operation
Installation Manual EDUS371705A-N Example: Automatic mode during cooling No matter which control is selected, variations on the behavior of the system are still possible due to protection controls to keep the unit operating under reliable conditions. The intentional target, however, 100% consumption and comfort, depending on the application type. -
Page 113: Malfunction Code List
EDUS371705A-N Installation Manual The test operation is automatically carried out, the outdoor unit INFORMATION display will indicate and the indication Test operation and Under centralized control will display on the user interface of put may be higher. This phenomenon originates from the compressor indoor units. - Page 114 Installation Manual EDUS371705A-N Malfunction code Contents Solution Main Sub code code Master/sub 1 01/03 • High pressure switch is activated. • Check stop valves situation or abnormalities in (S1PH)-A1P (X2A) (fi eld) piping or airfl ow over air cooled coil. •...
- Page 115 EDUS371705A-N Installation Manual Malfunction code Contents Solution Main Sub code code Master/sub 1 01/02 Temperature sensor malfunction Check connection on printed circuit board or actuator. (R3T)-A1P (X30A) 06/07 Temperature sensor malfunction Check connection on printed circuit board or actuator. (R7T)-A1P (X30A) 18/19 Temperature sensor malfunction Check connection on printed circuit board or actuator.
-
Page 116: Operation Of The Unit
Installation Manual EDUS371705A-N Malfunction code Contents Solution Main Sub code code Master/sub 1 Faulty wiring to Q1/Q2 or indoor- outdoor. Connect transmission wiring of Branch Selector units and indoor units to “TO IN/D UNIT (F1, F2)” and trans- mission wiring of other outdoor units to “TO OUT/D UNIT (F1, F2)”. - Page 117 EDUS371705A-N Installation Manual RELQ72TATJU type RELQ96,120TAYDU type 1 Terminal block for power supply 1 Terminal block for power supply 2 Tester 2 Tester 3 White connector 3 White connector RELQ72-120TAYCU type RELQ96,120TATJU type Opening hole There are measurement points 1 Terminal block for power supply at the back of the opening hole.
-
Page 118: Service Mode Operation
Installation Manual EDUS371705A-N Procedure for checking maximum concentration 17.3. Service mode operation Refrigerant recovery operation/vacuuming operation is possible by 2 below and take whatever action necessary to comply. 1 Calculate the amount of refrigerant (lbs. (kg)) charged to each to set mode 2. system separately. - Page 120 Improper installation can result in water or refrigerant leakage, electrical shock, fire or explosion. Use only those parts and accessories supplied or specified by Daikin. Ask a qualified installer or contractor to install those parts and accessories. Use of unauthorized parts and accessories or improper installation of parts and accessories can result in water or refrigerant leakage, electrical shock, fire or explosion.
Need help?
Do you have a question about the VRV Aurora RELQ-TATJU Series and is the answer not in the manual?
Questions and answers