Advertisement
Quick Links
Congratulations on your purchase of the ProMaster Key Grip Video Tripod kit! You obviously
have excellent taste.
Please read these instructions thoroughly to ensure proper operation of your new tripod kit,
even if you have used other tripods before. With proper use and care, the Key Grip will provide
many years of service.
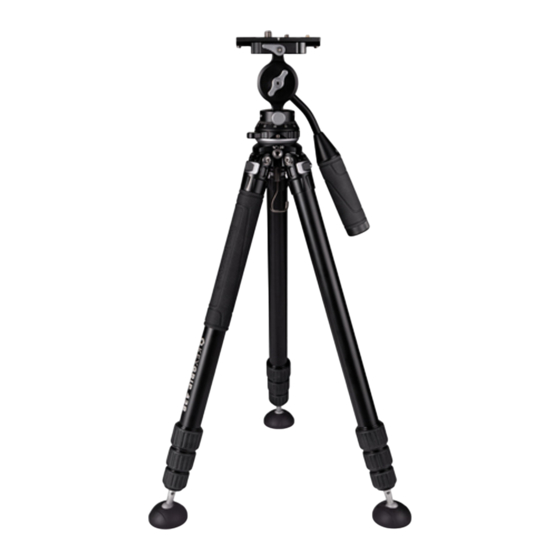
Be sure to refer to the main parts diagram as well as each of the figures throughout the pages
as you read. When a specific part of the Key Grip is referred to in red, you will find it shown on
the main parts diagram and/or in the referenced figure.
Advertisement

Related Manuals for Promaster Key Grip Video Tripod kit


Summary of Contents for Promaster Key Grip Video Tripod kit
- Page 1 Congratulations on your purchase of the ProMaster Key Grip Video Tripod kit! You obviously have excellent taste. Please read these instructions thoroughly to ensure proper operation of your new tripod kit, even if you have used other tripods before. With proper use and care, the Key Grip will provide many years of service.
- Page 2 Parts Diagram: QR plate Video Head QR platform QR plate QR knob QR platform Video head Tilt scale Tilt adjustment knob Leveling base Pan lock knob Control Panning scale Tripod collar handle Handle Leg angle release locks knob Control handle 2.5mm hex key Soft grip...
-
Page 3: Initial Setup
INITIAL SETUP When you first unbox the Key Grip Tripod, it will be stored in its padded fabric case. This bag provides a great way to store and transport the tripod, and its interior pouch is a convenient place for keeping accessories. - Page 4 hex keys stored in the control handle to tighten the mounting bolts. These bolts can also be tightened with a flathead screwdriver. Now place the QR plate (with your camera attached) into the top of the video head and tighten the QR knob to hold it in place.
- Page 5 USING THE VIDEO HEAD Your Key Grip Video Tripod Kit includes a precision machined aluminum video head. It is a 2-way head, meaning there is control for the tilt adjustment and separate control for the panning motion. An extendable control handle with a soft, comfortable grip helps achieve smooth panning and tilting motions.
- Page 6 loosened positions to apply varying amounts of tension. Doing this will slow down the movement of your camera and can help achieve smoother motions. Greater tension can be beneficial when working with heavier camera rigs. Changing the Direction of the QR Platform In its default setup, your camera mounts to the head in a front-to-back sliding direction.
- Page 7 Anytime you want to use a smaller leg angle (and are moving to it from a wider leg angle), simply push in on the leg. When you want to open a leg to a wider angle, pull out the leg angle lock first.
- Page 8 EXTENDING AND COLLAPSING THE LEGS The Key Grip Tripod has 4 sections per leg. This means you have 3 extendable leg sections and one fixed section which is connected to the tripod collar. All of the legs are keyed, meaning they will not rotate relative to each other.
- Page 9 Note: Before unlocking the leveling base, make sure that the pan lock knob, tilt adjustment knob, and QR knob on the video head are all fully tightened. USING THE WEIGHT HOOK weight hook is used to add stability to the tripod. This can be especially helpful for long exposures and in windy conditions.
-
Page 10: Tips For Use
THREADED ATTACHMENT PORTS Two threaded stainless-steel attachment ports can be found in the Key Grip’s tripod collar. These attachment ports are the most common sizes used in photo and video: one is ¼”-20 and the other is ”-16. These ports are a great place to attach a grip item such as a flex arm or an articulating arm, which in turn can be used to hold and position things such as a light, microphone, or other useful device. - Page 11 PRECAUTIONS 1. The Key Grip Video Tripod Kit is not water resistant. Do not submerge it or expose it to heavy rain or snow. If the tripod does get very wet, you may need to disassemble the legs to dry and clean them.
- Page 12 ONE YEAR UNCONDITIONAL WARRANTY If for any reason, this ProMaster product fails with ONE YEAR of the date of purchase, return this product to your ProMaster dealer and it will be exchanged for you at no charge. ProMaster products are guaranteed for ONE FULL YEAR against defects in workmanship and materials. If, at any time after one year, your ProMaster product fails under normal use, we invite you to return it to ProMaster for evaluation.
Need help?
Do you have a question about the Key Grip Video Tripod kit and is the answer not in the manual?
Questions and answers