Table of Contents
Advertisement
Quick Links
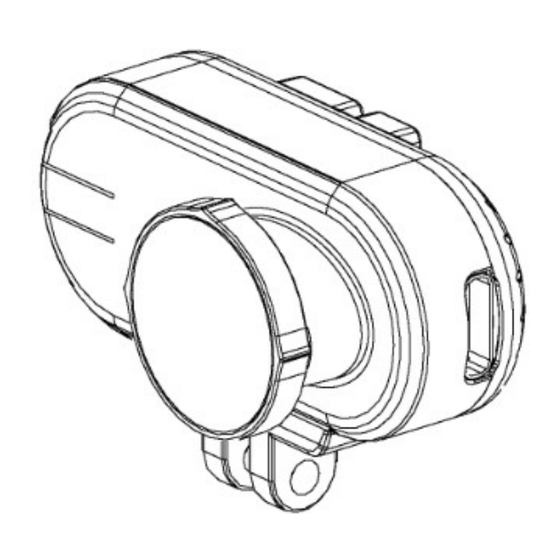
Hawkeye 4K Thumb
Hawkeye 4
https://drive.google.com/file/d/1ZkVCds3cGbcvCygsNZgR4szd_ehTGKm9/view?usp
https://drive.google.com/file/d/1ZkVCds3cGbcvCygsNZgR4szd_ehTGKm9/view?usp
https://drive.google.com/file/d/1ZkVCds3cGbcvCygsNZgR4szd_ehTGKm9/view?usp
3D/Gyroflow Cam
3D/Gyroflow
Low latency TV output
WDR
Video repair
RC trigger to capture
V1.4
Newst Manual:
=sharing
www.CNfpv.com
www.CNfpv.com
Advertisement
Table of Contents

Related Manuals for Hawkeye Mfg Thumb 4K


Summary of Contents for Hawkeye Mfg Thumb 4K
- Page 1 www.CNfpv.com www.CNfpv.com Hawkeye 4 Hawkeye 4K Thumb 3D/Gyroflow 3D/Gyroflow Cam Low latency TV output Video repair RC trigger to capture V1.4 Newst Manual: https://drive.google.com/file/d/1ZkVCds3cGbcvCygsNZgR4szd_ehTGKm9/view?usp https://drive.google.com/file/d/1ZkVCds3cGbcvCygsNZgR4szd_ehTGKm9/view?usp https://drive.google.com/file/d/1ZkVCds3cGbcvCygsNZgR4szd_ehTGKm9/view?usp =sharing...
-
Page 2: Table Of Contents
www.CNfpv.com Contents Safety Guidelines: ......................3 Features: ........................4 Buttons: ...........................8 Format SD Card: ......................8 PC CAM: .........................8 Video Settings: ........................9 System Settings: ......................10 Triggers: ........................11 Installation: ........................11 Record videos: ....................... 11 Transferring Files: ......................12 Update Firmware: ......................12 Check on www.CNfpv.com for new firmware/Manual updates. -
Page 3: Safety Guidelines
www.CNfpv.com Safety Guidelines: Please read the instruction manual carefully before using the camera for the first time. Please check the latest version manual on our website. 1.It’s a high-precision product, do not drop or crash it. 2.Do not expose the camera to strong magnetic objects, such as magnets or electrical motors. -
Page 4: Features
www.CNfpv.com Features : Wires: Red: 5.5-23V DC input + ( 5.5V to 5S battery, 6S not allow connect to camera DIRECTLY !Except our 6S power cable! ) (USB CAN ONLY Black: GND Yellow: Video Out Blue: Video trigger (active low) Note: Never connect video/trigger port to power+!!! - Page 5 www.CNfpv.com 3S,4S,6S Power cable: Note: 6S is 4S of it.
- Page 6 www.CNfpv.com Video pin: Note: the 3.5mm ear phone port is for Little pilot monitor; other monitors/TV/goggles please us RCA port. New AV cable: For DJI goggles,plug into the DJI goggles 3.5mm earphone port, goggles switch to AV IN:...
- Page 7 www.CNfpv.com LED indicator : 2.5K 4 : 3 50FPS Red + Blue 2.5K 50FPS 1080P 50FPS Blue 4K 30 Type C Port: A5,B5 : TV output (16pin or 24pin) OSD key board: Up button: switch to video mode/ Press 5 seconds to format SD card Right: Playback Left: Menu settings Enter :...
-
Page 8: Buttons
www.CNfpv.com Performance and Specifications: Resolutions 4K 50FPS(4:3 ,2880*2160) 4K 30FPS/ 1080P 50FPS/ 2.5K 50/30FPS/ 2.5K 50/30FPS 4:3 AV output PAL/NTSC PAL has lower latency! Micro SD card U1 Sandisk recommend SD card supported 8-128G(FAT32/exFAT) Size 22.5 ×50*13.5 MM Weight 15.5g File format *.MP4/H.265 Lens... -
Page 9: Video Settings
www.CNfpv.com about 10 seconds, the camera will enter PC CAM mode. Use amcap.exe to open the pc cam. You can set USB mode (U disk or PC CAM) in the menu. Please watch: https://youtube.com/shorts/iGPOdA0fMCg?feature=share Video Settings: Resolution: 4K 50/30fps、 2.5K 50fps, 2.5K 50/30(4:3)fps, 1080p 50fps, 1080p 30fps. Note: High frame rates make the TV output more smooth! We advice to use >=50fps for FPV! Note: 4K 50FPS can’t log the gyro data! -
Page 10: System Settings
www.CNfpv.com Electronic shutter:Fix the shutter speed. Auto, 1/60, 1/120,1/240,1/480,1/960,1/1200,1/1440, 1/1920, 1/3840,1/7680. Gyro log:off, on. Save the gyrolog and stable the image in PC. Gyro calibration:Please place the camera horizontally and keep it sate still, press OK button to start. System Settings: Date time setting. -
Page 11: Triggers
www.CNfpv.com Version. Version number. Check its the newest firmware on www.CNfpv.com. Triggers: The trigger pins need to be connected to the trigger control cable. Scan to watch. https://youtu.be/ulYC6Mg8_qI Note: Don’t connect the trigger pins to any power. If you want to control it by a MCU, connect it to a 3.3V GPIO through a 1K resistance. -
Page 12: Transferring Files
www.CNfpv.com Transferring Files: 1. Connect the camera to a computer via micro USB cable or card reader, and then turn on the camera. 2. Double click “My Computer” and locate “Removable Disk”. Enter “Removable Disk” and you will find all video files in the folder. Update Firmware: 1.Delete all the files and folders in the SD card(suggest:8G/16G). - Page 13 www.CNfpv.com This equipment has been tested and found to comply with the limits for a Class B digital device, pursuant to Part 15 of the FCC Rules. These limits are designed to provide reasonable protection against harmful interference in a residential installation. This equipment generates uses and can radiate radio frequency energy and, if not installed and used in accordance with the instructions, may cause harmful interference to radio communications.
-
Page 14: Check On Www.cnfpv.com For New Firmware/Manual Updates
www.CNfpv.com NOTE: Check on www.CNfpv.com for new firmware/Manual updates. For more information please check our Youtube/Facebook/Instagram channel: Hawkeye Firefly Official Youtube Facebook Instagram :... -
Page 15: How To Use Gyroflow
www.CNfpv.com How to use Gyroflow : : https://youtu.be/NaIAbzdivl0?si=Ji2aoBxGAELgyFMN 1. Use sd card reader to ready the video and gyro data on the sd card, make sure they are on the same directory. 2. Select a video file in the sd card directory. 3. - Page 16 www.CNfpv.com 5. Export video 6. You can select a video clip or change resolutions to reduce the rending time.
- Page 17 www.CNfpv.com Android: https://youtu.be/ZI3kAOvrAfg?si=z0yYrb3mUpwiI68T 1. Use sd card reader to ready the video and gyro data on the sd card, make sure they are on the same directory. 2. Select a video file in the sd card directory. 3. Click on the blue font to select the file directory for access authorization.
- Page 18 www.CNfpv.com Input “hawkeye thumb” to select lens profile(match the resolution). ( 1.55 ) version no need this step 5. Load the Motion data (1.55 version no need this step):...
- Page 19 www.CNfpv.com 6. Click “ auto sync ” . 7. When finished, Export video...
- Page 20 www.CNfpv.com 8. You can select a video clip or change resolutions to reduce the rending time.
- Page 21 www.CNfpv.com PC : Software downloads (WIN 10, 11): https://drive.google.com/file/d/1b9hHcAquPv38hZttc9Xcz6gURHscVj-k/vi 1. The video and the gyro files are placed in the same directly and the file names are the same. 2. Double click to run gyroflow.exe and drop the video file in to the software.
- Page 22 www.CNfpv.com 3. When the sync process is finished, export video. 4. For saving time ,you can select a video click to output.
-
Page 23: Portrait Video
www.CNfpv.com Portrait video : Input 90 or 270 degrees in “rotation”: Notes for Gyroflow : 1.Sync time change to 3-5 second: 2.Use rs-sync: 3.Select Dynamic zooming, then there will be no black side. 4.Sync points should be similar number, if its too different, delete it and add a sync point on other point(right click on the mouse). - Page 24 www.CNfpv.com 5.If can’t export video , turn GPU off, change to H.264. 6.Software require Win 10,11. If can’t open the software, install the VC pack: VC_redist.x64.exe . Download link : https://aka.ms/vs/17/release/vc_redist.x64.exe 7. If still can’t open, you can install VC: https://visualstudio.microsoft.com/zh-hans/downloads/?cid=learn-onpage- download-cta...
- Page 25 www.CNfpv.com 9. The light dot is optical flow, you could turn it off. If you don’t know how to setup the software, just download our preset software: https://drive.google.com/file/d/1b9hHcAquPv38hZttc9Xcz6gURHscVj-k/view...
-
Page 26: Camera Set Up & Tutorials
www.CNfpv.com Camera set up & tutorials: https://youtu.be/UvgmEo4Zv5E... - Page 27 www.CNfpv.com TV Cable: To Camera USB port 3.5mm earphone port can directly To other monitor/TV/goggles please connect to Little pilot Master/DJI: use RCA port: Hold – button for 2 seconds to Please switch to AV IN switch to AV IN...
- Page 28 www.CNfpv.com How to setup menu with monitor /goggles: https://youtube.com/shorts/NWS914nJCBI?feature=share How to replace FPC cable: https://m.youtube.com/shorts/qC4lM-10I5Y...
- Page 29 www.CNfpv.com www.CNfpv.com Remote control to record video Remote control to record video 1: A 2-way switches to control. The following example uses Betaflight F405 flight controller to illustrate how to configure The following example uses Betaflight F405 flight controller to illustrate how to configure The following example uses Betaflight F405 flight controller to illustrate how to configure the remote control to turn on/off the video recording function.
- Page 30 www.CNfpv.com Remote control to record video 2 : NOTE: FC Arm to record, dis-arm to stop recording. The following example uses Betaflight F405 flight controller to illustrate how to configure the remote control to turn on/off the video recording function. Use the pin on the flight controller to control the recording and connect the Hawkeye Cam’s TRG wire (video trigger).
- Page 31 www.CNfpv.com...
- Page 32 www.CNfpv.com...
Need help?
Do you have a question about the Thumb 4K and is the answer not in the manual?
Questions and answers